Does your Windows storage keep on giving warnings about low space storage on your Windows 11? Chances are programs that have filled up your storage are mostly games. So you are here looking for effective ways to move games to another drive in Windows 11. If you have a local drive with ample space then you can move those games to that storage. Read the guide below to understand the methods that will take a load of space out of your old storage.
Contents
Use a Third Party Software
It can be difficult to move installed games and programs to a different drive, especially for people who are not familiar with computer usage. But with EaseUS Todo PCTrans’s user-friendly software migration solution, the procedure is simple and hassle-free. Here’s a brief tutorial on how to use this effective tool to quickly move installed programs from one drive to another.
Install and download
- On your Windows 11 computer, start by downloading and installing EaseUS Todo PCTrans.
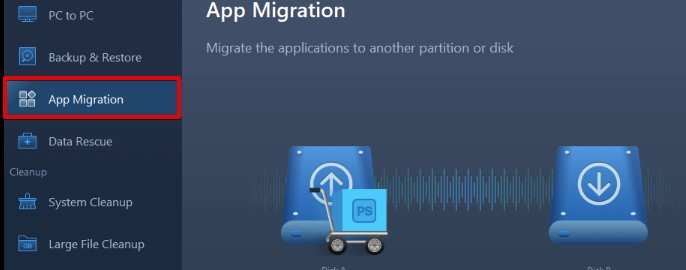
- After installation, run the program and choose “App Migration” from the home screen.
- A list of compatible programs will be automatically scanned and displayed by the software.
- Choose the programs that you want to move to a different drive.
- To designate the destination drive to which you wish to move the chosen programs, click the triangle icon.

- To begin the process of relocating the program installation location, click the “Transfer” button.
- To preserve all the changes, simply restart your computer after the transfer is finished.
EaseUS Todo PCTrans simplifies the otherwise complex process of transferring installed applications, providing a simple fix even for individuals with little technical knowledge.
Use Steam to Move Installed Games to Another Drive
You can maximize storage space and arrange your digital collection by simply moving your Steam games to a different storage drive. To move your games around the Steam platform without any problem, follow these easy steps:
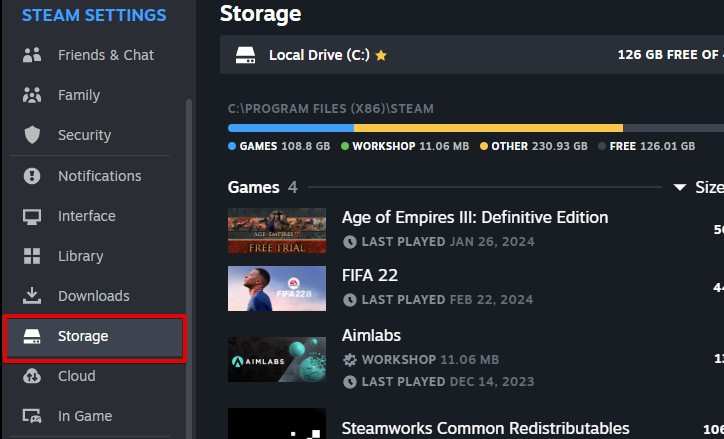
- To access the Storage Manager, launch Steam, then go to Steam > Settings > Storage.
- Specify a Secondary Install Place with a click on the + icon next to your current drive in the Storage Manager.
- Click Add after selecting the secondary install location (another drive).
- Your original drive and the new folder will now be listed together.
- Steam will ask you to select from your pre-selected library folders when you install a new game.
- Place games that are played more frequently on a faster SSD and games that are accessed less frequently on a slower-spinning hard disk to maximize performance.
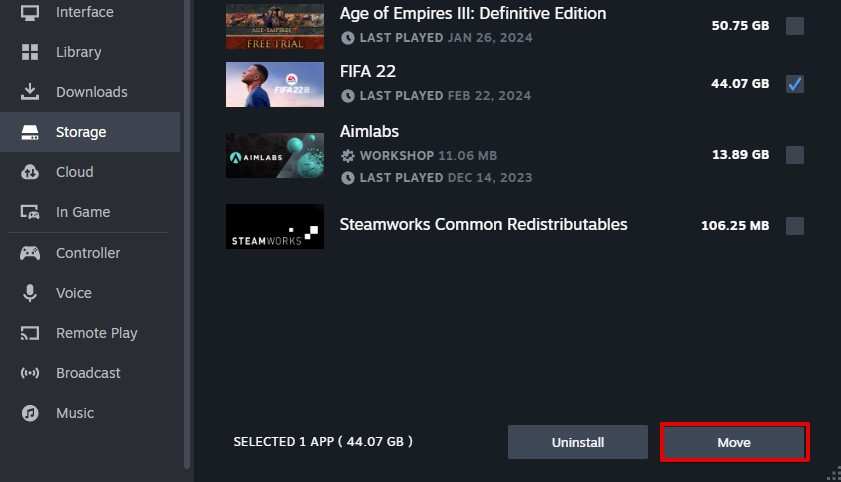
- If you wish to move a game that has already been installed, go back to the Storage Manager.
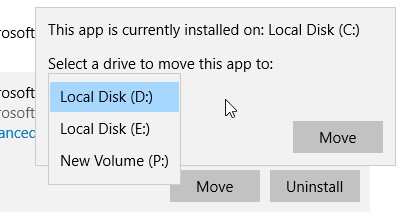
- Click Move after selecting the game, then select the destination drive and click Move once more to confirm.
Depending on the size of the game’s file, the process could take some time, but once it’s done, Steam will launch the game flawlessly from the new location.
These instructions let Steam users organize their library of games effectively, dividing them up among several drives according to storage capacity and frequency of use. This guarantees a tidy and convenient gaming environment.
Move Games From Windows Settings
Using Windows Settings to move games from a Windows drive to a new local drive is a simple process that gives users the freedom to effectively manage their game storage. If there have ever been complaints about Microsoft’s Universal Windows Platform (UWP) games, one big plus is how simple it is to move them to a different drive or folder. To transfer your UWP games to the another drive without any hassles, just follow these simple steps:
- Get to the Windows Settings by hitting the Windows key + I or choosing the gear icon from the Start menu, you can access Windows Settings.
- Proceed to “Apps” and choose “Apps & Features.”
- Find the UWP game you want to move from the supplied list in the Apps & Features section.
- To access more options in Windows 11, click the three dots icon or click the game’s entry.
- To start the moving process, find the “Move” button and click on it.
- Select the drive to be used as the destination for moving the UWP game.
- Keep in mind that UWP games offer flexible storage management since they can be transferred to any drive.
- Once you click “Confirm,” the game will be automatically moved to the designated drive.
Some games cannot be moved to another location due to the permanent installation of such programs. On Windows 10 and 11, some apps are fixed to be in a specific location that’s why the “Move” option is grayed out for them.