Effective data management and organization are more important than ever. Discarding the usage of compressing files can result in a variety of issues, such as clogged storage and slowed transfer rates. Many large storage computer files like games and programs can fill up your local storage. As a result, compressing them is a smart thing to do. Today, we want to take a look at a few methods on how you can compress on Windows 11.
Contents
What is File Compression in Windows 11?
NTFS file system boasts a compression system that can reduce the size of computer files on Windows 11. It removes unnecessary data or characters with repeating texts. On top of that, the compression algorithm does not remove important data.
Windows 11 compression has an extra edge with the ability to do transparent compression. It means that the compressed files will not be viewed as compressed by the apps. All the apps can operate normally while accessing the zipped files to work with.
How to Compress a File in Windows 11
Windows 11 supports multiple ways to compress games and programs. Here are the ways your games and programs can be compressed.
Method 1: Compress files without any software
- Enter the file location in your Windows OS system. In this case, go to the directory where your games or program is installed. You have to go where you see the game folder. Do not go inside the folder where you see its content.
- Select the folder or folders and do a right-click.
- Click on Compress to ZIP file. You do not need a third-party tool prior to following this method as Windows 11 natively supports zip and unzip files.
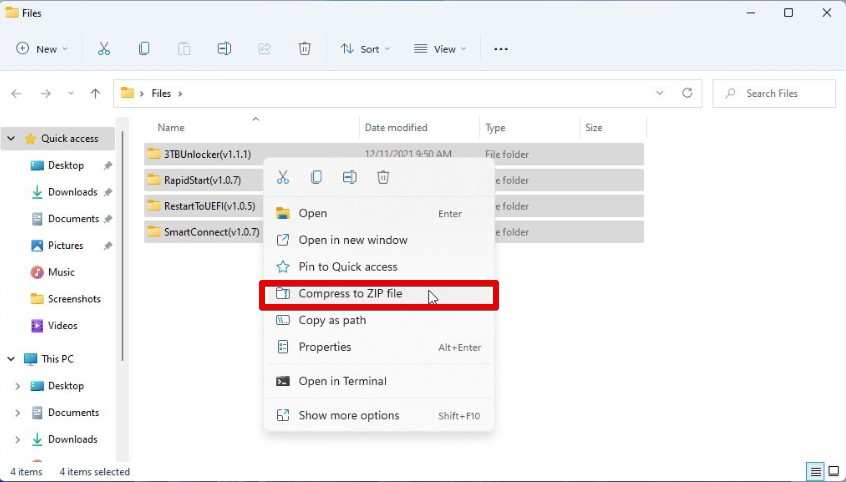
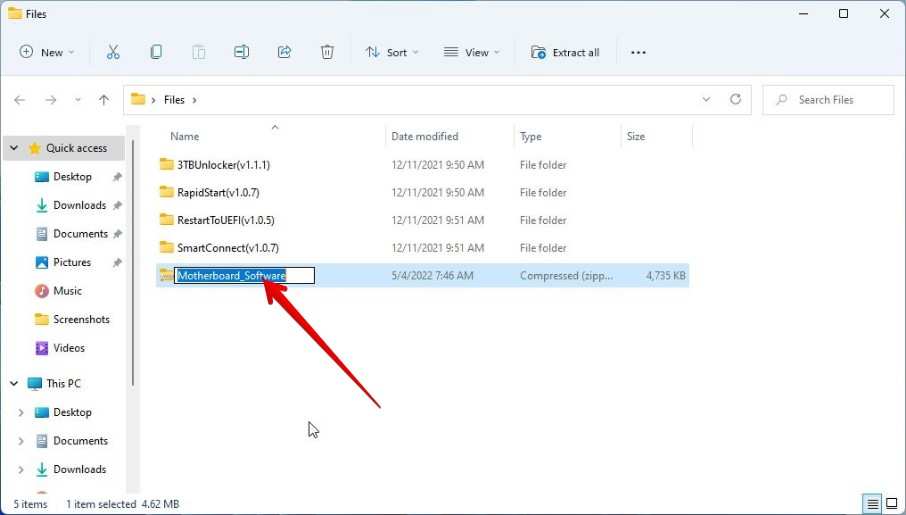
- The zipped archive will be made in the same directory where your game is located. After the compressed file is created, make sure you name your .zip library.
Method 2: Use Third-party Tools
There are many great options for compressing games and programs for Windows. The popular names are WinRar and 7Zip. In this guide, we will take 7Zip as an example.
7Zip is freely available and it is also an open source software. It can compress files in various formats such as BZIP2, TAR, WIM, and 7z. So to do this method, you have to download and install 7ZIP.
Follow the instructions after installing 7ZIP.
- Start by deciding the games or programs you wish to archive. This might apply to program files, game setups, or any other stuff you want to store more effectively.
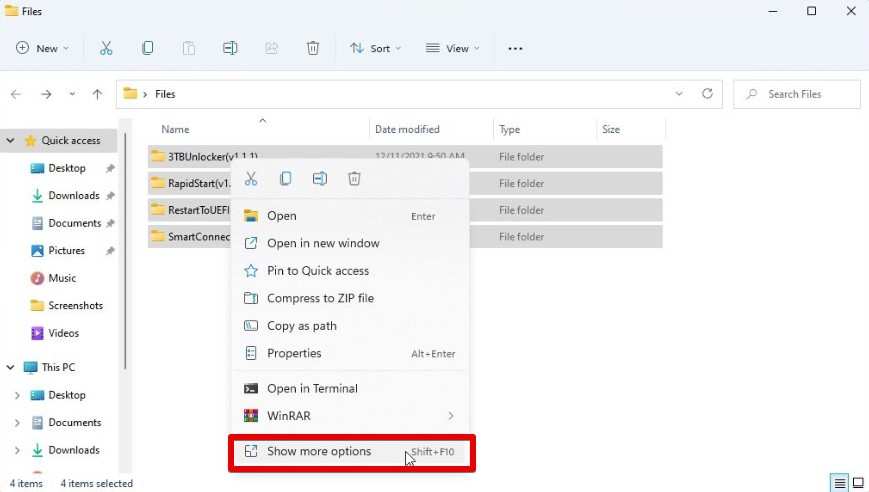
- Finalize your selections of folders and do a Right-click on them you have selected.
- Locate “Show more options” in the context menu that pops up to see other possibilities.
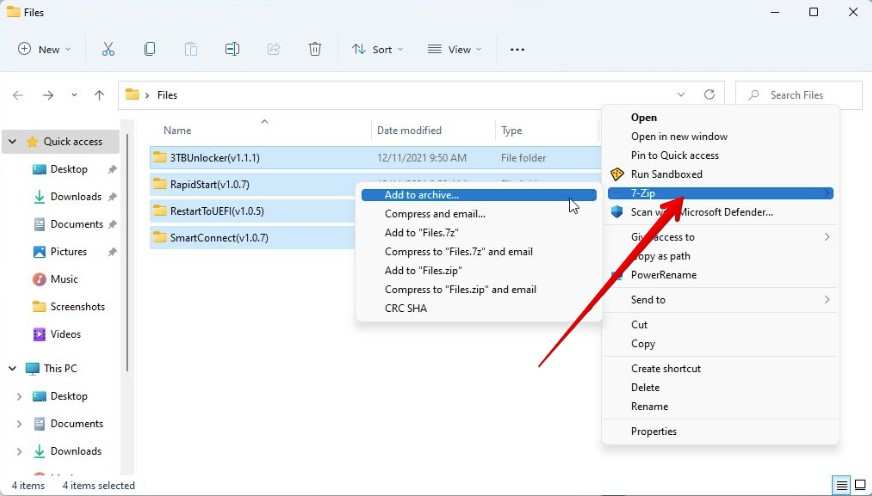
- The “7-Zip” item may be found in the enlarged menu. To access a submenu, click this option, and then choose “Add to archive.” The “Add to Archive” box for 7-Zip will now be shown.
- You may give a name for your compressed archive in the field next to “Archive” in the “Add to Archive” window. You may travel to the location where you wish to generate the archive by clicking the button with three dots to pick the destination folder.
- 7-Zip provides a number of archive types. To choose the format that best meets your needs, use the dropdown menu. The compressed archive’s file type is determined by the format you choose. The popular formats include ZIP, 7z, and TAR.
- Choose “OK” by clicking on it. The archive file containing your chosen games or programs will subsequently be created by 7-Zip when it has finished the compression process.

Conclusion
By choosing to compress many of your large files, you are saving up a lot of space on your computer. Your Windows 11 computer will be less clunky just by compressing some files. As you have read the guide, now you know you can even compress your games and programs natively.