If you are the type of person who likes to run their computer in power saver mode, then chances are that you face CPU throttling issues. Windows 11 computers allow users to reduce processing power but it may result in overheating and throttling. To prevent such limitations, you have to disable certain modes so that you can run your PC at its finest. This guide shows you the correct way to disable CPU throttling in Windows 11.
Contents
What is CPU Throttling?
CPU throttling is an essential method to control the heating levels of a CPU and clock speed. CPU throttling is primarily used to protect the central processing unit (CPU) from overheating and possible damage. Each CPU has a maximum permitted core temperature and a specified Thermal Design Power (TDP). CPU throttling kicks in when the CPU runs at a high workload, requiring more power and producing more heat. The throttling efficiently lowers the amount of power if the computer. As a result, it also reduces the heat that comes out as well. Technically, there is a dynamic adjustment of voltage and the clock speed.
Microsoft built CPU throttling into Windows 10/11 as an integrated feature to help battery-operated devices run more efficiently. This integrated mechanism slows down the CPU to avoid potential problems, conserve energy, and prolong battery life when faced with demanding CPU tasks or high temperatures. The particular CPU and the setup of the computer determine how much CPU throttling occurs.
Use Power Settings To Disable CPU Throttling
The throttle in your processor begins when your Windows 11 is in hibernation mode or battery-saving mode. In order to save energy, it limits the performance of your CPU resulting in a throttle. The easy way to not face the CPU throttle is by disabling battery saving mode. On your computer, de-throttle your PC by switching to high-performance mode. The switching of power options can take place in the Power Settings tab. To access the power plans in Power settings, follow the steps below:
- Go to Windows Settings by pressing the Win + I keys.
- After you enter “Settings” look for “system” which is easy to find. Click on it to enter the options available inside the “System” section.
- The next step is to click on the “Power & Battery” section on the right side.

- Clicking on the section will open drop-down options which are all the power plans. Now select the “Best Performance” power plan as it will not throttle your CPU.
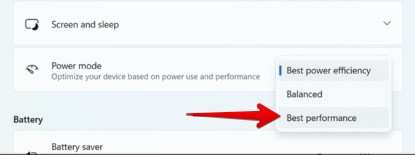
Selecting the highest power plan which is the “Best Performance” will gradually reduce the throttling of your processor. As a result, your computer will be able to function at its highest possible performance.
Use Group Policy Editor to Disable Power Throttling in Windows 11
An effective tool for administrators to customize user and system settings on Windows PCs is the Group Policy Editor. Using this editor, you can turn on or off power throttling as follows:
- Utilize Windows + R to initiate the Run dialog box.
- Type “gpedit.msc” and hit OK.
- Go to the Power Throttling Settings page. Navigate to Computer Configuration > Administrative Templates > System > Power Management > Power Throttling Settings in the Group Policy Editor.
- On the right side of throttling related settings, double-click on the Turn Off button below the settings section.
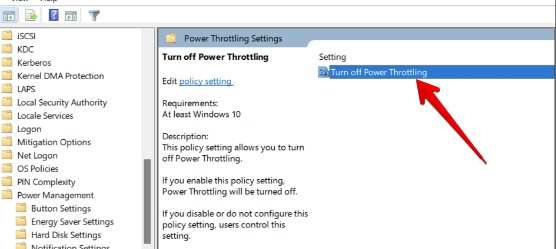
- Select “Disable”.
- Click “Apply” and “OK.”
Now do a quick reboot of your device in order for the changes to become effective.
Use Windows Registry Editor to Disable Power Throttle
Users of Windows 11 can view and modify the Windows registry, including turning on and off power throttling, by using the Registry Editor. To use the Registry Editor to control CPU throttling, follow these steps:
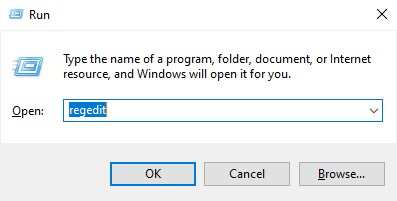
- Hi the Windows + R keys to launch a dialog box.
- Type “regedit” and hit Enter.
- Navigate to Computer\SYSTEM\HKEY_LOCAL_MACHINE\PresentControlSet\Control\Strength.
- Select New by doing a right-click on “Power” in the left pane, and then click Key.

- Put the new key in the name “PowerThrottling.”
- Right-click on the recently created key and select the “New” option.
- Go to DWORD (32-bit) Value to create a DWORD value.
- Give it the name “PowerThrottlingOff.”
- Double-click it, select 0 to activate the feature, or 1 to deactivate it, and then select OK.
Conclusion
Disabling the throttle of your computer CPU via enabling high power mode will help you run programs faster. On the other hand, underclocking your system with certain battery-saving modes can prevent CPU throttling if you do not use a high CPU or GPU-intensive program. The methods above show you how you can effectively disable CPU throttling so that you can blaze through the software you are using.