Dark Mode is currently the most trending theme which is now available on macOS, iOS and Android platform as well. In fact, many popular apps for both, Android and iOS devices have been upgraded with the dark mode theme support. If you work on a Mac system, then you can easily start using the Dark-Mode and can schedule the time to enable it on your system. In this article, we will show you how you can enable the dark-mode in macOS Automatically on Schedule.
Contents
About Dark Mode in macOS
Apple introduced its Dark Mode theme with the macOS Mojave update. Earlier, the Dark-Mode was offered with the beta update for testing purpose. Well, the same dark-mode is now globally available and most of the Mac users are now using it on their respective systems.
Many of the Mac users are not aware of the automatic schedule feature to enable Dark-Mode on a Mac system. If you too are completely unaware about using the Dark Mode’s automatic schedule feature, then the following step by step tutorial will help you to do so.
Dark Mode turns your Mac’s screen with a dark or black background and fonts in bright white color making it easier for the users to read out things clearly in the dark. By enabling Auto Dark Mode on a Mac system, you will be able to make use of both, Light Mode and Dark Mode on your system. Your system will switch between the modes on the scheduled time.
If we talk about the advantages of the Dark-Mode theme, this theme lessens the strain to your eyes in the dark environment. It makes the fonts, icons and other things look rich and bright without stressing your eyes. However, if the light around you is bright or if you are using your system in the broad-day-light, then you should not use this mode. Make sure you use the standard light mode when there is enough light around you.
Step by Step Guidelines to Enable Dark Mode in macOS Automatically
Basically, there are two different methods with which you can enable the Dark Mode in macOS Automatically. Here, we have provided both the methods so that you can easily try out the suitable method on your system.
Method 1: How to Enable Dark Mode Auto Feature?
Step 1:
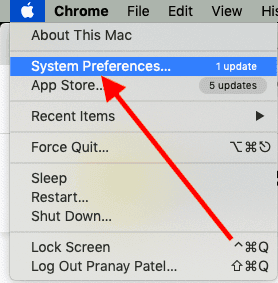
Go to the Apple Menu by clicking on to Apple’s icon from the upper left corner of the main screen.
Step 2:
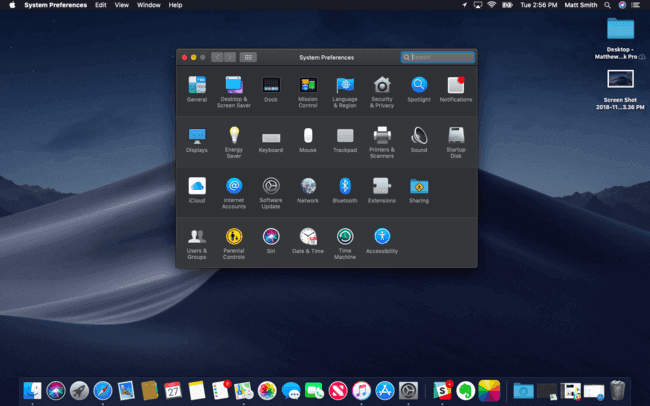
From the given drop-down menu, select System Preferences option. Alternatively, you can also select the System Preferences option from the main Applications folder.

Step 3:
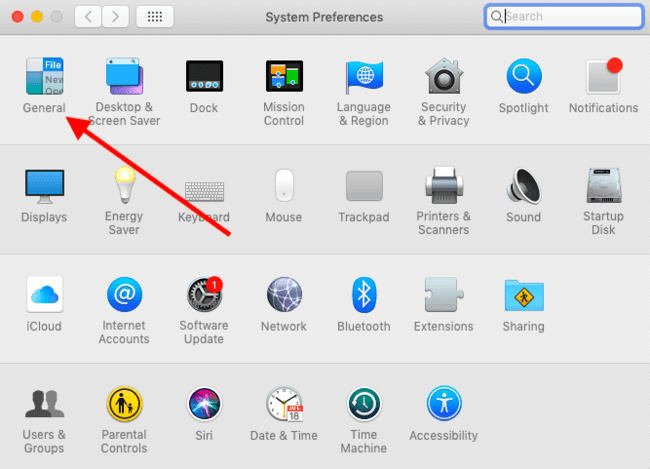
From the given page, select the General option.
Step 4:
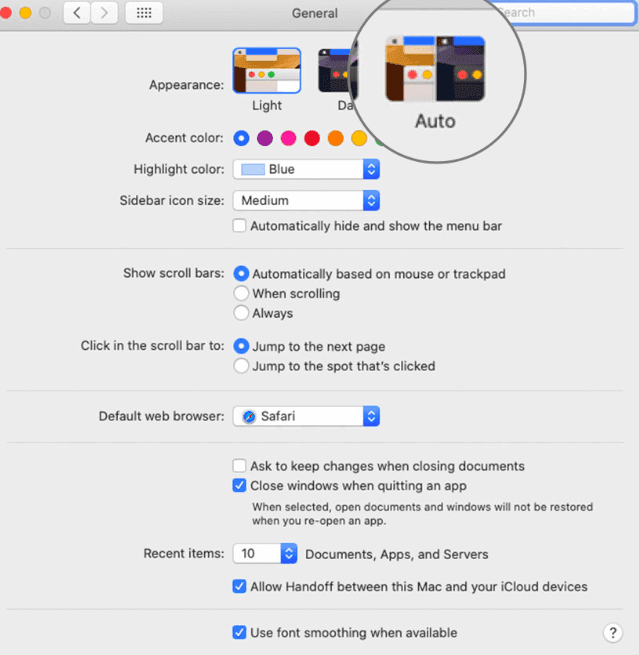
In the Appearance section, you will see three different options, Light, Dark and Auto. Select the Auto option by clicking on to it.
Once enabled, the black theme will be enabled when the system notices the sunset time. This is how you can automatically enable the Dark-Mode them on a Mac system. Now, if you want to customize the time or schedule the dark mode, then the second method is listed below.
Method 2: How to Customize Dark Mode Time on MacOS?
Step 1:
Go to the Apple menu by clicking on to Apple’s icon from the upper left corner.
Step 2:
Select System Preferences option from the menu or you can select this option from the main Applications folder.
Step 3:
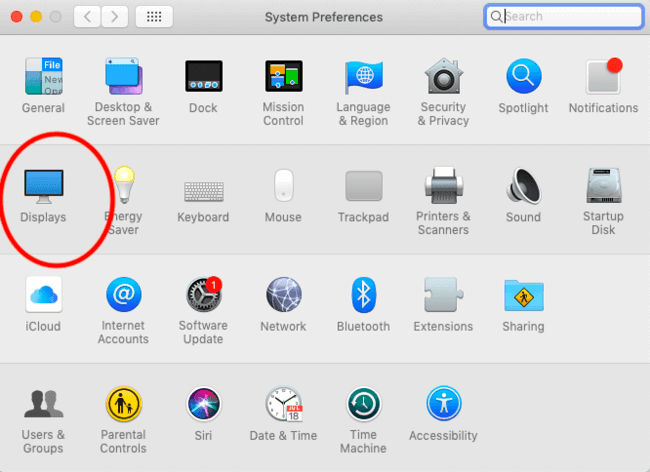
Select Displays icon from the given page.
Step 4:
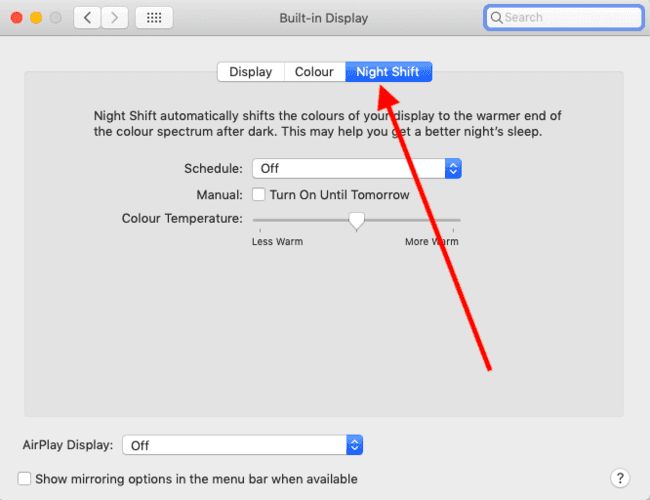
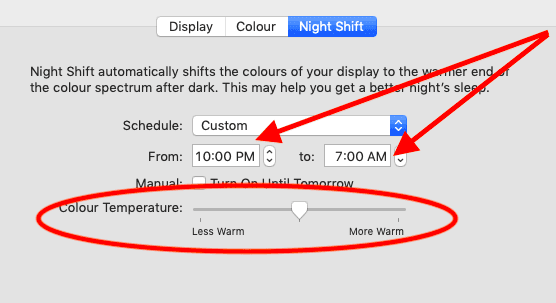
You would see a new option, Night Shift in the given tabs.
Step 5:
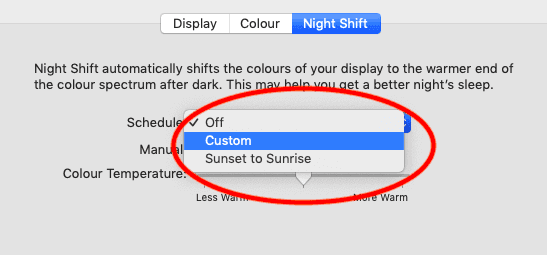
Select the Schedule option, a drop-down menu will be presented. Select the Custom option from the given menu.
Step 6:
From here, you need to select the time or schedule the automatic time by selecting the From and To time as per your requirements. You can also select the color temperature by selecting the slider using the trackpad.
Final Words:
We recommend everyone to use the Dark Mode feature as it is very light on your eyes. By enabling this mode, you can easily see the fonts and other controls of your system. According to a recent survey, people who are using the Dark Mode as a default theme have noticed improved productivity.