Installing Intel HD Graphics on desktop and laptop might be an easy process, but you may encounter “This computer does not meet the minimum requirements” at any moment. We all have been there and confused on how to solve it. In this tutorial, we are going to explore the easiest way to install the Intel HD Graphics driver manually and get rid of corrupted files.
Contents
Install Intel Motherboard Graphics Drivers
If you have purchased the Intel processor and Intel motherboard in combo for desktop or came with the laptop, then you don’t have to worry about manual work. Intel motherboards manufactured after 2007 have basic drivers installed. Uninstall Intel HD Graphics, and then the motherboard will install working drivers upon rebooting the machine. I have an old Intel Dual-core processor coupled with Intel motherboard, and the magic happens.
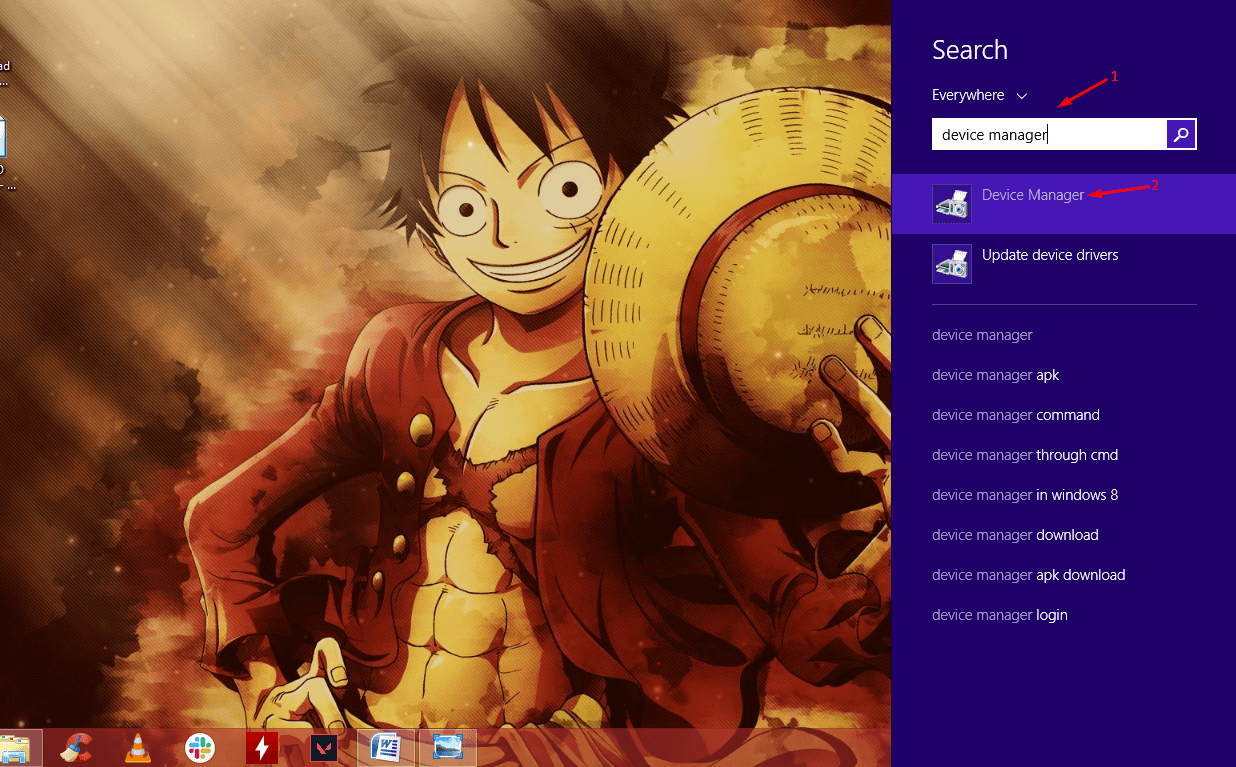
Step 1: Press Windows Key + S for search bar, and then type “Device Manager” and hit enter to open.
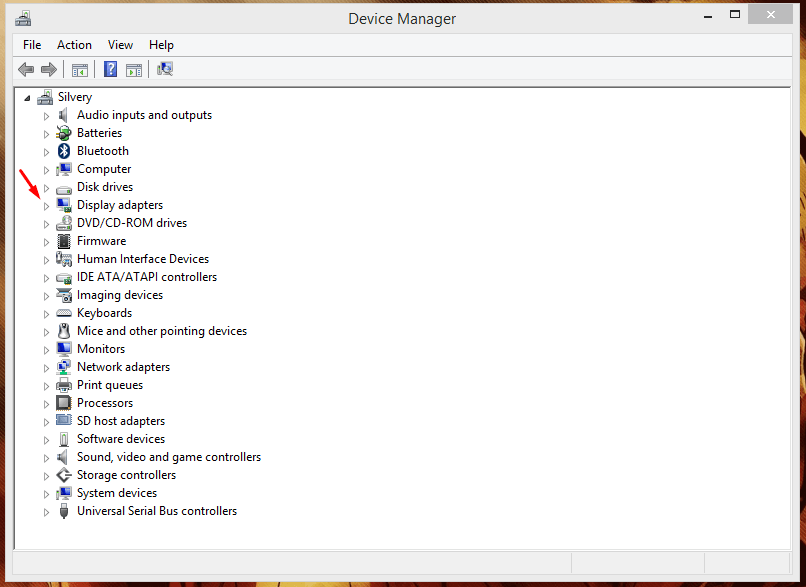
Step 2: Find “Display Adapters” and then click on the arrow to reveal the adapter.
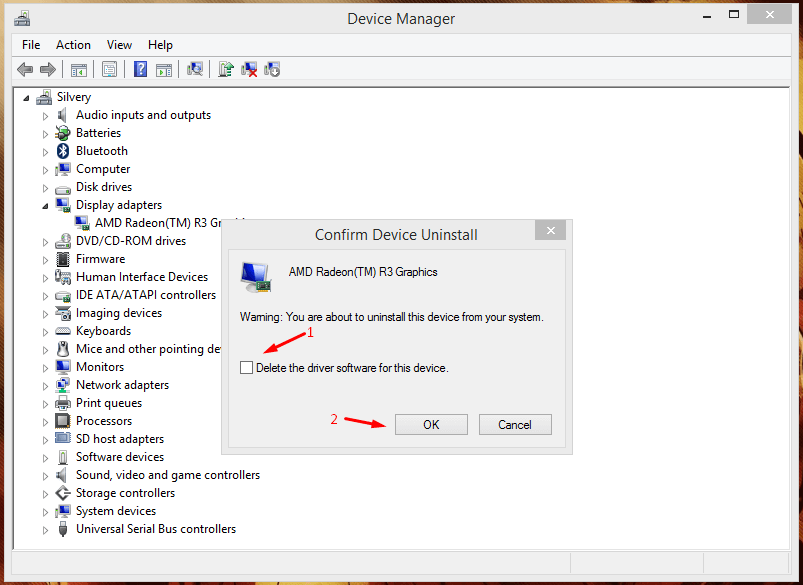
Step 3: Click to select the display adapter, and then right-mouse click for more options, and then click on “Uninstall” to continue.
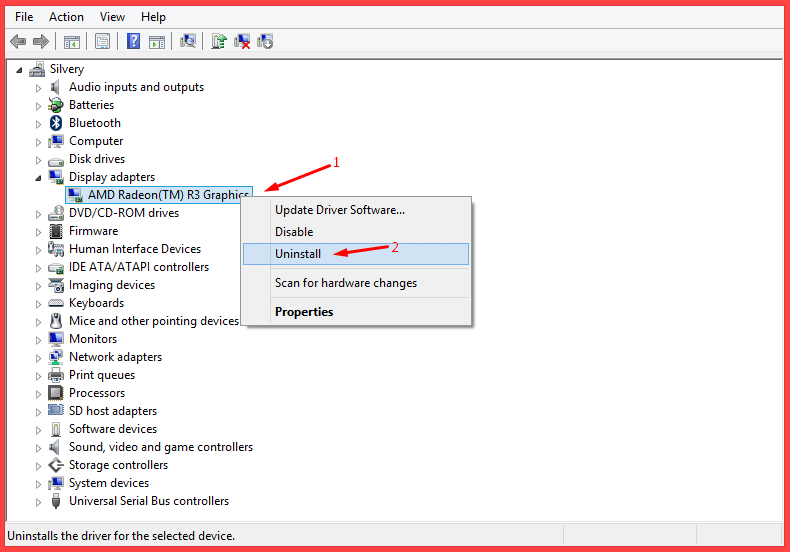
Step 4: A small window will pop-up on the screen and click on “delete the driver software for this device” and then click on “ok” to finish it.
Make sure to reboot the computer, and your Intel motherboard should install the drivers automatically, and it works flawlessly. Follow the next methods to install the latest drivers in the machine. Remember, you can always use this method to uninstall Intel HD Graphics and reinstall new ones.
1. Download Correct Drivers (Automation)
The error “This computer does not meet the minimum requirements” occurs when you are trying to install wrong drivers in the motherboard. Unfortunately, Google search results have become tainted due to individuals trying to rank the website. Intel did not even work on the web design to make it user-friendly in a decade. I found Intel official website hard to use in 2011, and I have the same impression to this date. Allow me to show you how you can install correct Intel HD Graphics drivers.
- This method will work on the Intel processor running laptop.
- This method will work on the Intel processor running desktop & workstations.
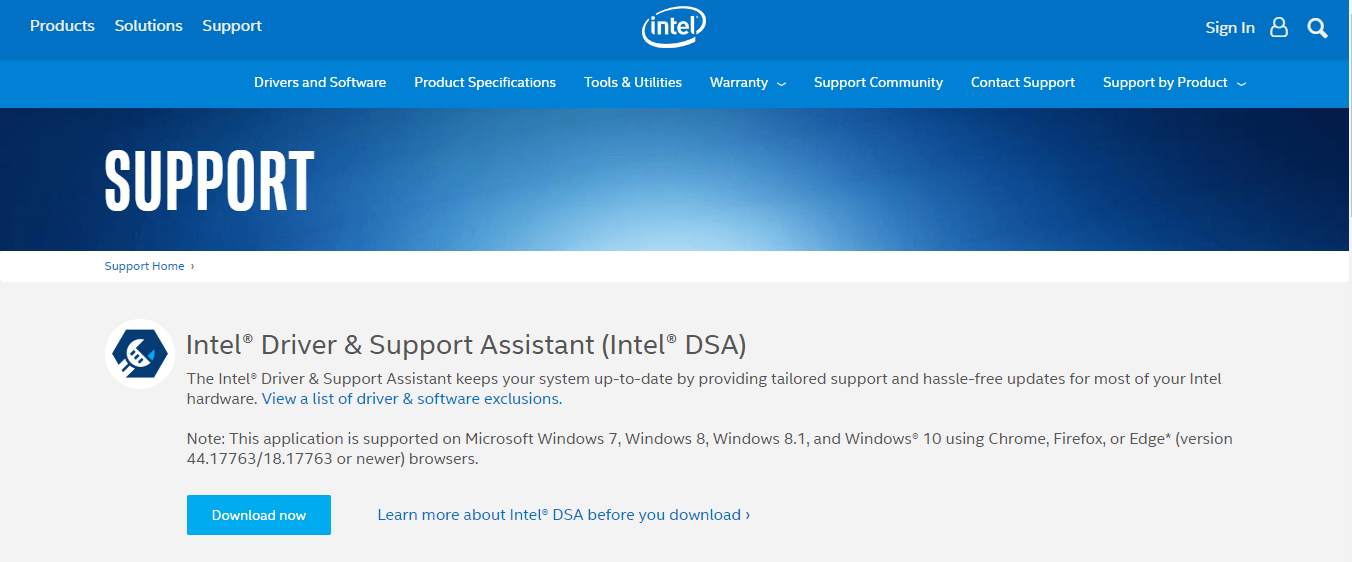
Step 1: Download Intel Driver utility from the official website.
Step 2: The program works flawlessly on Windows 7, Windows 8.1, and Windows 10 PCs. Additional installation instructions are not required because it follows the Windows traditional installation wizard.
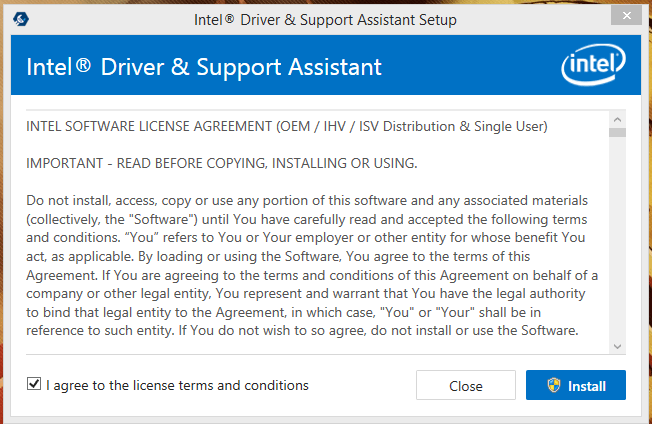
Note: You may have to download additional Java pre-requisites.
Step 3: Launch the program from the start menu or search bar.
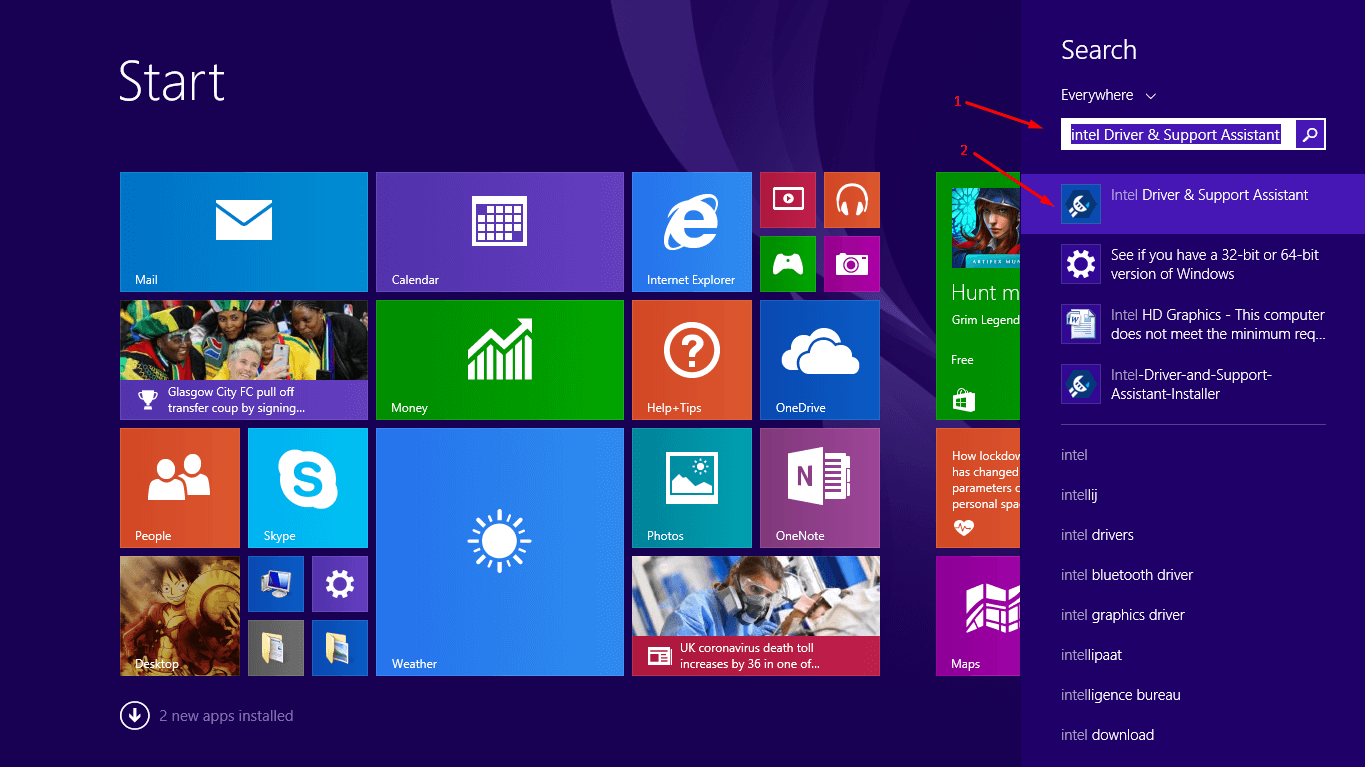
Press Windows Key + S and type “Intel Driver & Support Assistant” and then hit enter to continue.
Step 4: The computer default browser open a website and Intel utility will scan the computer for hardware information.
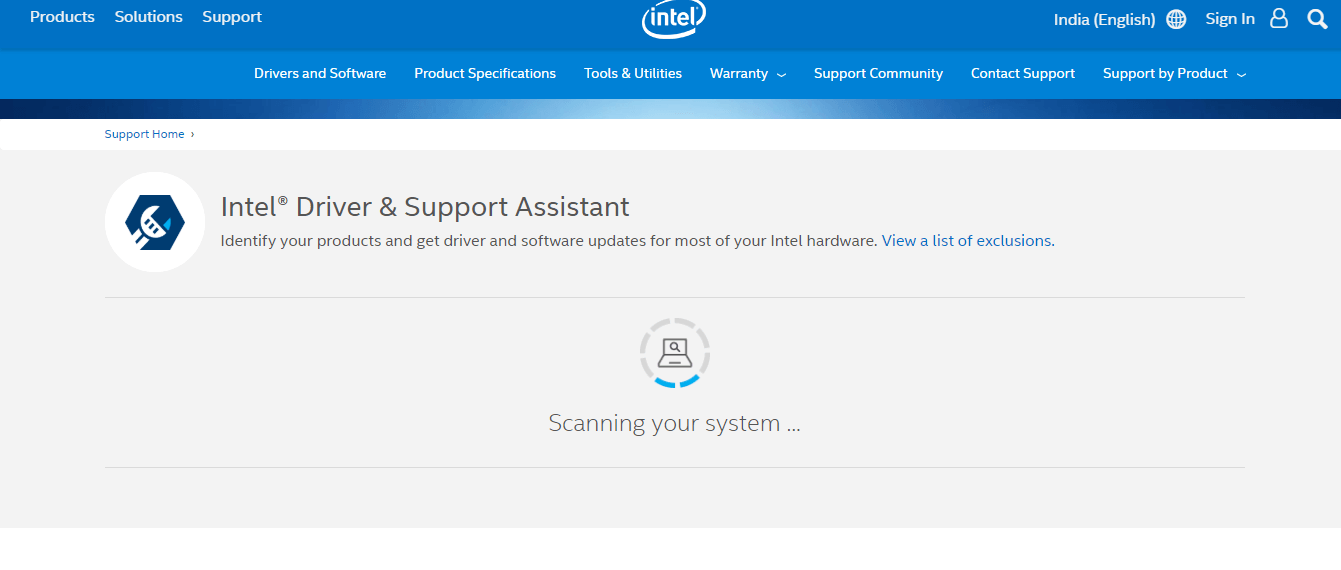
Step 5: The Intel Driver & Support Assistant will install the drivers automatically.
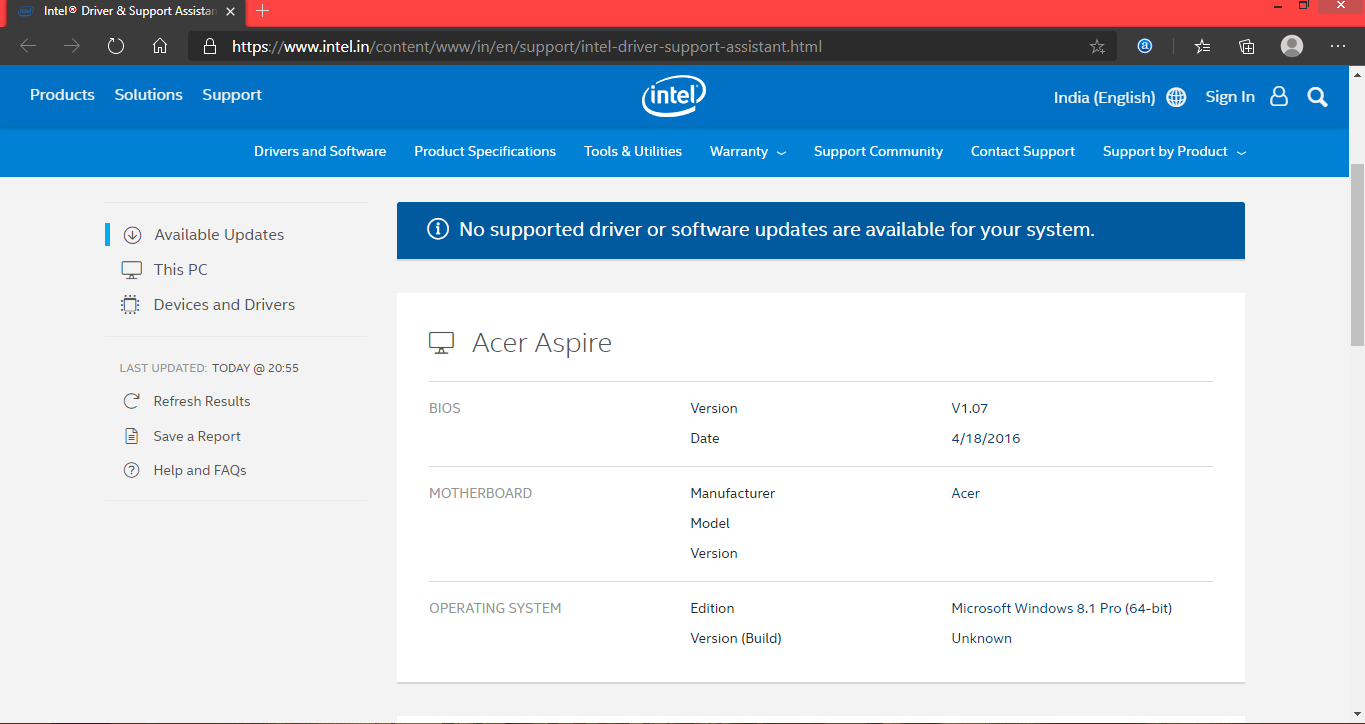
Unfortunately, I am running an old Intel processor laptop and desktop, so I cannot demonstrate it. But, I am not able to use this software on the older Intel processor running machine because it doesn’t support it. You have to look for an alternative if you are having complications and read the below method to solve it.
Solve no supported driver or update is available for your system
Intel is no longer supporting older machines and focusing on newer devices. We cannot blame the company because it requires a lot of workforces to keep up the updates and everything. We have to hunt for the Intel HD Graphics drives manually to avoid “This computer does not meet the minimum requirements” error.
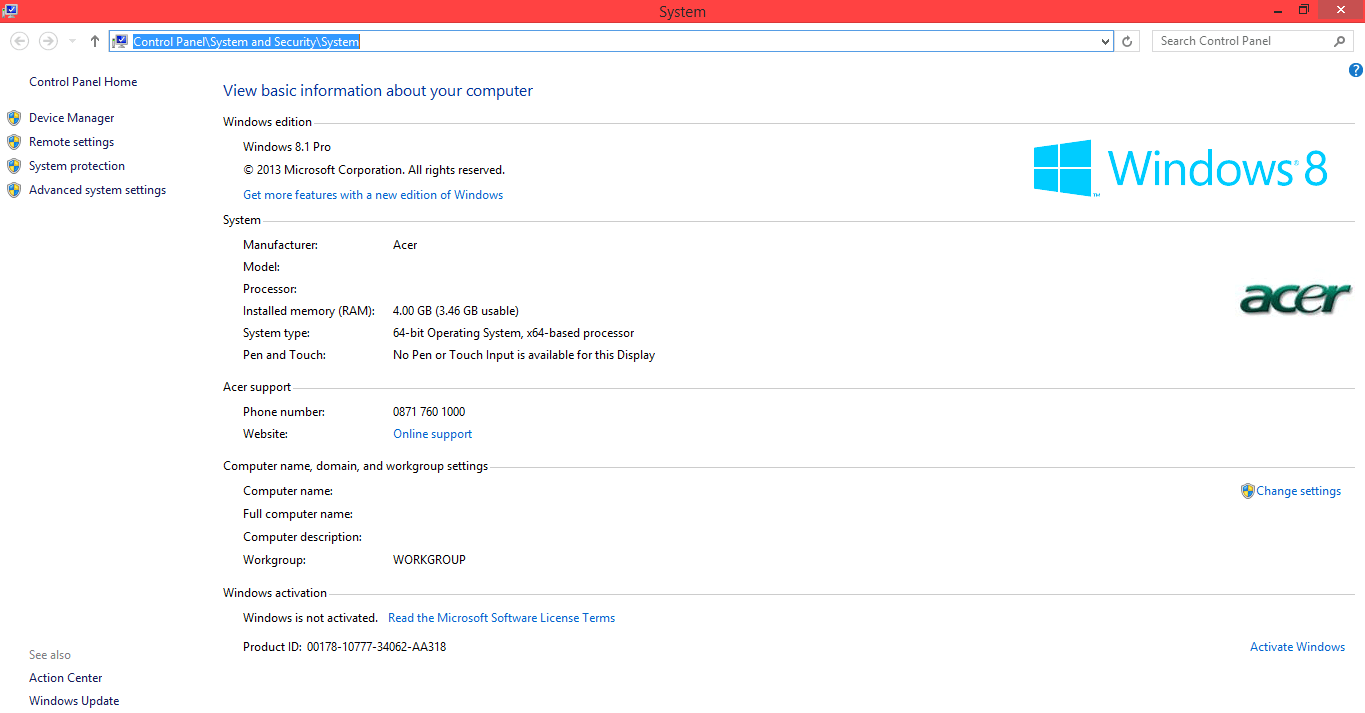
Step 1: Type “Control Panel\System and Security\System” in the Windows File Explorer and note own the processor name and model number. In our case, it is Intel’s Core i7-2649M Processor.
Step 2: Type the processor model number and generation in the search engine and then click on the official “Intel Download page” for the processor drivers.
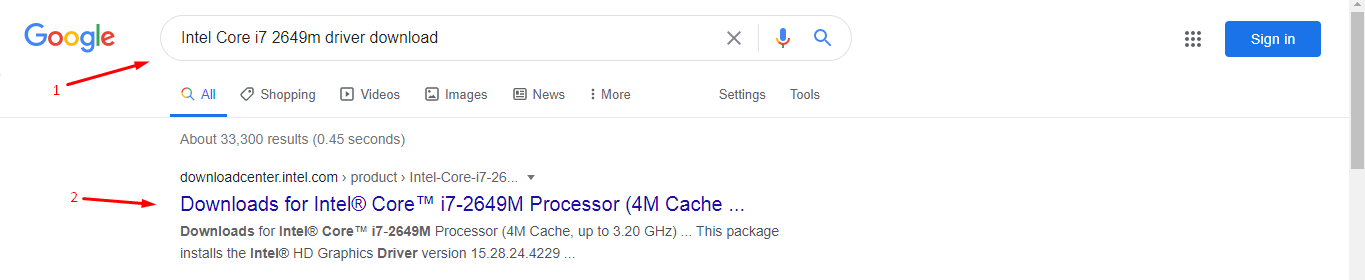
Step 3: Choose the operating system from Windows XP to Windows 10.
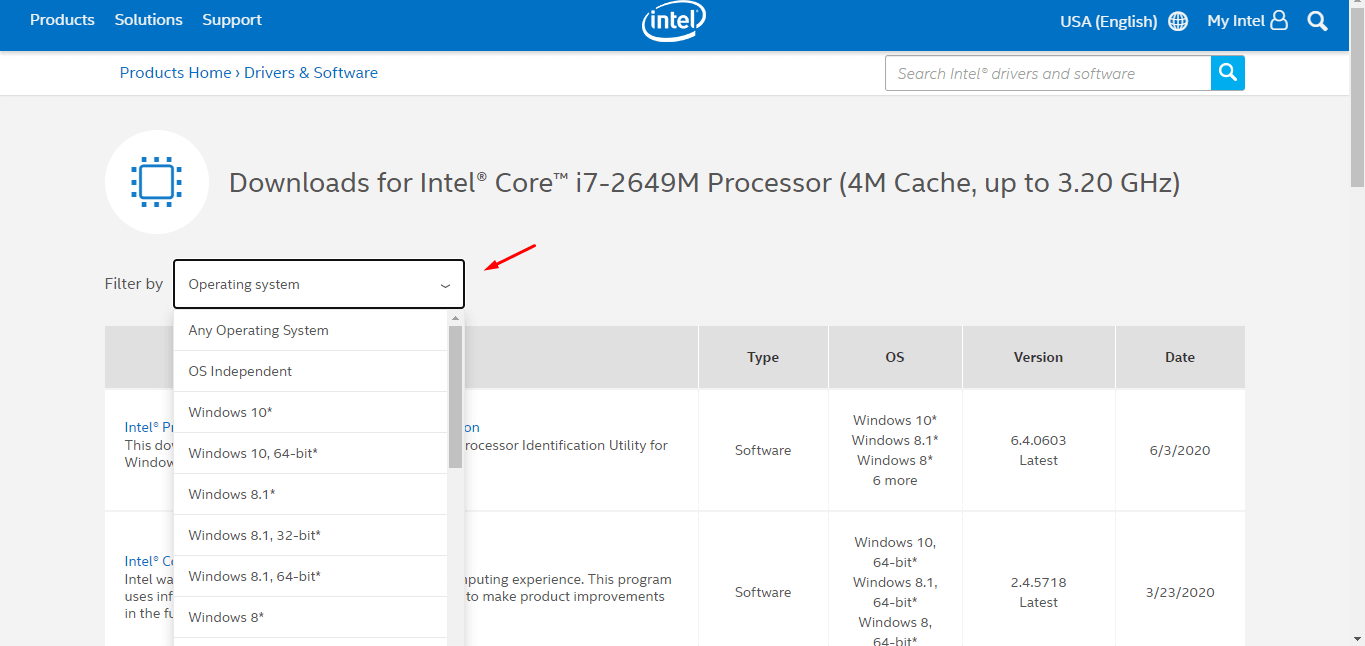
Step 4: Now, download the correct driver for your Intel processor.
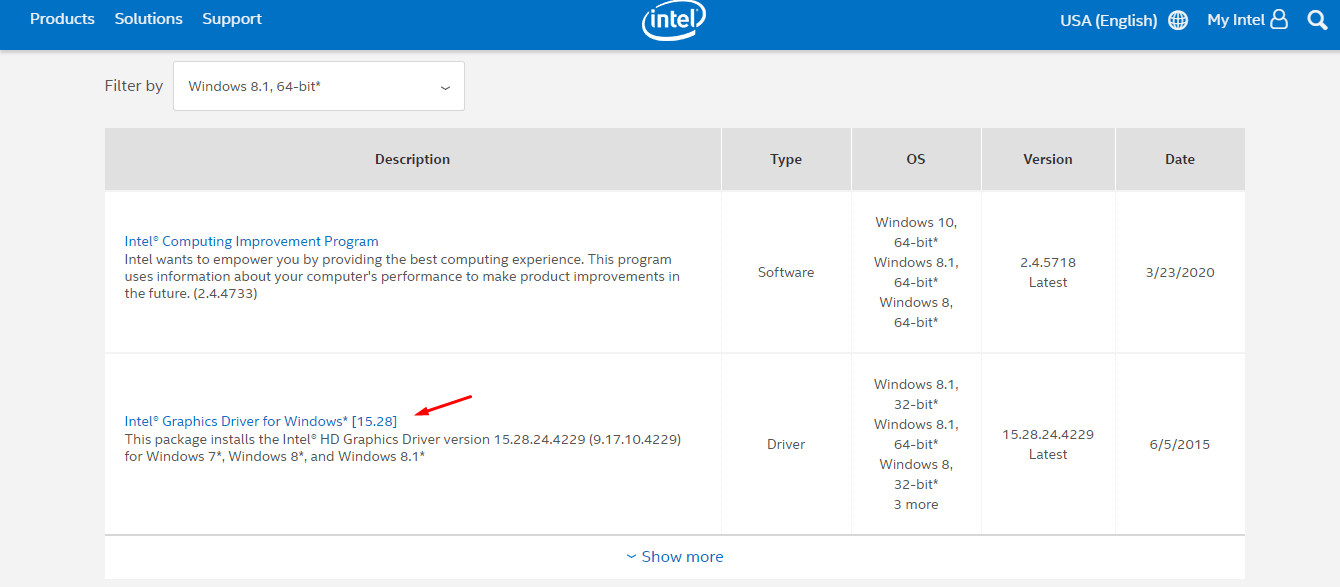
Download the graphics driver and then install it manually. Remember, you have to uninstall the device from “Device Manager” for fresh installation, and it will remove corrupted drivers. Readers can also use DDU (Display Driver Uninstaller) that removes remnants and fragments of the files from the system forever, and it is suitable for a fresh installation.
Bottom Line
The code error “This computer does not meet the minimum requirements” occurs because you are trying to install unsupported software for the Intel processor. Always check out the Intel download page for original and supported drivers, so you won’t face this problem again. Let us know what do you think about the solutions in the comment section below.