We all have multiple drives in desktops & laptops in Windows PC and it is not easy to manage. Many Windows machine manufacturers bundling laptops with SSD to boot the operating system and adding mechanical HDD for storage expansion. You can create multiple partitions in Windows PC without using third-party programs. Many custom assembled desktops owners don’t know that they can create partitions after operating system installation. We are going to show you how you can create multiple partitions in SSD & HDD using Disk Management.
Can you create partitions from SSD?
The market has expanded over the years, and storage drives have evolved from mechanical hard drives to Solid State drives. Millions of desktop & laptop owners have realized that slow mechanical drives are the bottleneck. We have upgraded 10 years old desktop by replacing the hard disk with SSD, and the performance boosted to the point that we continued using it. All Windows 11, 10 OS has a disk management feature in it, and Windows 7/8.1 Pro/10 detects the latest SSD drives.
The following tutorial will work on all HDD & SSD models.
A) M.2 SSD
B) NvME SSD
C) SATA SSD
All mechanical hard drives manufactured 20 years ago to the latest editions support the tutorial. We have used the same method to create partitions in Windows XP to the latest Windows 11, 10 PC. You don’t have to worry about the type of drive or Windows edition because we have created a lot of partitions over the years.
How to create partitions on Windows 10,11 PC?
Follow our lead to create multiple & healthy partitions in Windows 11,10 PC and if you have an 8.1 Pro machine, and then you can move to the next paragraph.
Step 1: Press Windows S and then look for “Disk Manager”, but it shows up like “Create & Format Hard Disk Partitions” and click on it to launch it.
Step 2: A window will pop-up on the screen, and you have to give a few seconds to let it load the drives & partitions in it.
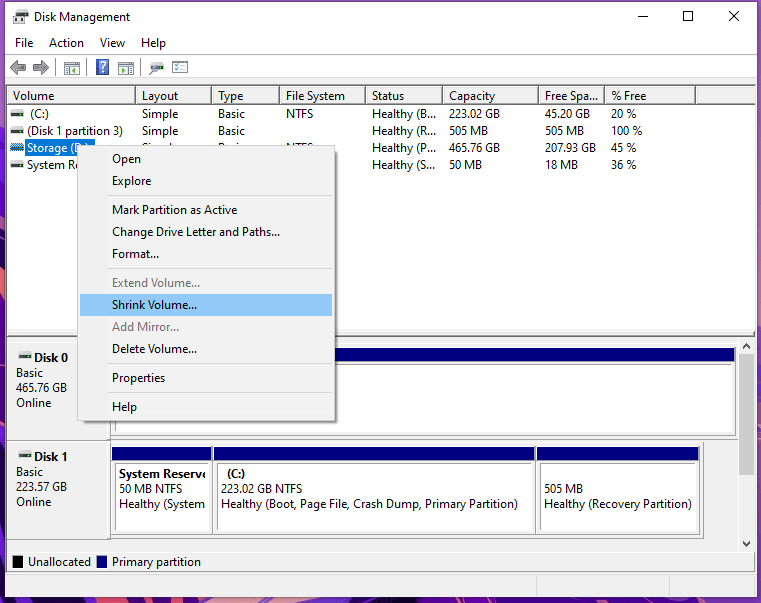
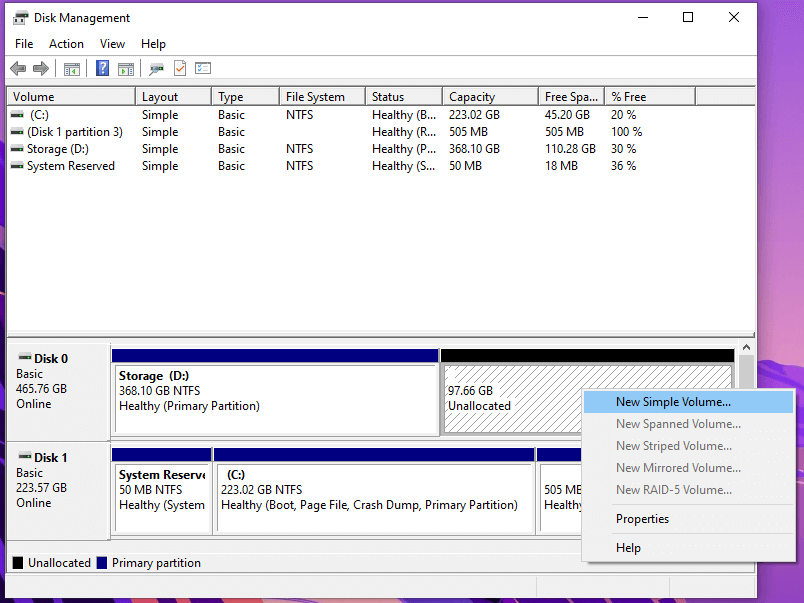
Step 3: Find the drive from the list, and you cannot make mistakes here.
- Disk 1 partition 3 is created by Windows to store core system files during OS installation.
- System Reserved is part of the core system files created during OS installation.
Step 4: Click to select the drive and then right-mouse click to view more options and then choose “Shrink Volume.”
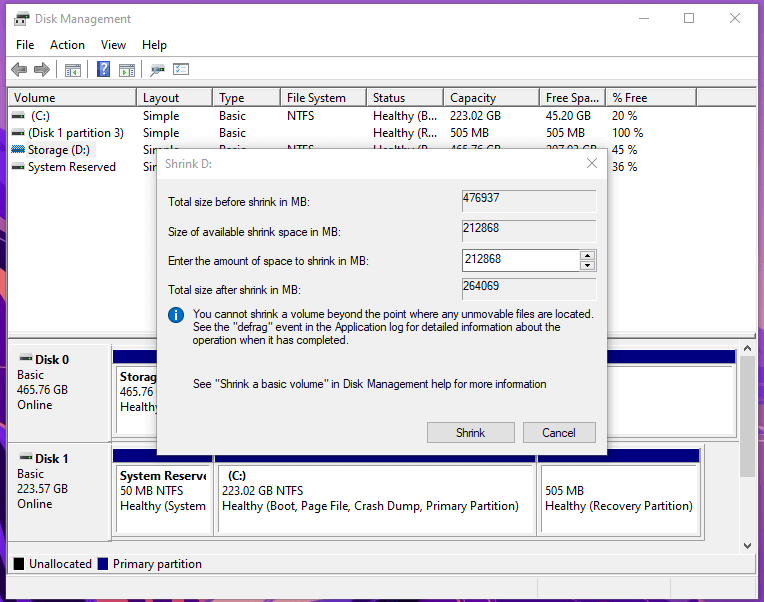
Step 5: Now, you have the option to select the size of the drive-in megabytes or MB’s.
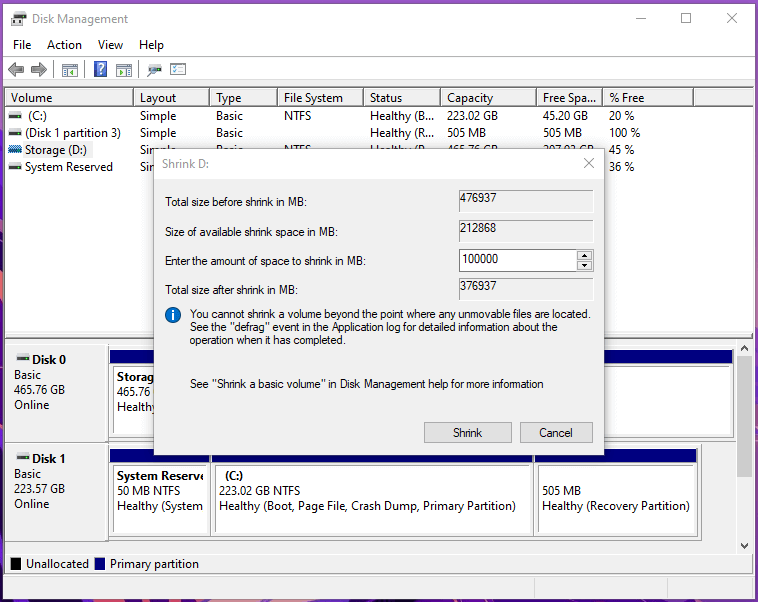
1000MB = 1GB
10,000MB = 10GB
100,000MB = 100GB
1,000,000 = 1TB
The first one shows the total size of the drive.
The second one shows how much you can shrink from the drive like 212868MB in our case.
You can select the size of the new partition in the third option and you can take your time to decide it.
Step 6: In our case, we have selected 100,000MB, which stands for 100GB as our drive has 200GB of free space in total. Click on “Shrink” to continue.
Step 7: Wait for a few seconds/minutes depending on the drive speed and Windows machine hardware.
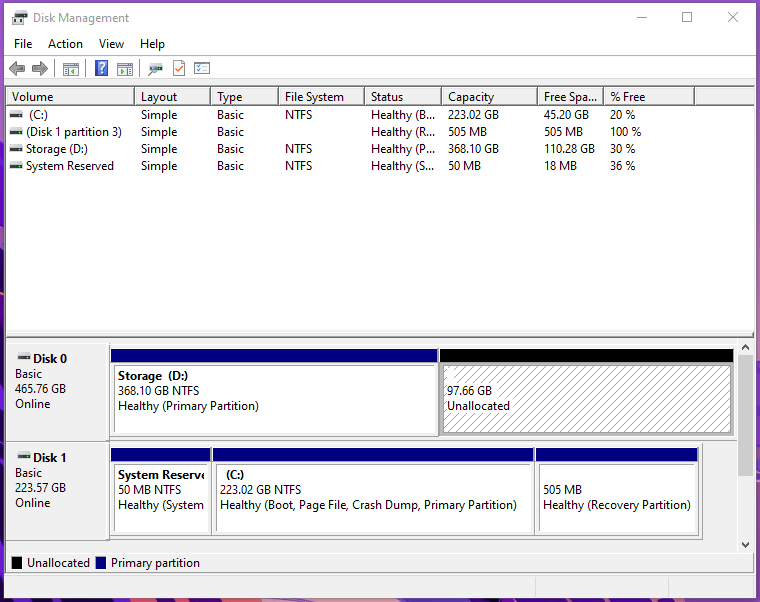
Note: We are using an old 500GB (5200rpm) drive, and it took over three minutes, but the window went into non-responsive mode. We force closed the Disk Management window and restarted the PC, and then the new partition showed up on the screen.
Step 8: Hover the mouse of the new unallocated partition and right-mouse click to view more options and then select “New Simple Volume” and then click on “Next” to start the process.
Step 9: We have selected 100,000 in volume size as that’s what we are targeting here, and then click on “Next” to continue.

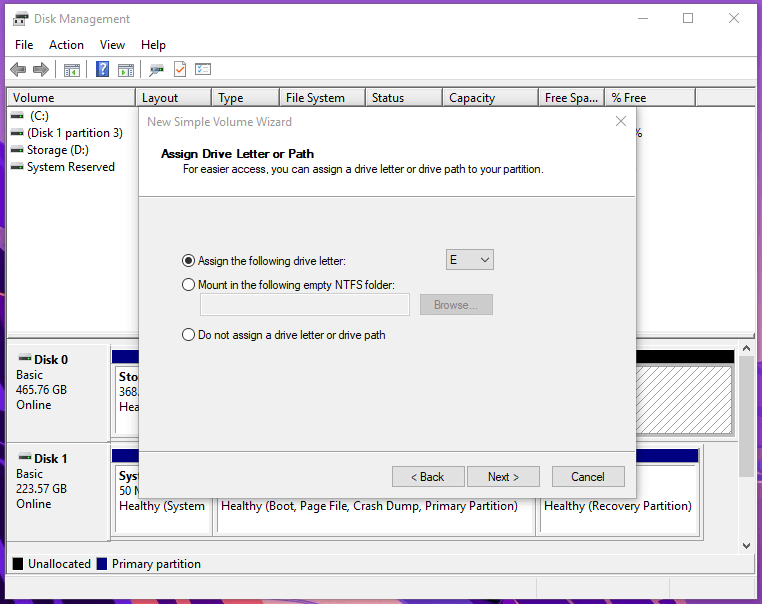
Step 10: You can assign a letter to the drive and then click on “Next” to continue.
Step 11: You can select File System (NTFS is recommended), allocation size, name the volume, and then click on “Next” to continue.
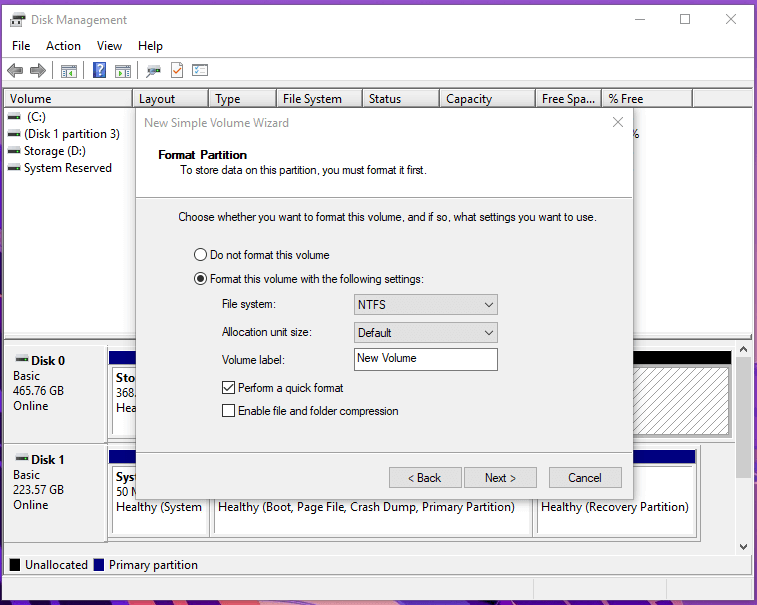
Note: You can keep everything to default as that’s what we do during installation as well.
Step 12: Click on “Finish”, and the new partition will appear on the computer.

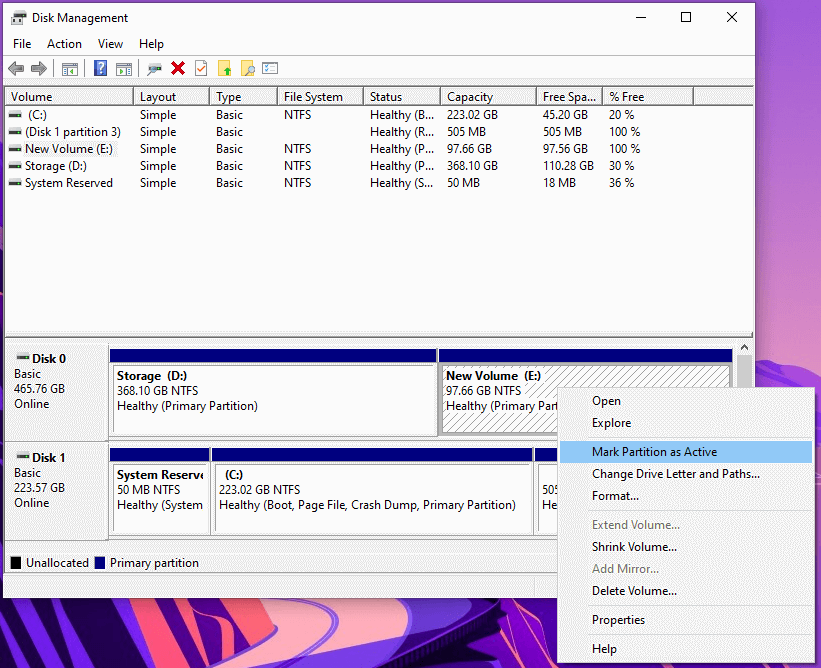
Step 13: Right-mouse on the new partition to view more options and then choose “Mark Partition as Active” to complete the process.
You don’t have to restart the computer as the new volume doesn’t require one. In case, if you have encountered errors during the new partition creation then you can seek assistance in the comment section below or head to Microsoft Forums for community assistance.
Bottom Line
Windows Disk Management exists in Windows XP or later editions, and we have all editions so far. You can create/delete partitions in Windows 11 XP/Vista/7/8.1 Pro/10 using the Disk Management feature. Most of the Windows PC won’t encounter problems as long as it does not contain threats and maintaining a clean environment. You don’t need third-party tools to create new volumes in Windows 11/10 as the software recognizes SSD & HDD.