Windows is an innovative operating system, where Microsoft has invented an algorithm. The advanced algorithm decide, which program will get raw juice for maximum performance. The operating system can make a decision to give one particular program more RAM, CPU and power for better performance, while others will throttle. The priority system is designed to give optimal performance across the platform and ensure that the user job is getting done.
Contents
Can you change programs priority in Windows 10?
Microsoft opened the doors for the users, who want to give majority of the resources to one specific program. Of course, it is not available as an official feature in control panel or settings bar. The Remond-based company knows that this is a software-based tweak coming from experienced users only. You have to take roundabout methods to accomplish the task and you can do so. There are multiple ways you can power up a specific program but only a handful of them work on all editions. Windows 10 has changed a lot since initial launch in 2015 and it is no longer a basic operating system.
Set CPU Priority from Task Manager
There are many solutions, but you can set the CPU priority from the task manager, and it works effectively. The PC administrators don’t have to go through complicated guides because Windows will direct resources to the particular program. The task manager method will work smoothly, and you can always revert the changes by following the same tutorial backward.
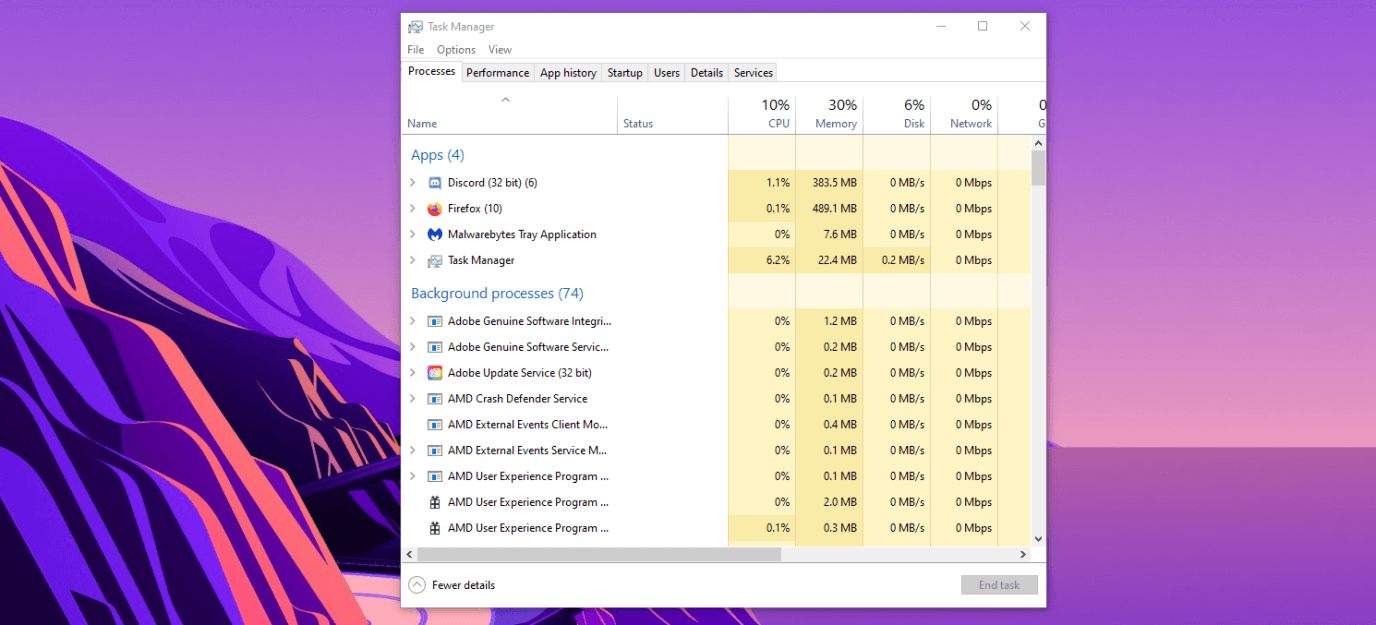
Step 1: Open Task Manager by pressing Ctrl + ALT + DEL button and then choose “Task Manager” from the list.
Step 2: Click on “Details” from the top menu in the task manager.
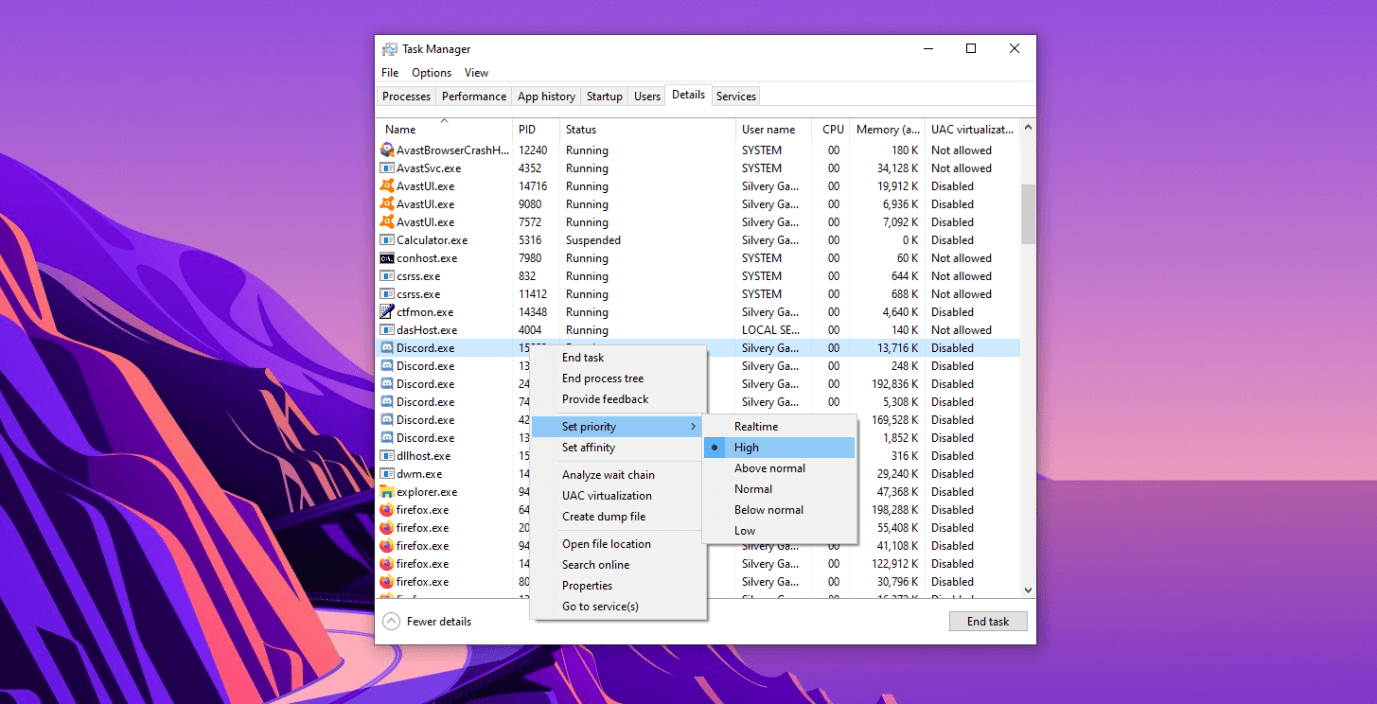
Step 3: Find the program that you want to set CPU priorities.
Step 4: One program can have a lot of executable running in the background, and you should choose the right one. In our case, we have selected Discord, where we were connected to the voice channel.
Step 5: Click to select the executable service and then right-mouse click for more options.
Step 6: You have a lot of options on the screen, so select “Set priority” and then choose “High” to complete the process.
Readers might be using laptops, so you have to keep in mind that Windows will use more energy in the process. Readers can consider this solution as temporary as it will reset the next time the machine restarts. Do not take it as the permanent solution as Microsoft has an algorithm placed in the latest edition.
Set CPU Priority Manually
You can set every program priority manually but you have to do it everytime the system boots. Of course, it is an effective way to do so as Command Prompt supports it. You can tell the operating system to give demanded CPU resources to particular programs.
Step 1: Press Windows Key + S and then type “Command Prompt” and then open as administrator.
Step 2: Now, type (start “” /AboveNormal “C:\Windows\System32\discord.exe”) in the command prompt or CMD.
Step 3: You can head to the Task Manager to see whether Windows has increased priority. Open Task Manager > Details > Discord executable program and you can follow the first instructions for visual presentation.
You can change the executable program at the end of the command with the given program.
If you don’t know the name of the program then go to C: partition and then program files or programs (x86) to find the executable file. Remember, many software companies rename the installed folder to company product name like Apex Legends game launched by EA.
The American company EA, launched Origin library program, where Apex Legends is installed and the executable file name is PlayApex.exe that is a complete different name from what anyone can imagine.
So you have to check the executable file name manually from the program files folder.
Automate CPU Priority
Windows 10 enables the function by default but it was changed by third-party program or malware, then it might be creating the issue. Windows is not able to give maximum CPU resources to the installed programs.
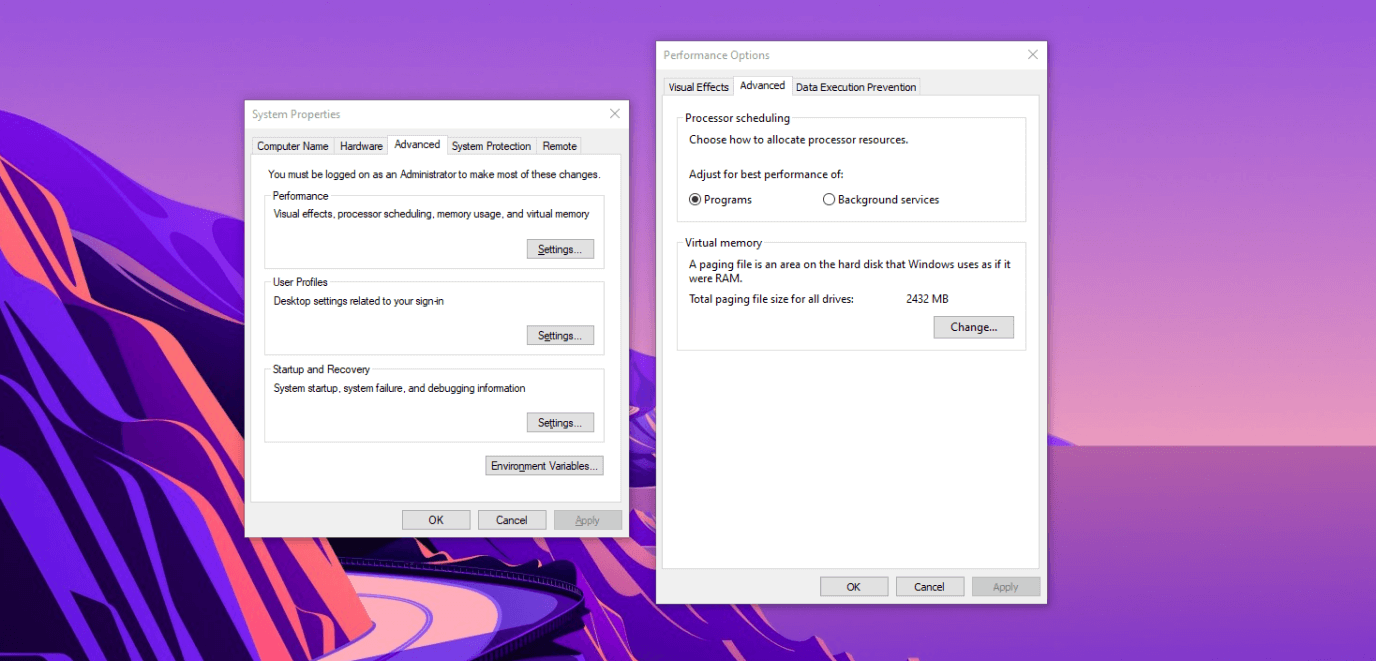
Step 1: Press windows key + R to open “Run” application.
Step 2: Copy & paste “SystemPropertiesAdvanced” and then hit “ok” to open it.
Step 3: A new window will show up on the screen and then click on “Advanced” and then “Settings” under peformance.

Step 4: A new window will pop-up and choose “Programs” and then hit “Apply” and then “OK” to finish the process.
Close all windows running in the background and then restart the PC for the Windows 10 to take the new setting into effect. If the setting is already on the programs then nothing has changed in the file system.
Bottom Line
Now, you got three ways to set the CPU priority in Windows 10 and all of them work flawlessly on every edition released by Microsoft so far. Remember, you should set the power consumption to “High Performance” from control panel because laptops have power saving balanced mode turned on. Let us know which solution worked for to set the CPU priority in the comment section below.