In today’s computerized age, protection and security are foremost concerns. Ensuring delicate data, such as individual and money related data, amid e-mail communication is significant. Windows 11 offers strong features and improved security conventions, making it less demanding than ever to send encrypted emails. In this article, we’ll explore step-by-step information on how to send encrypted emails in Windows 11, guaranteeing your messages stay secure and private.
Understanding Encryption in Windows 11 PC and Laptop
Mail encryption includes encoding the content of your messages so that as it were the expecting beneficiary can decode and study them. Windows 11 utilizes the S/MIME (Secure/Multipurpose Internet Mail Extensions) convention, permitting for email encryption and digital signing. By implementing S/MIME, you’ll ensure your email communications’ confidentiality, integrity, and realness.
Setting Up a Digital Certificate:
You must get a digital certificate some time recently by sending encrypted emails to Windows 11. A digital certificate acts as a digital ID, confirming your personality and permitting others to encrypt messages particularly for you. Follow these steps to set up a digital certificate:
a. Open the “Settings” app in Windows 11 and explore “Accounts” and after that “Email & accounts.”
b. Under the “Digital certificates” area, tap “Get a digital certificate.”
c. Select a certification authority from the accessible choices and take after the instructions to get your digital certificate.
d. Once you have received your digital certificate, it’ll be automatically introduced on your framework.
Configuring Encryption Settings:
After procuring your digital certificate, it’s basic to design the encryption settings in Windows 11. This guarantees that outgoing emails are encrypted by default. Here’s how you’ll set up encryption settings:
a. Open the “Mail” app in Windows 11.
b. Click on the gear symbol found within the lower-left corner to get to “Settings.”
c. Within the settings menu, select “Compose and reply.”
d. Under the “Encrypt” area, enable “Encrypt new messages by default.”
e. Save your changes and near the settings menu.
Composing and Sending an Encrypted Email:
Presently that your encryption settings are arranged, you’ll compose and send encrypted emails. Follow these steps:
a. Open the “Mail” app and press the “Compose” button to compose a new email.
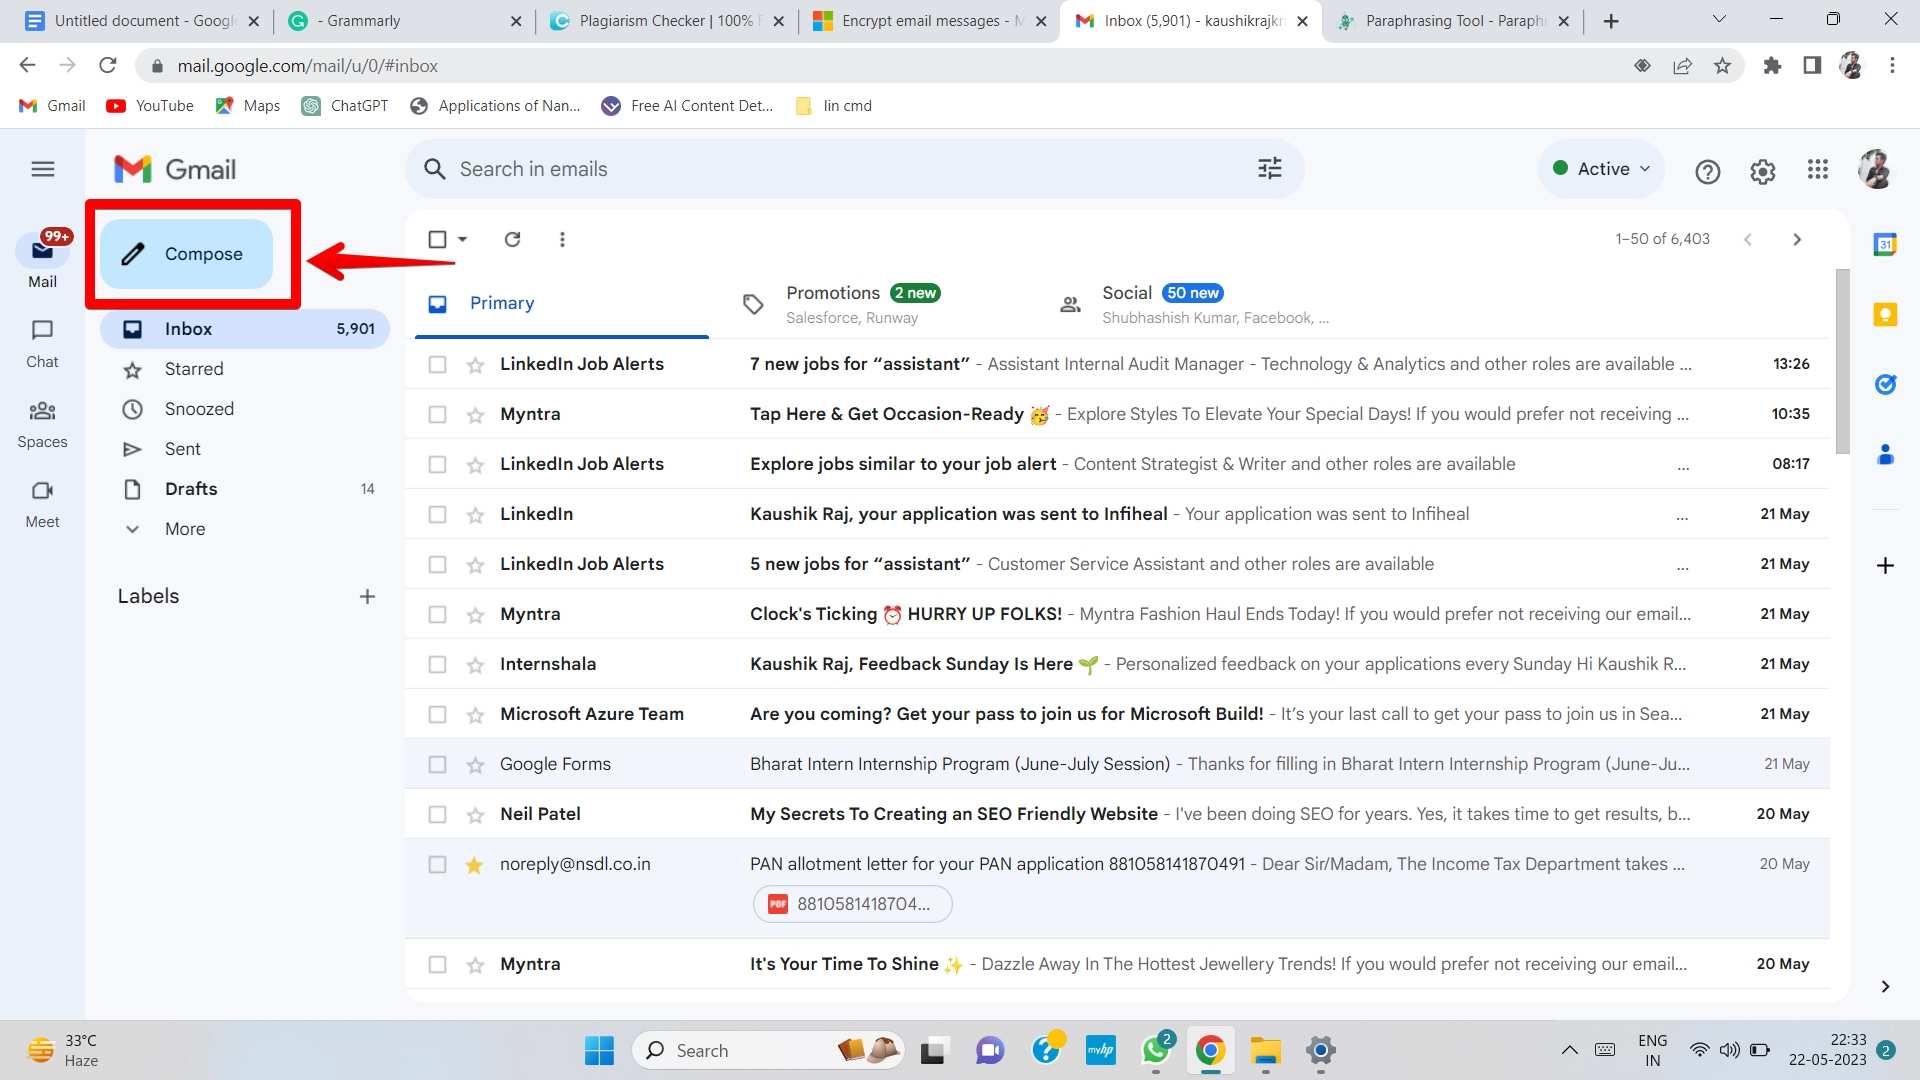
b. Fill in the recipient’s mail address, subject, and message content.
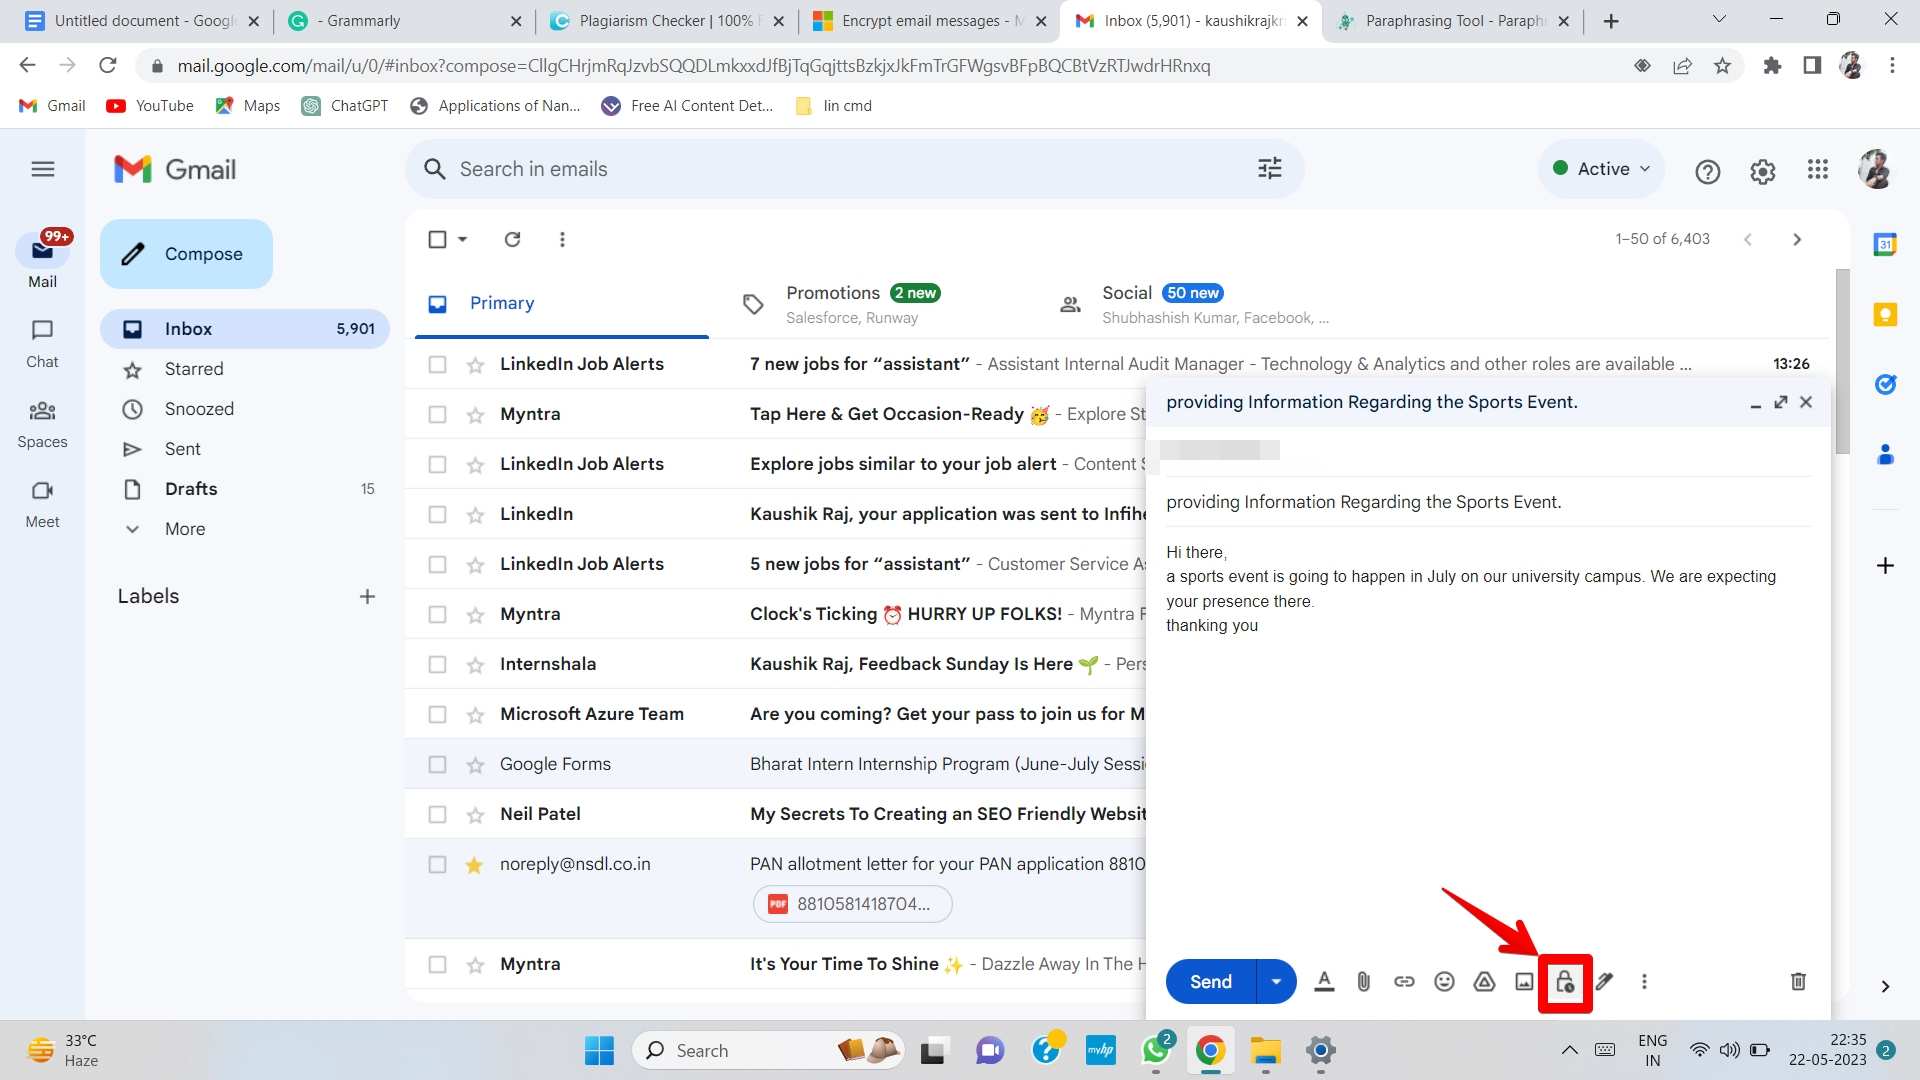
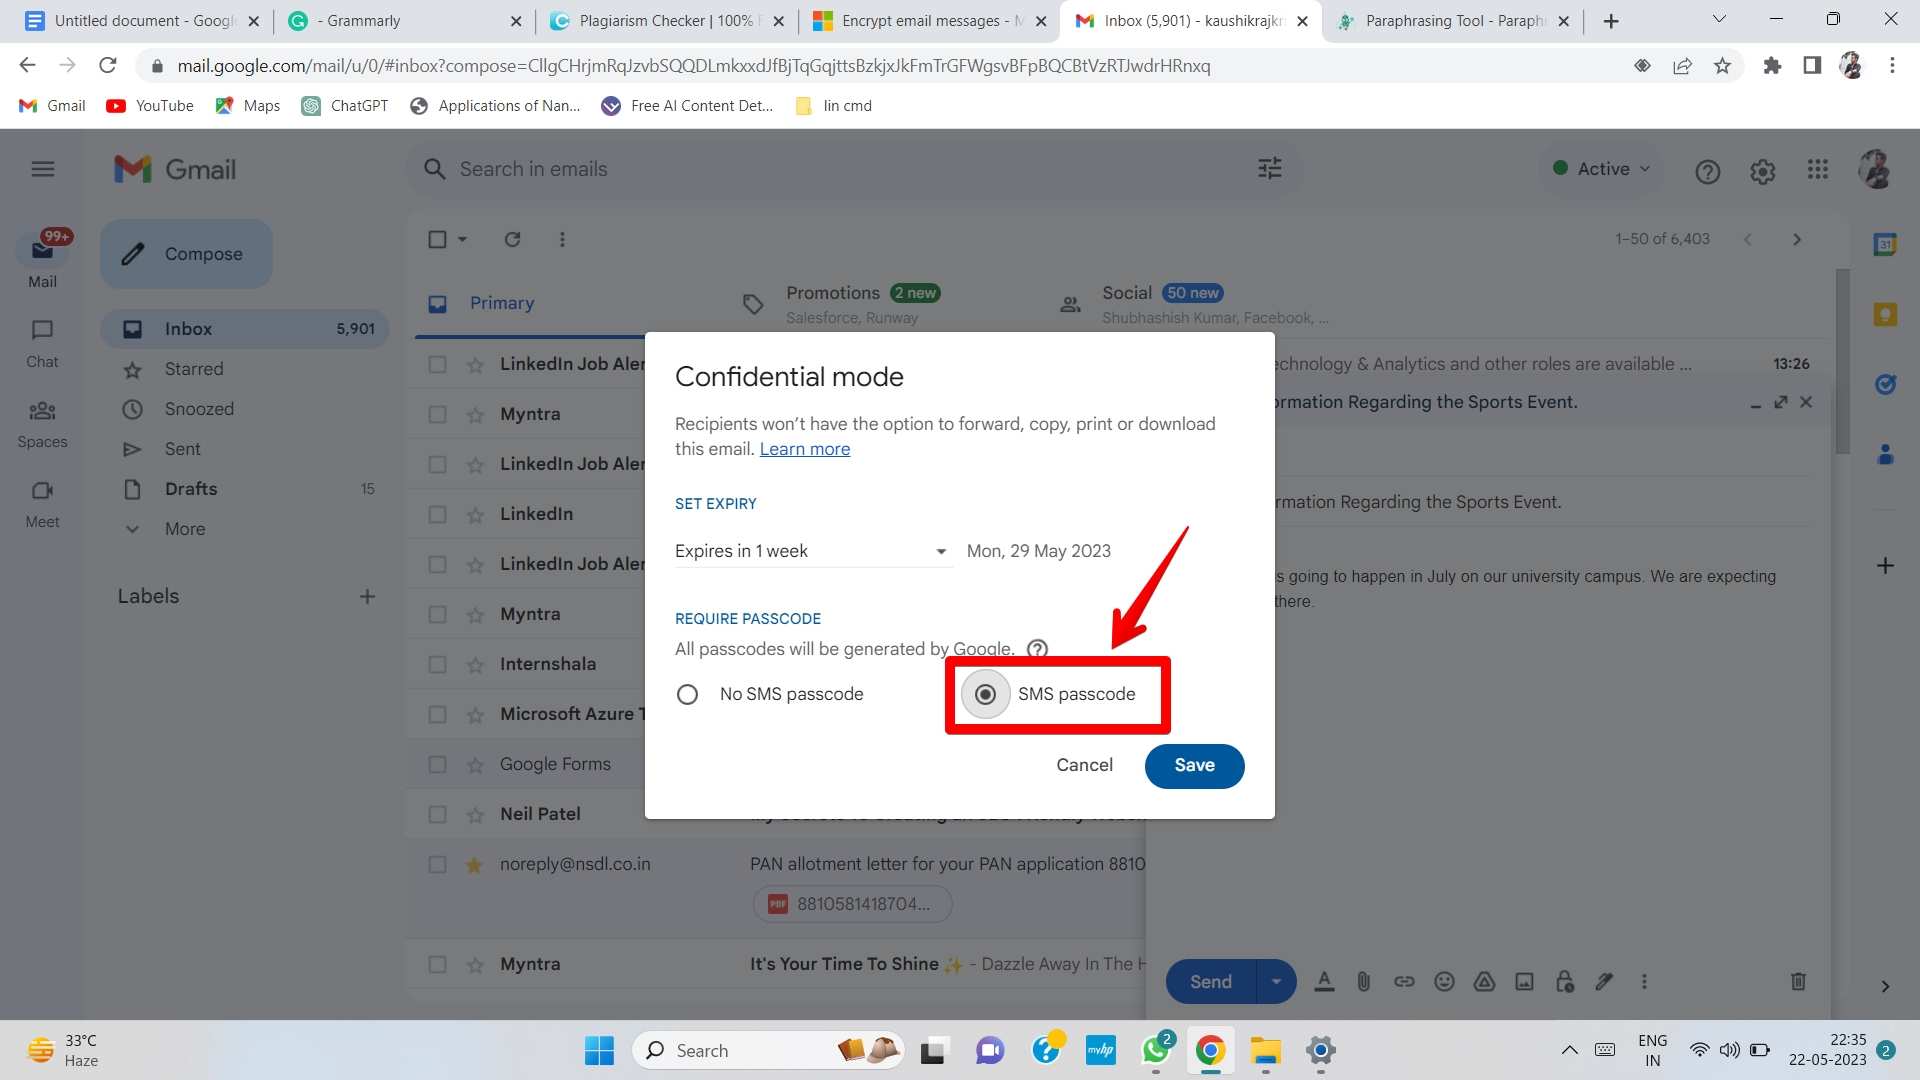
c. Press on the “confidential mode” tab found within the lower-right corner of the email composition window.
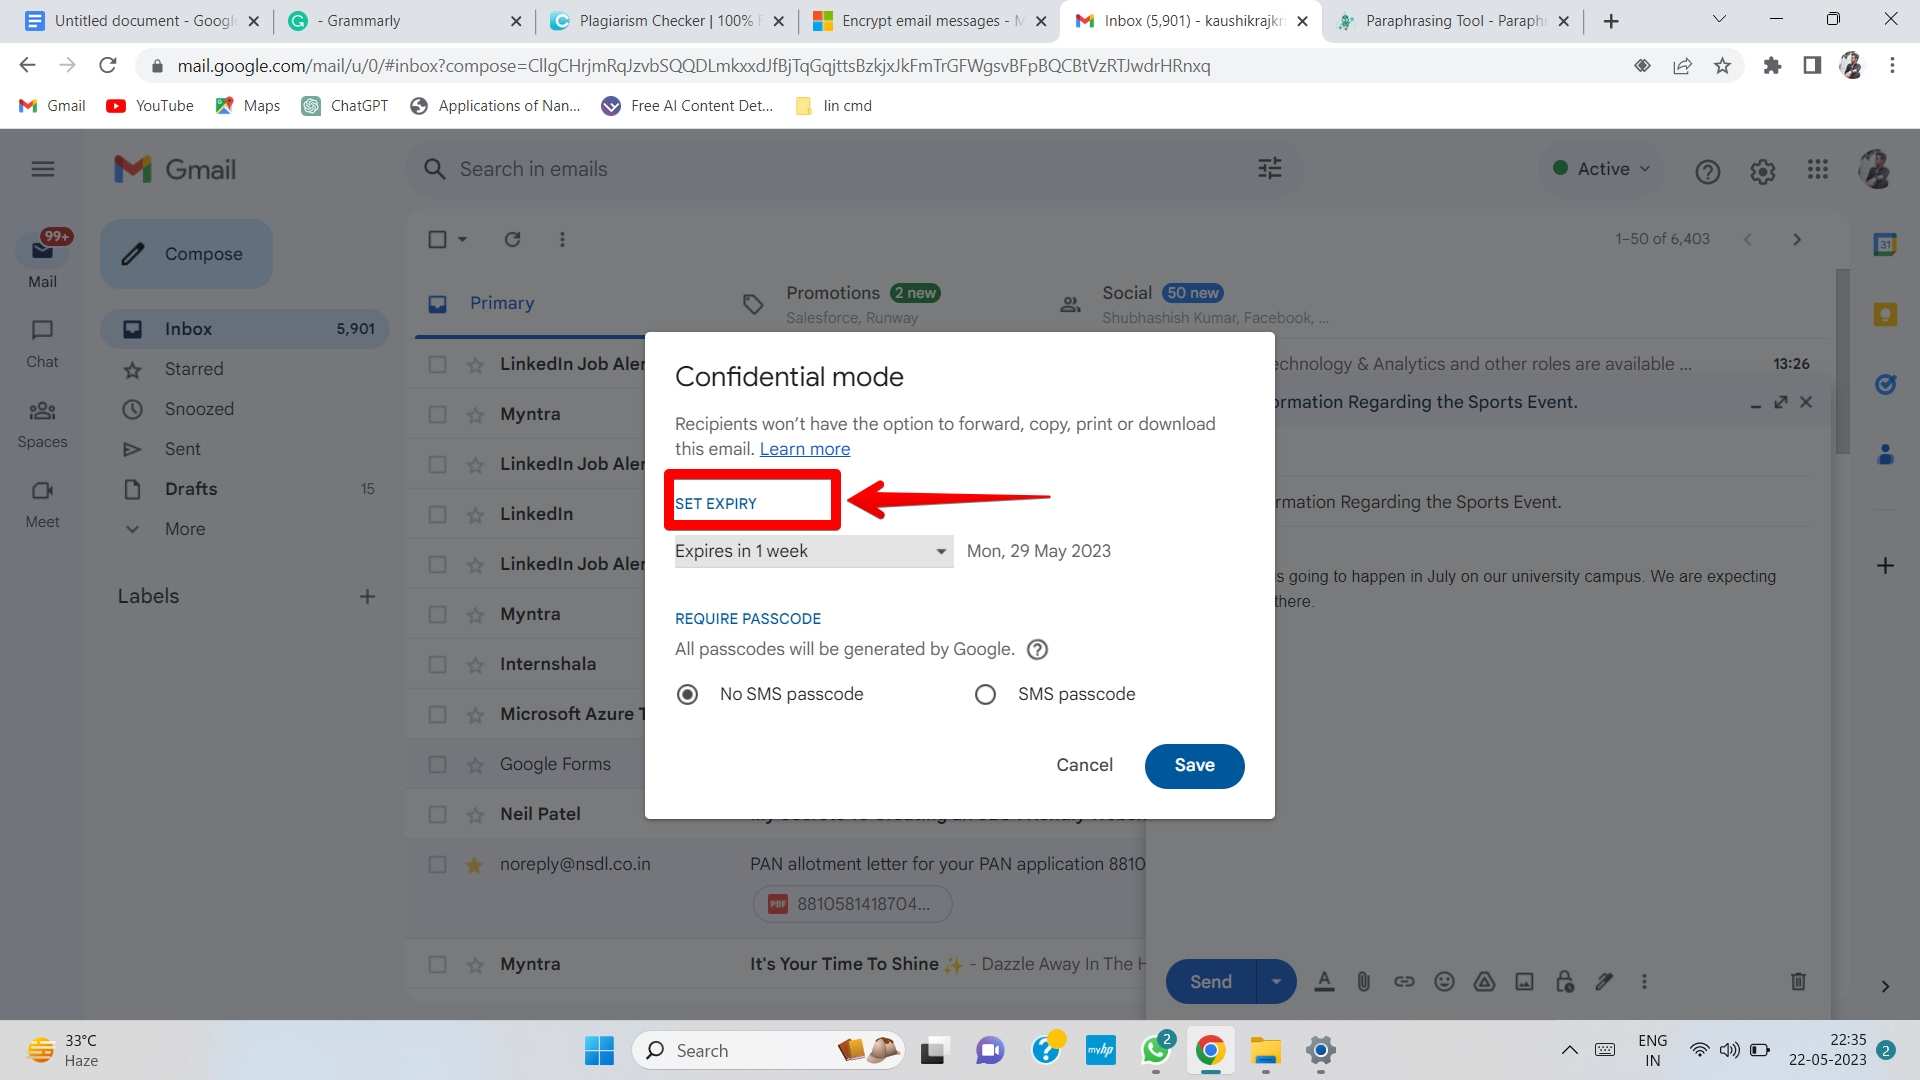
d. Under the “confidential mode” area, press “set expiry option” and “set passcode” to encrypt the email.
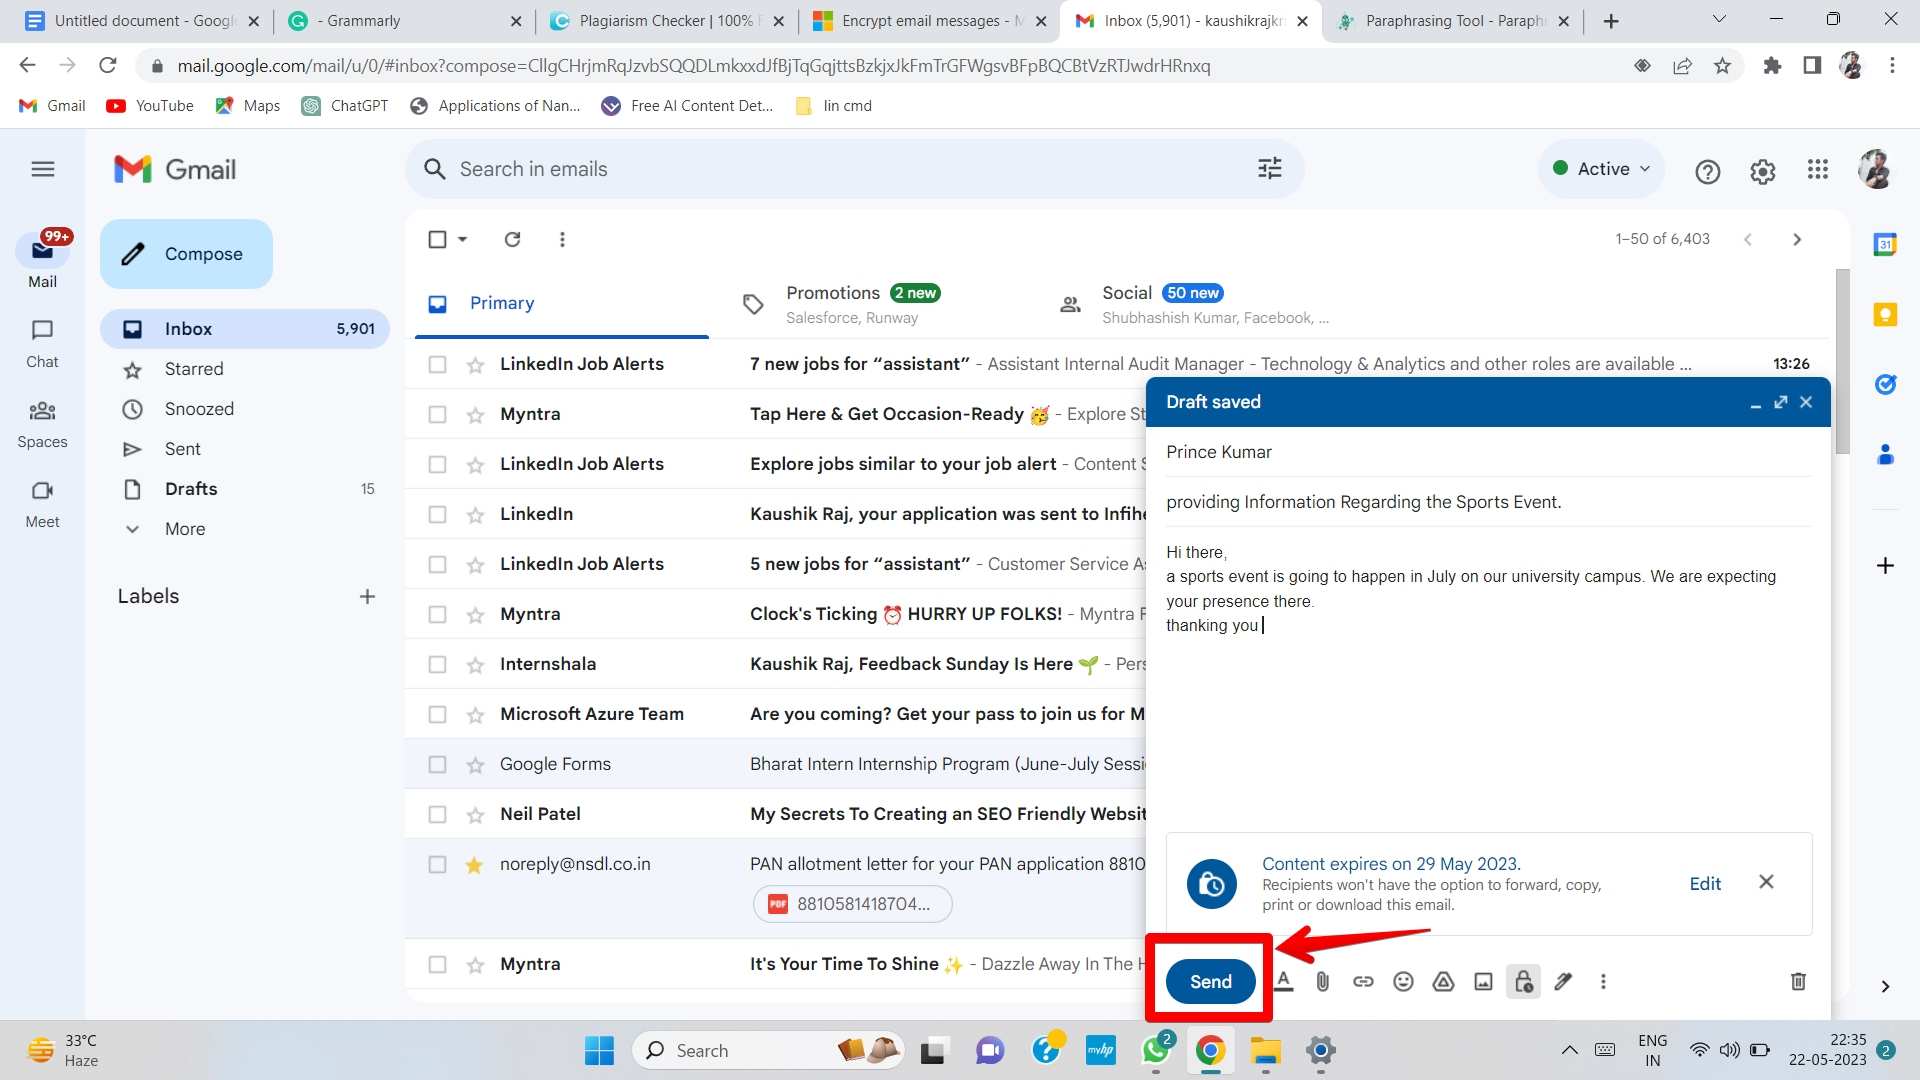
e. Once satisfied with the e-mail, tap the “Send” button to deliver the encrypted message.
Decoding an Encrypted Email:
Once you get an encrypted mail in Windows 11, the Mail app naturally decrypts it, provided you have the matching private key related along with your digital certificate. Decrypting an email is effortless:
a. Open the Mail app and find the encrypted email in your inbox.
b. Double-click on the email to open it.
c. The Mail app naturally decrypts the mail, permitting you to read its contents.
d. React to the email as you would with any other regular message.
Verifying the Recipient’s Encryption Capability:
Some time recently sending an encrypted email, guaranteeing that the recipient’s email client supports encryption and features a valid advanced certificate is essential. This confirmation handle makes a difference to ensure that the encrypted e-mail can be decrypted at the recipient’s conclusion. Here’s how to confirm the recipient’s encryption capability:
a. Communicate with the recipient in advance and inquire about their encryption capability.
b. Inquire the recipient to share their digital certificate or give you with their open key.
c. Import the recipient’s digital certificate or public key into your Windows 11 Mail app.
d. Once imported, you’ll then select the recipient’s e-mail address whereas composing an mail, and Windows 11 will consequently encrypt the message for them.
e. In the event that the recipient does not have encryption capabilities, consider utilizing alternative secure communication strategies, such as secure file-sharing platforms or encrypted messaging apps.
Managing Encryption Certificates:
Over time, you’ll have to manage your encryption certificates in Windows 11. This may involve renewing expired certificates, importing modern ones, or denying old ones. Here are some key points to consider when overseeing encryption certificates:
a. To resume an expired certificate, contact your certification specialist and follow their particular renewal process. Once you get the renewed certificate, it’ll replace the terminated one automatically.
b. To import a new certificate, get the certificate file (usually in .pfx or .p12 format) from the certification specialist and take after the consequence process inside the Windows 11 Mail app.
c. To revoke a certificate, contact your certification specialist and take after their revocation handle. Revoking a certificate nullifies it, avoiding its future use for encryption.
d. Review and manage your encryption certificates to guarantee validity and maintain a secure e-mail communication environment.
Conclusion:
Sending encrypted emails in Windows 11 guarantees the security and security of your delicate data amid communication. You’ll set up a secure email environment by getting a digital certificate, arranging encryption settings, confirming the recipient’s encryption capability, and overseeing your encryption certificates. Remember to remain vigilant and consider additional security measures to protect your emails past encryption. With these practices in place, you can certainly send encrypted emails and protect your private data in Windows 11.