Windows 10 lock screen loved by millions of consumers as it offers custom wallpaper, notifications, time & date, and other interesting interface. However, I have seen people, who do not prefer to have it on the screen because it causes them a lot of irritation. The lock screen does not work smoothly for older machines because it has animations and blur option as well. The older machines do not support render animations and blur effect faster thus, it slows down the desktop interface loading.
What is Lock Screen in Windows?
Microsoft started to provide a traditional lock screen on Microsoft innovative operating system XP-series. The lock screen provides basic protection against local threats such as privacy invasion. Microsoft laid down the plan to add security feature to protect the personal files and folders from co-workers, family members, private detectives and general people. Of course, the lock screen protection proved ineffective against criminal hackers and penetration experts.
For professionals Lock Screen is an annoying part for them because it consumes a bit of time to boot desktop. Sometimes, I find it irritating as well because it locks down the machine, when I am away for a moment or two minutes. I am going to legit ways to remove the lock screen as there is no official option available at disposal.
Effective Technique: Create New Registry
I recommend the consumers to create a restore point because I cannot imagine, if the actions applied are irreversible. In this method, our knowledge in registry will assist in removing main files. Windows OS left with zero choices and it has to boot desktop without obligations.
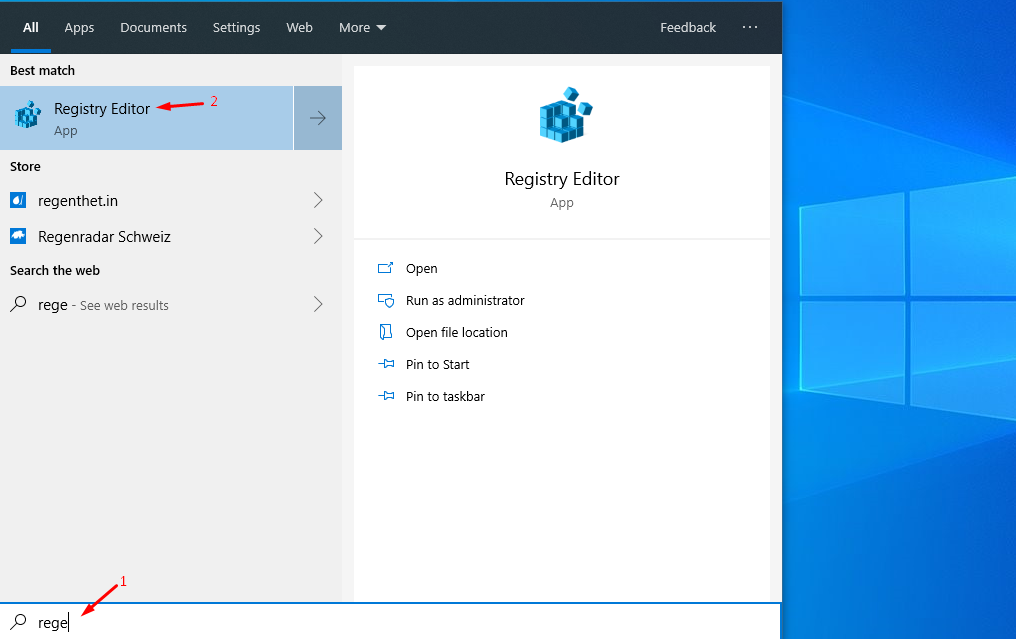
Step 1: Click Windows + S and then type “Regedit” to open core files & registries. Make sure to run the regedit as administrator to ensure that owner of the PC makes changes.
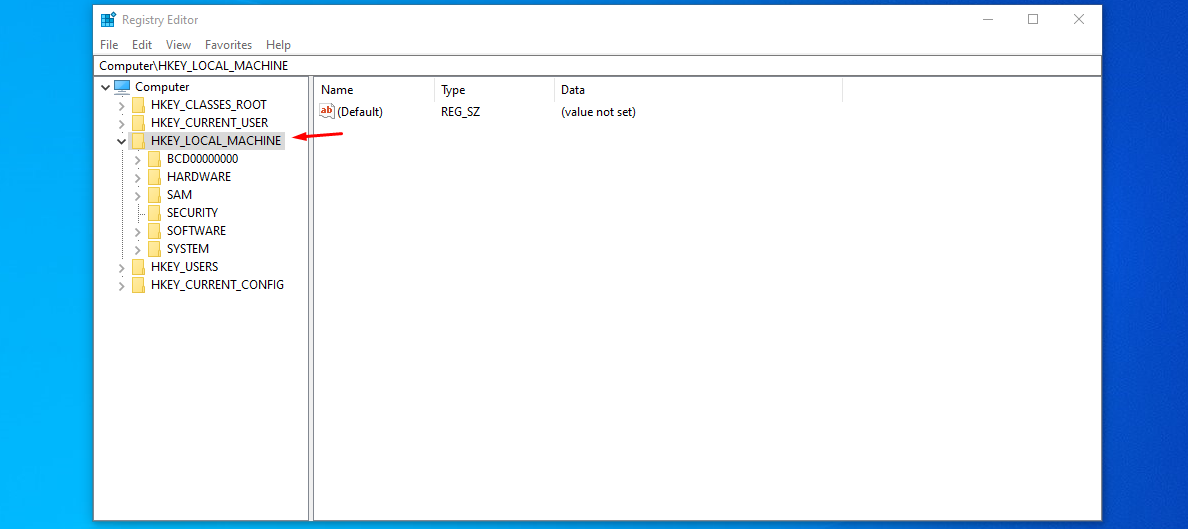
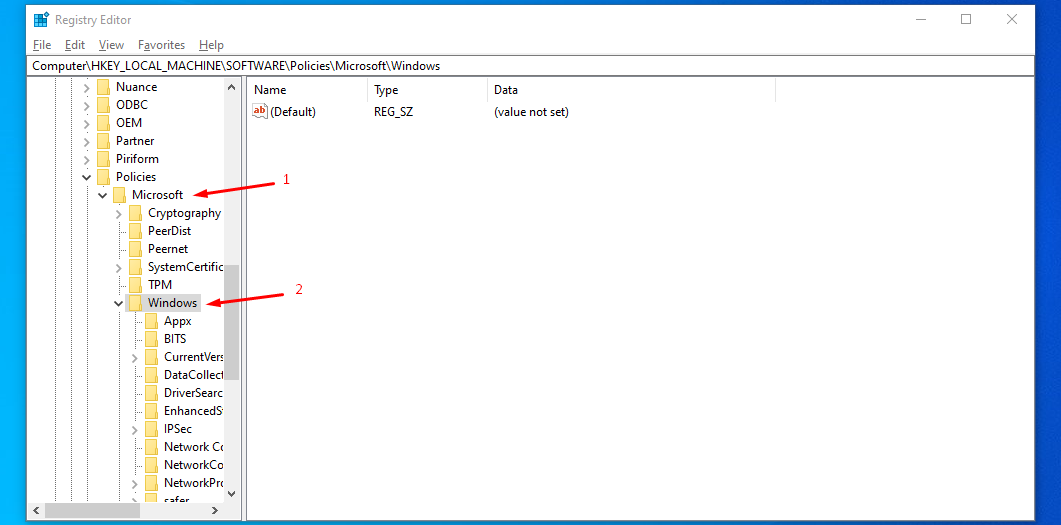
Step 2: I look at the options and it confuses me a lot, but you have to double-click on “HKEY_LOCAL_MACHINE.”
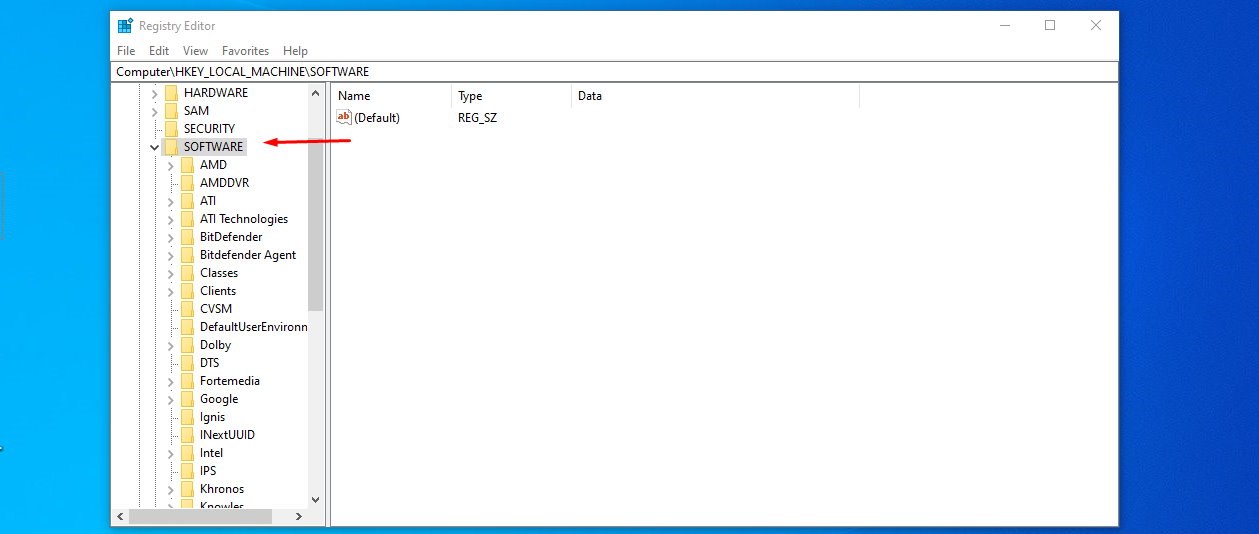
Step 3: Double-click on SOFTWARE to open more folders.
Step 4: Yes, you have to view more folders and starting with “Microsoft,” and then “Windows.”
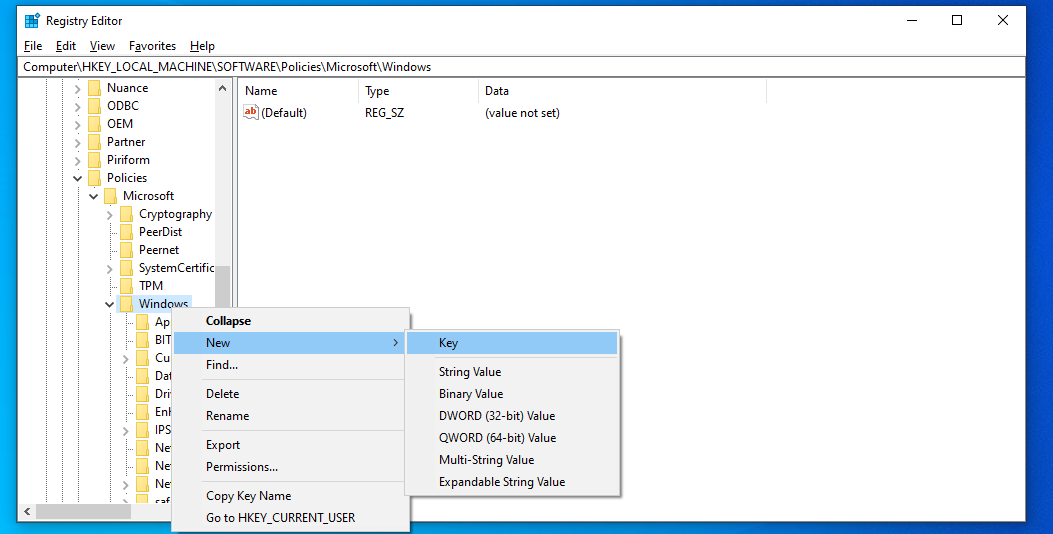
Step 5: Right-click mouse on Windows, and select “New,” and then select “Key.”
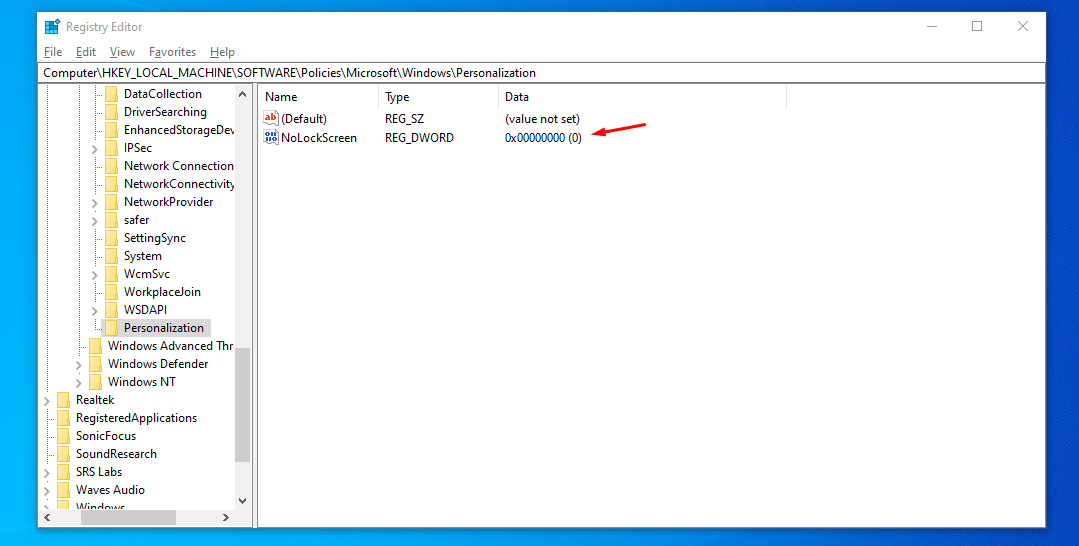
Step 6: A default named folder created in an instant and then rename it as “Personalization” without failing.

Step 7: Right-click mouse in newly created folder, and then select “New > DWORD (32-bit) Value.”

Step 8: Make sure to rename the new file as “Lockscreen” and then click enter to save it.
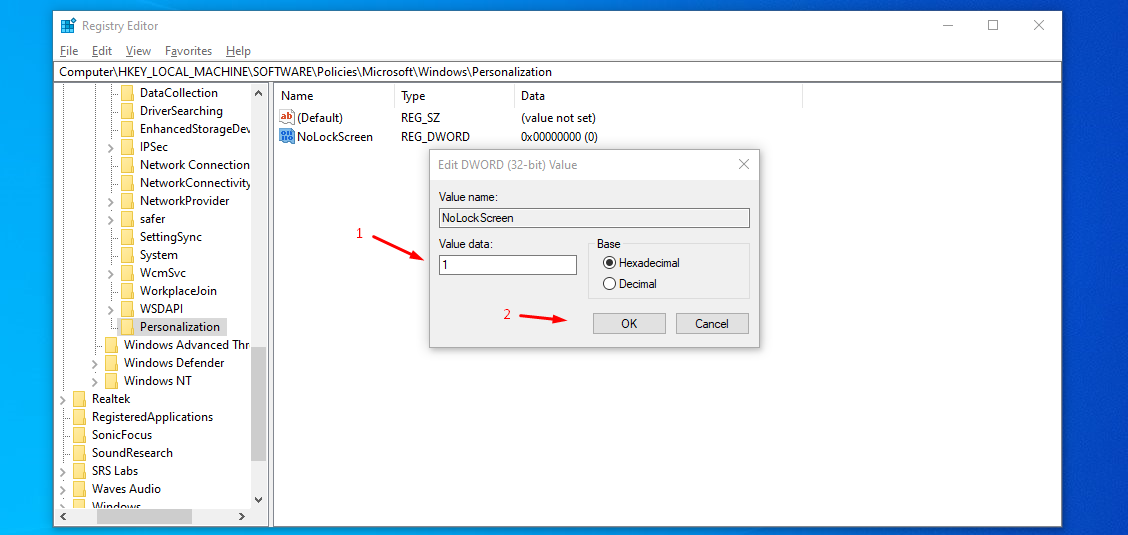
Step 9: Double-click on the newly created file and then change the value from 0 to 1 and then click on OK to make changes.
I inform the readers to remove lock screen password, if you have set one earlier and make sure to restart the computer. The registry method not functions on few build versions because Microsoft creates patches, so it does not function normally in other builds.
Bottom Line
In a few editions, the technique does not work at all because Microsoft fixed the gap hole, so no one can take advantage of it. Instead of fixing the loopholes patches, they should have added an official update, but it cannot happen without the support from millions. Let us know if you have figured out a new technique in the comment section below.