Since the Windows 2000 operating system included the Encrypting File System to protect device data on hard drives, encryption functions have been available on Windows devices.
The encryption features, including BitLocker Device Encryption, have recently been enhanced to provide easy and robust data protection options, including encrypting whole and portable drives.
BitLocker is a feature of Windows 11 that can be found in the Professional and Enterprise operating system versions. The goal of Bitllcker is to increase the safety of your data by simply encrypting your drive.
When BitLocker is enabled in Windows 11, it encrypts your files using an efficient encryption algorithm called AES, giving a reliable way of securing your data. On the other hand, removing the encryption is a simple process if you no longer want BitLocker to secure your data. This article will demonstrate how to disable or stop BitLocker on your device.
Contents
Is It Safe to Disable BitLocker In Windows 11 PC, Laptop, Surface Pro, Desktop?
In some instances, the security and privacy of your data on the drive might be compromised if you disable BitLocker encryption. For example, if you have a dual-boot PC and turn off BitLocker, the second OS can read your data. Furthermore, if your laptop is lost or stolen, the data on its drive could be accessed by whoever finds it if it is not encrypted.
BitLocker cannot prevent hackers and criminals from accessing your drive’s data while you’re online. If that’s your primary issue, you should know that your data is already encrypted while you’re using it.
You should use a firewall, anti-virus software, and your own good decision as a user to keep yourself safe from danger on the internet. However, if you decide to turn off or disable BitLocker, you should be more careful about who or what operating system has physical access to your device.
Disable or Stop/Turn OFF BitLocker In Windows 11 PC, Laptop, Surface Pro, Desktop
In this section, we will learn about disabling BitLocker in Windows 11.
Step.1 To access the Settings menu, you may either hit the Start button or the Windows key on your keyboard. Alternatively, you can launch Settings by pressing the Windows key plus the letter I.
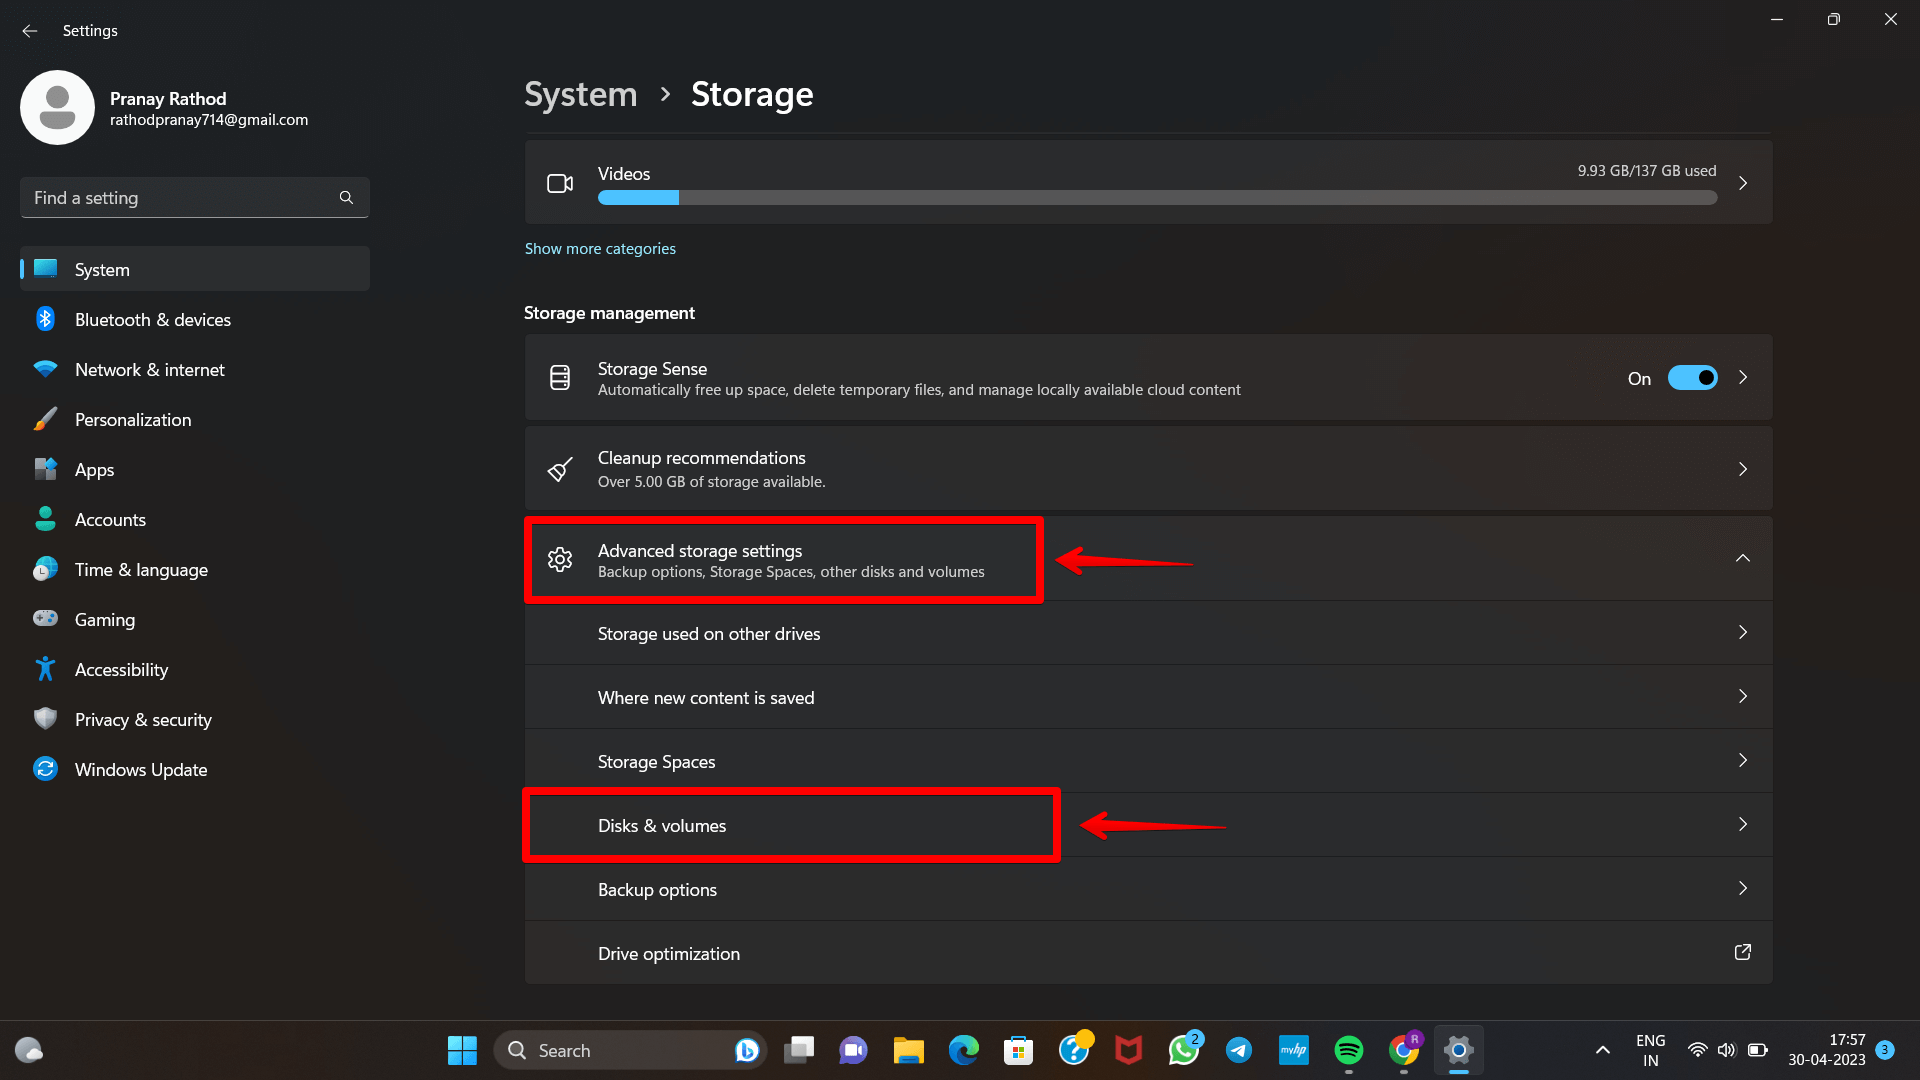
Step.2 After opening Settings, go to System> Storage > Advanced storage settings.
Step.3 Once you access the Advanced storage settings column, select Disks & Volumes.
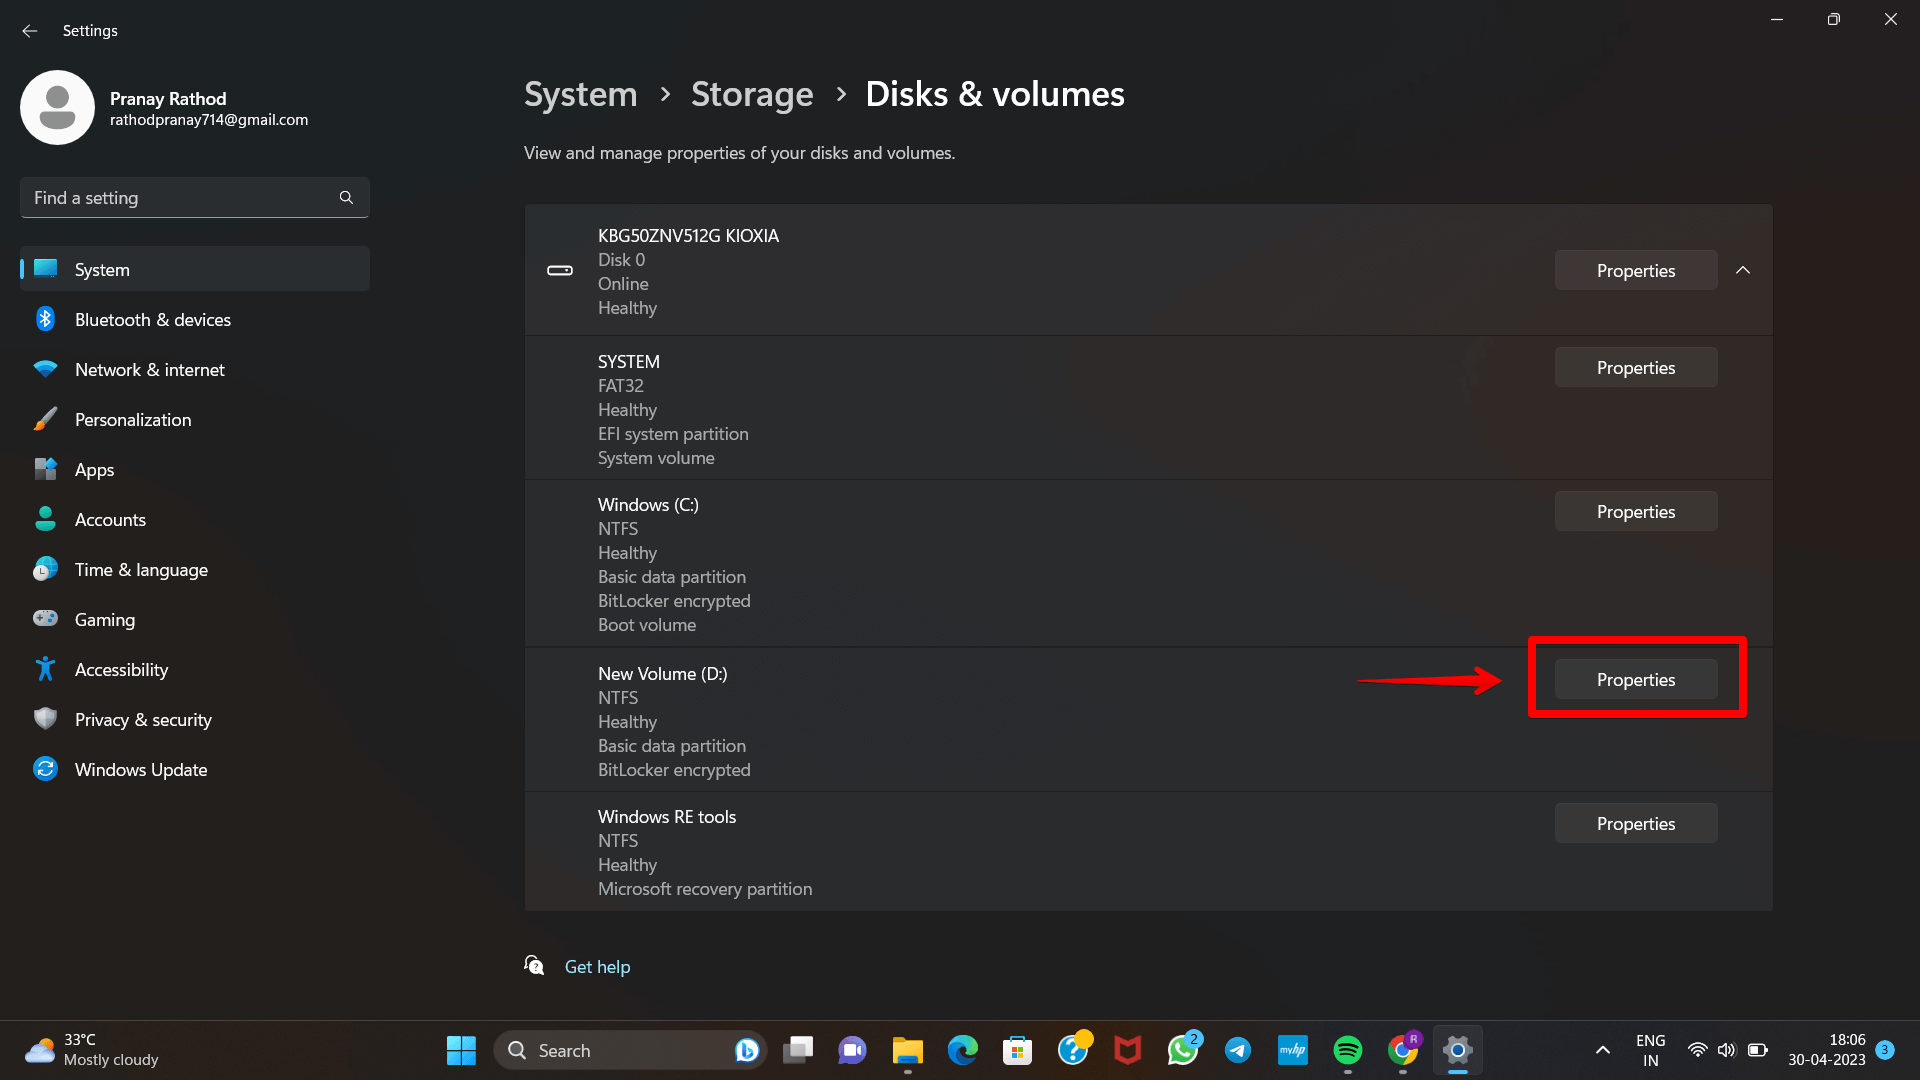
Step.4 Next, click Properties for the drive you want to disable encryption on.
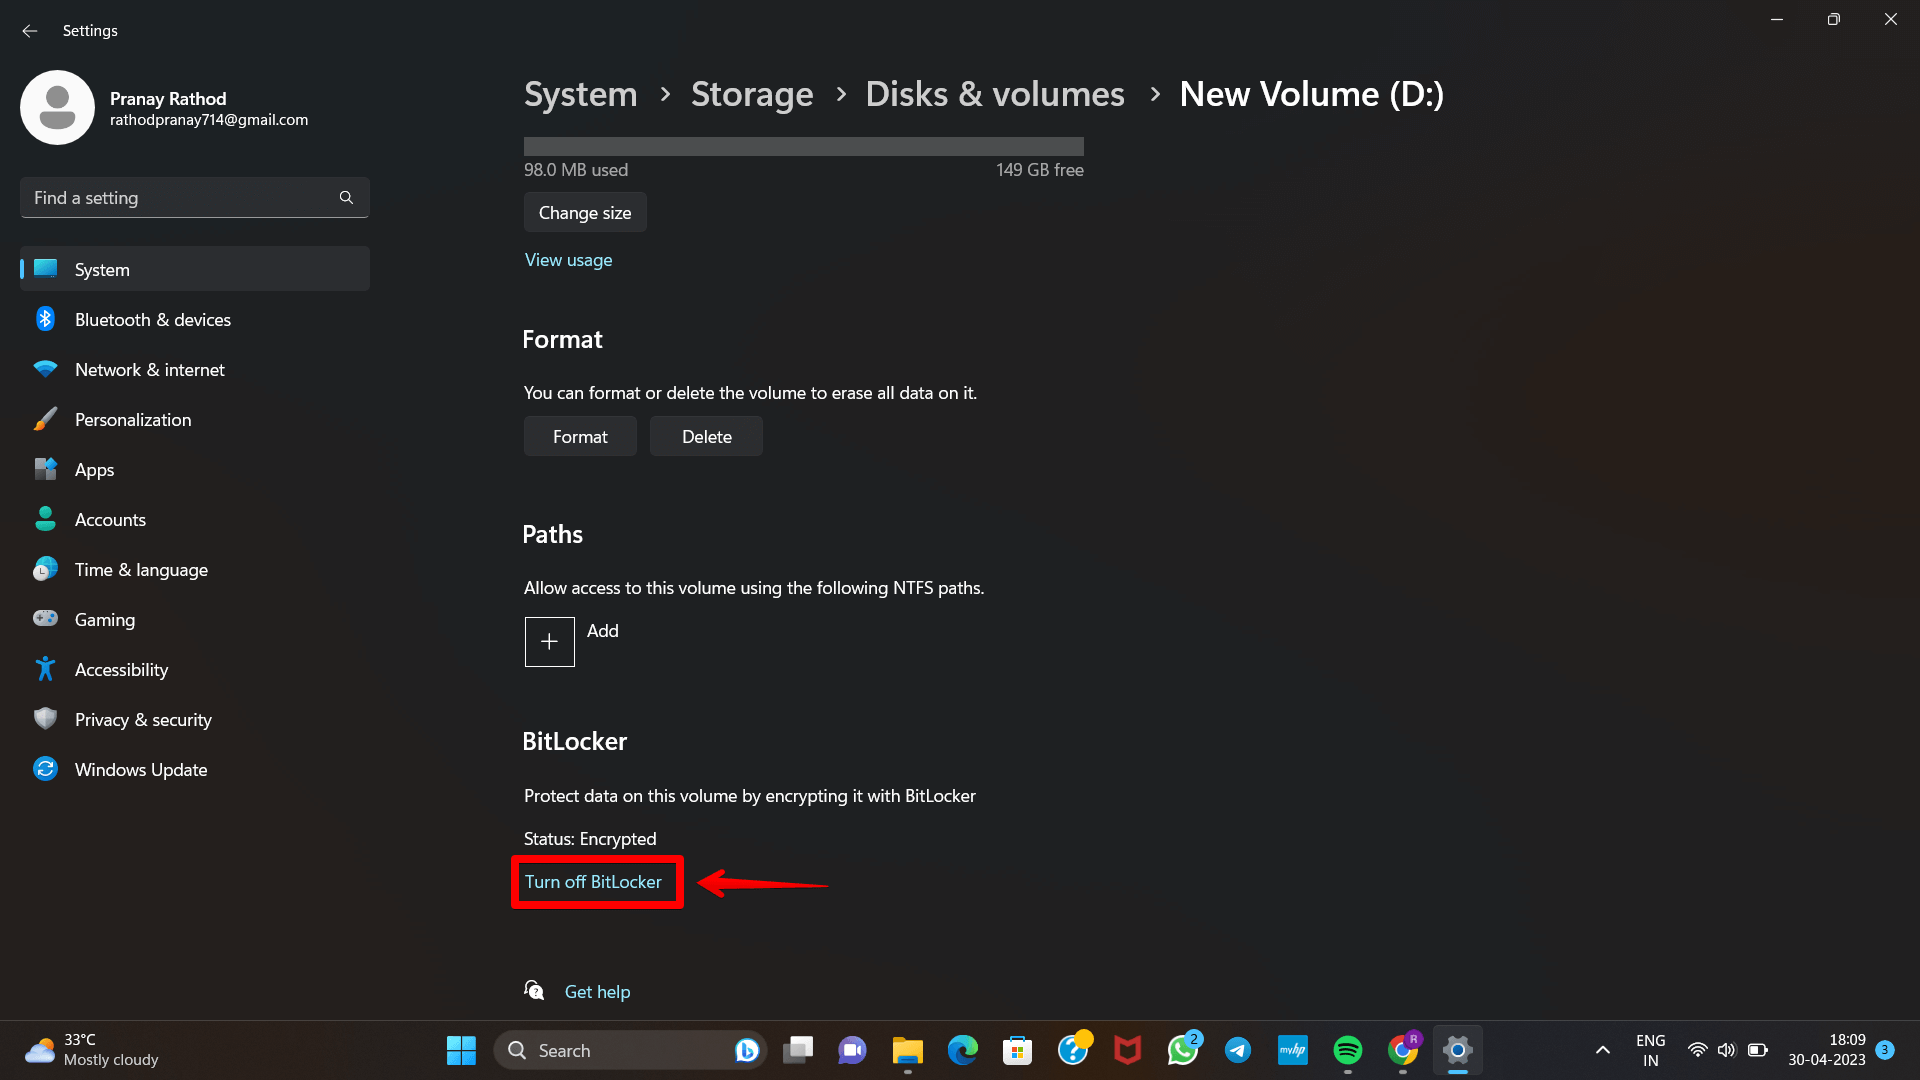
Step 5. Click the Turn off BitLocker link in the section labeled “BitLocker.” Tap the button.
Step.6 Select Turn off BitLocker again under Operating system drive. you receive the verification message.Click the Turn off BitLocker button
Step.7 In the BitLocker section, find the Turn off-BitLocker link and click on it.
Step.8 Next, click the Turn off BitLocker option again, which appears under the Operating System drive section.
Step.9 Finally, confirm the action by clicking the Turn off-BitLocker button when the verification message pops up.
The progress of the drive decryption process can also be monitored. It is essential to remember that encrypting a disk might take several minutes to finish, and the amount of time it takes can vary from System to System.
After you have finished the steps stated above, the encryption protection provided by BitLocker will be disabled for the drive that you have specified. After you have finished the task or tasks that BitLocker prevented you from completing, you should re-enable BitLocker-to ensure your data is kept secure.
FAQ On How To Disable Turn off Bitlocker in Windows 11
Conclusion
In conclusion, turning off the encryption provided by BitLocker in Windows 11 may be a useful option in several situations. However, it is essential to consider the implications of disabling this safety measure before taking action. Suppose you do want to go with deactivating BitLocker.
In that case, the procedure is a simple one that requires you to navigate via the options menu, open the Advanced storage options, and turn off BitLocker for the particular disk that you want to change it for.
It is essential to remember that the decryption process might take several minutes, and the exact time needed can vary depending on the System. You can activate BitLocker in Windows 11 to protect your data after you have finished the task or tasks that BitLocker was preventing you from doing.