Windows 10 is a well-known OS for eating your high speed mobile or broadband data within few hours. Because of this problem Microsoft itself introduced a feature called “Set As Metered Connection”. That option seems to work for DoSVC bandwidth eating problem, but for BITS or Background Intelligent Transfer Service setting as a metered connection won’t solve the problem.
Disabling BITS is kind of not good as you won’t get any updates from Microsoft including security updates for Microsoft Defender.
Contents
Fix BITS Windows 10 Problem Quickly
But before that you may need to know what exactly is Background Intelligent Transfer Service and what does it do ?
BITS Info
Transfer files in the background using idle network bandwidth. If the service is disabled, then any application that depend on BITS , such as Windows update or MSN Explorer, will be unable to automatically download the programs and other information.
What Trigger this service ?
- In my experience it’s the Windows OS update the mainly trigger the service and download a lot of data !
Methods to stop this service temporally
Method 1
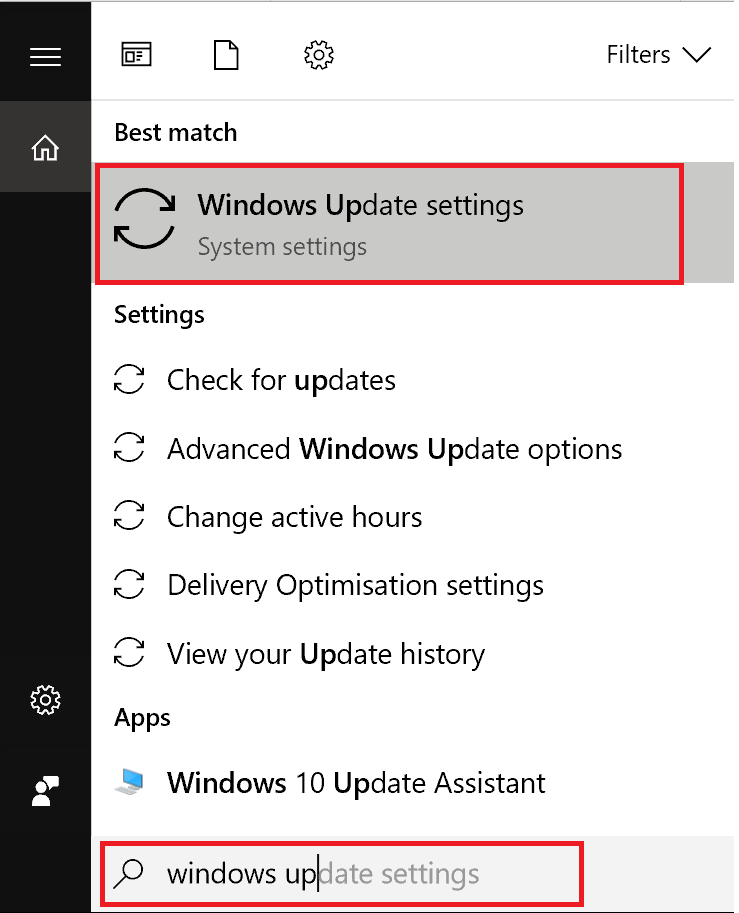
Step 1 : Just press Windows + S, to bring up the Win10 search bar if you are hiding it and in that enter “Windows Update Settings” just like in the picture shown below.
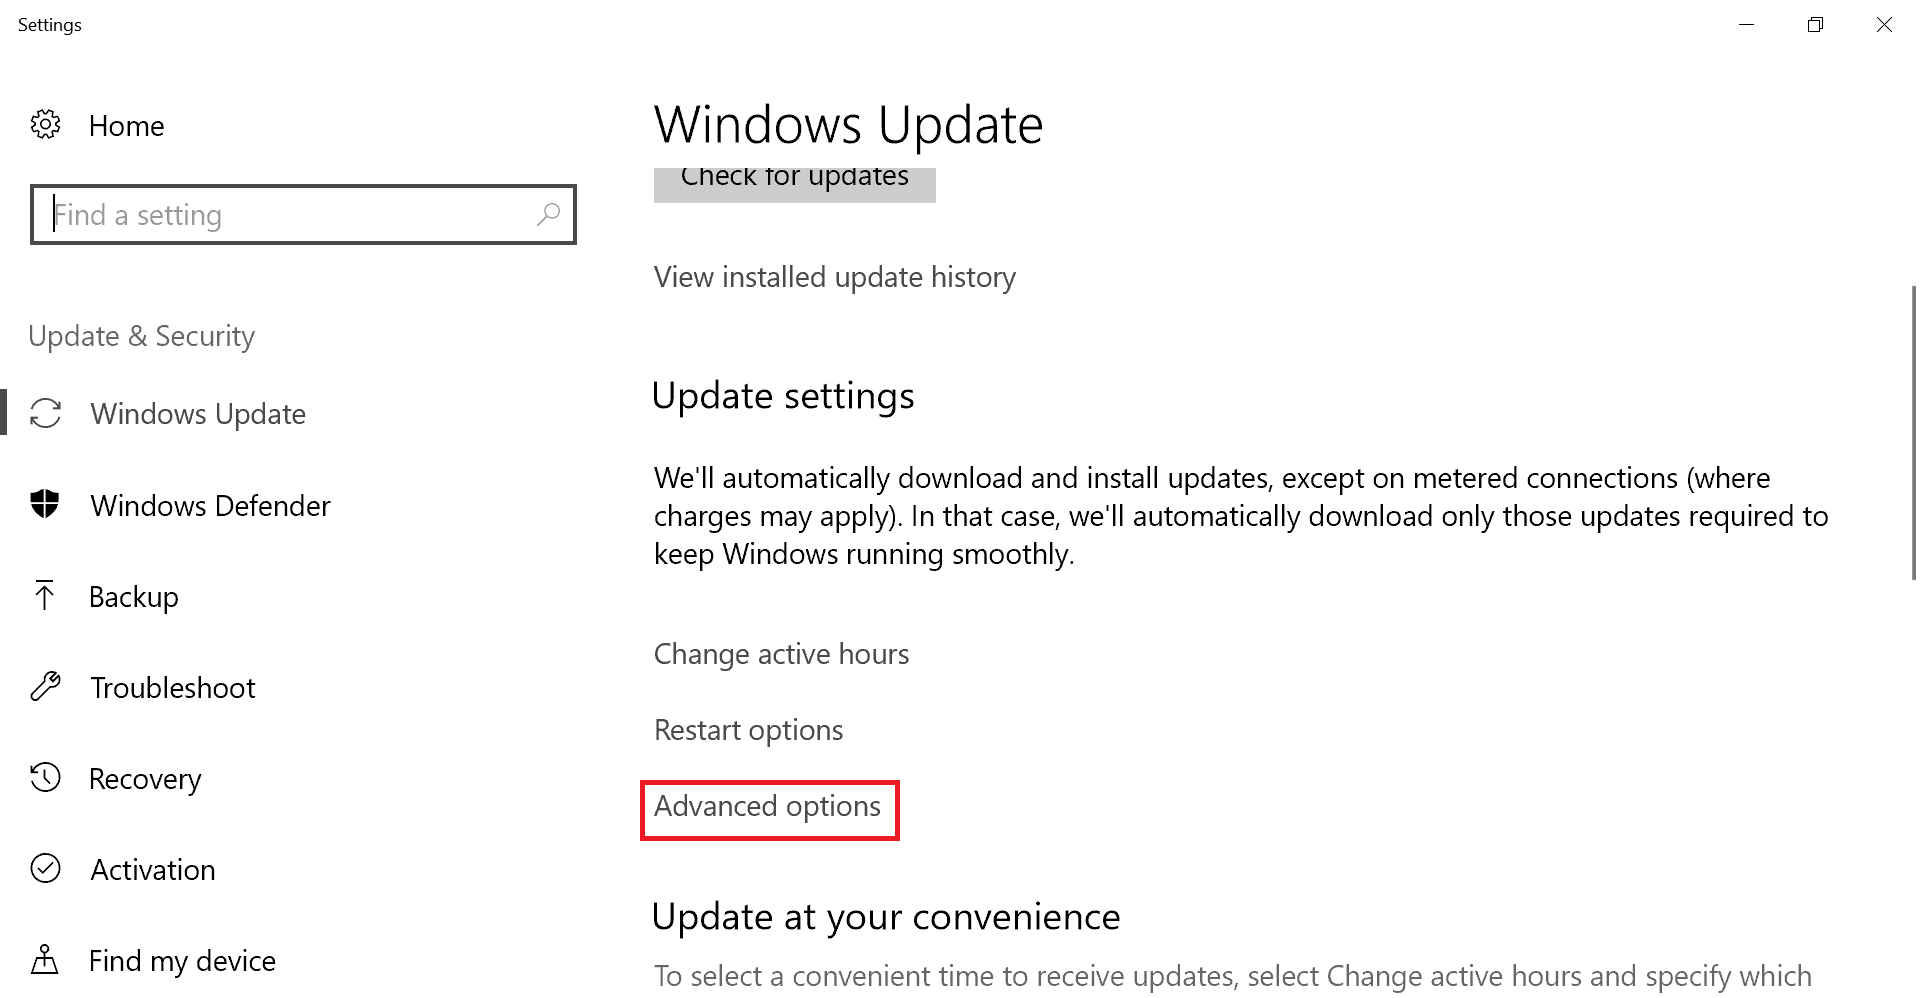
Step 2 : Now scroll down till you see “Advanced Options”, now select that.
Step 3 : Now again scroll down till you see, “Pause Updates” and select that option. This will tell Win10 OS not to update your OS for 35 days and you can also see for how long this will remain in paused state.
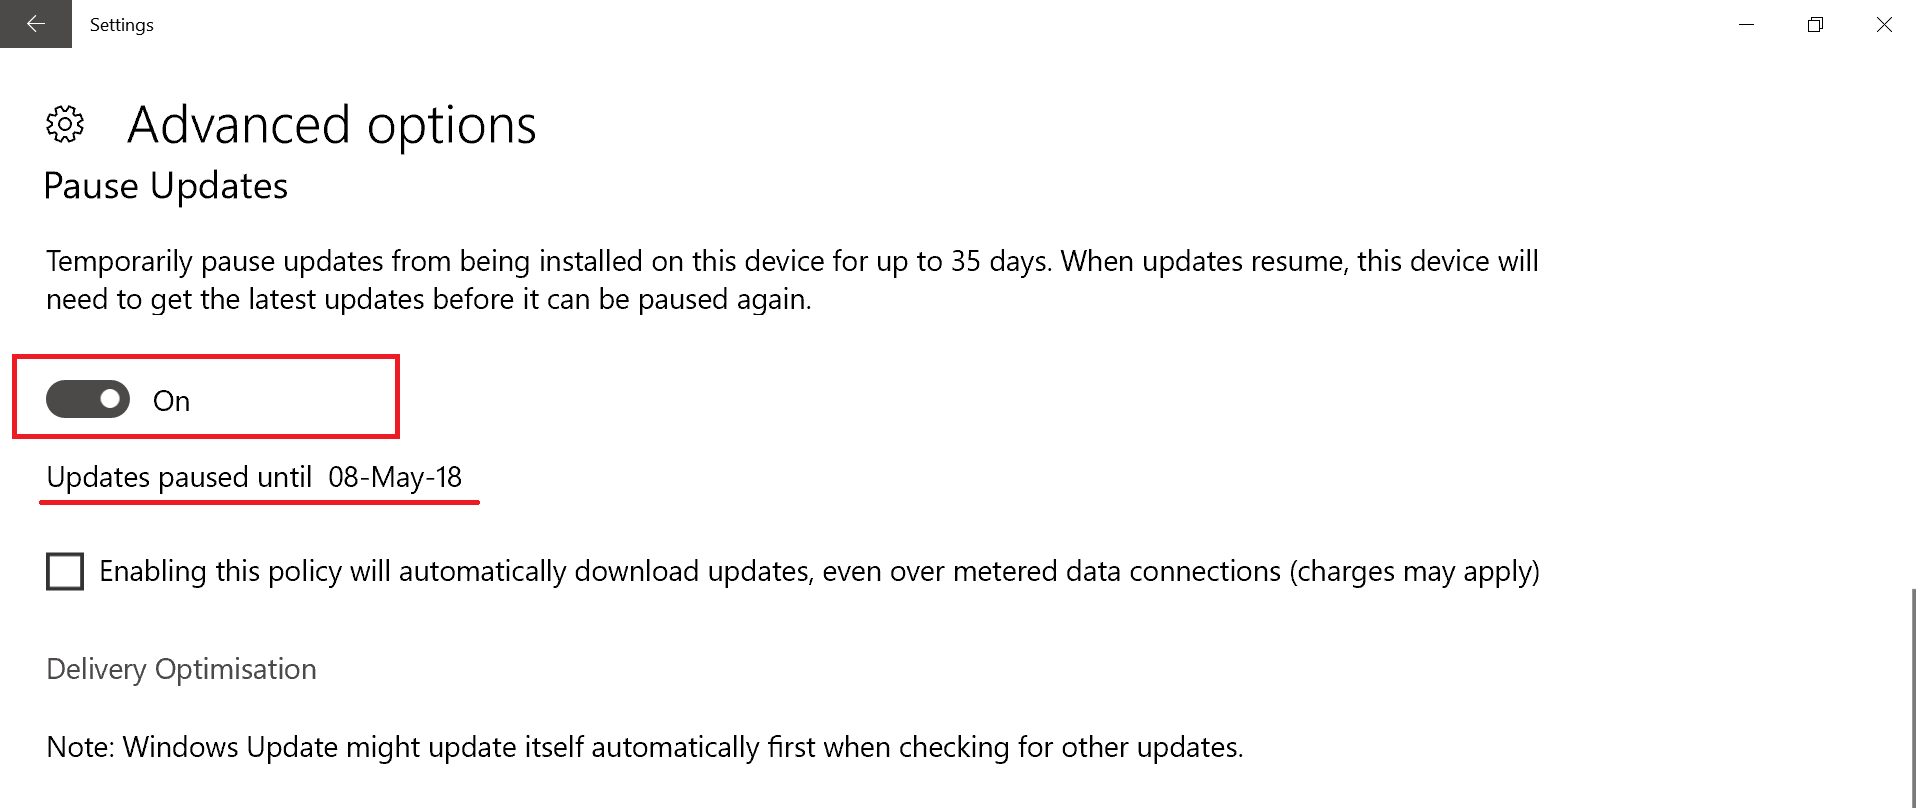
Note : You can only pause this for one time and before pausing it again you need to update to latest KB.
If you want to download Windows 10 offline update, please visit that article as it will be helpful for most of us.
Method 2 : This method will come handy to most of us.
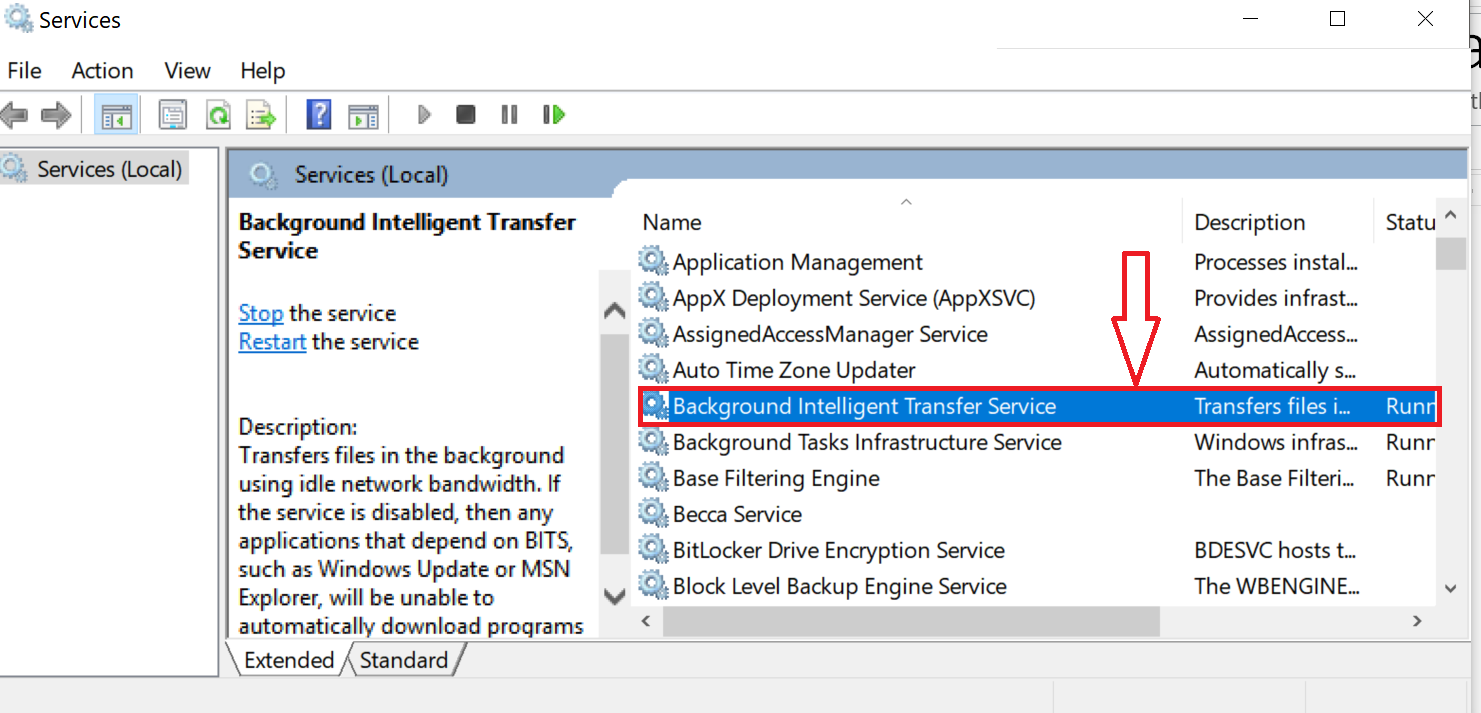
Step 1 : In search bar just type “Services” and hit Enter.
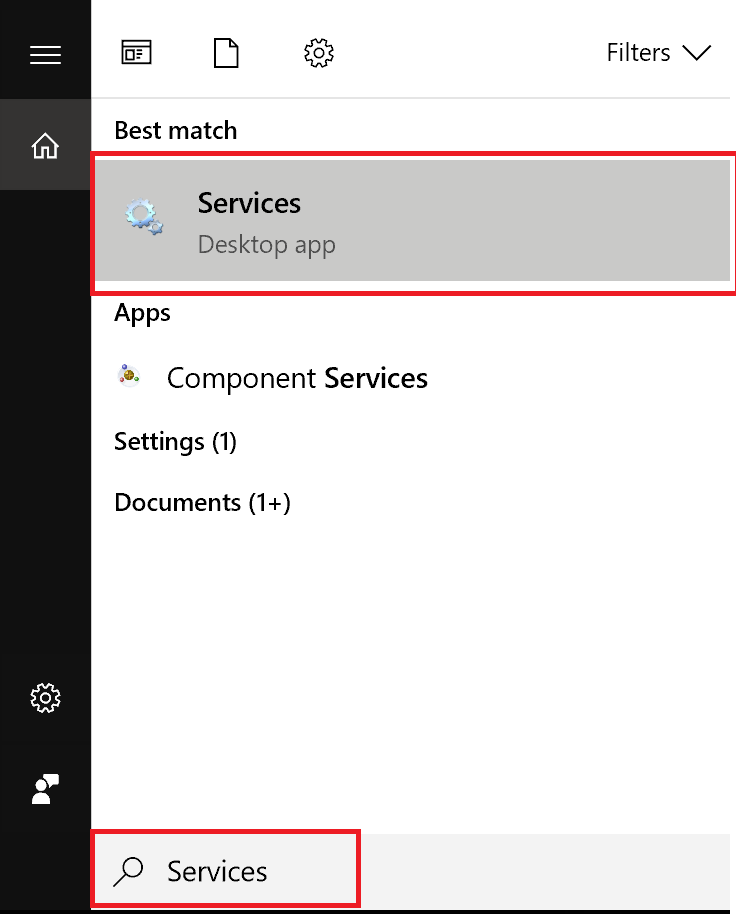
Step 2 : In services find “Background Intelligent Transfer Service” as shown in the picture below
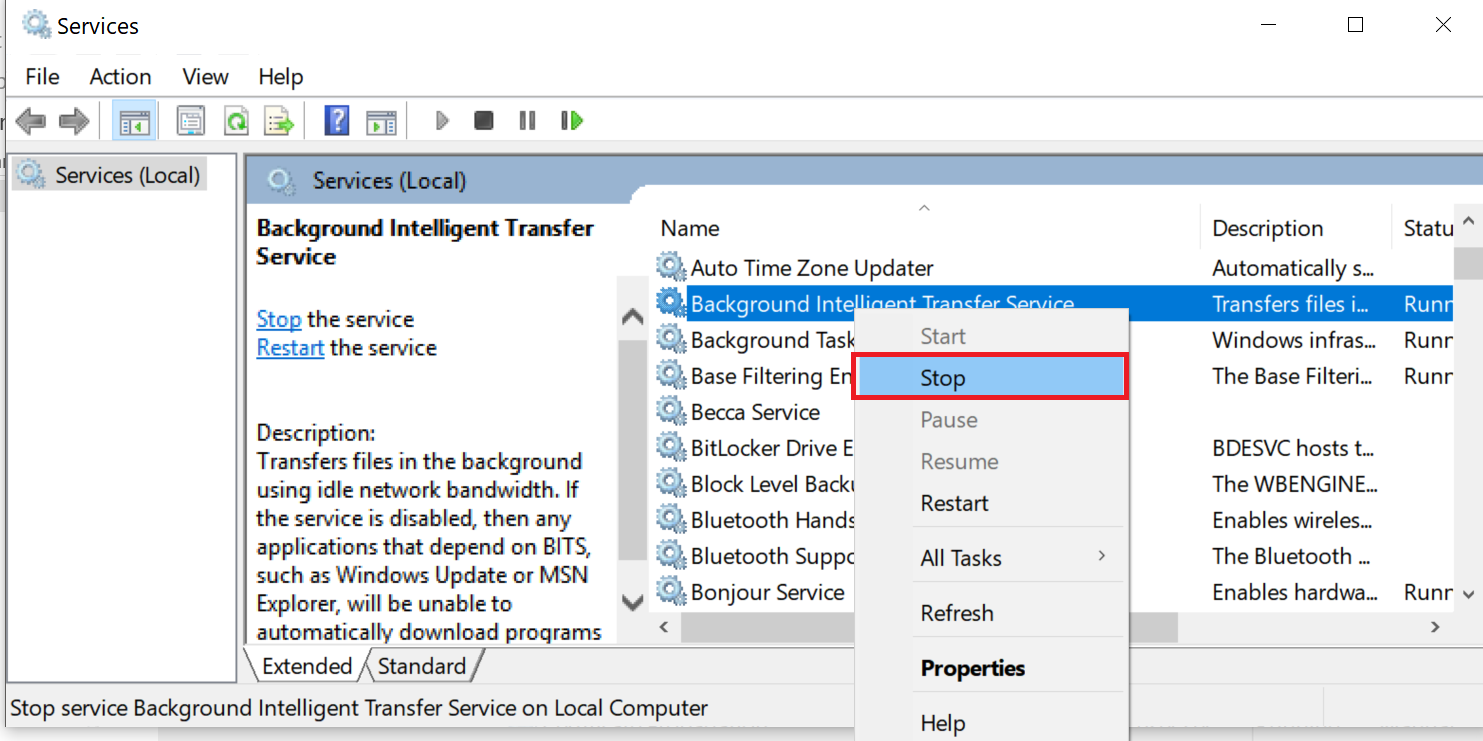
Step 3 : Now right click on that and press “Stop” . For more info see the image added below
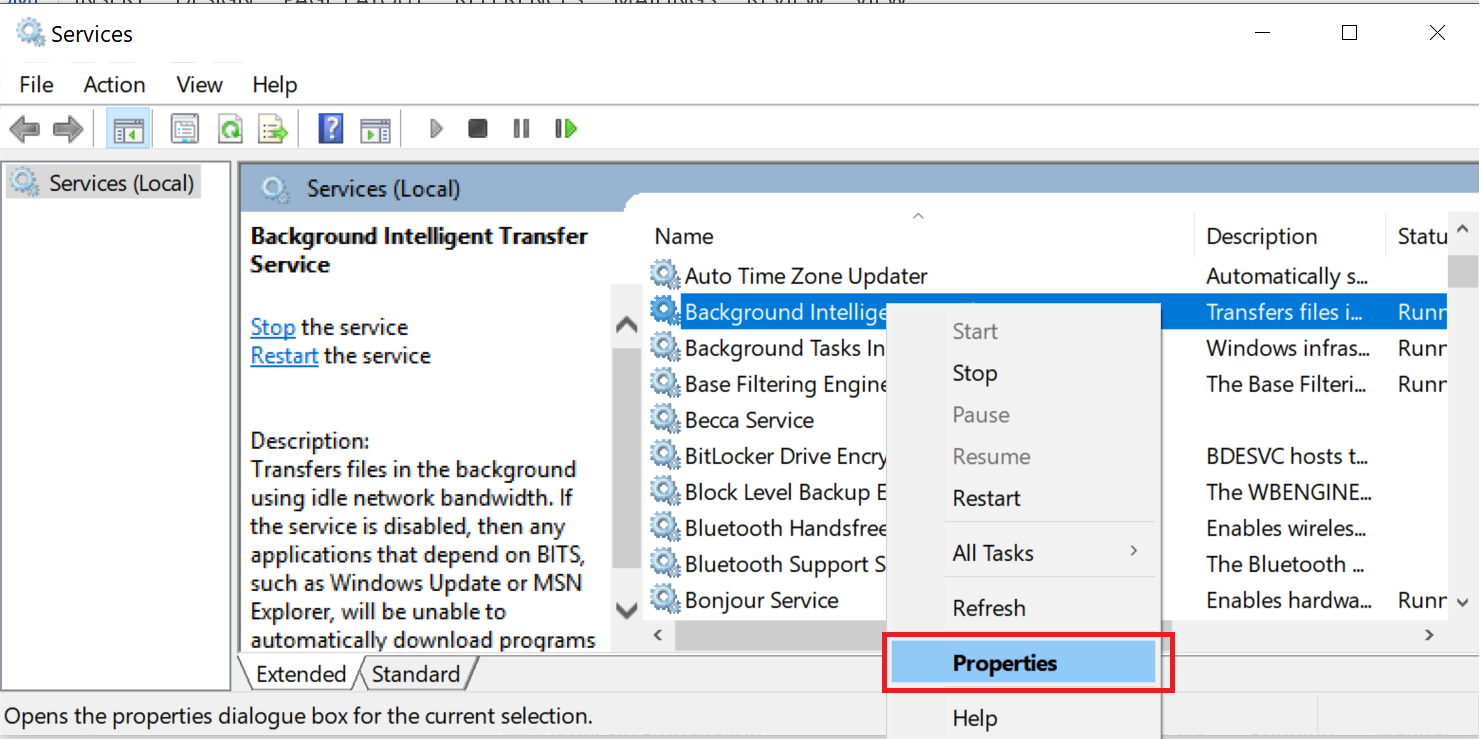
Step 4 : Now you will think job done!. Nope now select “Properties”
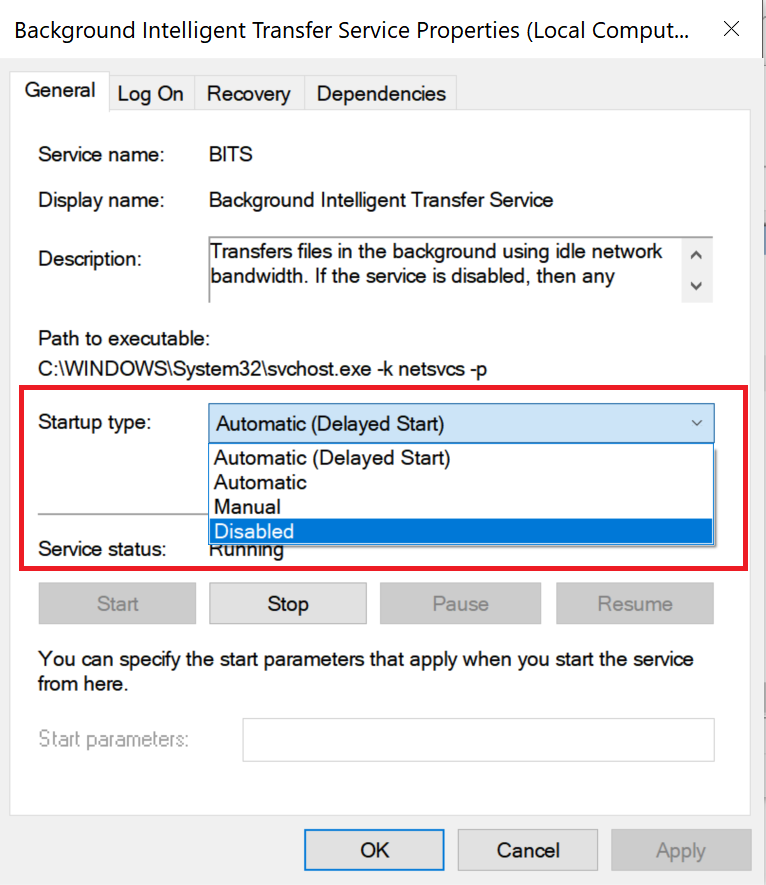
Step 5 : Now select “Disabled” as shown below and hit “OK” or “Apply”
Yep it’s done, but sometimes Microsoft triggers this service and will download new security patches etc so it’s better you add this service to your Taskbar for quick access and stop the service without much loss of your high speed Internet data.
Hope now you know how to quickly disable or stop BITS service.
FAQ
Why this service keeps on restarting after restarting my PC or laptop?
- This is an important component that keeps Win10 running smoothly so even if you disable or stop it, it will restart. Major factor that triggers is the Windows 10 OS update and you need to disable Win10 auto updates.
Can offline updates stop this service from restarting?
- Nope, no matter what mode you choose to update your OS, BITS will run in the background but won’t eat your high speed data.
Can Microsoft phone/Chat support will help you to stop this service ?
- Nope, they will help or guide you on how to disable it temporally.


I’ve been using mobile data on my Laptop for months now and I never had this problem. I just set the connection as metered and nothing ever gets downloaded on the background with my approval.
Thanks for the article. I use a metered connection but still it downloaded 250 MB, blocking my internet access for an hour. So the Microsoft promises of “when idle” is also a joke.
You will have to check every time if its running or not from the services every time you wake up/hibernate/restart the laptop or pc