There are many ways to record audio in Windows PC, and you can many free solutions to do it. I do the voiceover for YouTube videos, and I have been using many programs to record audio & later merge it with videos. After considering many aspects, I have compiled a list of audio recording software that will change your game. Every reader has a different environment and that’s where our requirements drastically change, and I got everyone covered here.
Contents
Why do you need a Voice Recorder?
Everyone has a different set of requirements and that’s where Audio Recorder becomes a major factor. Nobody wants to create videos that have bad audio output because it is annoying & you cannot deliver the message to the listeners. We are introducing three audio programs that have changed my video audio experience and they are suitable for every category.
1. Windows Voice Recorder
Microsoft bundled a simple recorder in Windows 10 that works fine in most of the cases. I have started using recently for social media, and it works great. You can resize the window and make it smaller as possible for more room on the screen.
Step 1: Open the “Voice Recorder” and then click on the three-dot setting for more options.
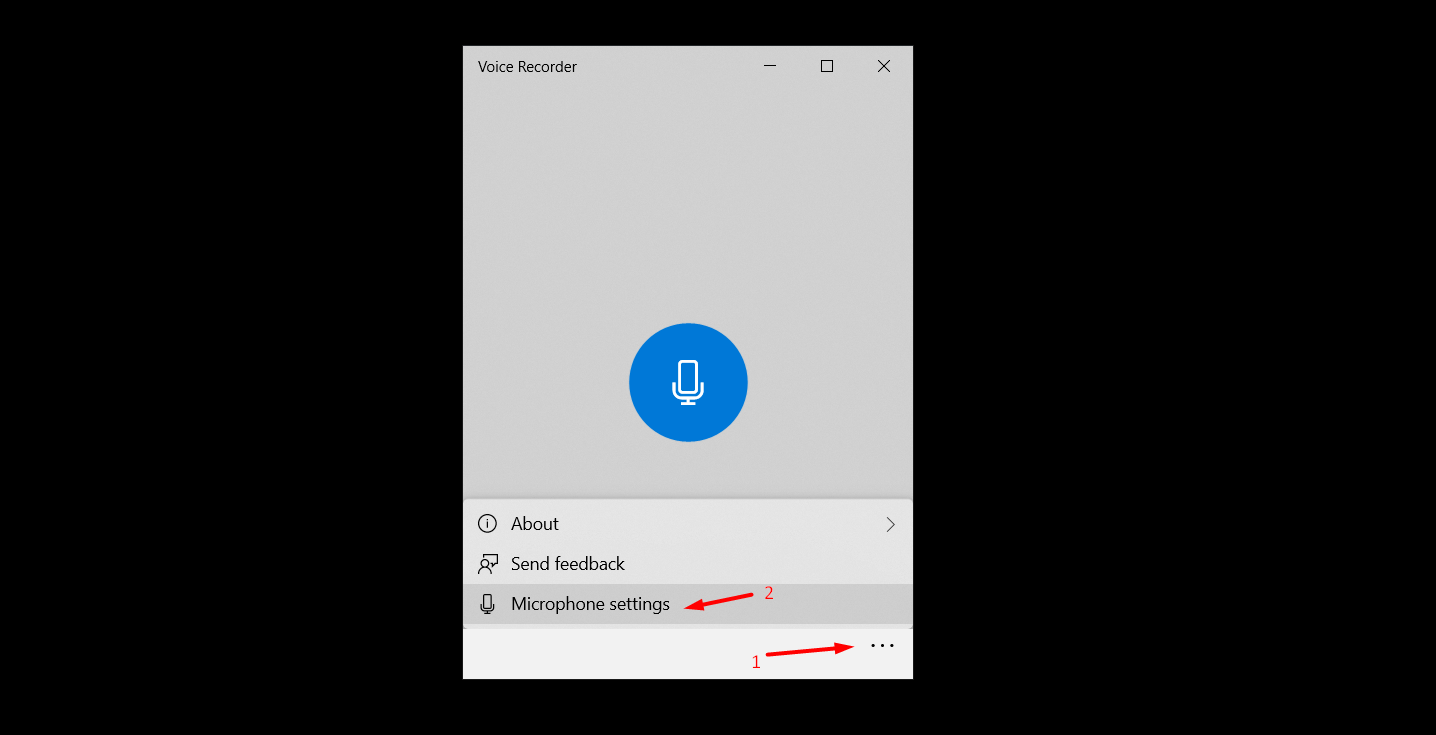
Step 2: Settings will show up on the screen and then find & turn on “Voice Recorder” to access the microphone. You have to give microphone permission to the program and then it will work normally.

Step 3: Click on the “Record” button to start recording the voice.

Step 4: We have to appreciate Microsoft adding the circles that indicate the voice loudness. The circle will expand based on your voice volume & pitch.
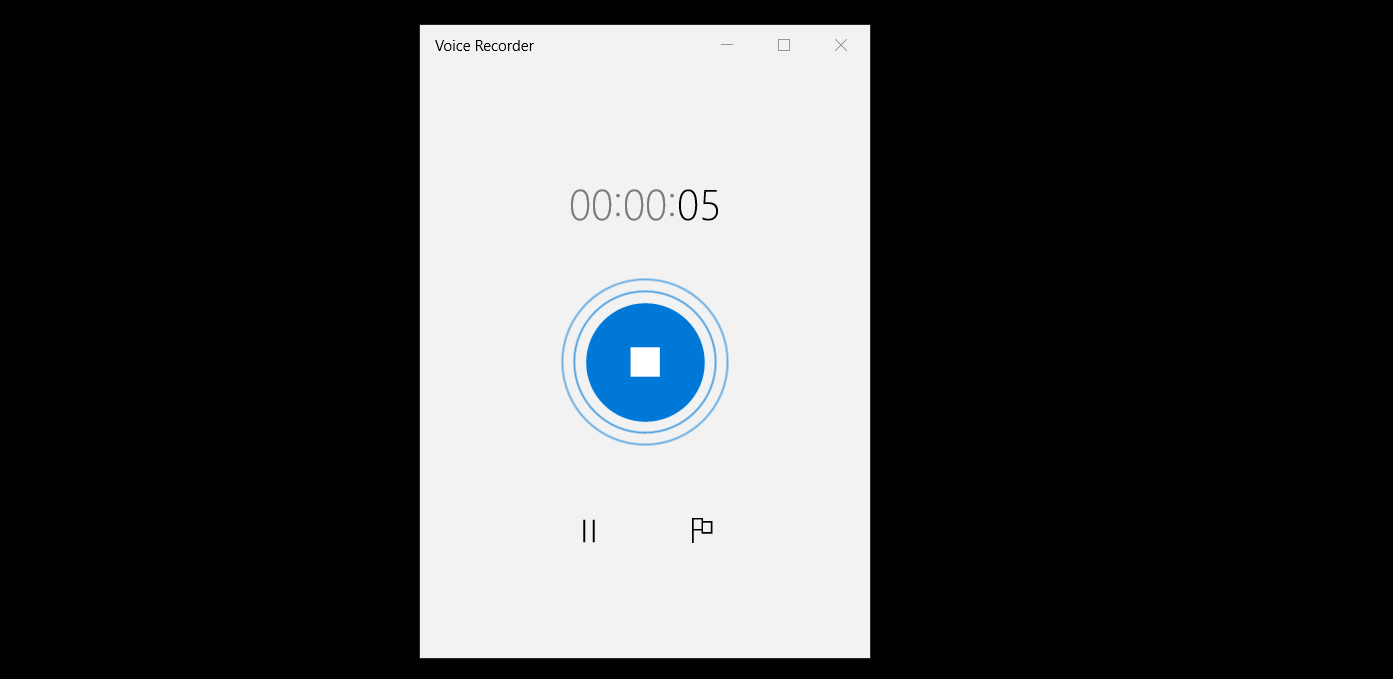
Step 5: Once the recording is finished, then you can click on the same blue button to stop and save.
Step 6: Right-mouse click the recorded file, and you have many options available. Click on “open file location” to find the file.
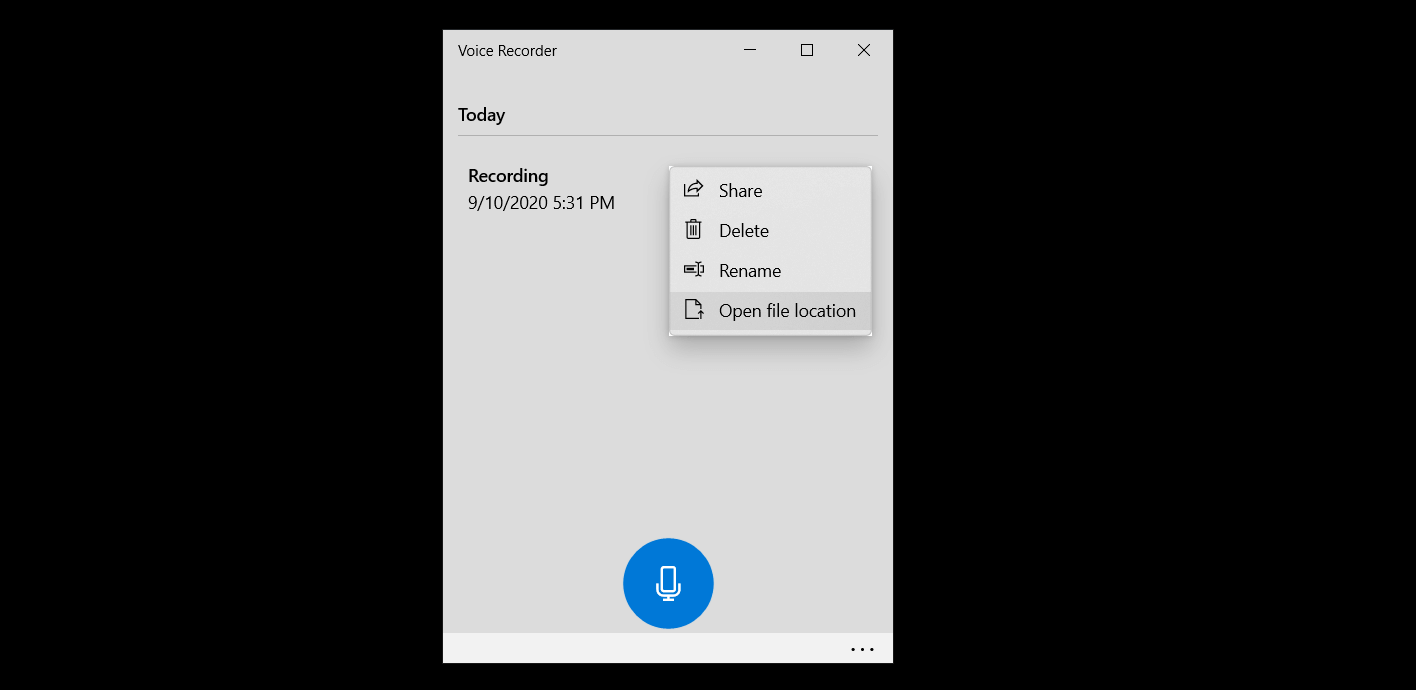
Step 7: The audio file is recorded in the M4A format that works with many video editors.

I hope that Microsoft would add audio format selection, so I could change it to MP3. That’s the only CON here and the rest of the functions like output is flawless.
2. Audacity
Audacity is an open-source solution that has changed the course of recording capabilities. Millions of professionals, music engineers, producers, YouTube creators, and others use Audacity daily. The program is available for free to download and is operating for 2000. The audio recorder is an advanced program, so do not consider it a mediocre solution.
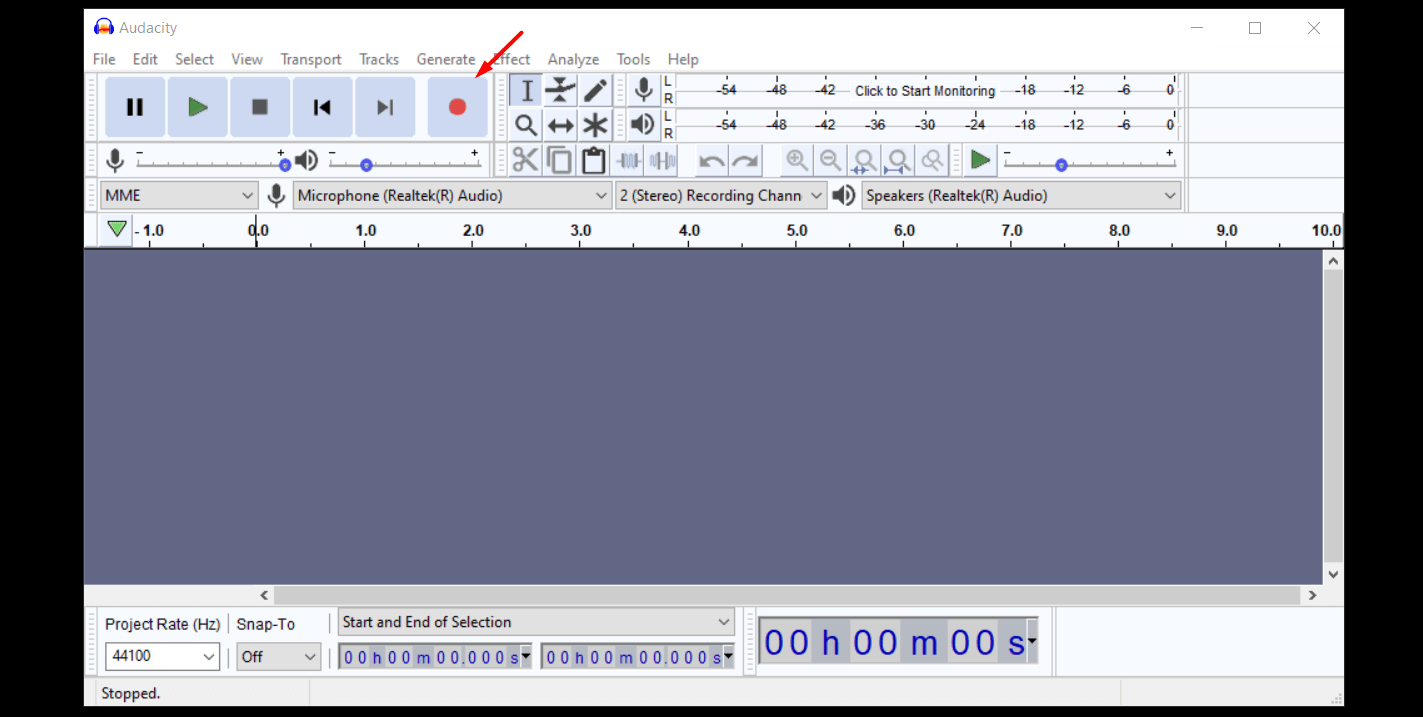
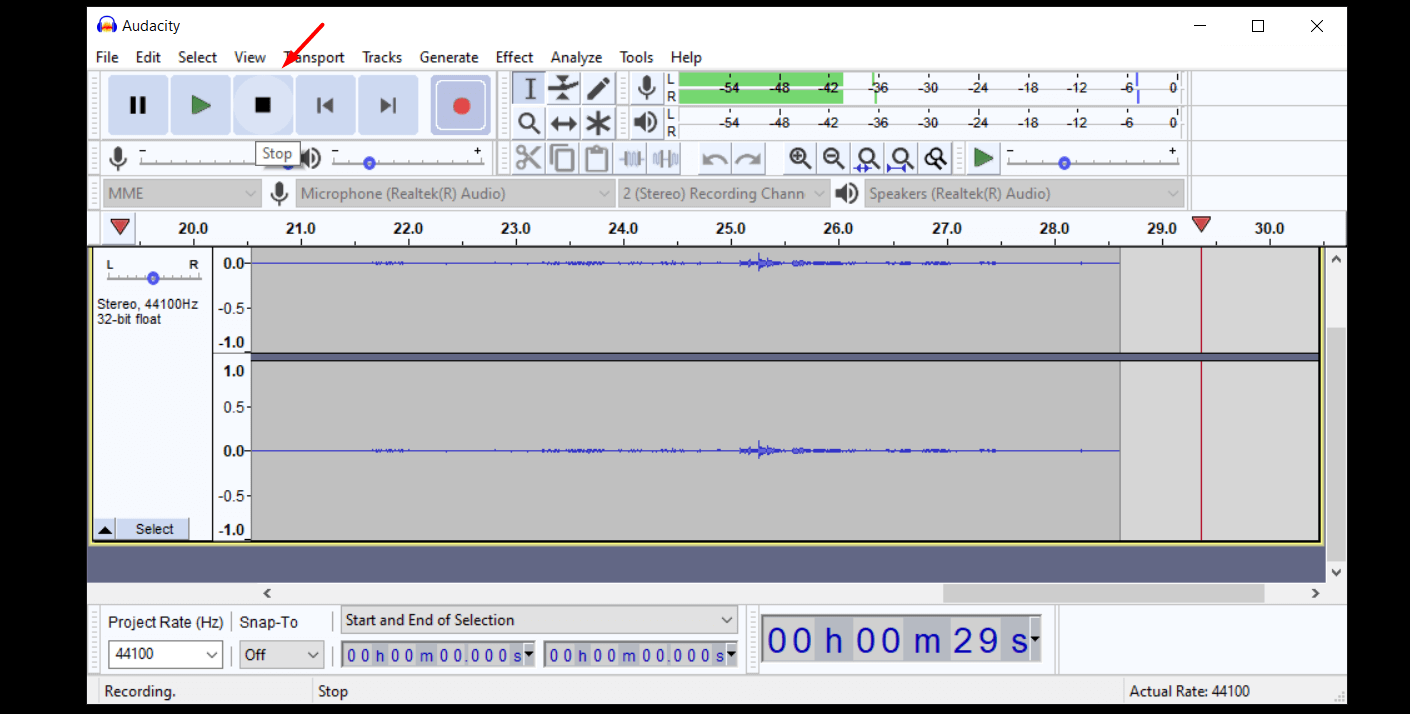
Step 1: Launch Audacity and then click on the “Record” button.
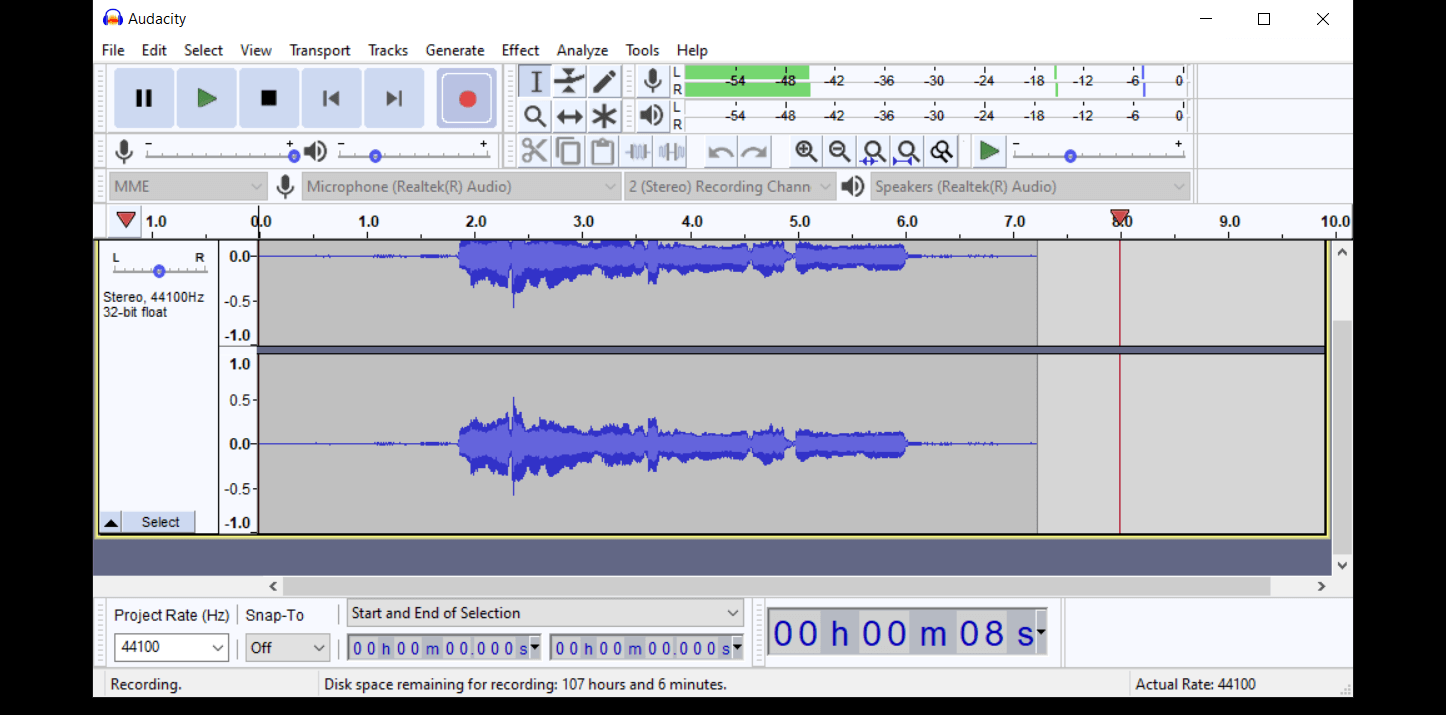
Step 2: You can monitor the voice pitch and see, what it is working for you.
Step 3: Click on “Stop” once you are done with it.
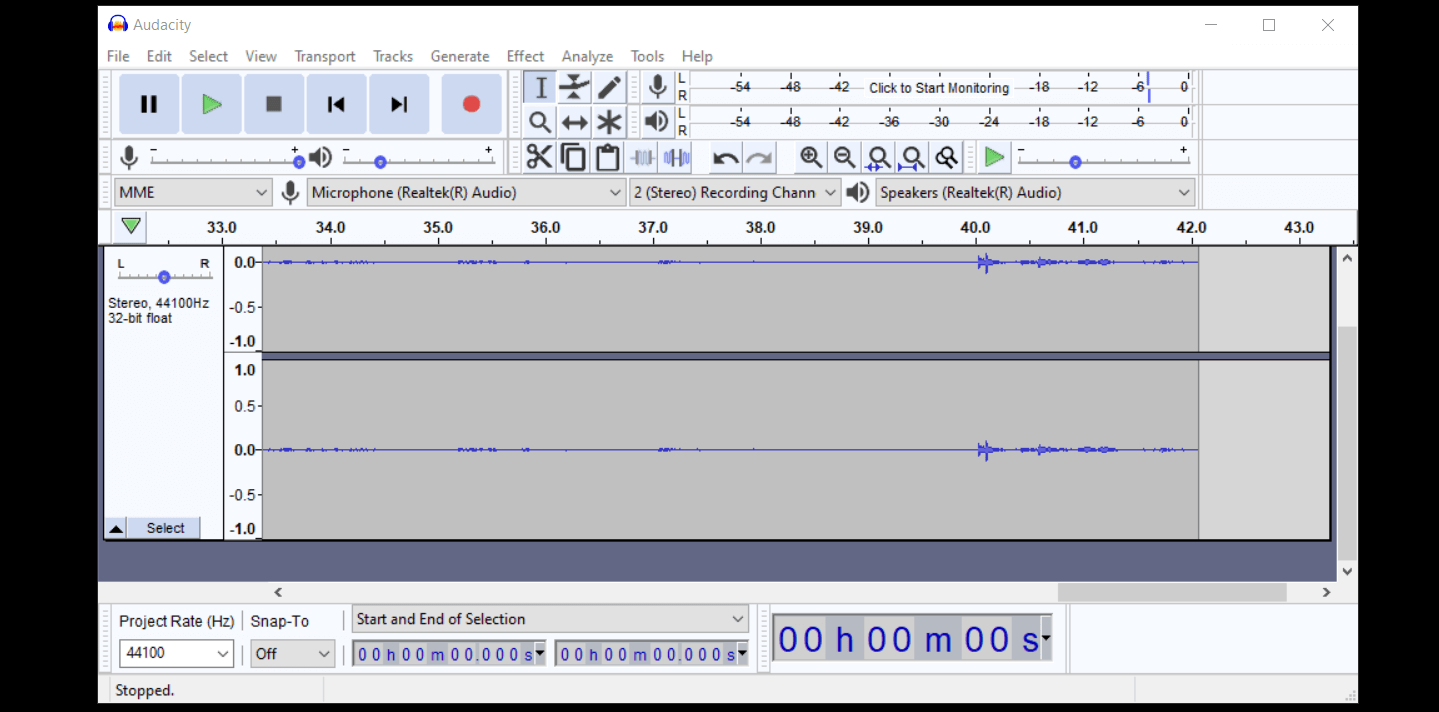
Step 4: Click on the “Play” button to preview it, and make changes to it.
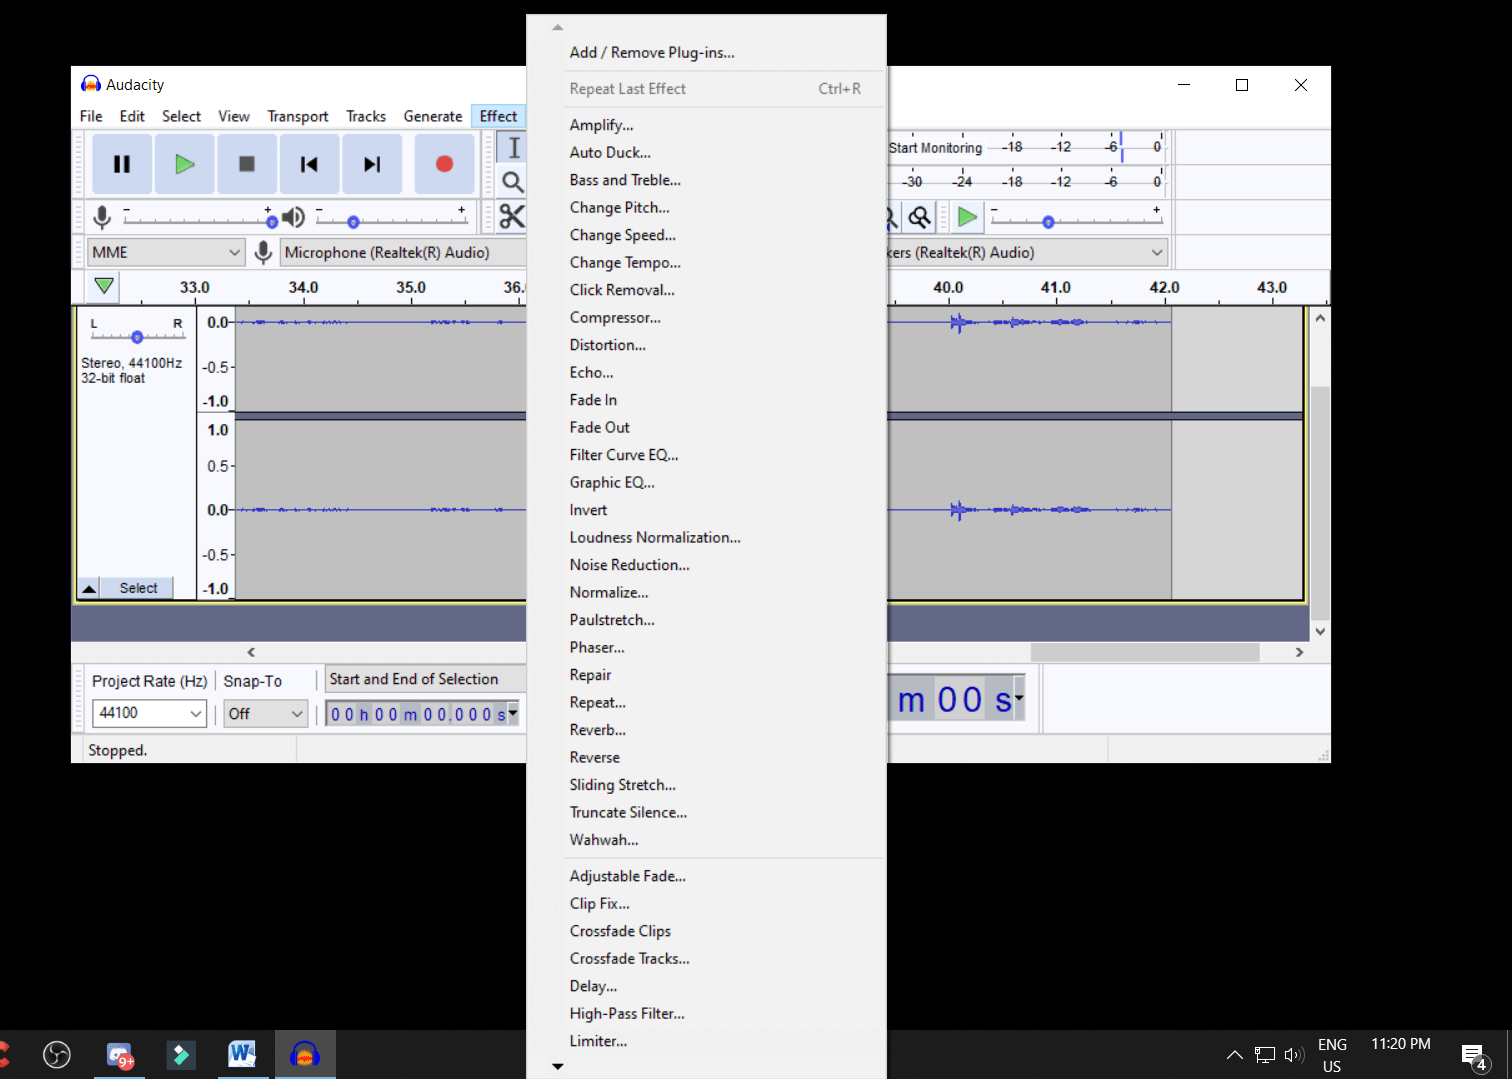
Step 5: Now, click on “Effect” and start editing the RAW audio file. Audacity magic happens here, and you can remove background noise, give bass to voice, and remove unwanted parts.
Step 6: Click on “File”, then “Export” and then “Export as Audio Format” to save in local storage.

Audacity is an advanced audio recorder, editor, and background noise remover. It is an exceptional solution for users, who are living in noisy surroundings. I have used it in the past, and it has helped remove traffic disturbance and brought professional playback in my videos.
Download Audacity | Windows XP or later
3. OBS Studio
OBS Studio is an advanced Video Recording solution, but it can be used as Audio Recorder. A creator like myself looking to record gameplay and record high-quality at the same time, need an advanced solution. OBS Studio is an advanced Video & Audio recorder that has helped many times. If you are making a tutorial and want to record high-quality sound at the same time, then this is your first choice.
Step 1: Press Windows + S and then search for OBS Studio, and always open the program as administrator.

Step 2: Take a closer look at the program options.

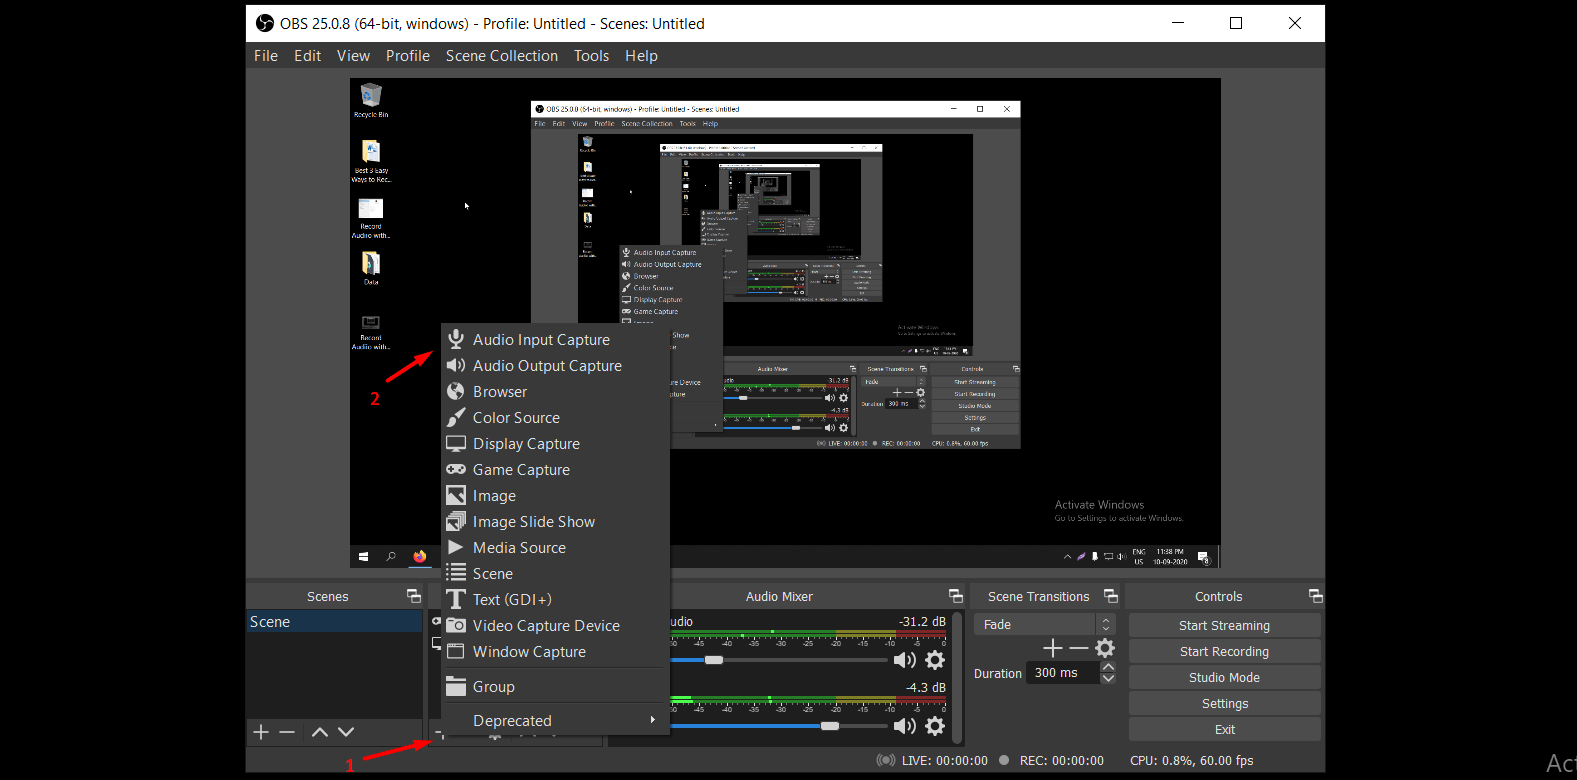
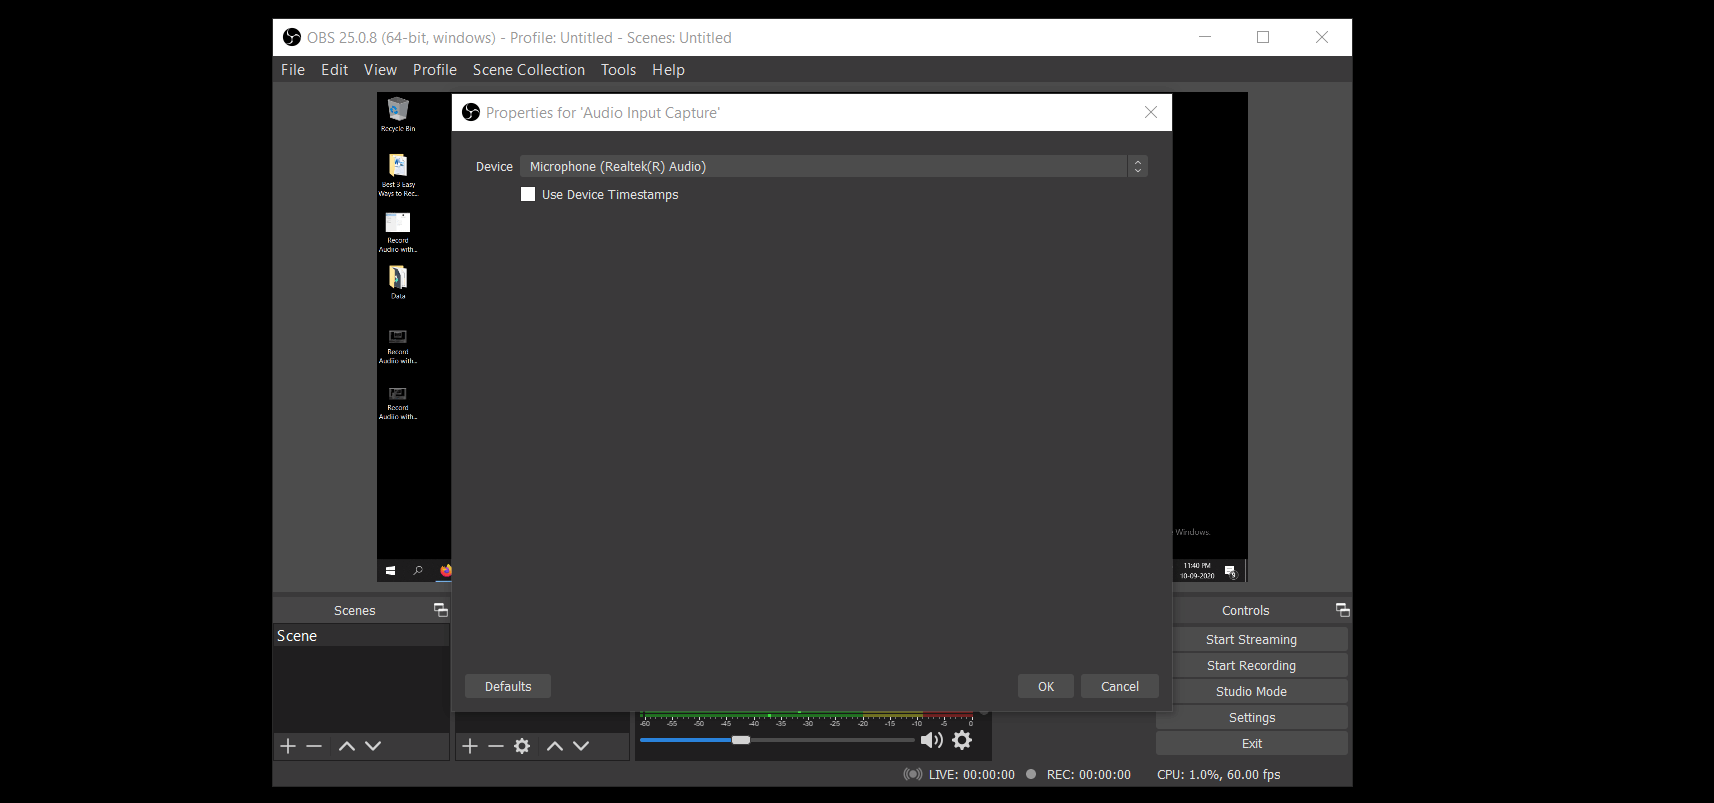
Step 3: Click on the plus button located below “Sources” and click on the + button to add the element. In the menu, select “Audio Input Capture” to continue.
Step 4: Select the microphone and if you have a connected external microphone, then you can select it from here.
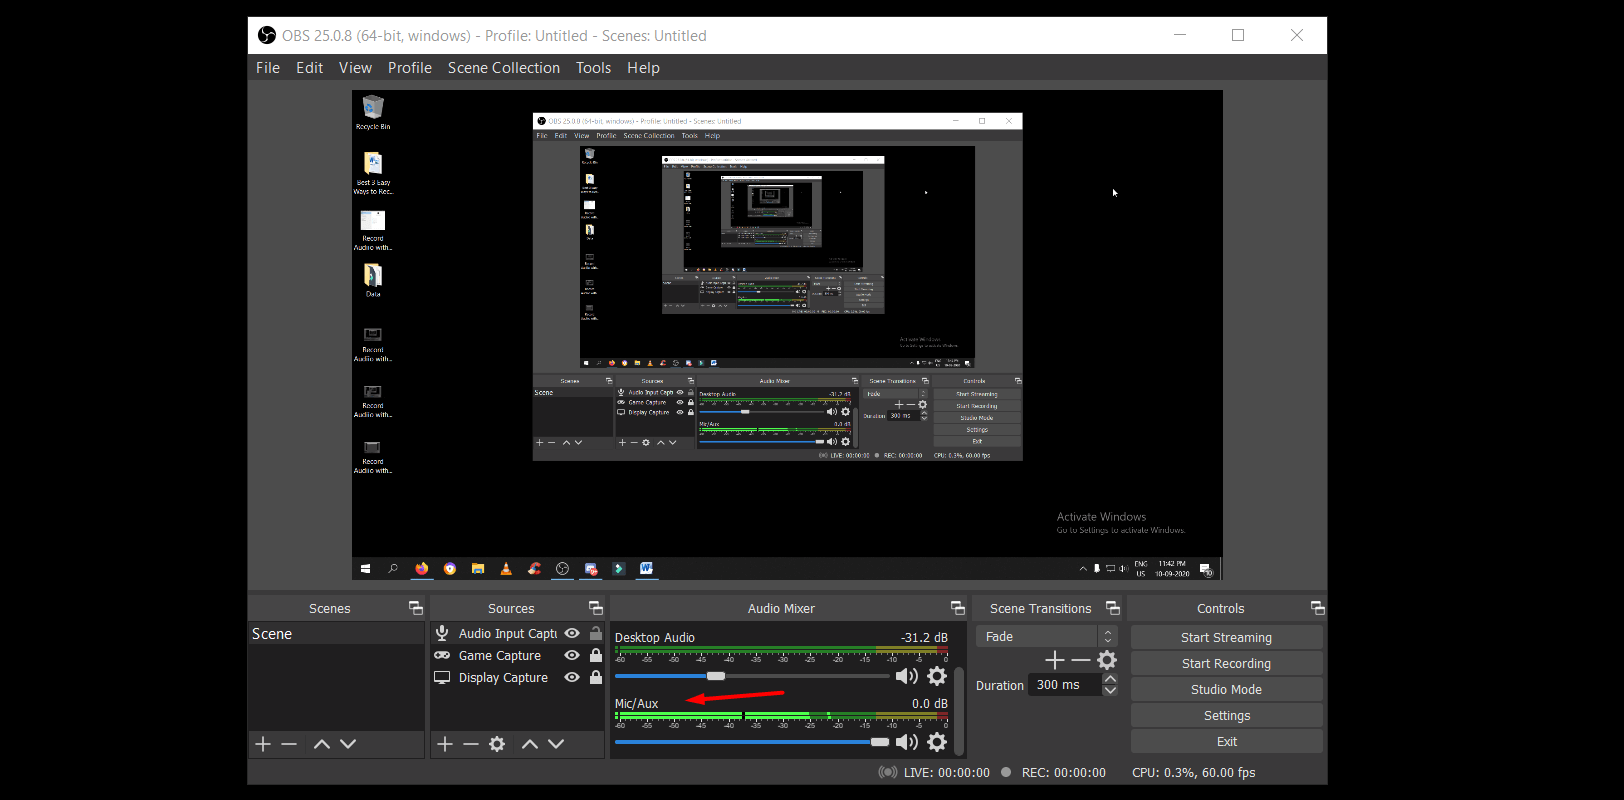
Step 5: Scroll down to the bottom in the “Audio Mixer” window located at the middle bottom. You can adjust the volume in “Mic/AUX” to meet stable output, and it will help fix the cracking voice as well.
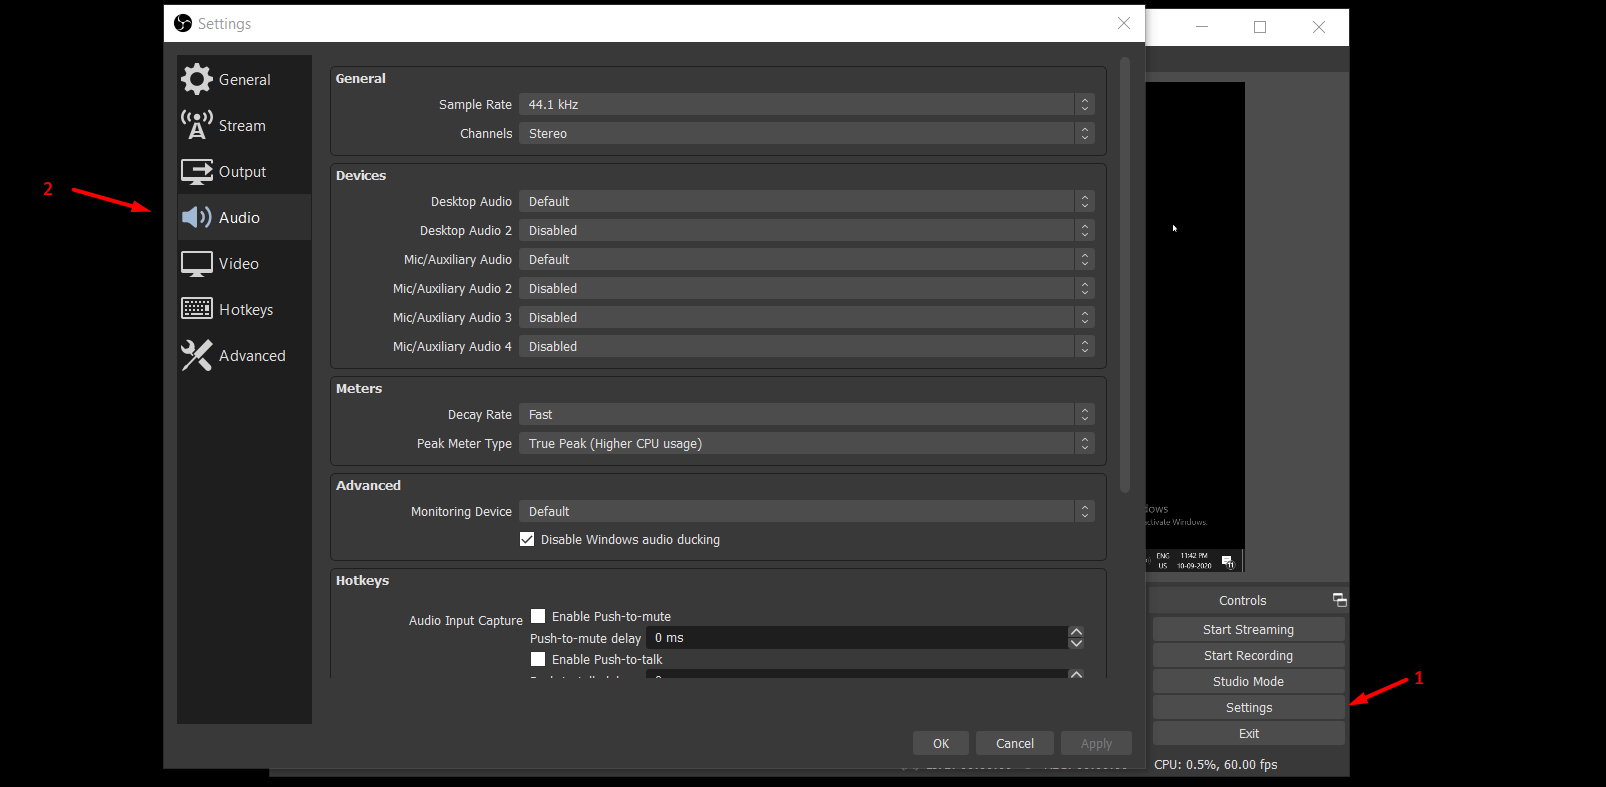
Step 6: You have complete control over the audio by clicking on “Settings” and then select “Audio” to access advanced audio options. I recommend the users to play around with the options for 15 minutes to experience the best audio settings for your microphone.
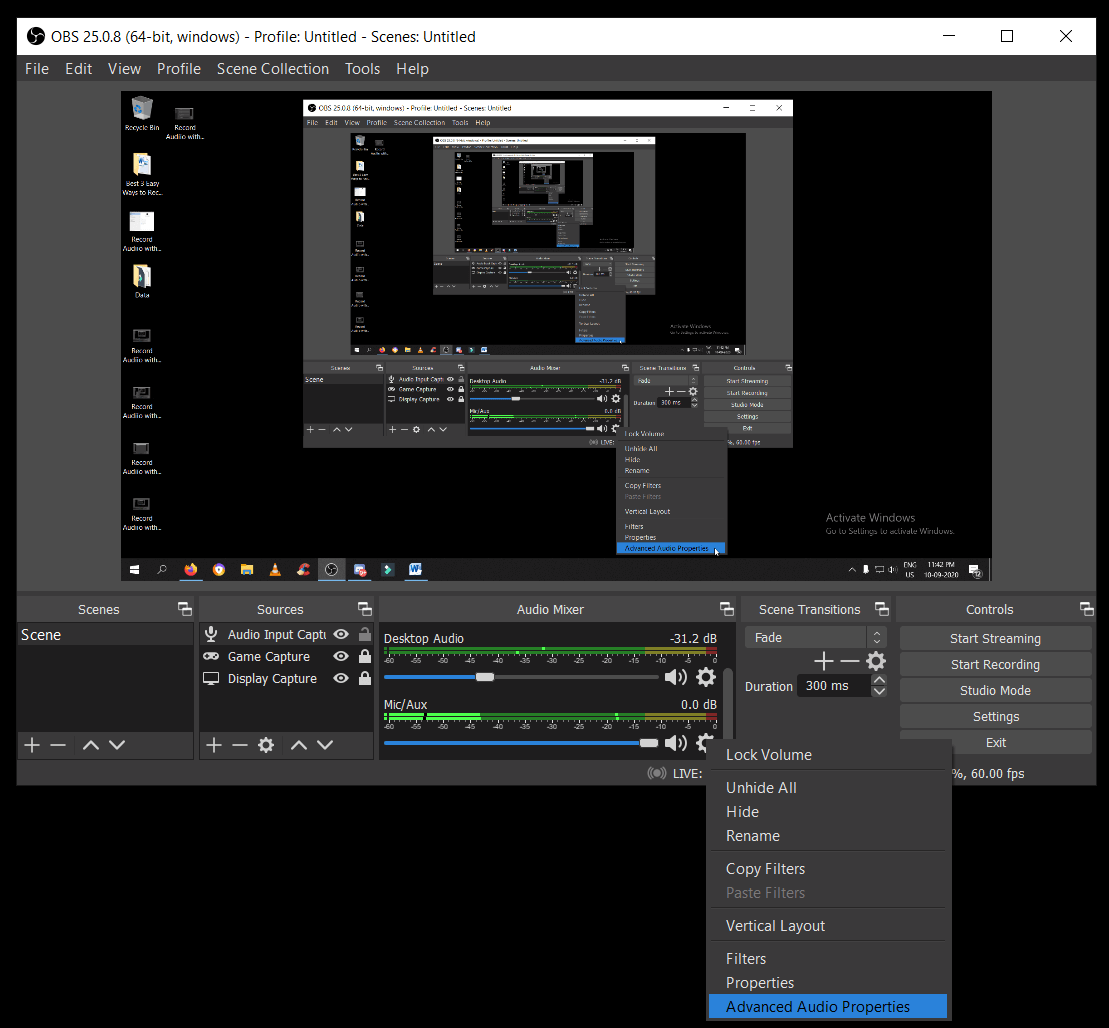
Step 7: You can add filters to make the audio output better by clicking on the gear icon beside “Mic/AUX.”
We have been using OBS Studio for many years and it has been a reliable companion for millions of content creators around the world. OBS will run smoothly on any mid-range Windows machine and if you have a low-end machine, then go with Audacity.
Bottom Line
Audacity is a one-stop solution for professional recording and editing, and I don’t think, you need additional programs to record your voice. We recommend checking out tutorials on YouTube for guidance because it might seem hard-to-use, but it is a user-friendly solution. Let us know what do you think about our list of the best 3 easy ways to record audio on Windows 10.