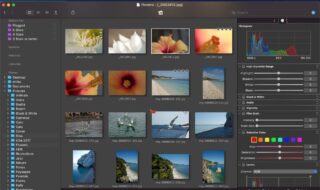
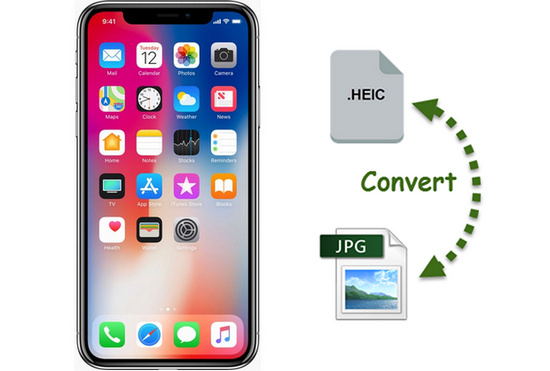
With iOS 11, Apple switched to a file format called HEIC to reduce file sizes. The bad news is that currently these cannot be viewed on Windows and Android devices, although it is rumored that support is coming soon. The good news is that it is easy to convert HEIC images to JPG, which is a more universal format. If you don’t know HEIC, it stands for High Efficiency Image Format also called HEIF, and is the file type for photos in iOS 11, that is all models iPhone 6S and later, as well as in the 2017 iPad 9.7. If you copy photos from one of these devices on to a laptop or Android phone, you’ll see it won’t be recognized when you try to open it.
Contents
However, you can use one of these five easy methods to effectively convert HEIC to JPG:
1. Convert to JPG while transferring to Mac/PC
If you own a more recent Apple model like the iPhone 7 or higher, you can easily convert HEIC files to JPG by changing a setting. Pick up your iPhone and open up Settings > Photos > Transfer to Mac or PC > Automatic.
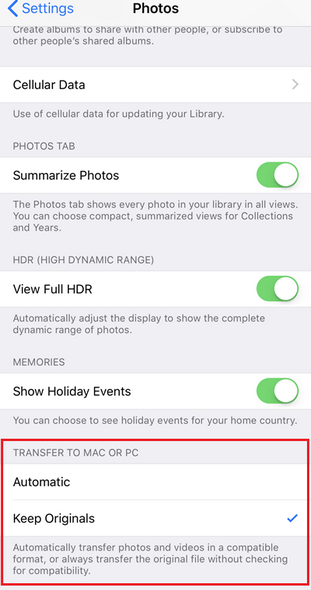
Because this method is still new, it is best to backup your photos before changing the setting. Once you have, you will see that the HEIC files will have converted to JPG when you transfer your iPhone pictures to the computer.
2. Convert HEIC Files to JPG Photos with FoneCope
FoneCope can not only change photo formats at top speed, but it does so by protecting your personal information as it does not require you to upload the photos to any cloud service. This is the best method to convert HEIC to JPG if you’re an iPhone 6 or earlier (till iPhone SE) by following these steps:
A). Plug iPhone to Mac or Win PC using a USB cable
First, download and install FoneCope , then you can connect your iPod, iPad, or iPhone to your system using a USB cable.
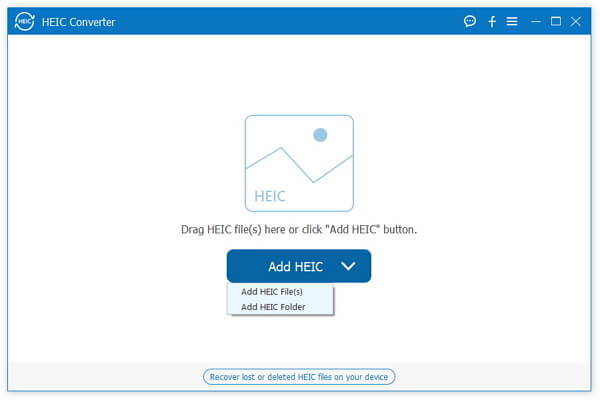
B). Add HEIC files to convert on Windows 10/8/7/XP
Click on the “Add HEIC” button to add HEIC folder or files. Alternatively, you can also directly drag single or multiple photos into this converter program.
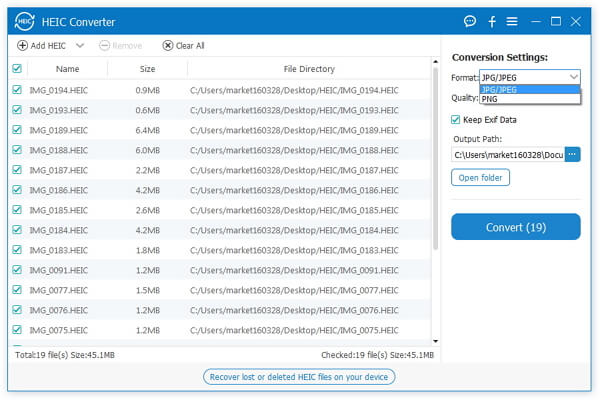
C). Choose particular HEIC photos to convert
Look at the photos loaded in and pick the ones that you want to convert. Here you will also see information of your HEIC files, like File Directory, Size, and image name. Once that’s done, confirm the Conversion Settings on the top right corner. Here you can set Destination Output Folder and also choose a format from either JPG/JPEG or PNG as well as the. To start the process, just click on the “Convert” button.
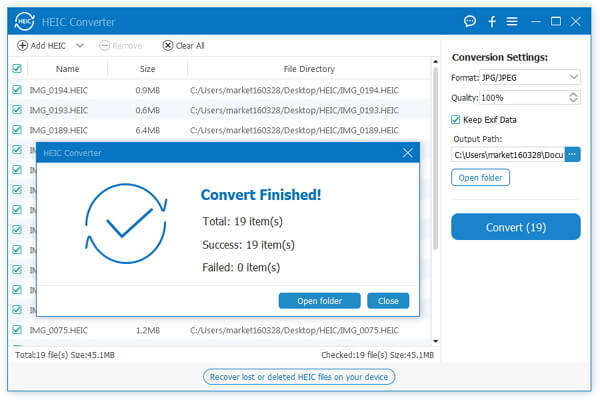
D). View your JPG photos after conversion
Once you see the “Convert Finished” message, click “Open folder” and view your converted pictures on PC. This converter enables you to convert images that are compatible with Win, Mac, Android, iOS, Mac and Windows. Now you can view your photos anywhere. Thus you can now flawlessly change photo files format fast by using FoneCope Convert software.
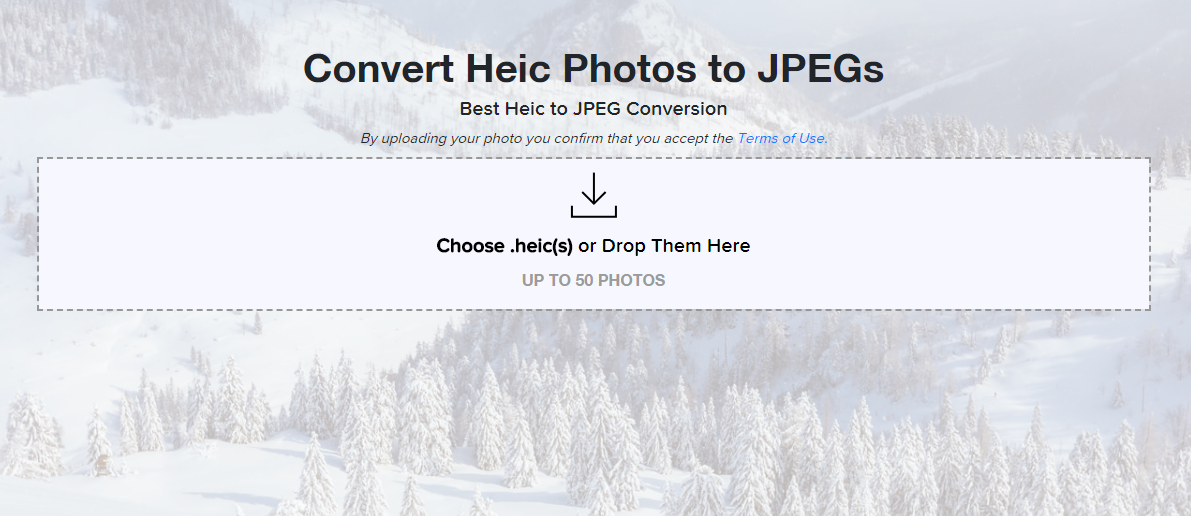
3. Convert to JPG online for free
Quite a good number of websites, like HEICtoJPG [ https://heictojpg.com/ ], help you transform files to JPG online. They are simple to use and do not require you to download any applications or programs.
To start off, transfer the photos into your PC from your iOS 11 device. Then open your chosen site and directly drag HEIC files into the frame or open them from the folder. Wait for the conversion to complete.
The biggest problem is that most of these sites will usually put a limitation on the number of photos you can convert, usually only allowing you to upload and convert 50 photos at once. Also, it takes a long time for the file format conversion. If you have hundreds of HEIC files to change to JPG, this method might not be your best choice.
4. Change to JPEG with OneDrive or Dropbox
You can use Dropbox or OneDrive to convert pictures to JPG automatically every time you upload a HEIC file by following these methods:
Convert HEIC files to JPG Using OneDrive: OneDrive automatically changes HEIC photos into JPG while uploading them.
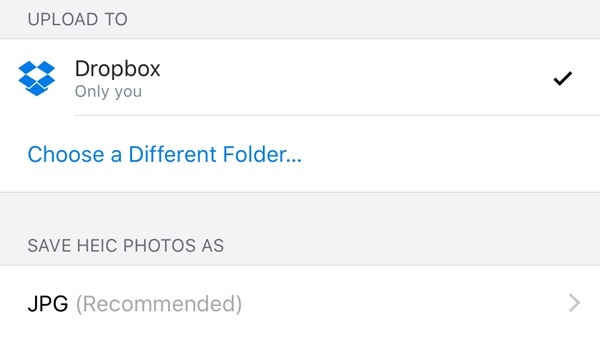
Convert HEIC files to JPG Using Dropbox: First, open Dropbox on your iPhone and then click on the setting icon on the upper left. Then select Camera Uploads and choose “save HEIC photos as JPG” option.
Finally, just open up the same OneDrive or Dropbox on your computer and download the uploaded as JPG files.
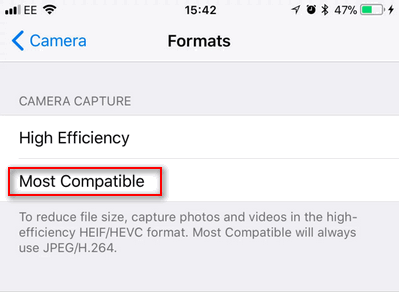
5. How to cancel saving pictures as HEIC
Open up Settings on your iPhone. Then go to Camera > Formats > Most Compatible.
Comparison of methods:
- For iPhone 7 or later users, method 1 is the best.
- FoneCope HEIC Converter Features: Decently priced, Adjustment Setting, Privacy Protected, Fast.
- Online, OneDrive and Dropbox Features: Free, No Adjustment, Privacy Risky, Slow