Windows 10/11 PC depends on services that enable the software to communicate with the hardware. One non-working service is enough to have “failed to connect to a Windows service error message” on Windows 10. If your PC is having multiple service issues then it is not a complicated process to resolve the issue. We have listed all methods that are known to solve “Failed to connect to a Windows service Windows system event notification service” in Windows 10/11 PC.
Contents
1. Fix Corrupted Files
Microsoft added an inbuilt tool that allows the administrators to look for corrupted files or misplaced system files in the machine. We installed a copy of the software in the machine and the inbuilt tool detected a few corrupted files & fixed them instantly. In short, Microsoft inbuilt tool works and does come in handy to resolve corrupted system files.
Step 1: Press Windows Key + S and then lookup for CMD or Command Prompt as administrator.
Step 2: Now, copy & paste (sfc /scannow) and then hit enter to start the process.
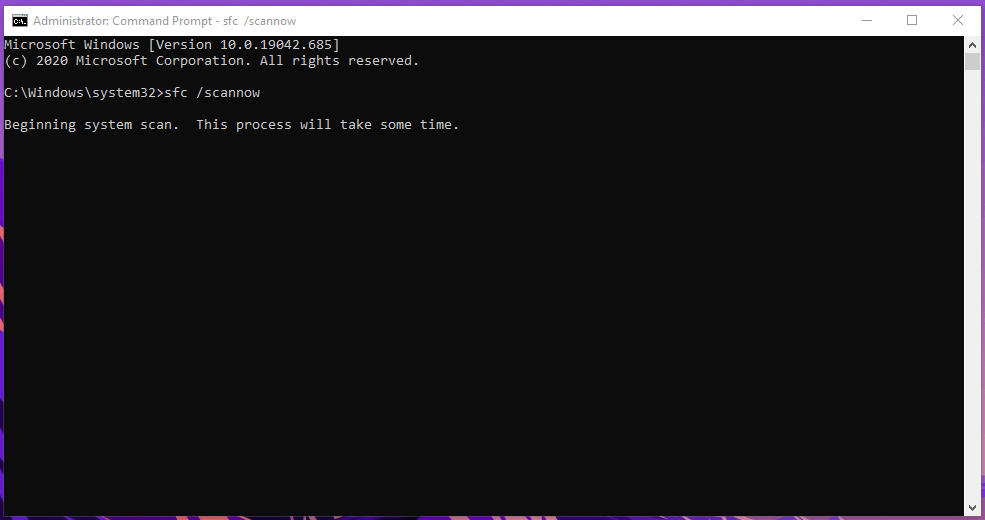
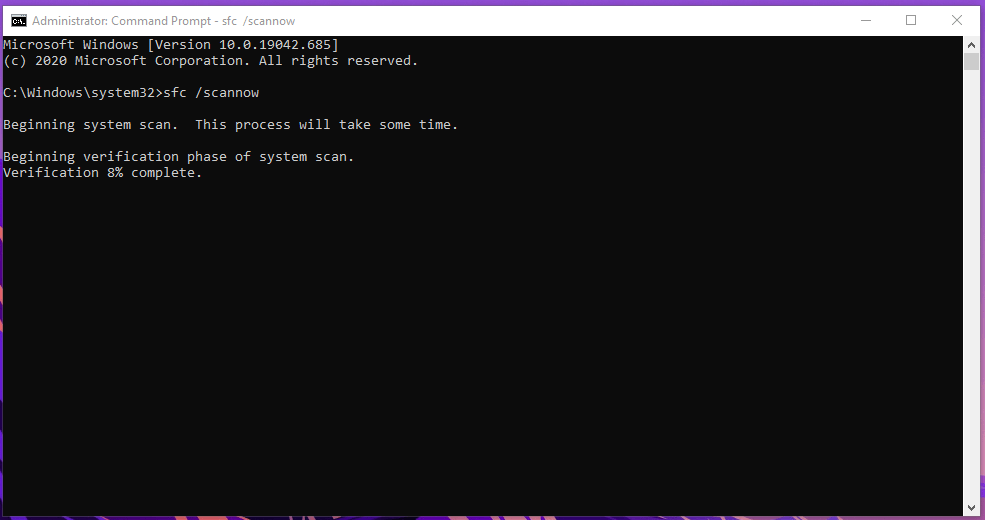
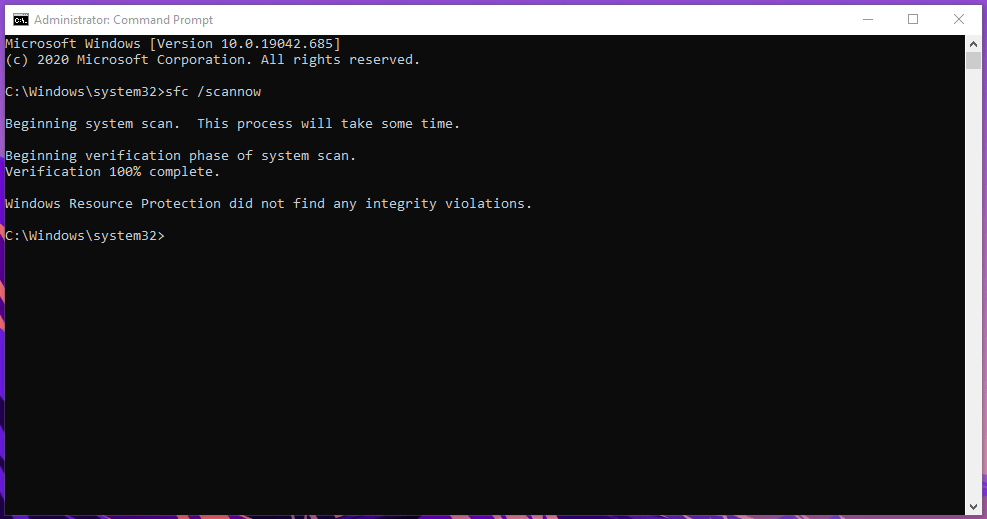
Step 3: You can monitor the scanning period from 0% – 100% and be patient, while the SFC Scan is working in the background.
Do not run programs in the background because the inbuilt tool is working behind the scenes.
Step 4: The Microsoft tool could not find violations, which is a good sign.
In case, if you have minor errors, then it will fix them immediately. However, we did have a situation, where SFC Scan could not resolve or fix the issue, and forced to install a fresh copy of Windows 10 on the machine.
2. Disable Fast Startup
The fast startup is an innovative method that allows Windows 10 to boot the system at a faster pace, but it can trigger “Failed to connect to a Windows service.” The fast boot sequence doesn’t give the services to launch smoothly, which leaves many services in a non-working state.
Step 1: Go to Control Panel and reach (Control Panel\Hardware and Sound\Power Options) location.
Step 2: Now, click on “Choose what the power buttons does” located at the left side panel.

Step 3: Now, click on “Change settings that are currently unavailable” to continue.
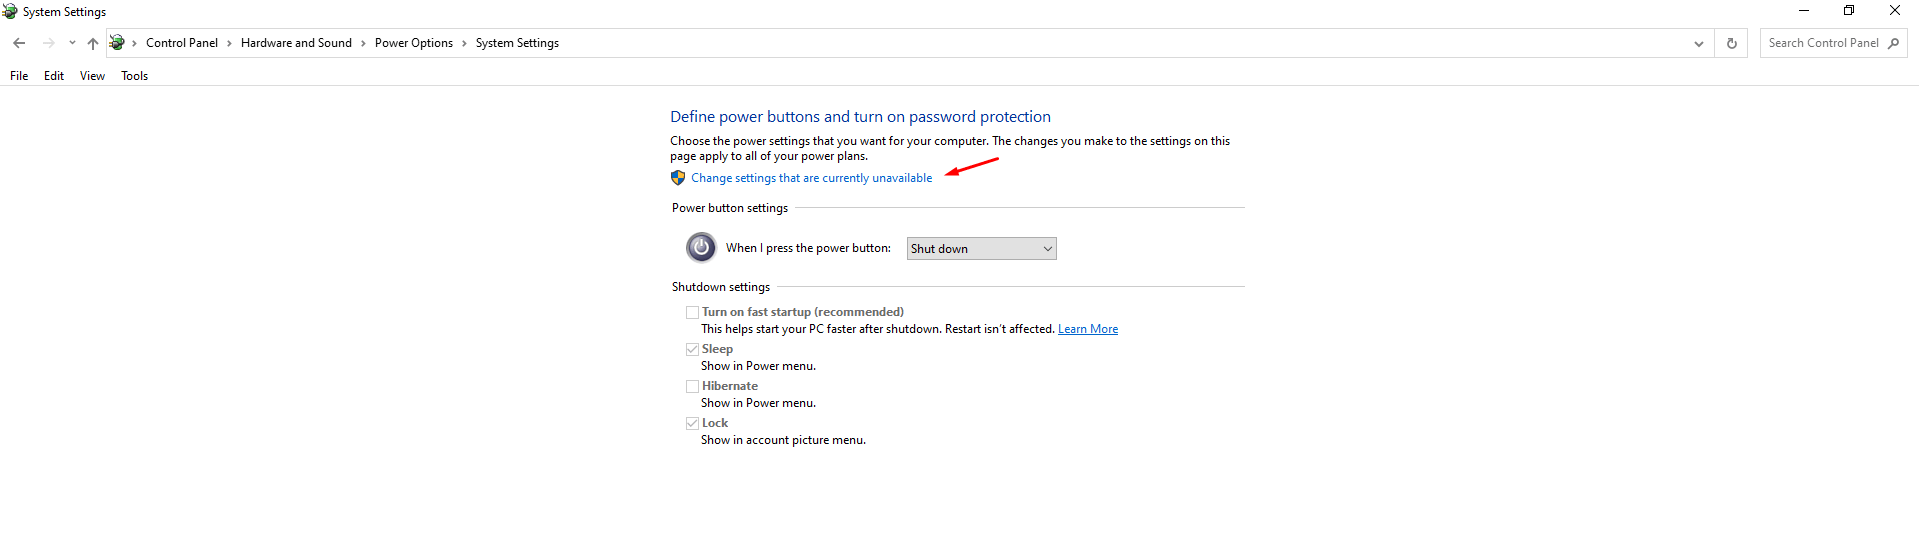
Step 4: Untick the “Turn on fast startup (recommended)” and then click on “Save Changes” to complete the process.
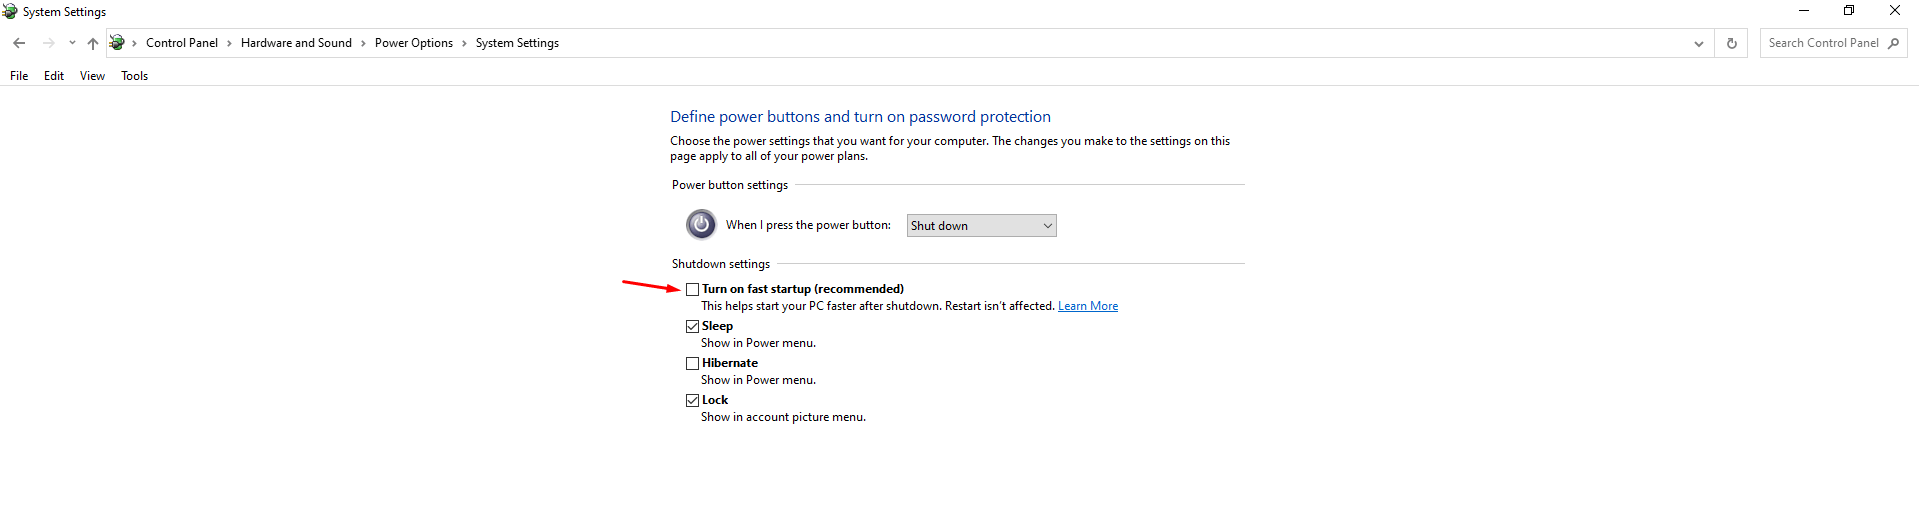
The operating system running SSD doesn’t need this function as the Read / Write speeds are above 300MB per second. We have unselected the feature long back because the machine has M.2 SSD that offers 300MB per second speeds.
3. Reset Winsock
Step 1: Open Command Prompt as an administrator using the search bar.
Step 2: Copy & paste (netsh) and then hit enter.

Step 3: Then copy & paste (winsock reset) and then hit enter.

Step 4: Close the Command Prompt window and then restart the PC to finish it.
The “failed to connect to a Windows service” error should be resolved by now. Do not skip the restart part as it plays an important role in ending the previous session and clearing the path to the services.
4. Stop One Windows Service
Microsoft added “Windows Font Cache Service” that creates a temporary file called FontCache Dat file, which might be creating the issue. You have to delete the temporary file from the system, and it will resolve the issue instantly.
Step 1: Press Windows Key + S and then type “Services” and run as administrator.
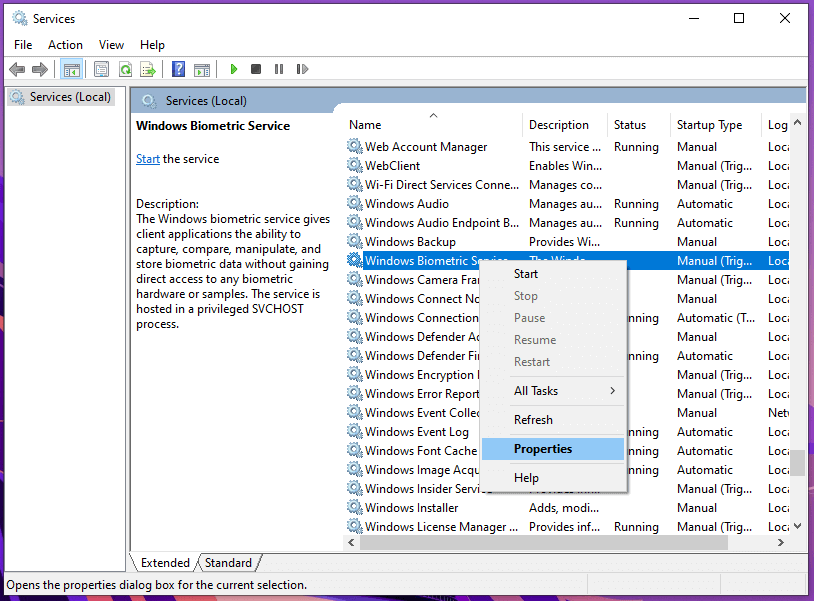
Step 2: A new window will show on the screen with Windows services running, and you have to find “Windows Font Cache Service” among them.
Step 3: Click to select and then mouse-right click for more options and then choose “Properties” to continue.
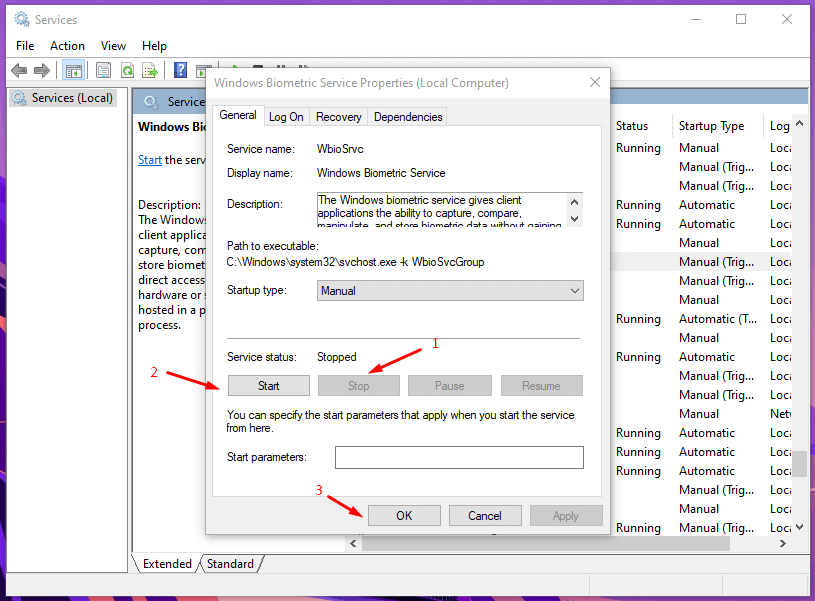
Step 4: Stop the service and start the service within a minute, and then click on “OK” to complete the process.
Close the window, and your Windows PC will no longer suffer from the error.
5. Reinstall Windows 10
We have installed Windows OS at least 100+ times in one decade because of several reasons. Unfortunately, Microsoft is not able to solve several software-related errors in the upcoming build versions because of the wide range of hardware combinations. In case, if the problem is persisting then you can consider installing a fresh copy of Windows OS on the machine.
Bottom Line
Apply the solutions that we have suggested, and you won’t face the “failed to connect to a Windows service error message” error. You should update the Windows build version to the latest, and 20H2 is a stable version, while the 2004 build version is unstable. Let us know which solution worked for you in the comment section below.