A Domain Name System which is known as DNS which converts your URLs into its IP address. Internet only understands the IPs of the computers and websites. Cloudflare DNS is an Internet security service which helps you to speed and secure your websites. This is basically free, fast and most secured server which replaces the traditional 8.8.8.8 to 1.1.1.1 server on the computer.
Most of the computer users use the default DNS i.e. 8.8.8.8 on their computers. Cloudflare is offering 1.1.1.1 as free server for the Internet and computer users. The company claims that the Cloudflare DNS service is more faster and secure than the Google’s own service.
Basically, Cloudflare works as a resolver to respond to a DNS query. Cloudflare claims to resolve the DNS query at the earliest compared to other DNSs. The Cloudflare DNS takes only 14.8 milliseconds of time to respond to a DNS query. On the other hand, most of the DNSs take around 70 milliseconds for the same.
Before setting up your Mac system with the Cloudflare DNS, there are a few things which you need to know. By changing the DNS of your system, some of the tools or software or devices may not work properly. Many networking devices including your Wi-Fi router connected with the existing DNS i.e. 8.8.8.8, once you change the DNS, your Wi-Fi router will stop working and you have to setup it with the new Cloudflare’s DNS. This way, you have to setup all the other networking devices. You have to be well prepared with all of these issues after changing the existing DNS.
If we talk about the good things of this service, Cloudflare is like an extra security tool for your web browsing to add an extra layer of security on the websites and webpages which you browse on the Internet. It is better for you to keep more security on your computer and for that reason we are here with proper guidelines to setup Cloudflare DNS on a Mac system. A complete step by step tutorial with proper screenshots is given here.
How to Setup/Configure Cloudflare DNS on Mac OS Macbook Air And PRO
Step 1 : First, go to the upper left corner of your Mac system. You could see an Apple icon there, click on to the Apple’s icon.
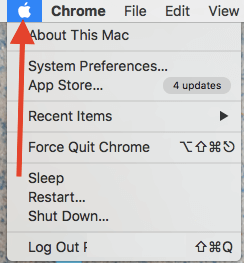
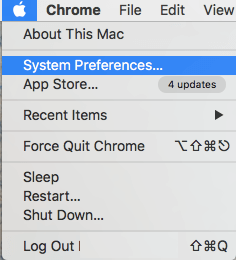
Step 2 :
A drop down menu will be presented to you from which you need to select System Preferences option. You can see more from the image.
Alternatively, you can open the System Preferences on your Mac from the Applications menu. Just click on to the Applications icon from the Dock of your Mac system and you will see System Preferences icon there.
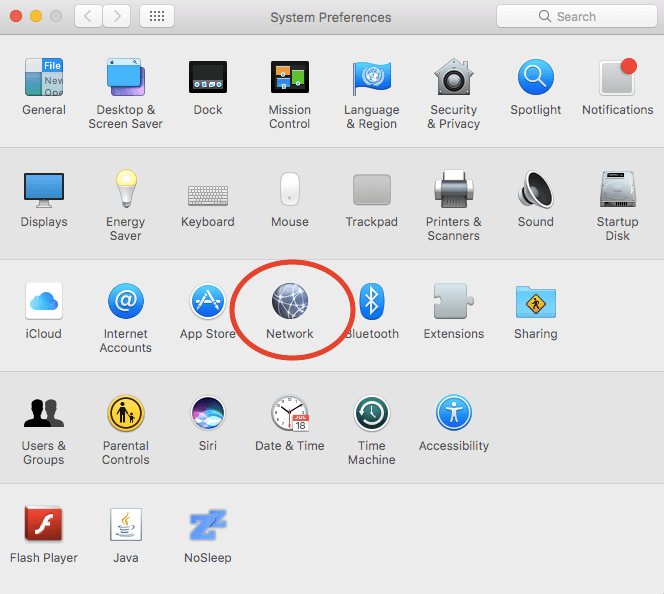
Step 3 : A new Window will be presented to you on the Screen. Explore the icons well from the presented Window and click on to the Network icon.
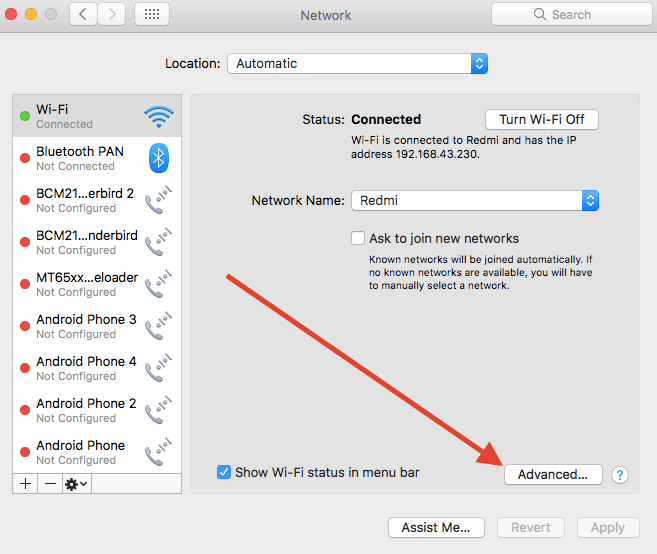
Step 4 : From here, you need to click on to the Advanced button which is given at the bottom side.
Step 5 : You would see different sections on this Wireless Network page of your Mac system. From the given options, you need to select the DNS option.
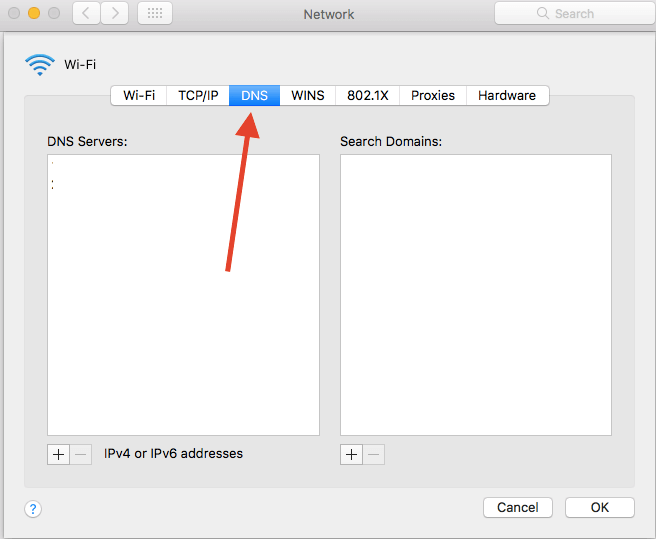
Step 6 : From here, click on to the + icon. You can see it in the below image. Once you click the + icon, you will be able to insert a new DNS to the given field. Make sure to enter the following DNS into the given field.
1.1.1.1
1.0.0.1

You can add the above DNS one by one by clicking on to the + button from the given Window.
Step 7 : Once you are done with it, all you need to do is just click the Ok button which is given at the bottom of the page.
When you hit the Ok button to apply changes on the DNS of your system, your Internet connection will be disconnected. Sometimes, it reconnects immediately. Or if your router is configured with other DNSs, you need to change the settings in your Wi-Fi router as well.
Congratulations! You have set your computer to use Cloudflare’s 1.1.1.1 DNS server which is more faster and secure from Google’s existing server.