Trying to run a command chkdsk allows users to verify errors in their local drive. However, there could be an occurrence when this command does not work. Instead, an error about unable to check the disks shows up. So here are three solutions if you are facing this problem on your Windows PC

Contents
The Reason That Shows Windows Cannot Run Disk Checking Due to Write Protection
All Windows PCs have some built-in utility tools that help improve the quality of your system. Among all these utility tools, there is Chkdsk which is a disk checking feature users can access via command prompt. Chkdsk prompt attempt a quick check of your local drive which comes in handy at times. However, it is not 100% reliable as it may not work when things get complicated. One of the more common scenarios where this error occurs is when a start-up error happens on your computer.
You can tell the disk checking tool is not working when there is a message “The type of the file system is NTFS”. Below that, the main error is displayed on the screen.
The reason why your Windows PC is showing this error is because of the following statement:
1. Read-only mode is enabled to provoke Write Protection.
2. The local disk hardware is corrupted or has physical damage.
Solution
Method 1: Use CMD
Resetting NVRAM and PRAM can remove write protection as they store various configurations of your Windows computer.
- Press the shortcut keys for Run: Windows + R. Type “Cmd” and press enter.
- After you enter the cmd prompt Write or paste the prompt: Chkdsk F: /f /r /x. Keep in mind that the letter “F” is the drive that will get affected, change it accordingly.
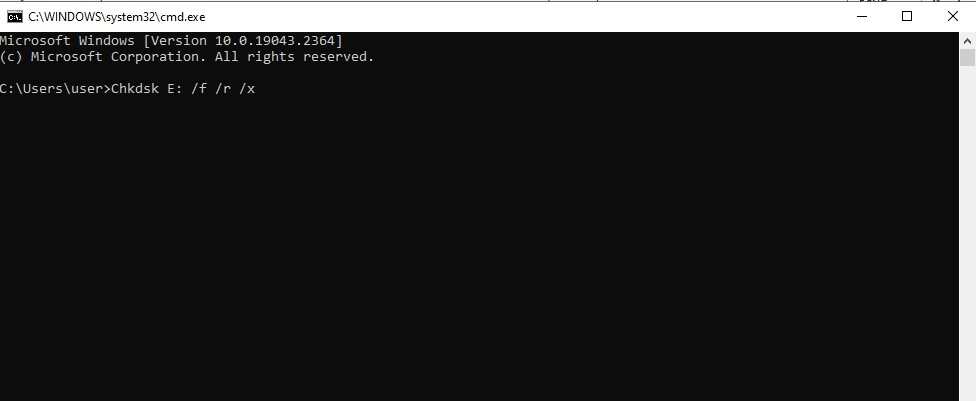
- After properly pasting the command, press enter.
If the problem is still occurring then look for other methods below.
Method 2: Use Registry Editor
Registry Editor has so many benefits for resolving Windows-related issues. The error we are dealing with here can also be resolved using the registry editor.
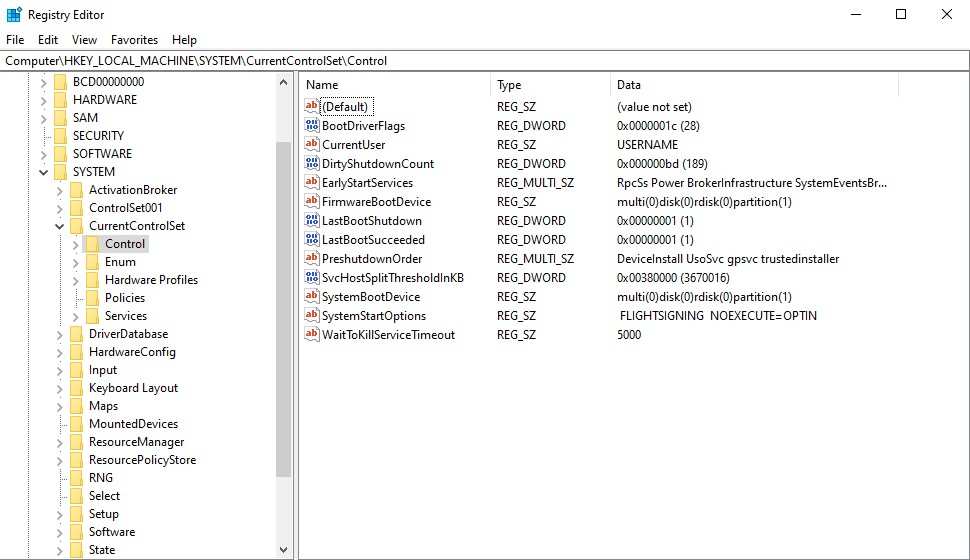
- In your Windows computer, hit the shortcut keys for opening Run prompt i.e. Win + R.
- Type Regedit and click OK.
- Copy and paste the following in the address bar of the registry editor: HKEY_LOCAL_MACHINE\SYSTEM\CurrentControlSet\Control\StorageDevicePolicies.
- Go to “WriteProtect” by double-clicking on it.
- Shift the value to 0.
If StorageDevicePolicies is not discoverable in your registry follow this alternative:
- Open the registry and paste the following: HKEY_LOCAL_MACHINE\SYSTEM\CurrentControlSet\Control. \
- Now in the blank area of the window, do a right click > New > Key.
- Now set the name of the key as “StorageDevicePolicies”.
- Right-click on the blank area and choose the DWORD (32-bit) value.
- Change the DWORD name to WriteProtect and alter its value to 0.
Method 3: Use EaseUS Partition Master
If all the Windows in-built methods did not work to solve the issue “Cannot Run Disk Checking on This Volume Because It is Write Protected” then your third-party software is the next trick. EaseUS Partition Master is a tool for extracting Write Protection and tons of other stuffs. As a result, your local drive will not restrict itself with Write Protection and will work normally. Here is the trick to solve your problem with EaseUS Partition Master
- Download the installer from the given link https://www.easeus[.]com/partition-manager/epm-pro.html
- Now click on “Free Trial” as we do not require the premium version here.
- Open the installer and install the program.
- Open EaseUS Partition Master and see the section on the left side. Select the “toolkit” option at the bottom.
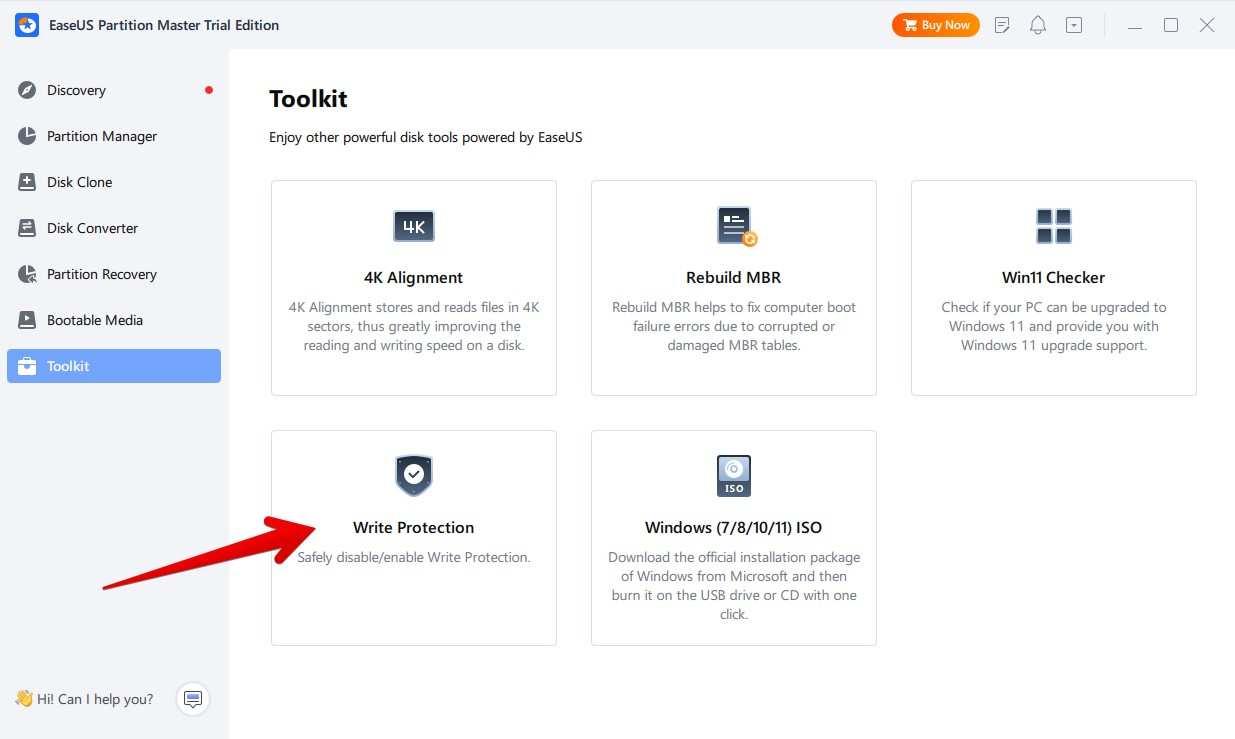
- Click on “Write Protection” and then select the drive in the “Choose Drive” section.
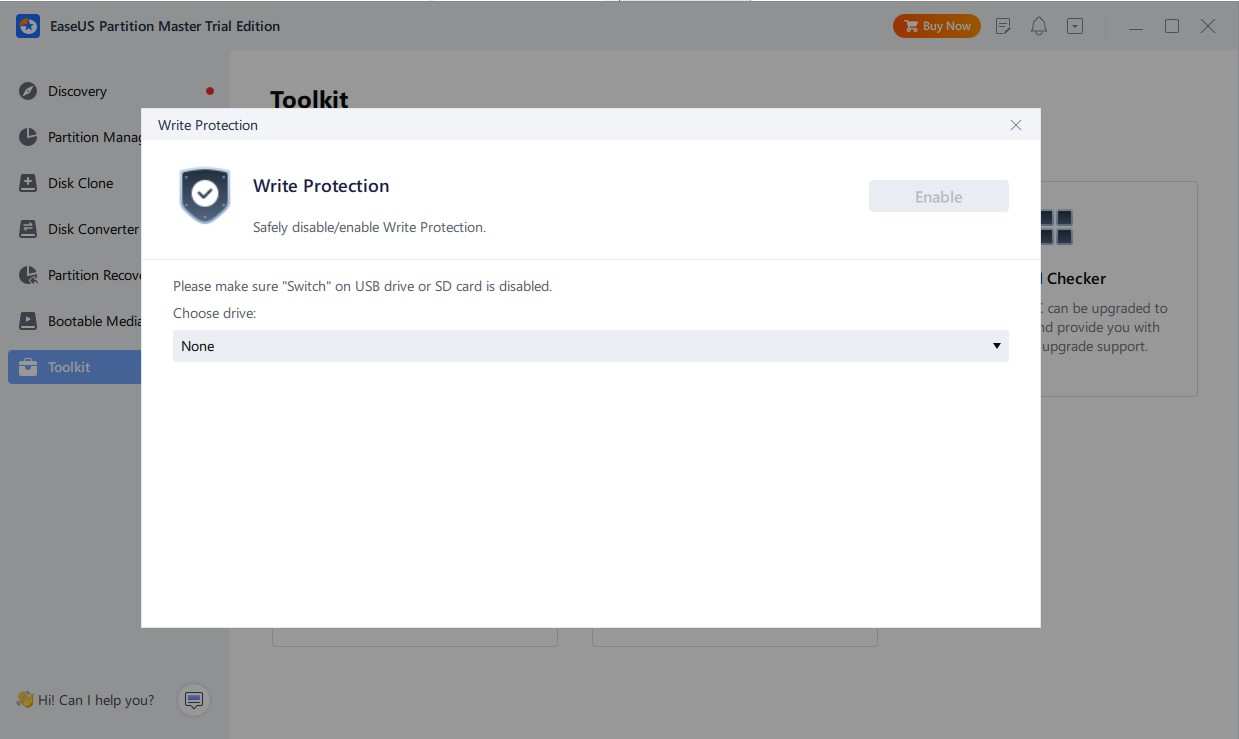
- After that, a new option will be available on the same page. That option is to choose to enable or disable Write Protection. You have to click on “disable” as want to remove Write Protection.
Conclusion
The problem related to disk checking is often fortunately very specific. As a result, removing Write Protection or fixing system file usually resolve chkdsk issue on your computer. One of the methods mentioned in this guide should resolve your problem.