Google Update program running in the background is a common problem that every Windows administrator faces. There are plenty of Google services running in a wide range of machines and that’s how the company designed them to keep every of their application up-to-date. However, I find it uncomfortable because it could consume plenty of CPU + RAM + Internet resources. If you are using Windows 10 PC, then you can look up for googleupdate.exe or googleupdater.exe to locate its existence.
Contents
What is GoogleUpdate.exe?
Do you remember to Google Play Services?
Google designed the executable program to look up for installed solutions and keep them up-to-date. Windows PC consumers have plenty of reasons to uninstall it, and one of the crucial ones is that they access the internet at any time. Nobody knows its specific function or schedule on when to connect to the internet and update the Google-related programs.
Furthermore, the updating program doesn’t require administrator permission to access the internet and download it. Overall, you don’t have any control over its actions and that could lead to slower downloads. Of course, I don’t want to grant permission to any installed program that I cannot control.
Unfortunately, the company did not provide any official method to remove the program or uninstall it. Administrators have no choice but to opt third-party firewall solutions to block the Google Updater. I will provide proper guidance on how you can remove it, and keep it away from the computer.
Delete GoogleUpdater.exe
Deleting the executable update program is the only way to remove it permanently. Now, you have to find the location of the executable program and then delete it manually. I do recommend the readers to back up the file in another location and it will prevent the program from launching it.
Step 1: There are two locations, where you can find the Google Updater executable file.
- C:\Users\username\AppData\Local\Google\Update\
- C:\Program Files (x86)\Google\Update
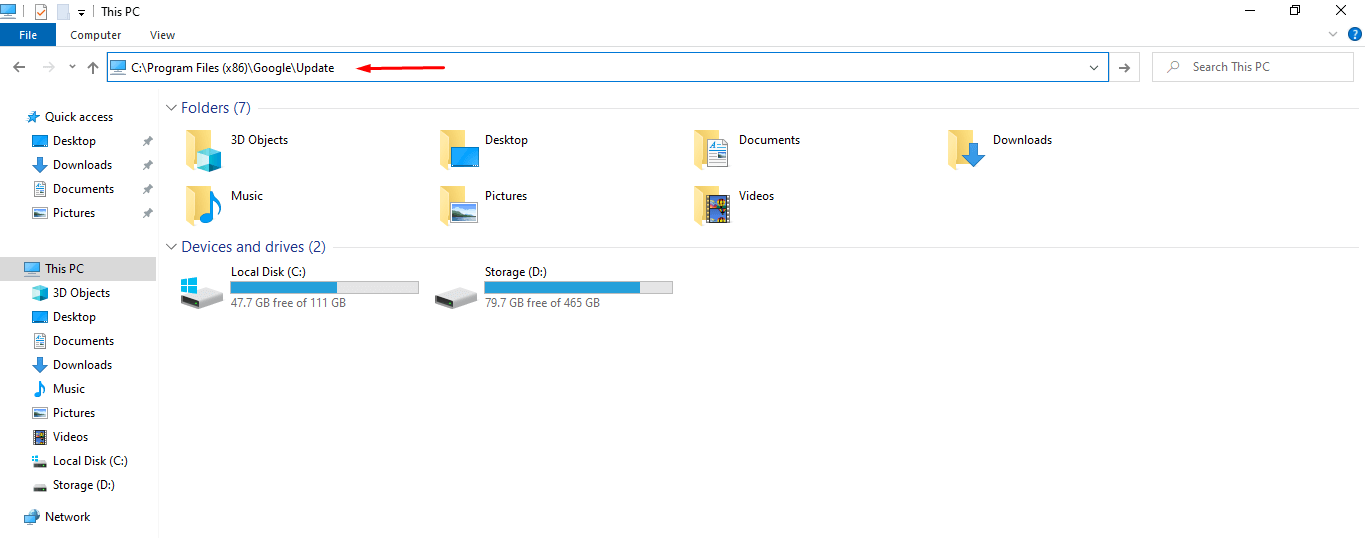
In my case, I found the file in (B) second location and that’s Google Chrome updater.
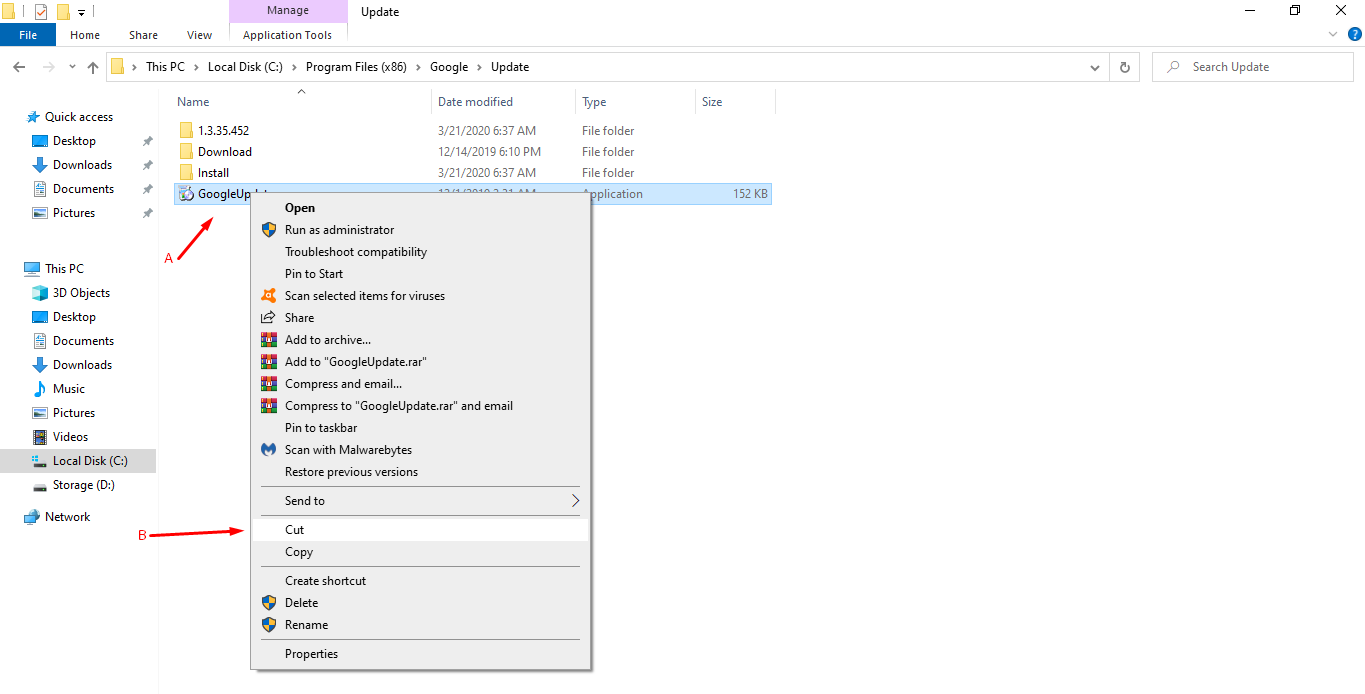
Step 2: Click on “GoogleUpdate” to select it, then right-mouse click for more options, and then click on “Cut” to continue.
Step 3: Paste the file to another location. I have selected a different partition/drive and then pasted the file in an empty new folder.
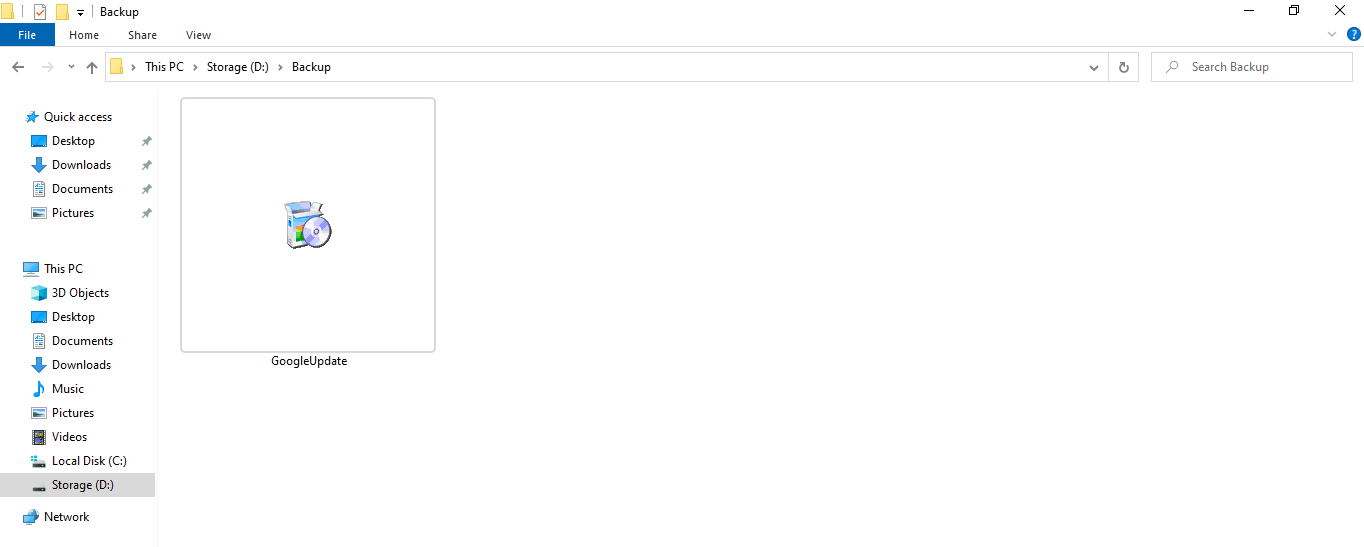
Re-install Chrome or Google products to recover the deleted file. I don’t recommend the readers to delete it permanently because I might need it in the future and I don’t wish to reinstall the same program.
Disable Google Updater in Task Manager
Microsoft, Apple, and Google products frequently run updaters in the background that could slow down the computer a little and consume plenty of internet resources. No need to download any additional programs because you can prevent the executable program to launch by disabling it during startup.
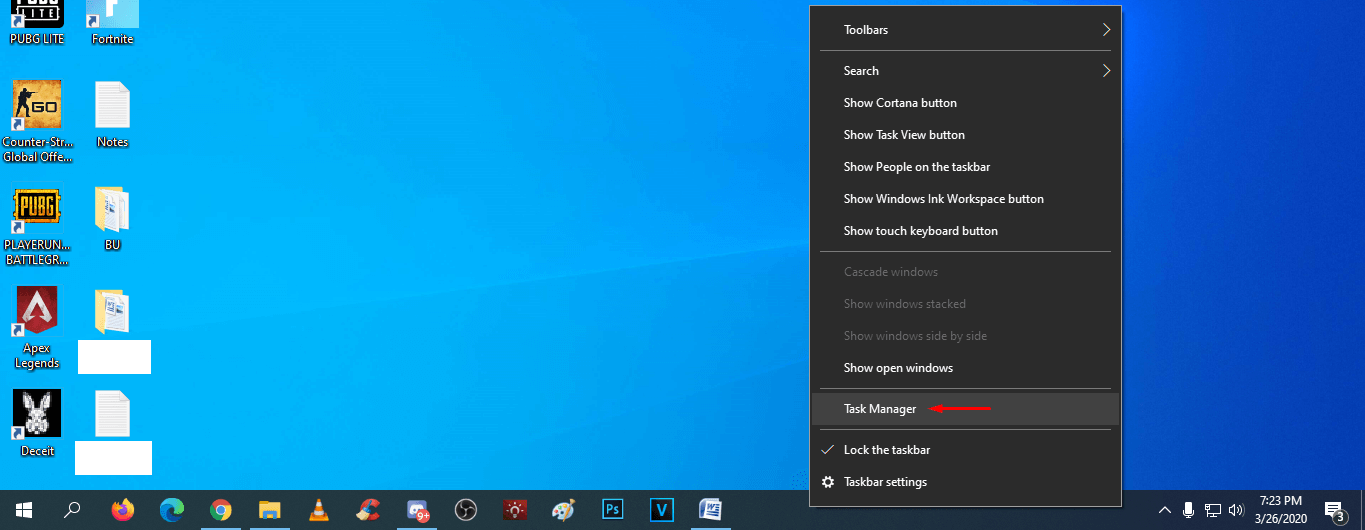
Step 1: Open “Task Manager” by pressing Ctrl + Alt + Del and select “Task Manager” or you can open it by pressing right-mouse click at the bottom of the taskbar.
Step 2: Click on “Startup” located at the top menu.
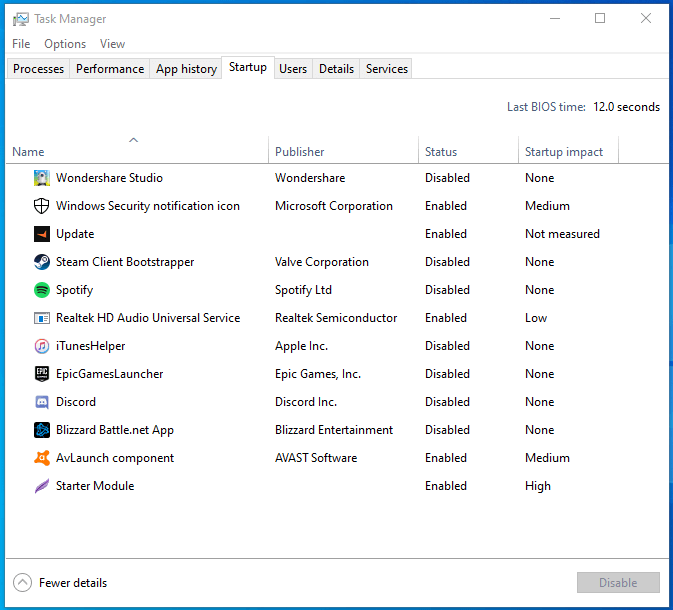
Step 3: Select the executable program from the list and then click on “Disable” to prevent it from running.

Currently, GoogleUpdate.exe or GoogleUpdater.exe is not running on my PC, so I had to select another program for a demonstration.
Preventing Windows from launching the program is the most prominent way to keep it from running in the first place. I have disabled almost every single program because it slows down the computer, and eats up machine resources.
Windows Task Scheduler
Task Scheduler allows third-party programs to run services at a specific period. Of course, we cannot mess around in this section because we don’t have enough options to do so. We are going to remove the schedule permanently and this won’t delete the program whatsoever.
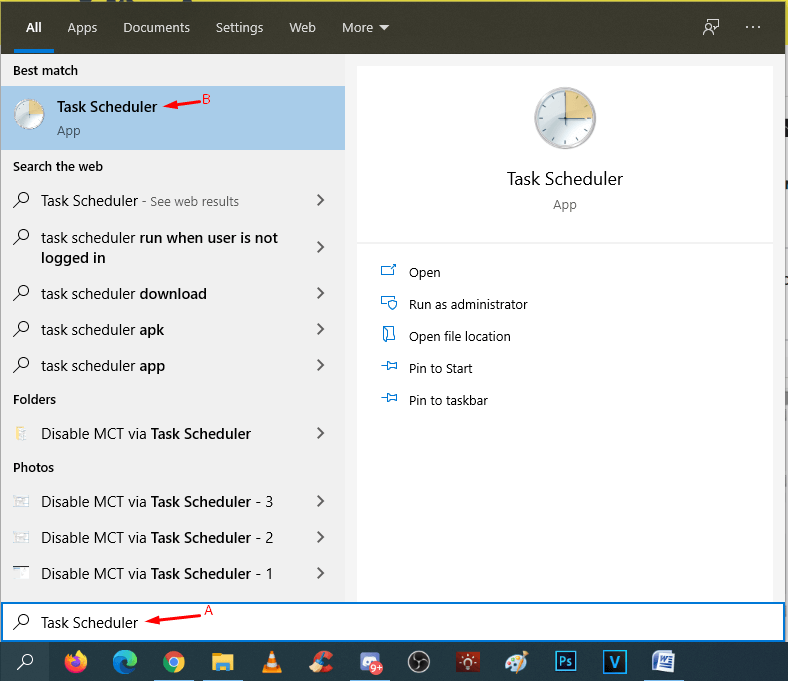
Step 1: Press Windows key + S, then type “Task Scheduler” and then run as administrator.
Step 2: Find Google-related scheduled programs. In my case, I have two updates that I found by scrolling down a little, and the list follows alphabetical order.
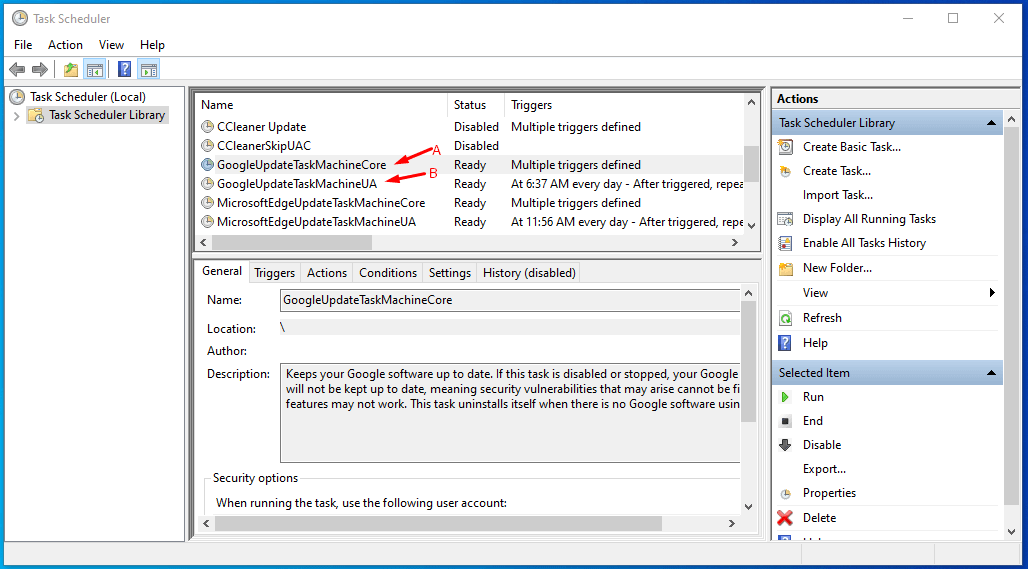
Step 3: Click to select “Google Update” and then right-mouse click for more options to click on the “Delete” button.
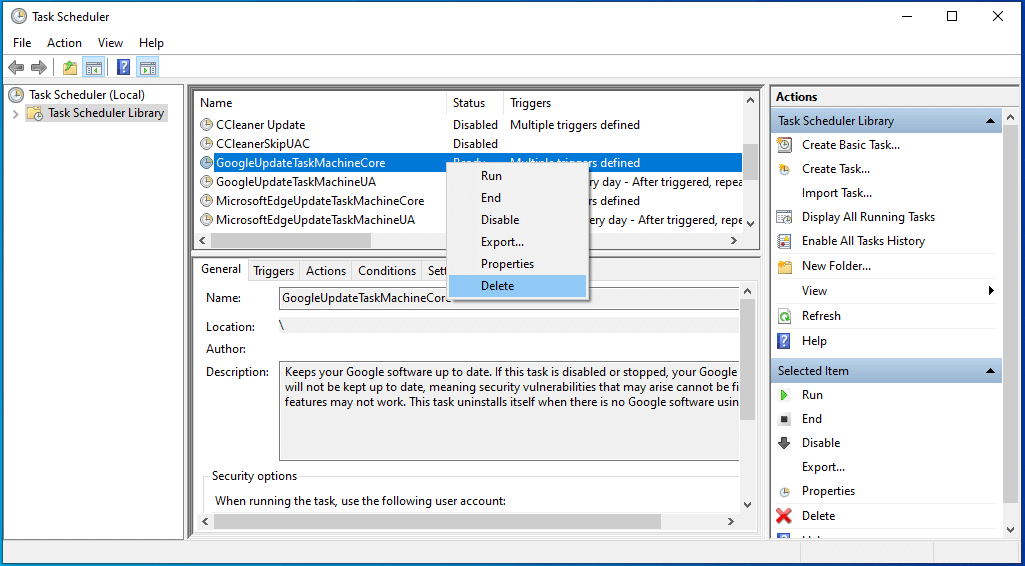
You are not deleting the Google Updater and removing it from the scheduler and preventing it from launching. However, I don’t know how many times it will launch in a week or so. I do recommend moving to the first solution because it will prevent Google from updating programs.
Also make sure you restart your PC or Laptop after the above to steps to benefit from the above tricks and tips provided by our tech team to save your bandwidth.
Bottom Line
Nowadays, updating the Chrome browser has become very important because it enables consumers to prevent privacy invaders and hackers from entering your computer using loopholes. Make sure to keep Google products updated to prevent bugs, glitches and to experience new features. Let us know which solution helped you from removing GoogleUpdate .exe in the comment section below.