In today’s digital landscape, data loss can have far-reaching consequences, making it essential to have a reliable backup strategy. With the release of Windows 11, Microsoft has introduced an enhanced set of tools to create and restore system image backups. In this comprehensive guide, we will walk you through a step-by-step process of creating a system image backup and leveraging it for data recovery on Windows 11. In the digital age, data loss can be a devastating experience, and having a robust backup strategy is essential. Windows 11, the latest operating system by Microsoft, provides an improved set of tools to create and restore system image backups. In this guide, we will walk you through the step-by-step process of creating a system image backup and using it for data recovery on Windows 11.
Section 1: Understanding System Image Backup
A system image backup is an exact replica of your entire operating system, including installed applications, settings, and files. In the event of system failures, hardware problems, or data loss, it gives you the option to return your machine to a previous condition. Windows 11 presents a streamlined approach to creating and restoring system image backups, ensuring a smoother user experience.
Section 2: Creating a System Image Backup on Windows 11
Step 1: To enter the Settings app, first hit the Start button and then choose the gear symbol.

Step 2: Within the Settings app, navigate to the “System” category
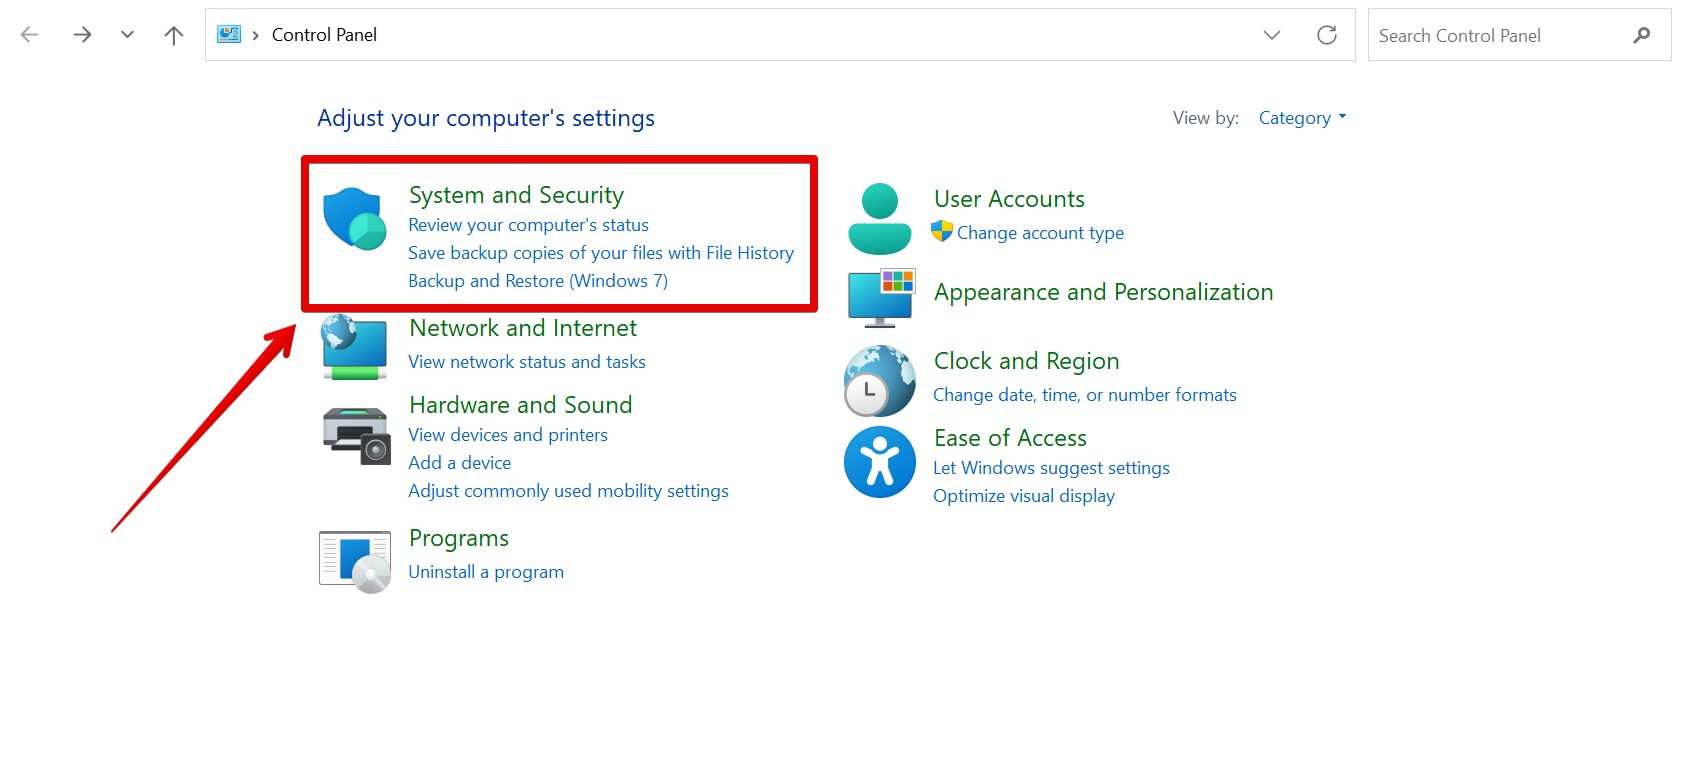
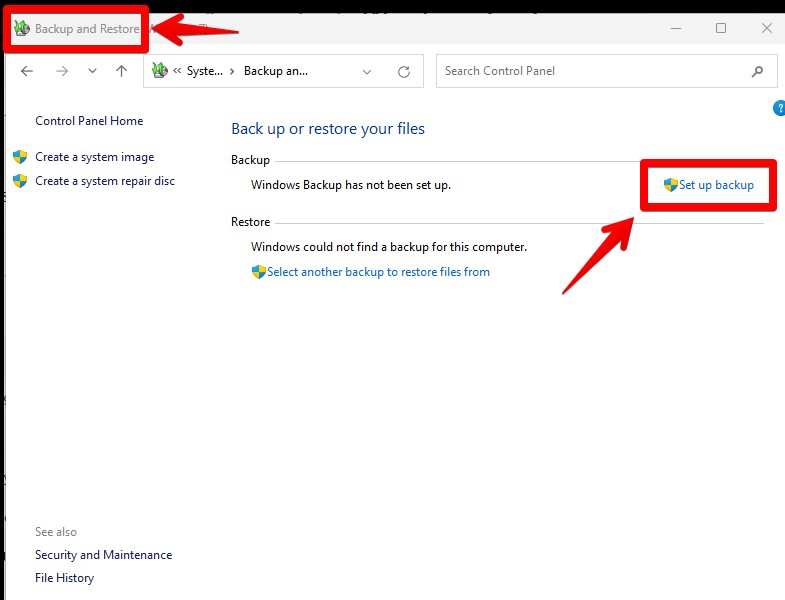
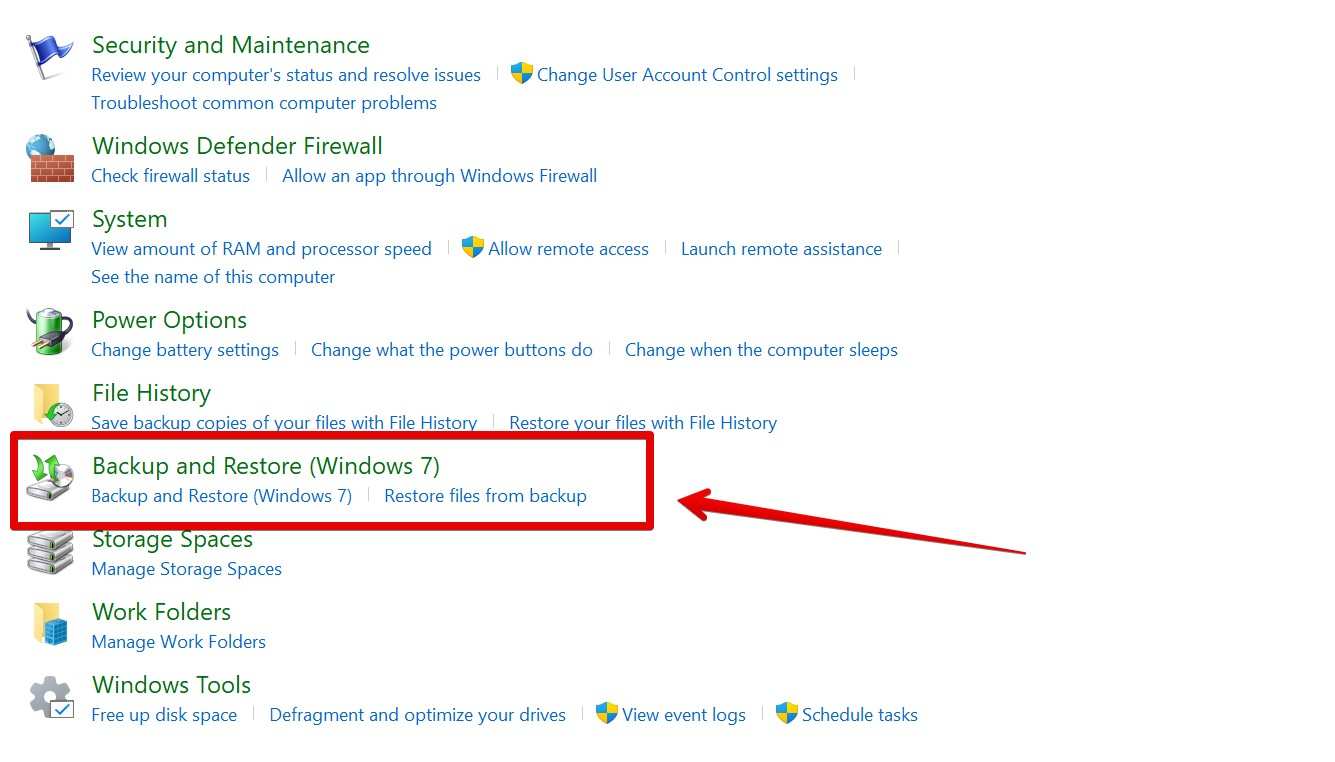
Step 3: Find and click the “Back and Restore” option in the box underneath the “Storage management” column.
Step 4: Search for Create a system image in the panel on the left
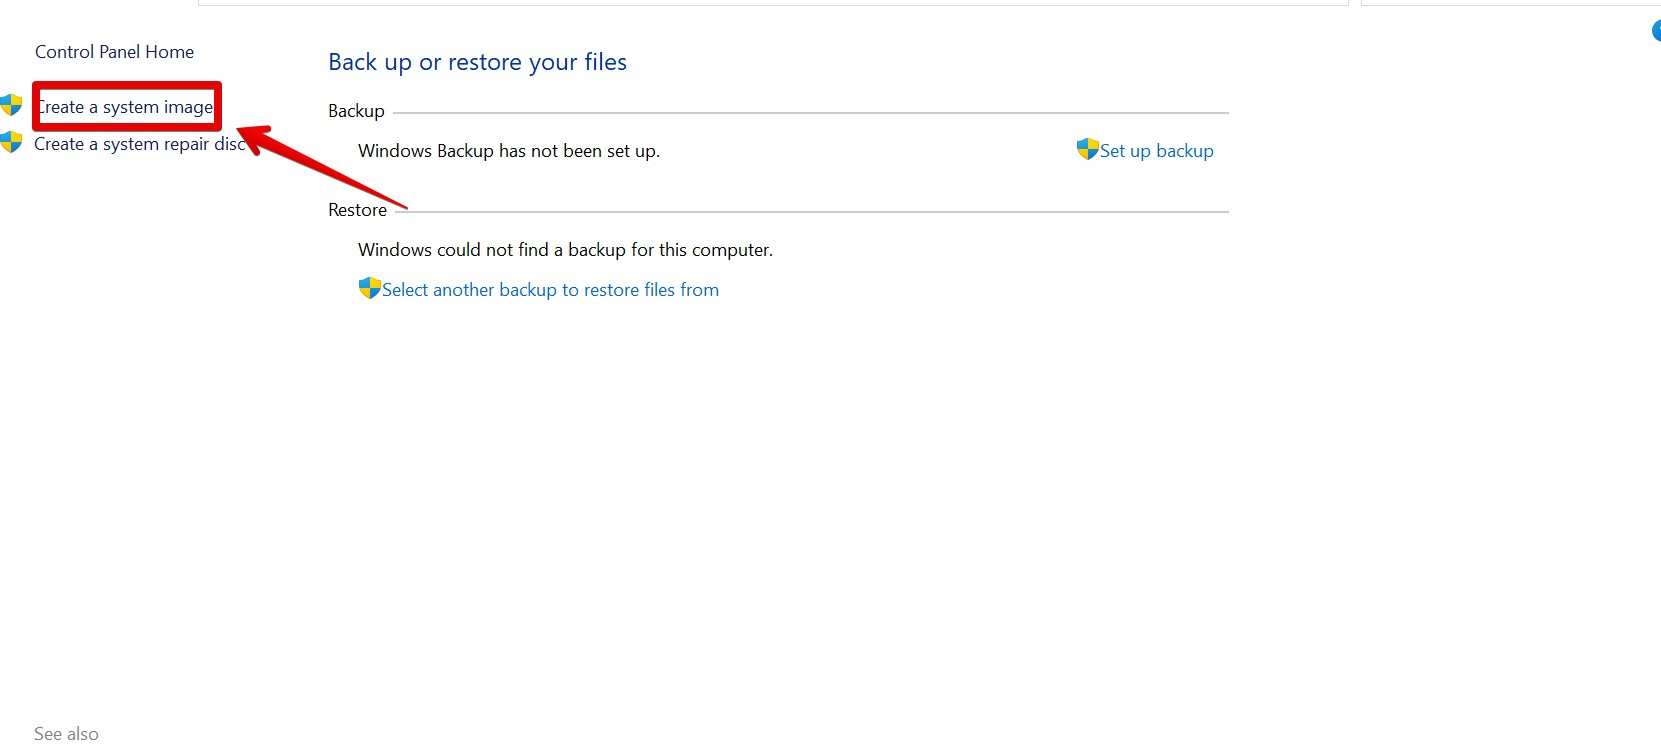
Step 5: Begin the backup procedure
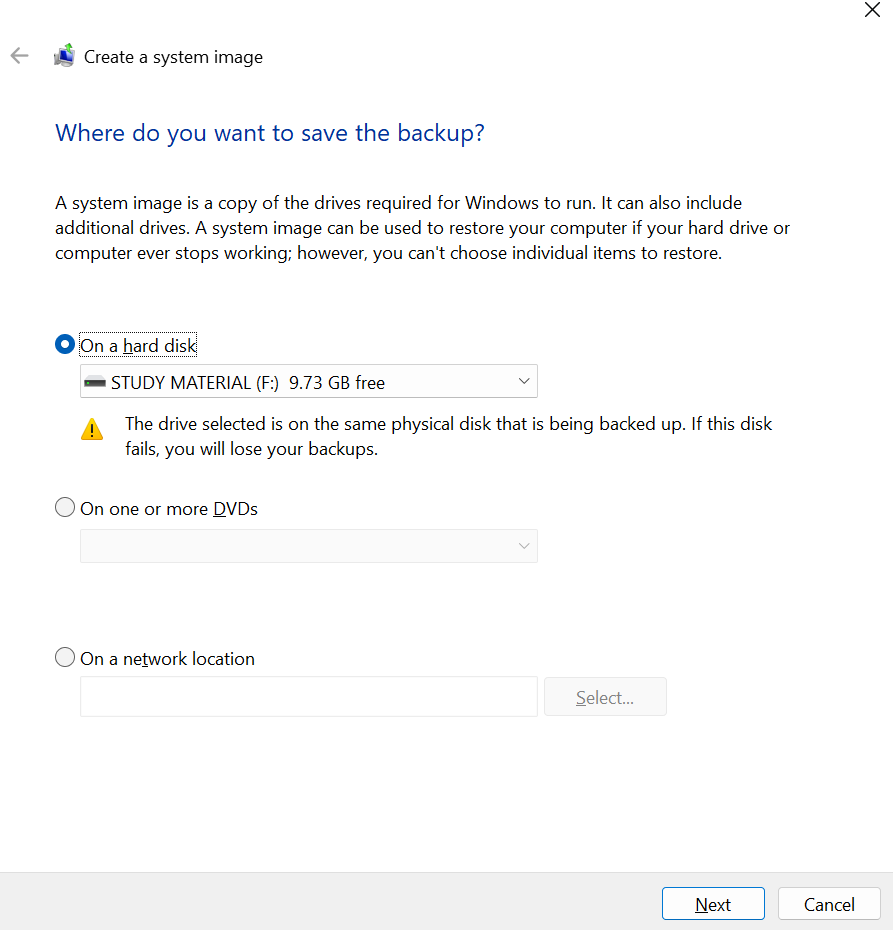
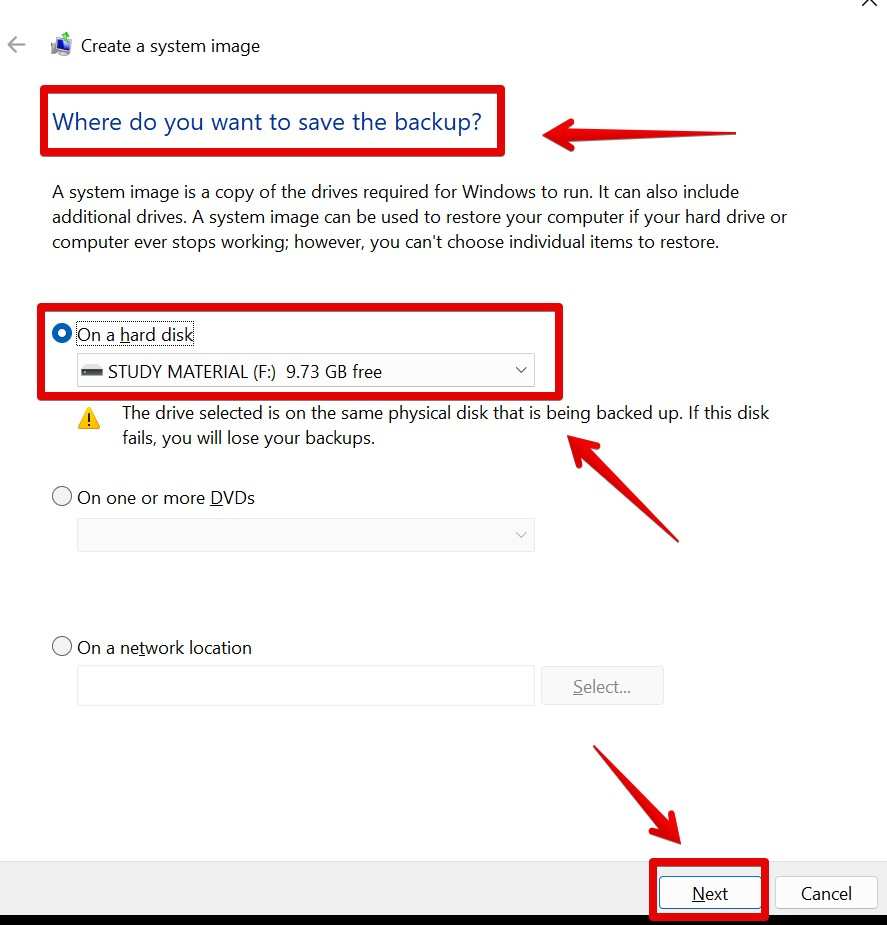
Step 6: Choose the location on the destination drive, ideally an external hard disc or a network site, where you want to save the system image backup.

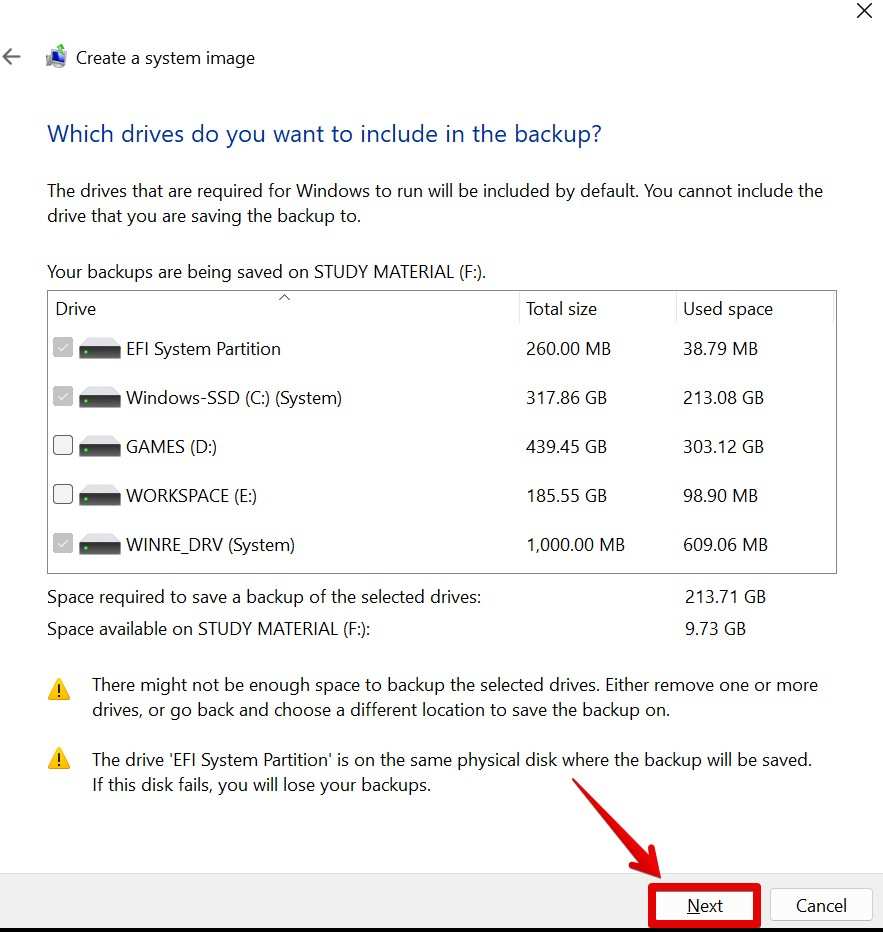
Step 7: Review the drives selected for backup and click on the “Next” button.
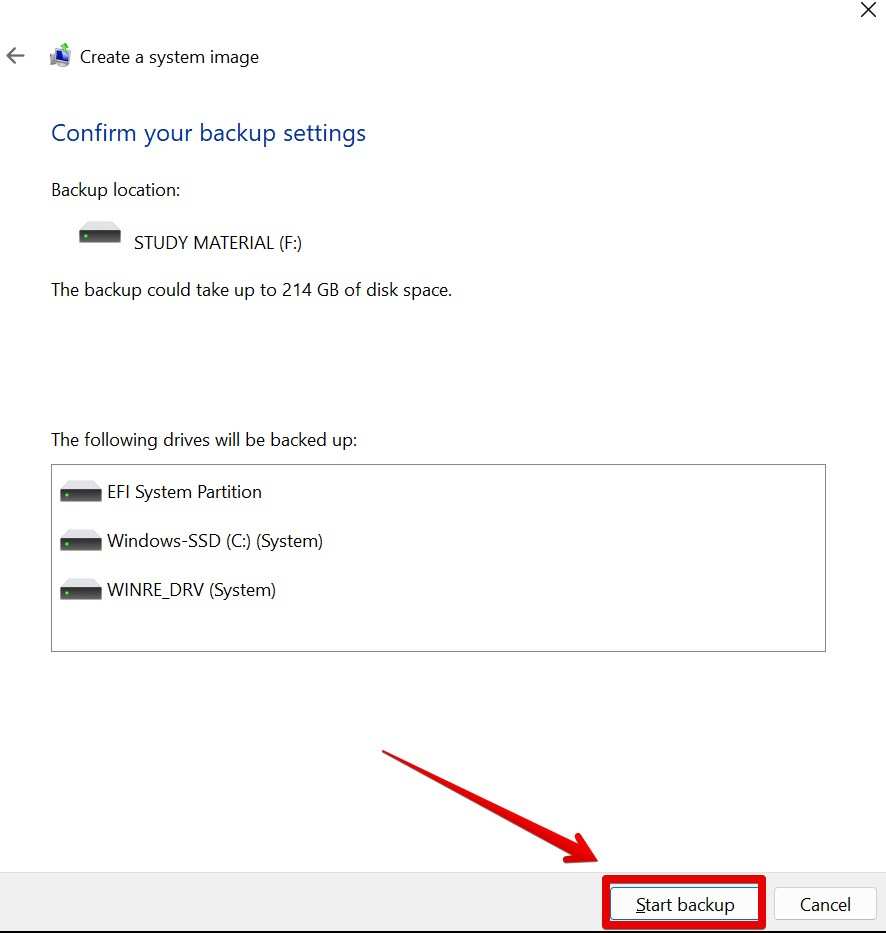
Step 8: Confirm the backup settings and click on the “Start backup” button to commence the creation of the system image backup.
Step 9: Allow the backup to finish, keeping in mind that the time needed will depend on your system’s size and computer speed.
Section 3: Restoring a System Image Backup on Windows 11
Step 1: Access the network location where the system image backup is stored by connecting the external hard drive there.
Step 2: Open the Settings app, navigate to the “System” category, and search for the “Recovery” in the menu..
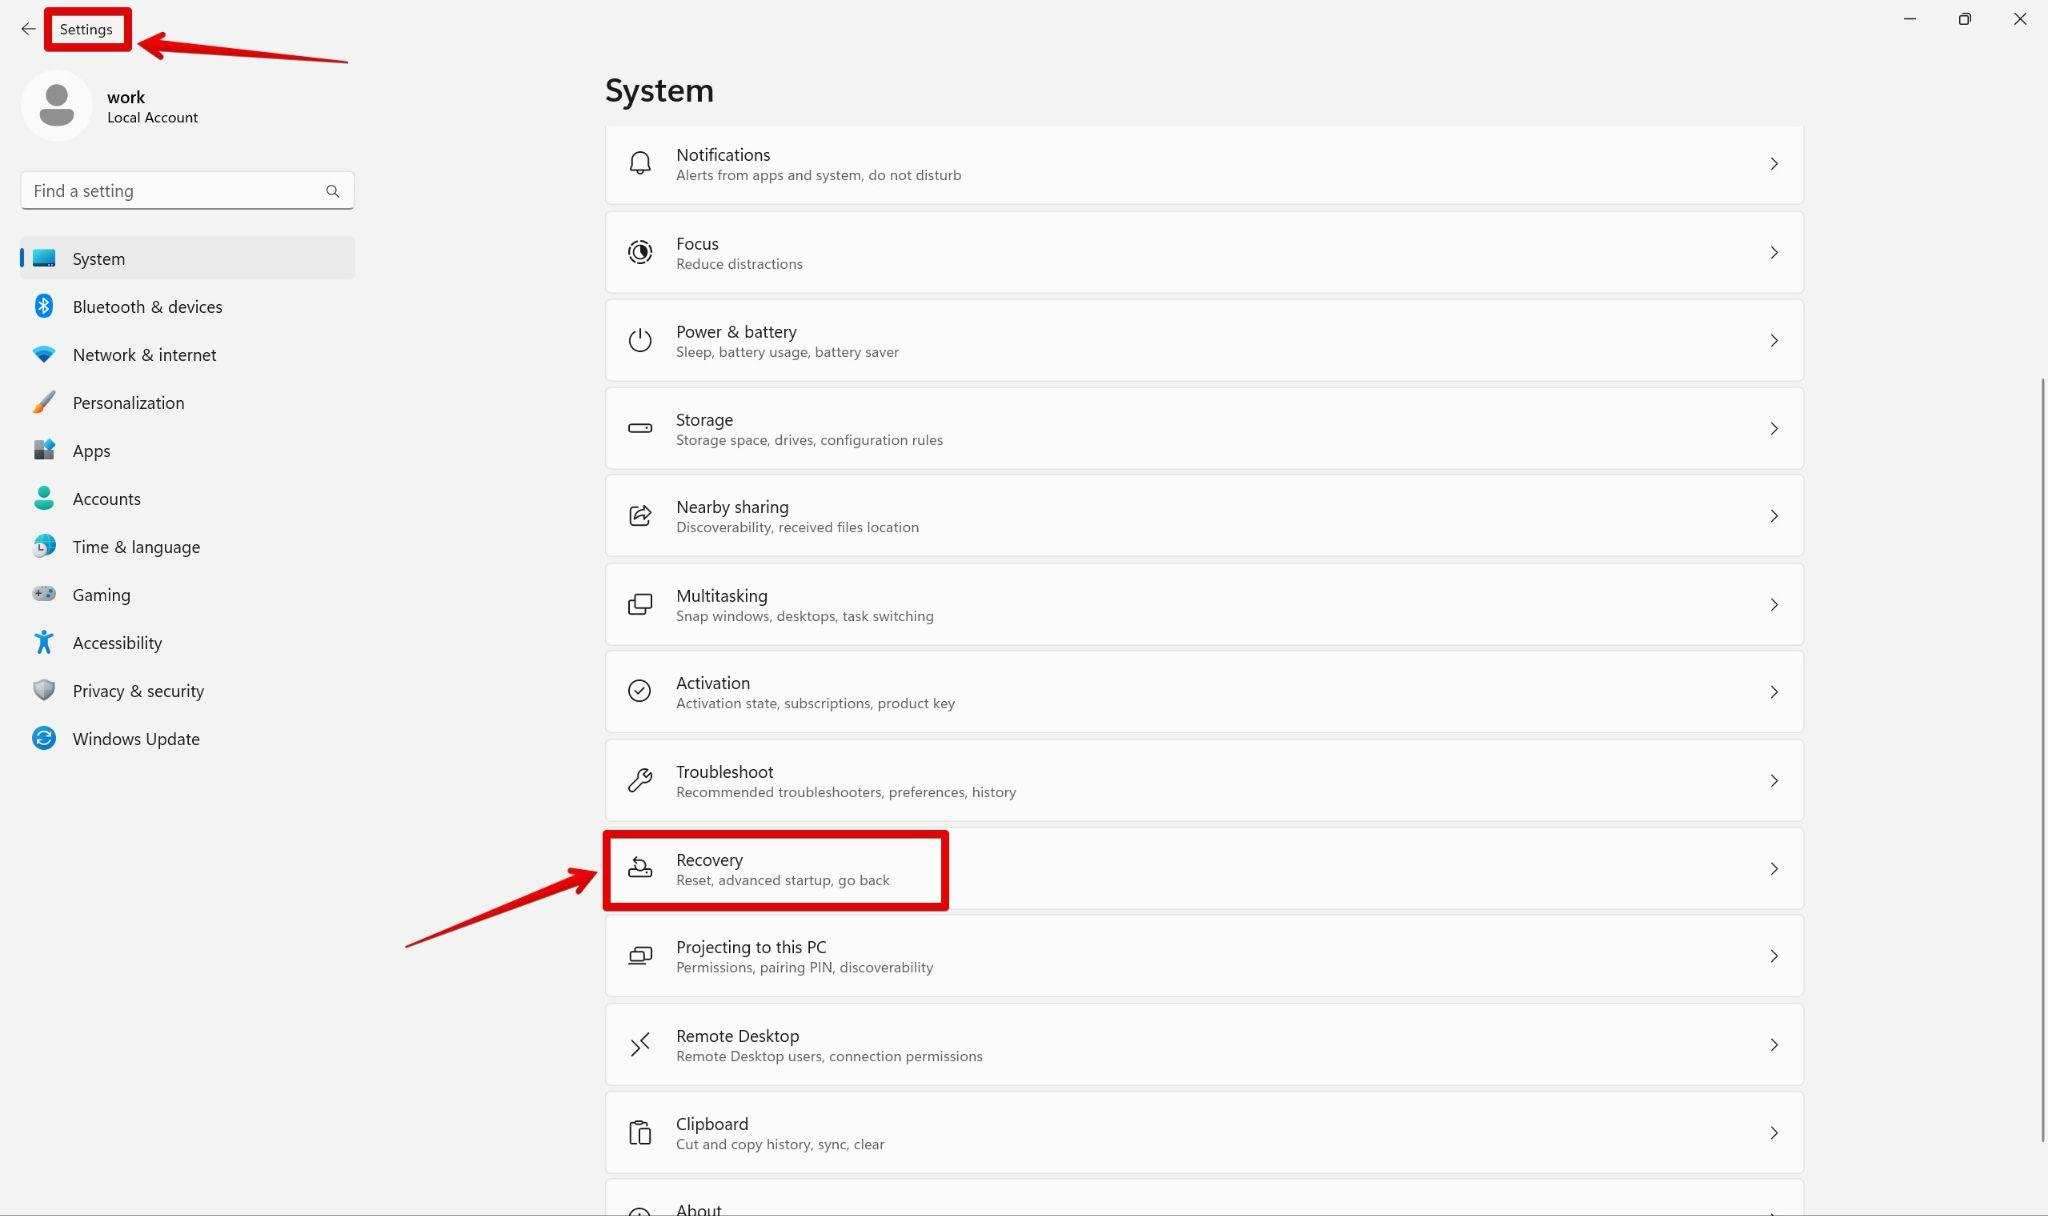
Step 3: Click on the “Recovery” link.
Step 4: Within the Recovery options, click on the “Restart now” button found under the “Advanced startup” section.

Step 5: Windows 11 will restart and display the Advanced Startup Options menu.
Section 4: Best Practices for System Image Backups and Data Recovery
Regularly create system image backups to ensure your data remains protected against unforeseen events.
Store your system image backups on separate external drives or network locations to mitigate the risk of single-point failures.
Periodically test the restoration process by restoring your system from a system image backup, thereby verifying the backup integrity.
Maintain an updated copy of critical files separate from the system image backups to facilitate quick access to essential data.
Consider automating the backup process using built-in Windows 11 features or reliable third-party backup software to streamline your backup workflow.
Conclusion:
Creating and restoring system image backups on Windows 11 is a straightforward process that provides a safety net against data loss and system failures. By following the steps outlined in this guide, you can safeguard your valuable data and recover your system quickly and efficiently. Remember to create regular backups and periodically test the restoration process to ensure the integrity of your backups. With a robust backup strategy in place, you can have peace of mind knowing that your data is protected and recoverable in case of any unfortunate events.