Microsoft has recently created Windows 11, which serves as their most up-to-date operating system. This advanced software comes with a wide array of functionalities and improved safeguards for enhanced protection. However, like any software, Windows 11 may encounter occasional errors. A frequent problem encountered by users is the occurrence of the “Publisher Could Not Be Verified” error. This particular error message tends to show up when trying to execute or install a program originating from an untrusted or unfamiliar origin. In the following article, we will investigate different approaches to resolve the “Publisher Could Not Be Verified” error on Windows 11, thereby ensuring a more seamless and secure user experience.
Contents
- Understanding “Publisher Could Not Be Verified” Error In Windows OS
- Technique 1:Easily resolve the issue named “Publisher Could Not Be Verified” by installing verified certificates on Windows 11 10
- Technique 2: Fix “Publisher Certificate Could Not Be Verified” Error on Windows 11 with PowerShell
- Conclusion
Understanding “Publisher Could Not Be Verified” Error In Windows OS
The “Publisher Could Not Be Verified” error message is designed to protect users from potentially harmful software. When Windows identifies an application or file as being from an unverified source, it displays this warning to caution users against running or installing it. While the intent is to safeguard the system, it can be frustrating for users who need to use trusted programs that trigger this warning. Luckily, there are methods available to deal with this error and proceed with executing or installing the desired application.
Technique 1:Easily resolve the issue named “Publisher Could Not Be Verified” by installing verified certificates on Windows 11 10
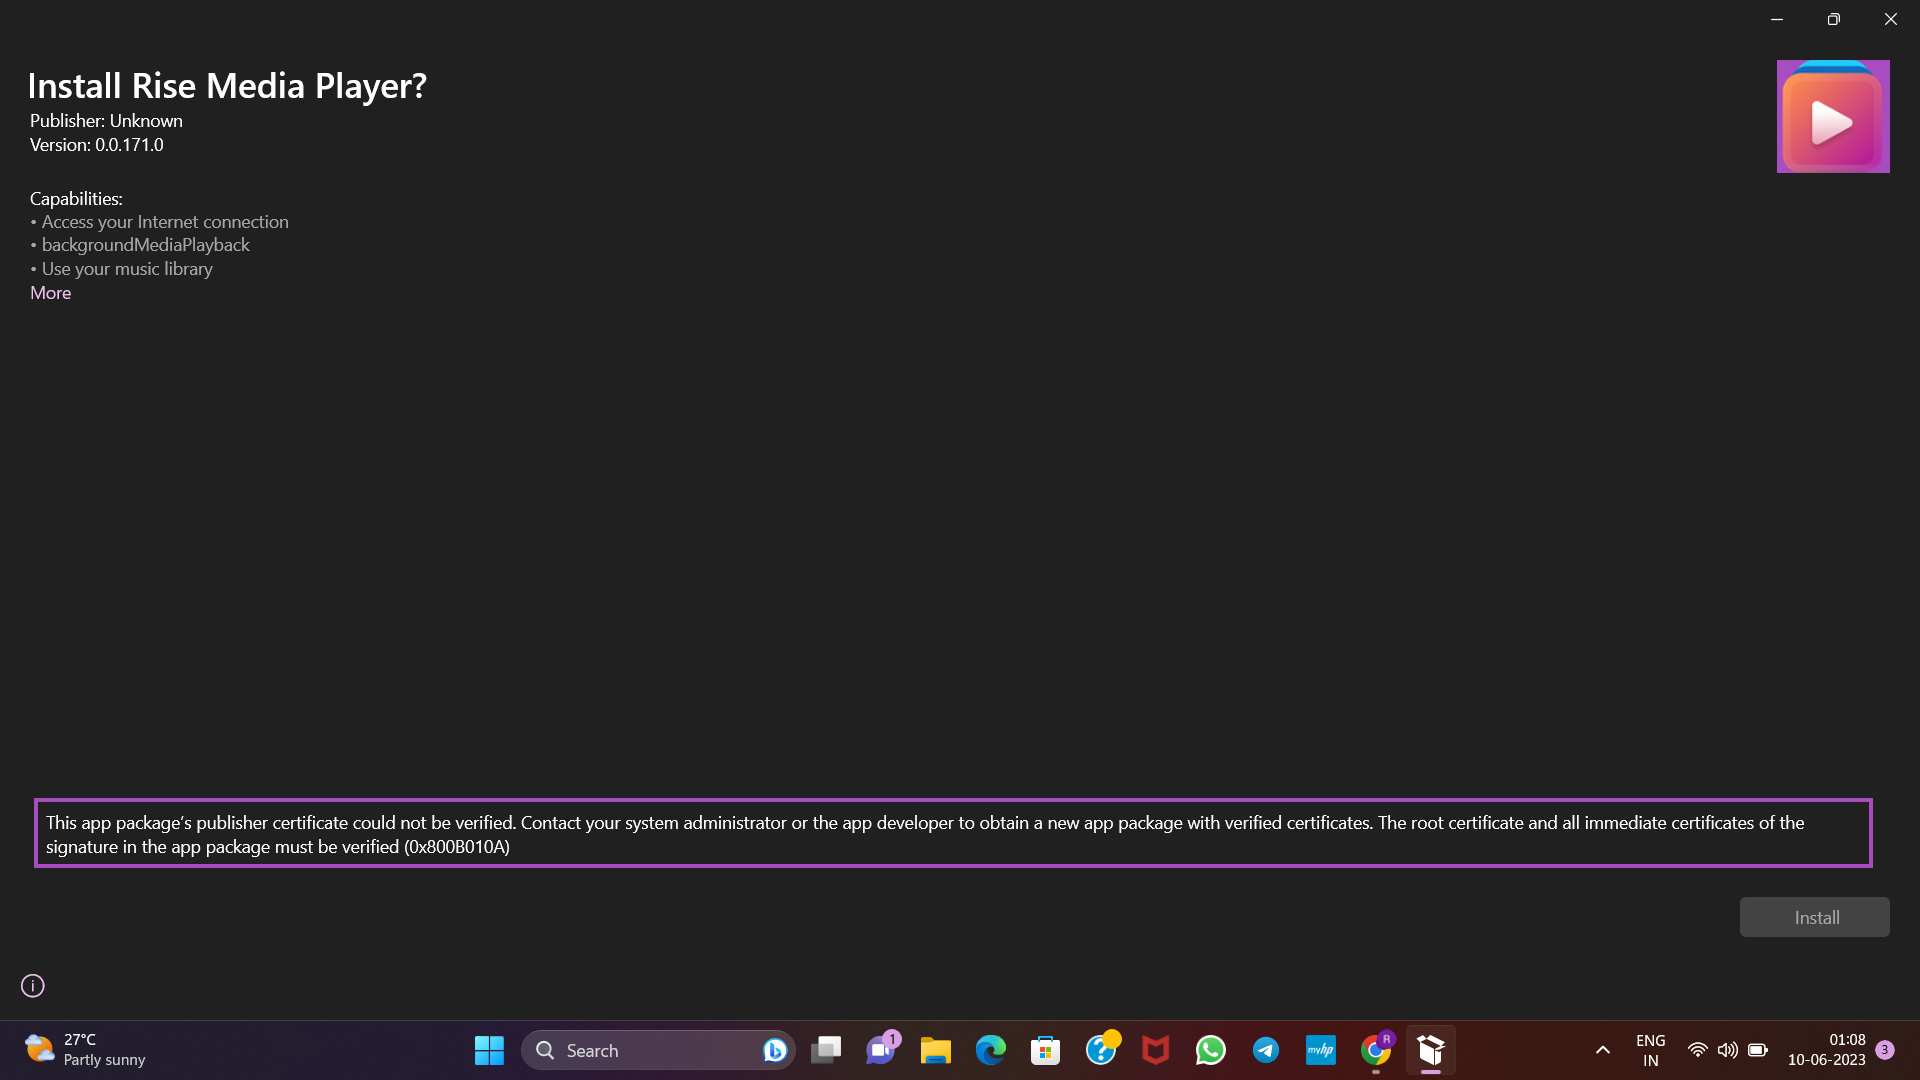
For this approach, we will install Rise Media Player, an exceptional open-source media player designed for Windows 11. However, during the installation process of the MSIX package, an error occurs, displaying the message “Publisher certificate could not be verified” .This error prevents users from successfully installing the application.
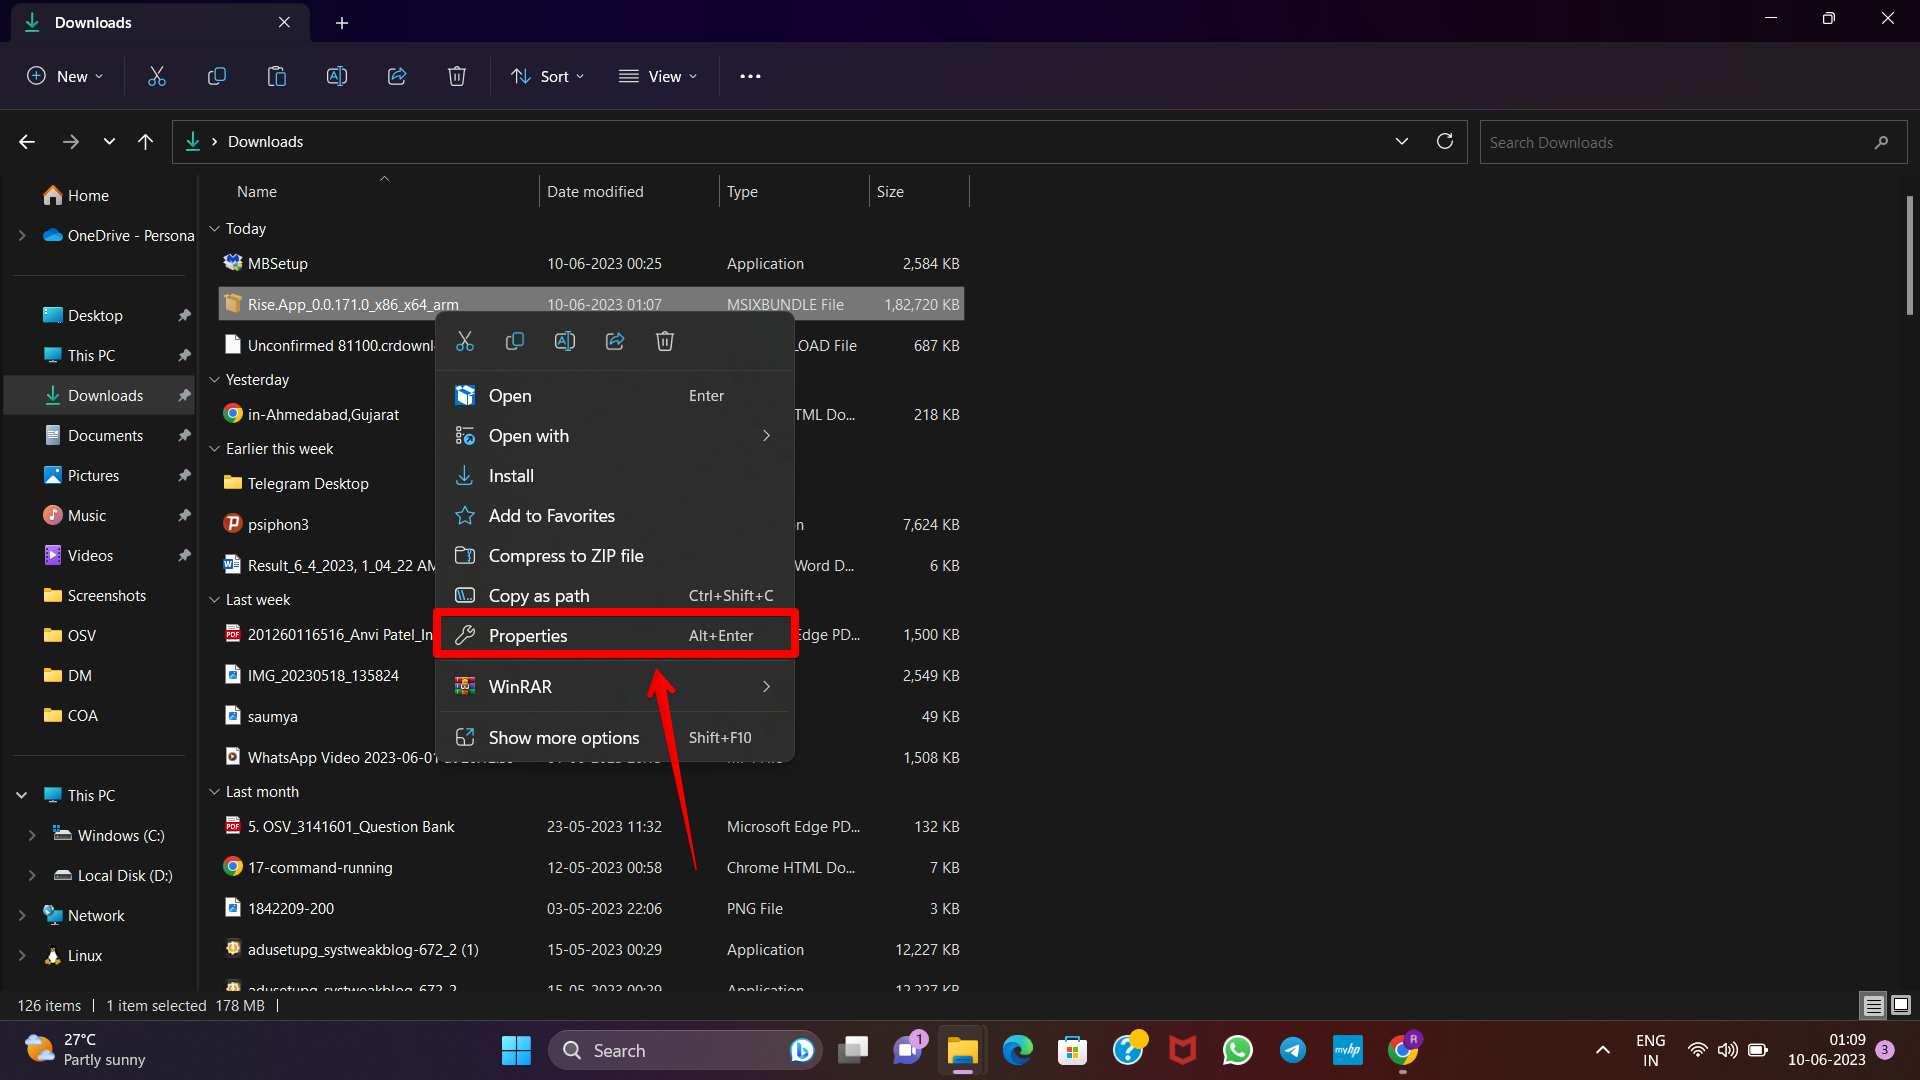
Step 1
Click on MSIX/MSIXBUNDLE package and click at “Properties” in the context menu.
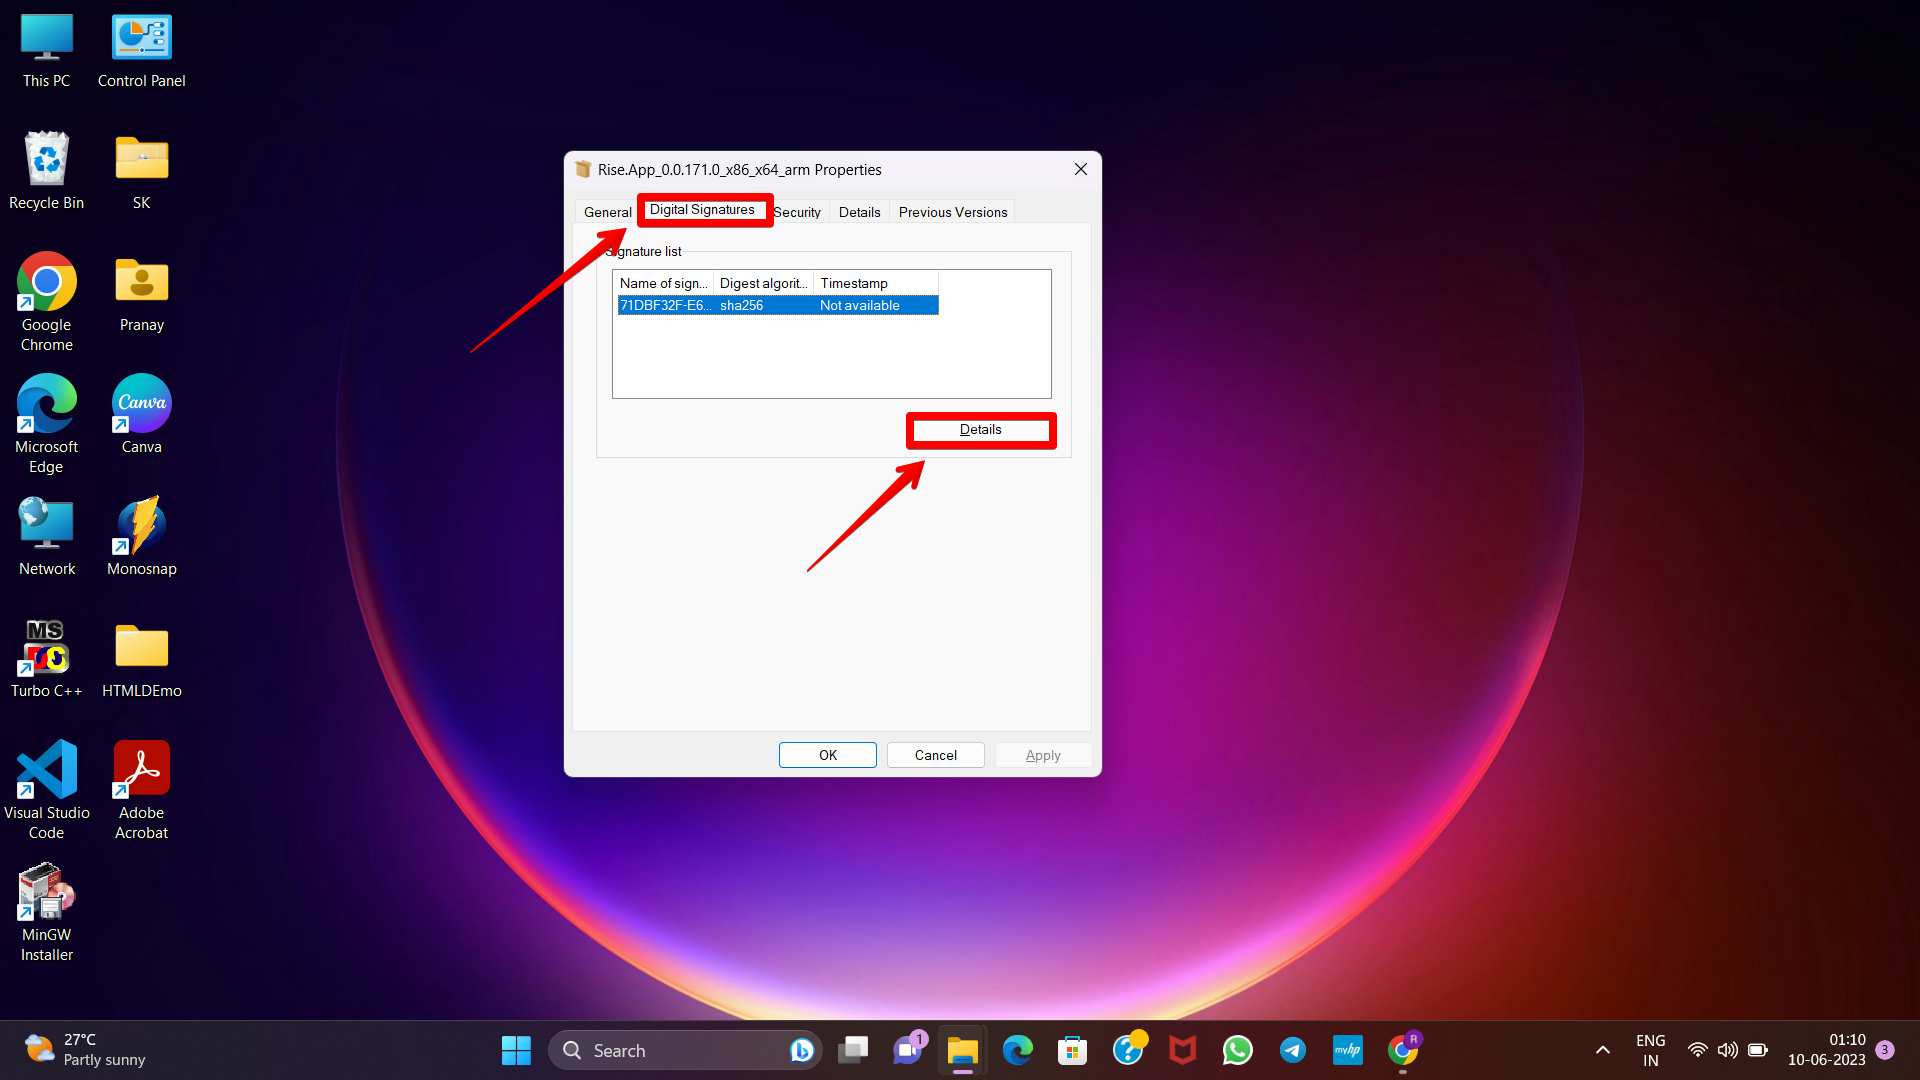
Step 2
After that navigate to the “Digital Signatures” tab. Then select the option “Details.”
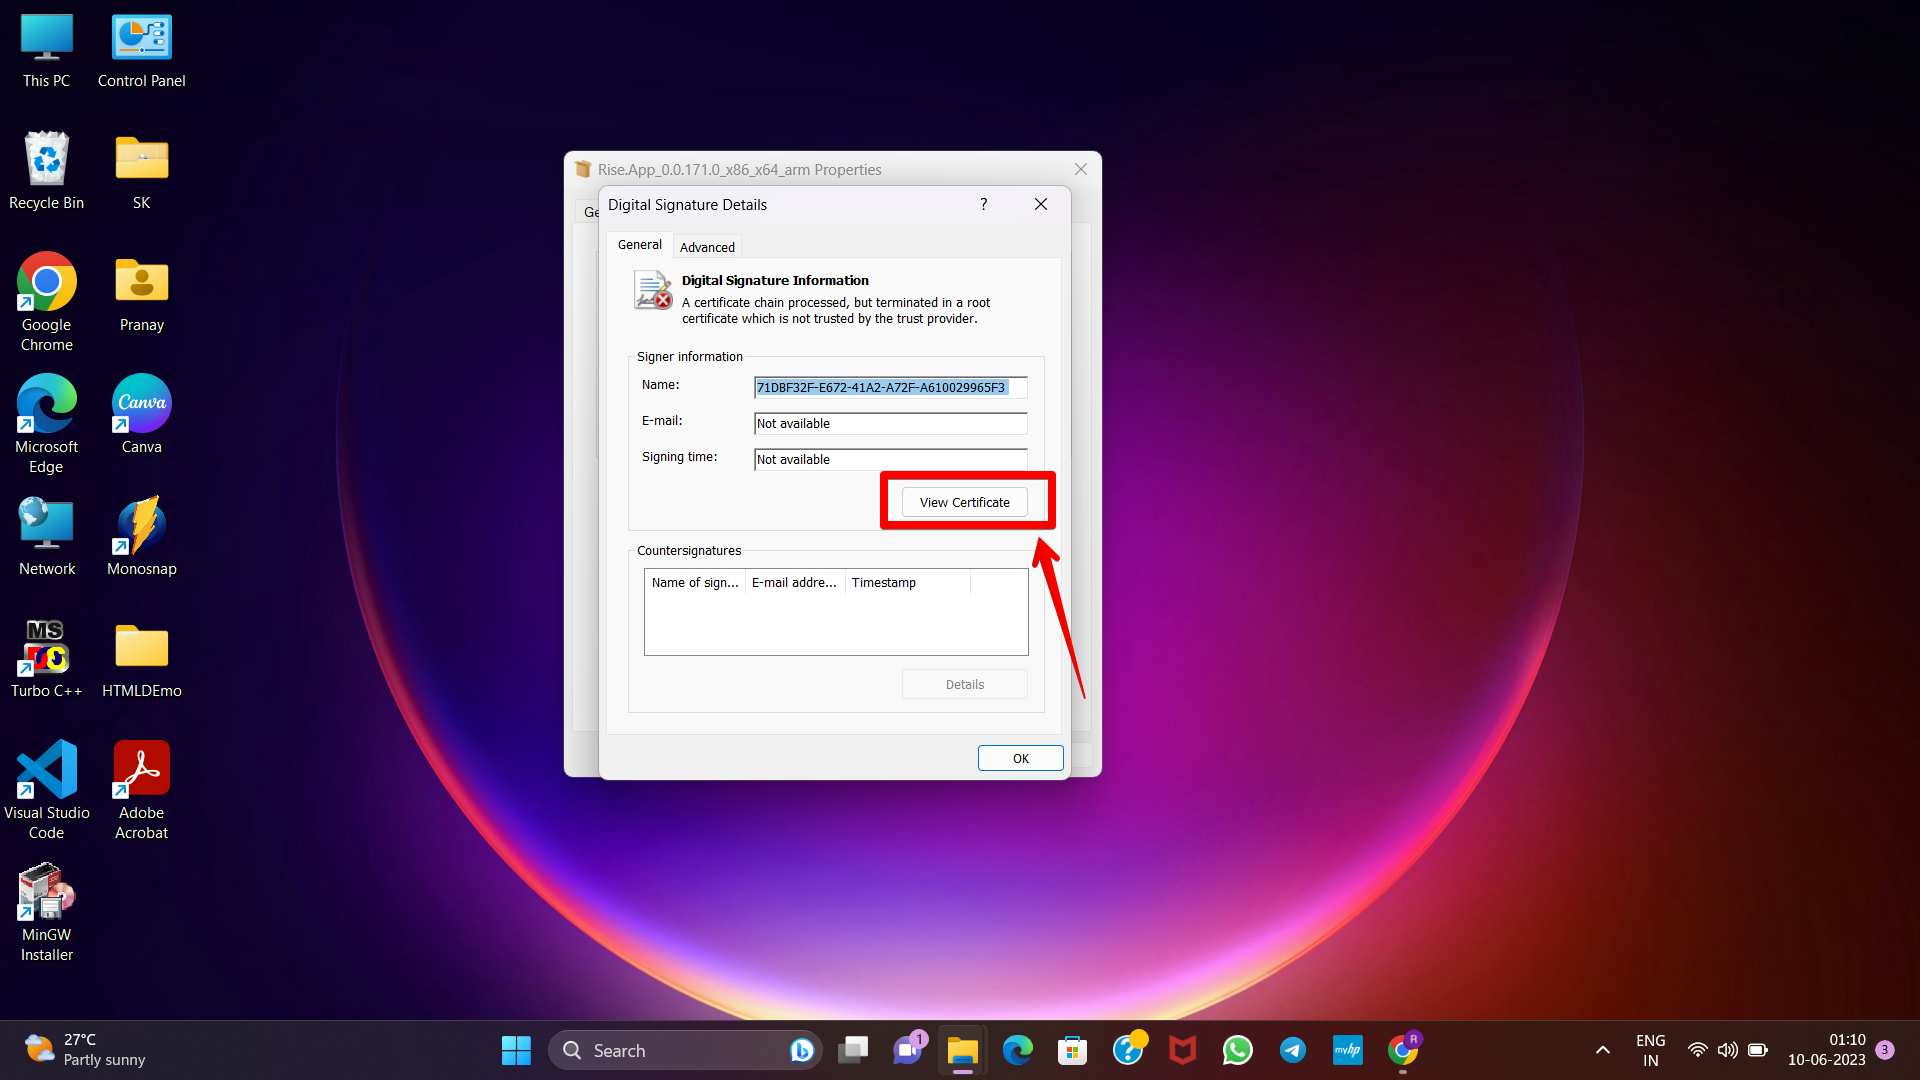
Step 3
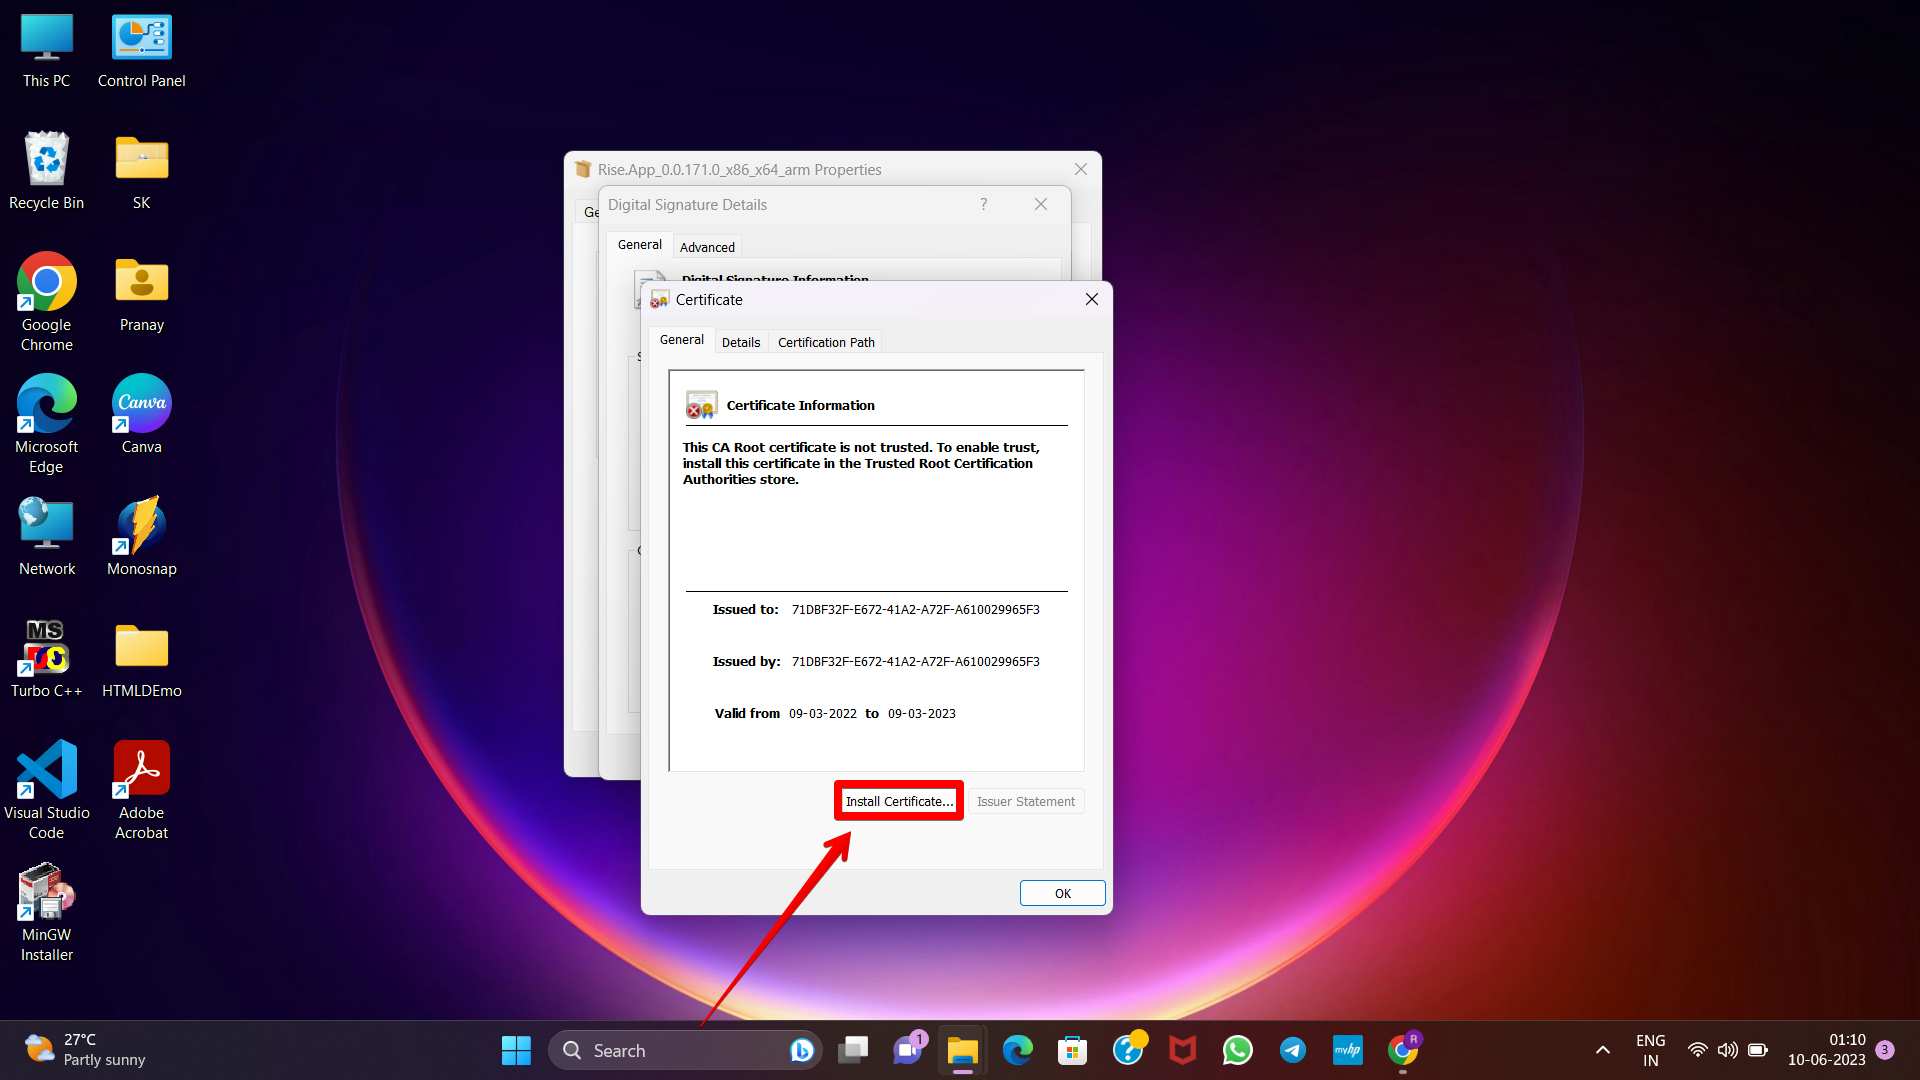
At the Digital Signatures tab, click at “View Certificate.”
Step 4
Click on “Install Certificate” to open the Certificate Import Wizard.
Step 5
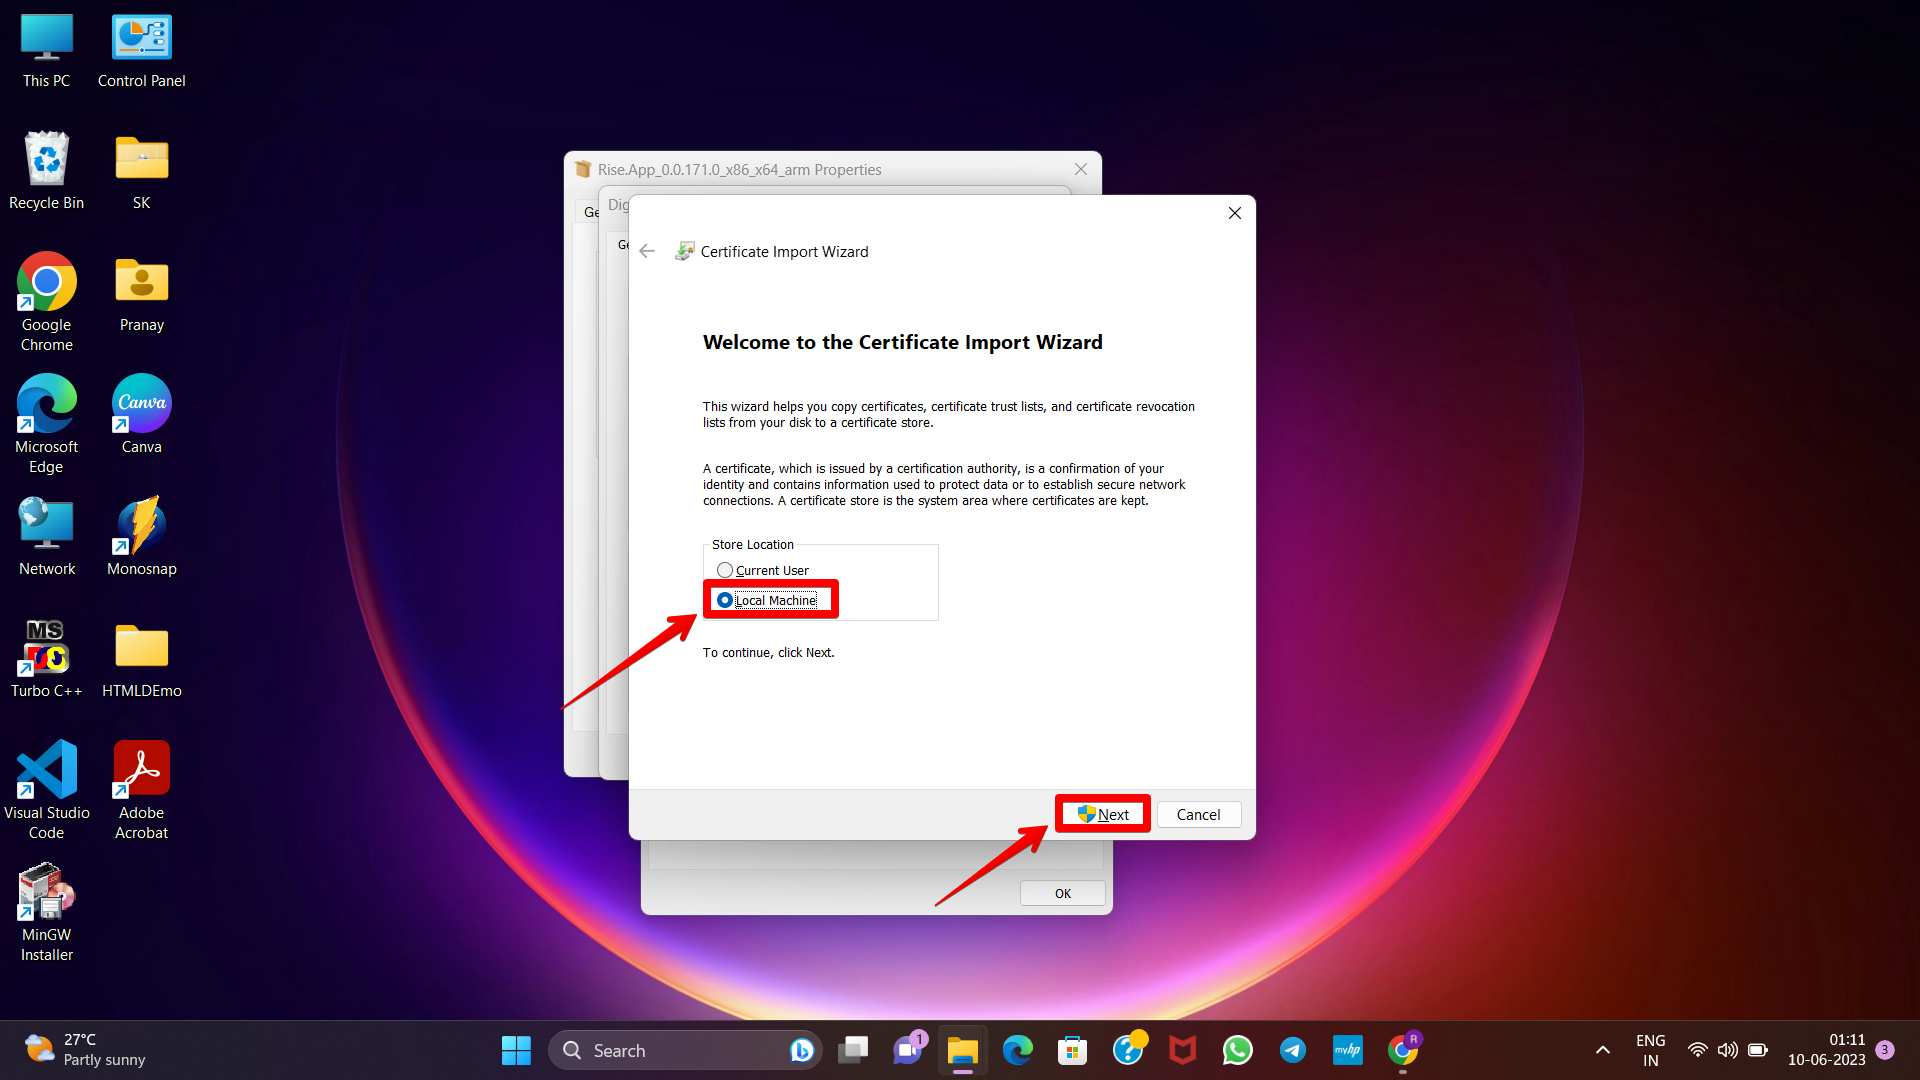
Within the Certificate Import Wizard, choose the option “Local Machine” and proceed by clicking the “Next” button.
Step 6
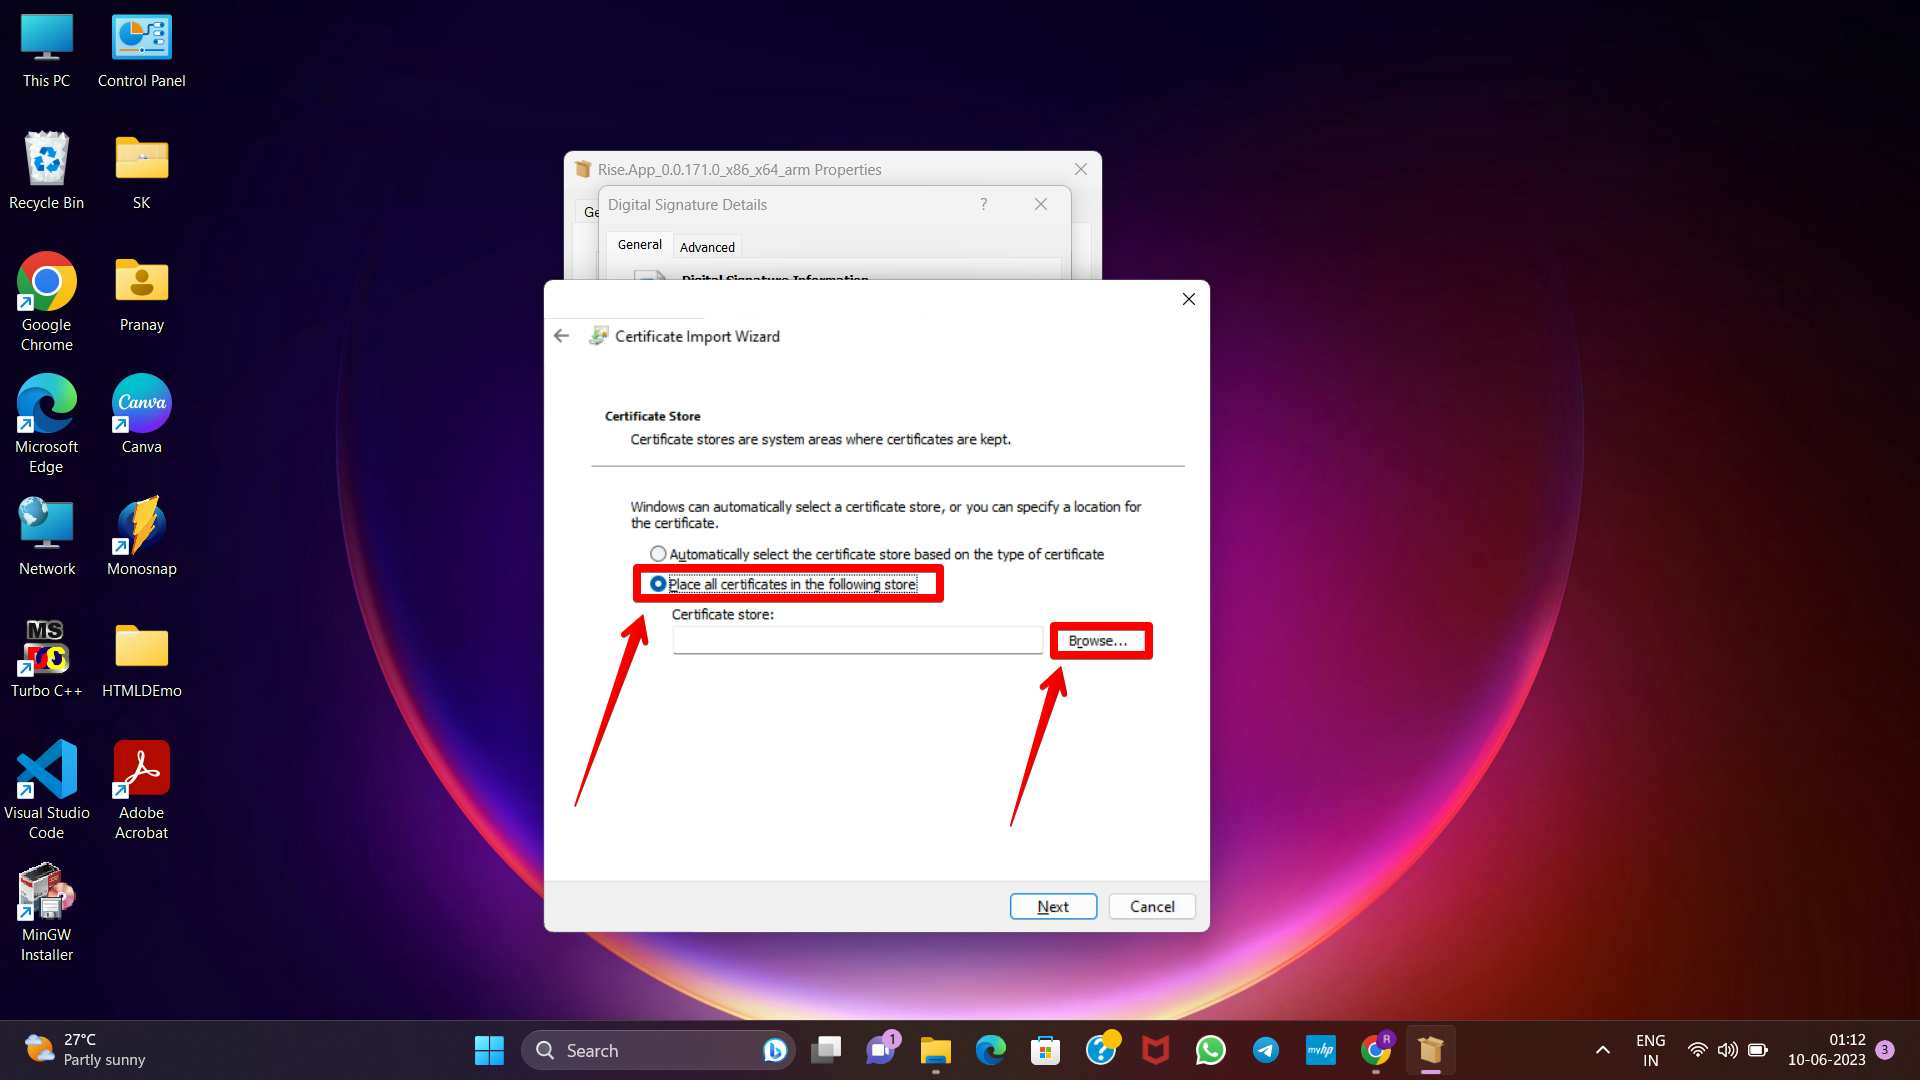
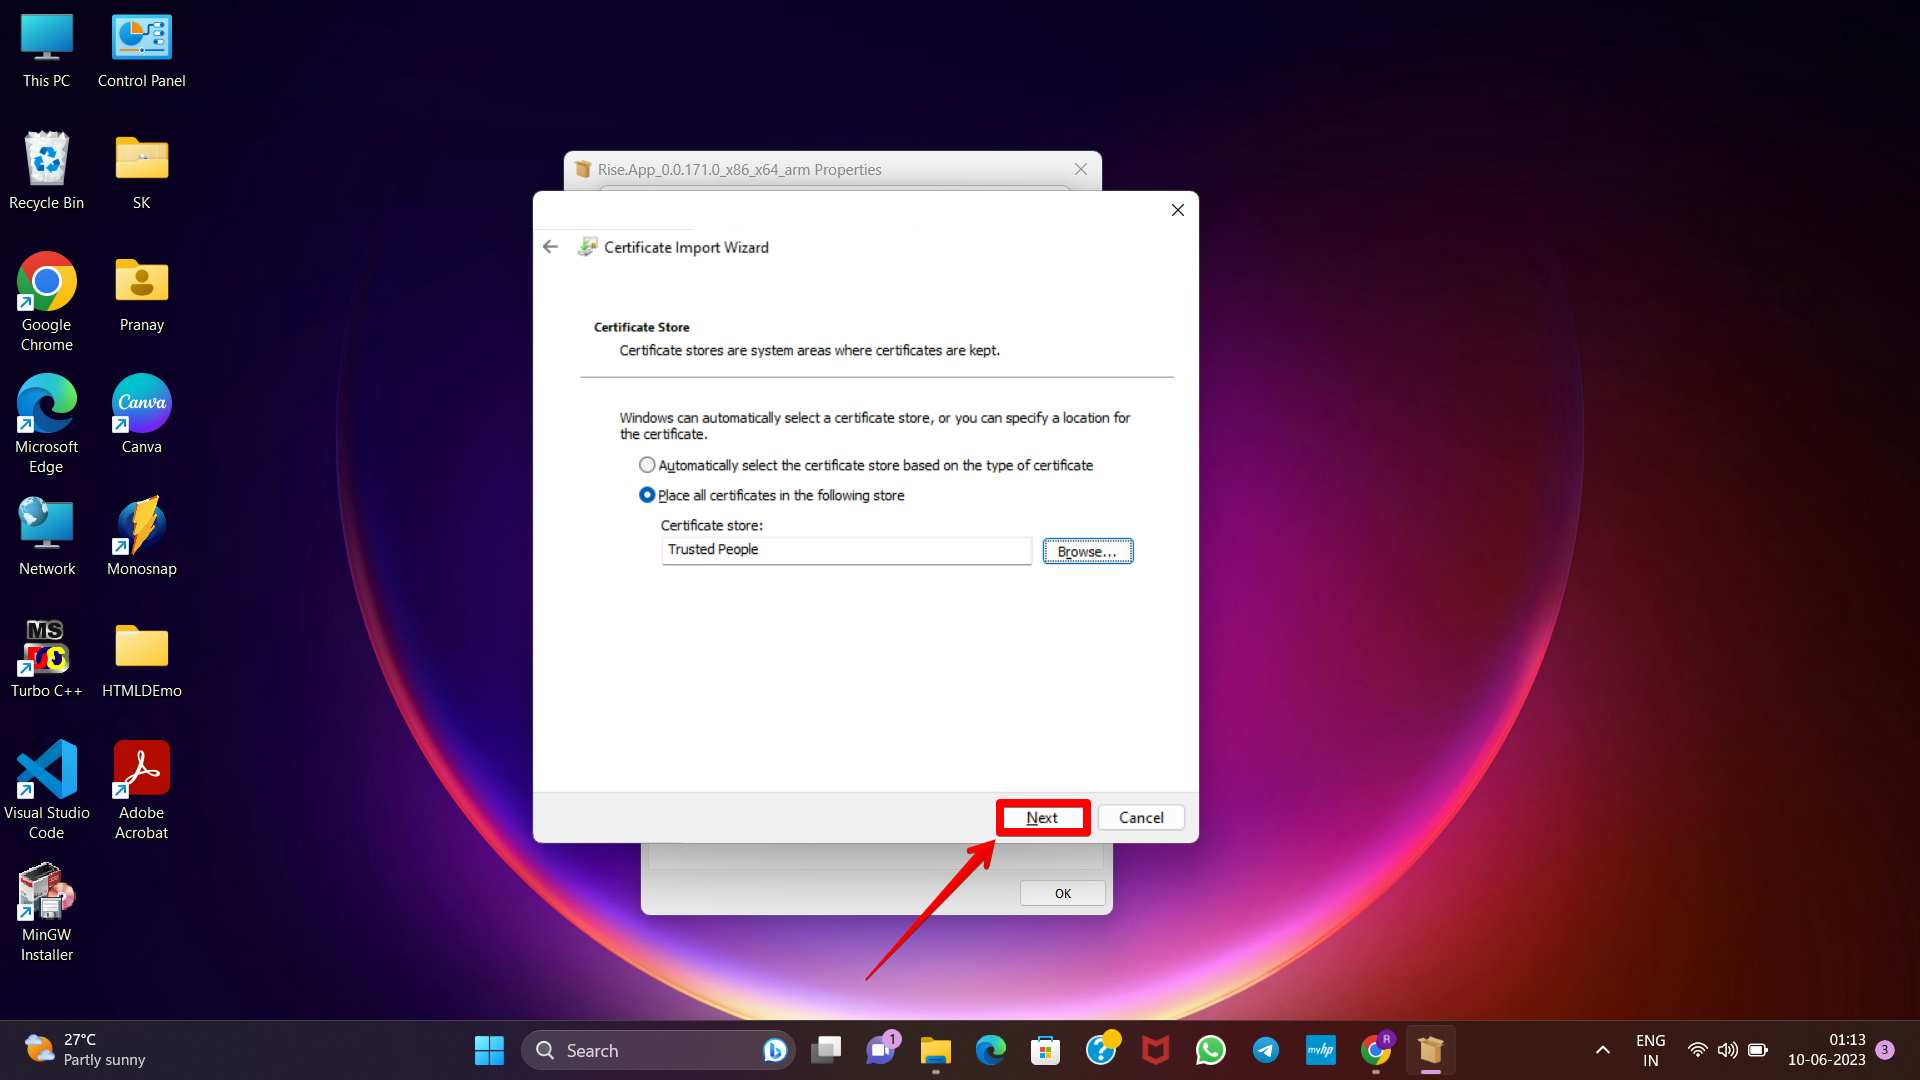
Choose the “Place all certificates in the following store” option. After that click on “Browse” subsequently.
Step 7
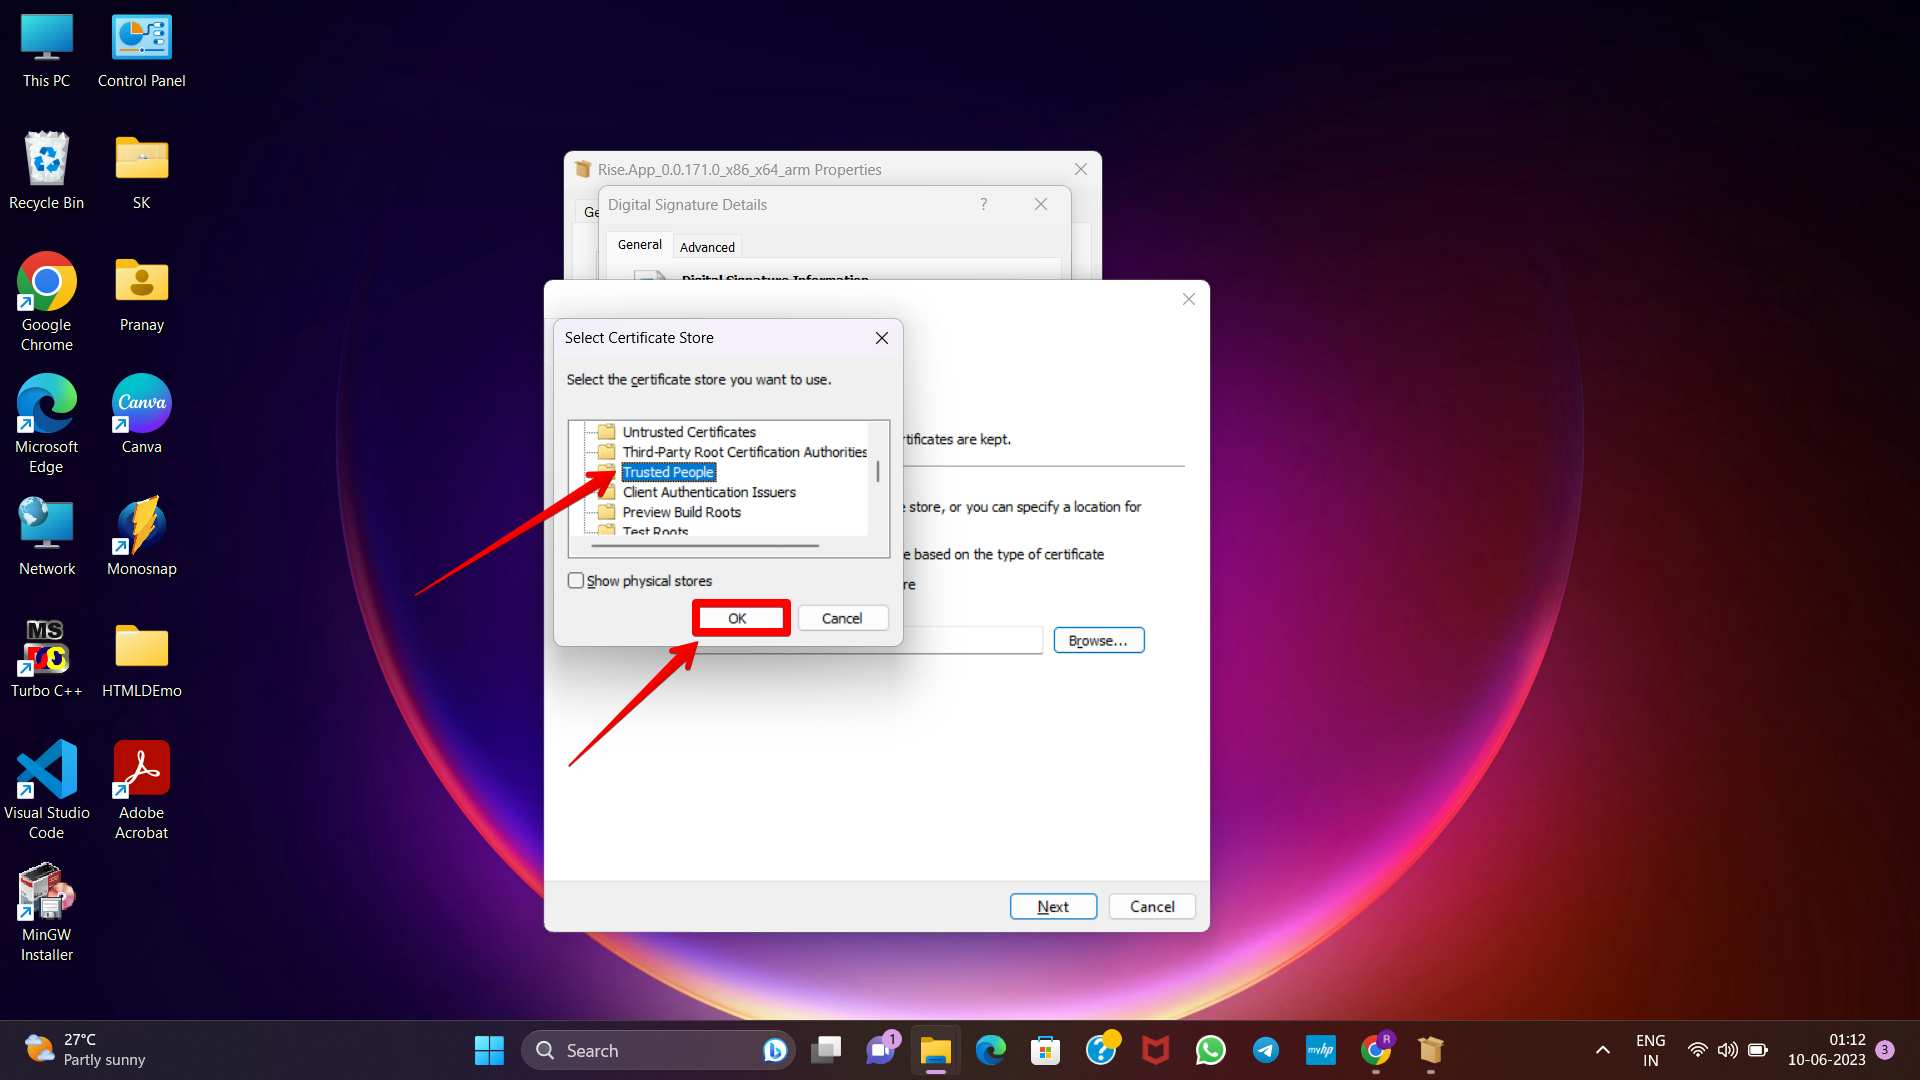
Other windows will appear. Scroll down to select “Trusted People.” Click the “OK” button.
Step 8
Click on the “Next” to proceed. Now click on “Finish” to complete installation of the certificate.

Step 9
Close all the open windows.
Step 10
Double-click on the MSIX/MSIXBUNDLE package, and it should allow you to install the app without encountering the “Publisher Could Not Be Verified” error.
Technique 2: Fix “Publisher Certificate Could Not Be Verified” Error on Windows 11 with PowerShell
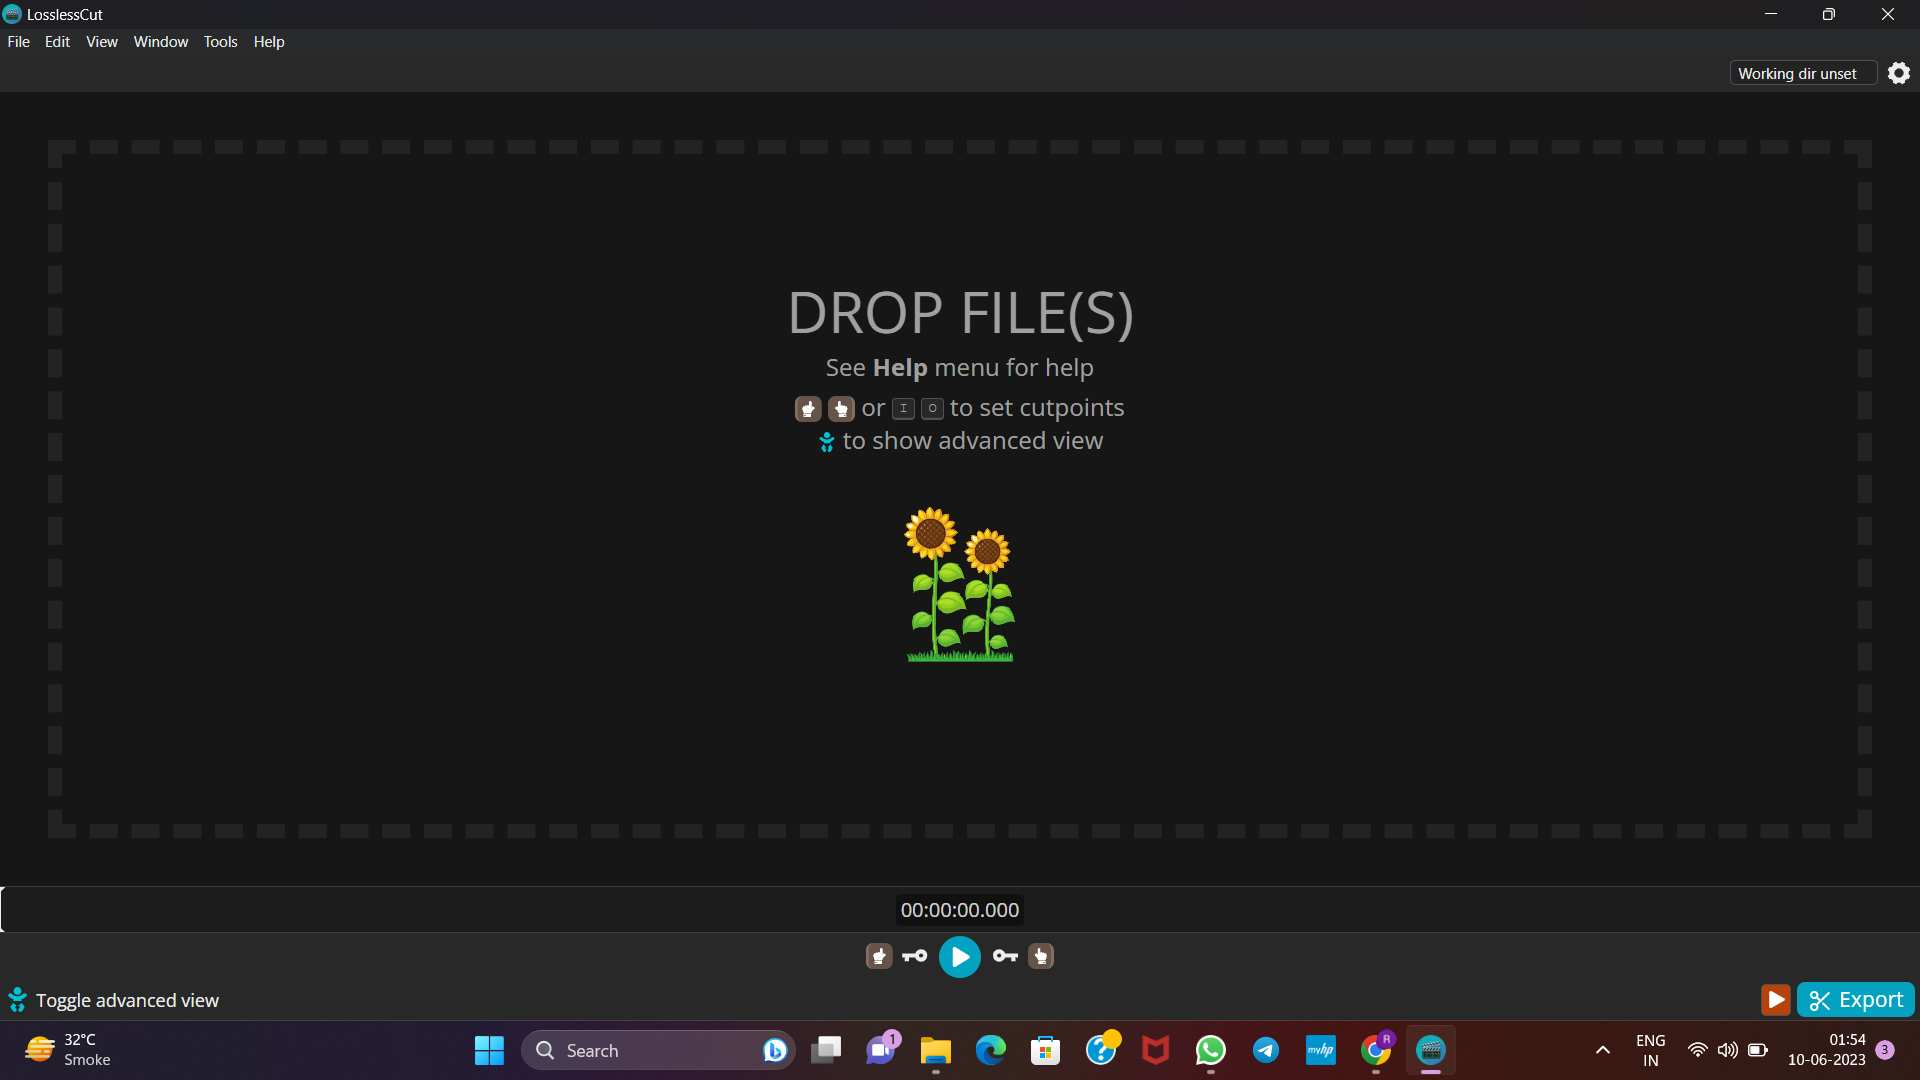
If the “Digital Signatures” tab is not visible in the properties window, as mentioned in the previous fix, you can use this method to install the application. This situation typically occurs when the developer still needs to include the necessary certificates with the app. This guide’ll show you how to achieve everything using Lossless Cut, an audio/video editor without a Digital Signature. The instructions below will let you manually install the software despite the “Publisher certificate could not be verified” problem.
Step 1
Click at APPX/APPXBUNDLE package to open “Properties.”

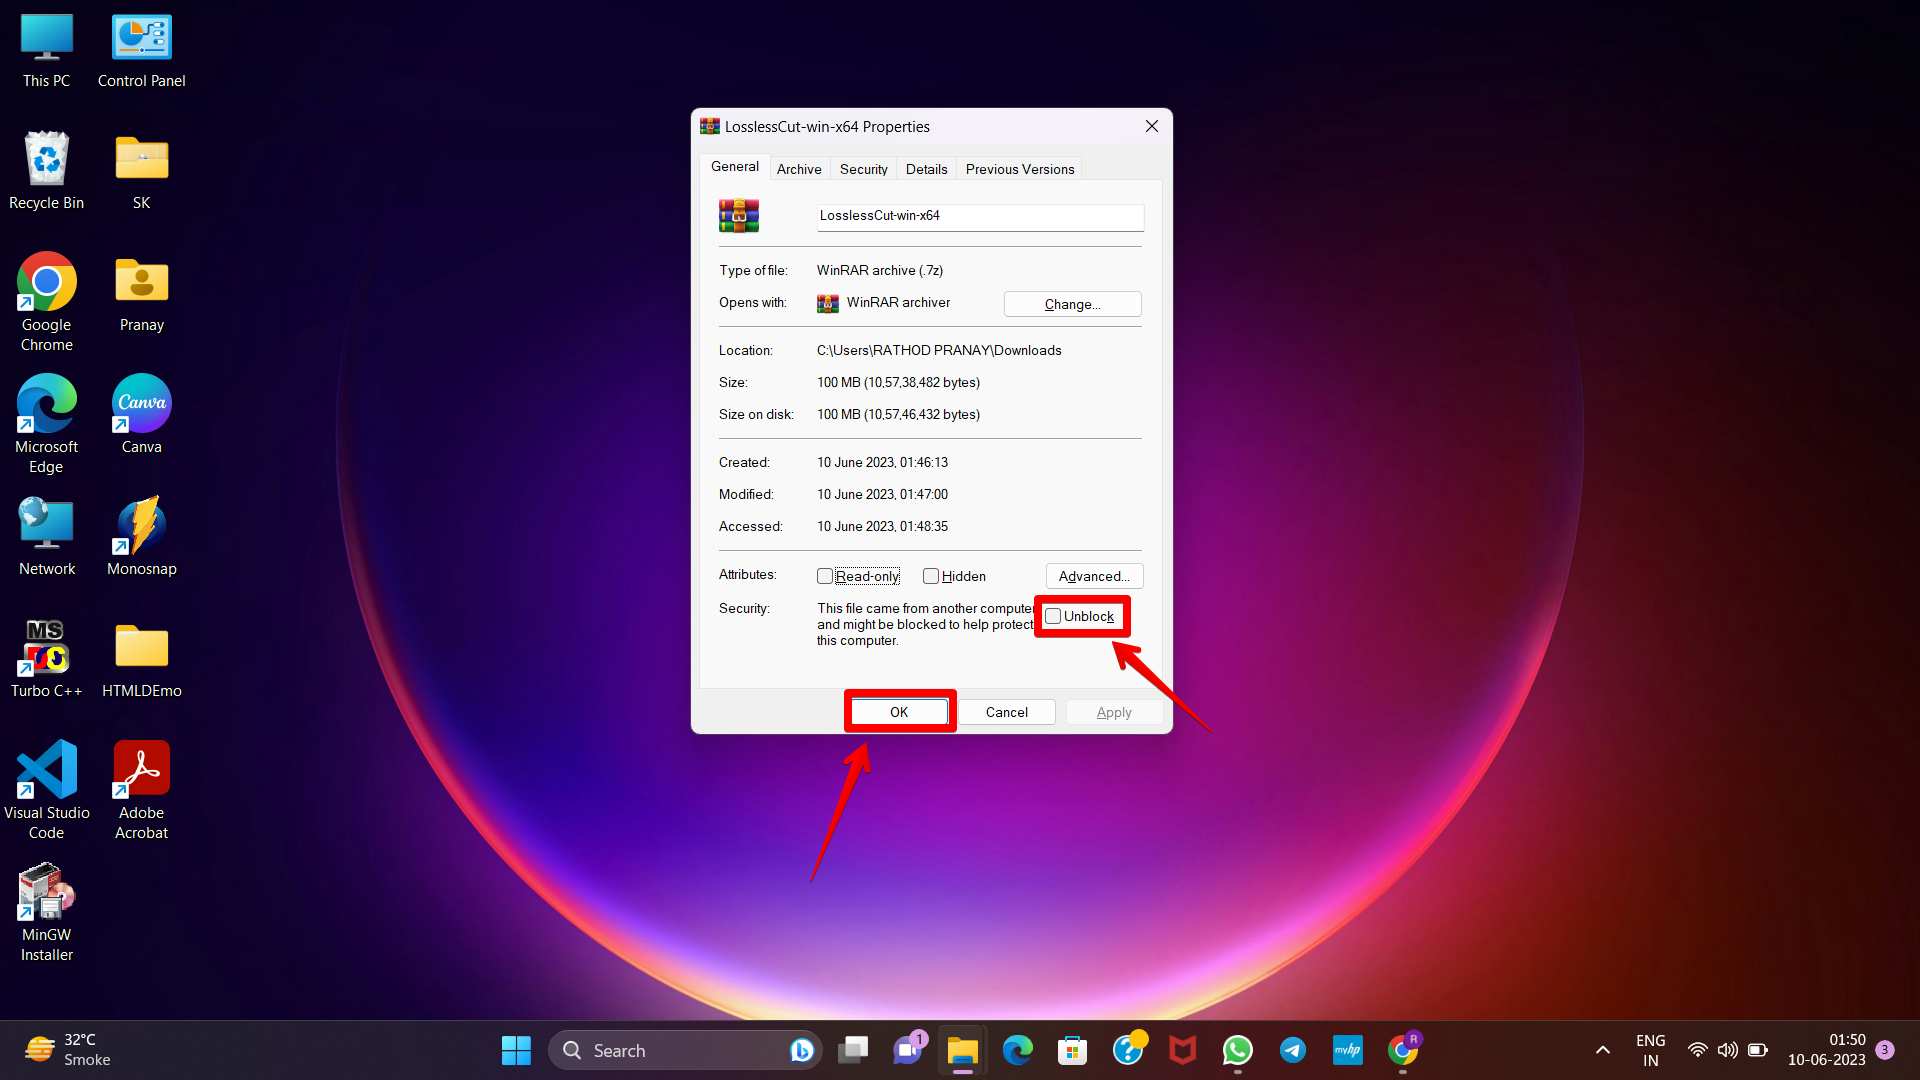
Step 2
To unblock a file, go to the “General” tab in the Properties window and find the “Security” option at the bottom. Check the “Unblock” box and click “OK” to proceed.
Step 3
Double-click the app and try to install it. If you find that the error still persist, proceed to the next step.
Step 4
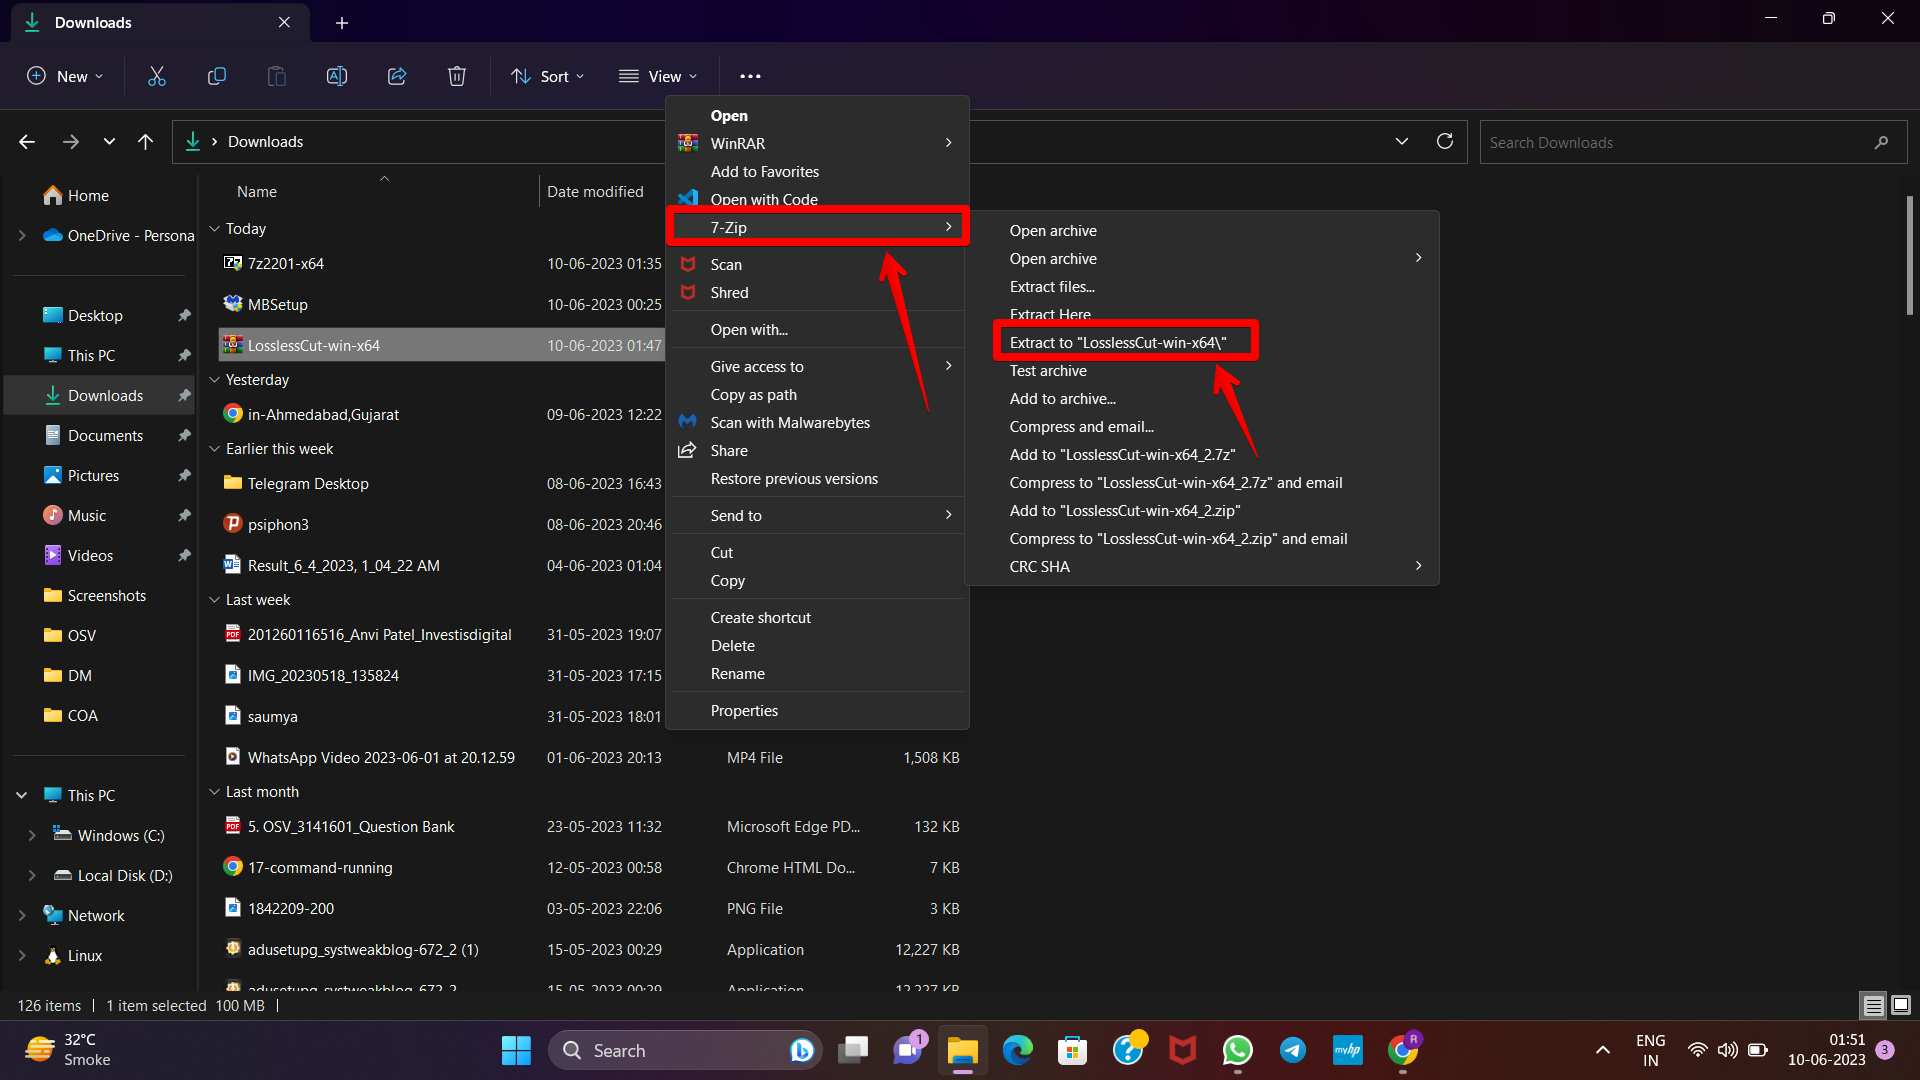
Install 7-Zip from provided link and right-click on MSIX/MSIXBUNDLE package.
Step 5
Now choose “Show more option”. From that navigate to “7-Zip” from the context menu. Select “Extract to folder.”
Step 6
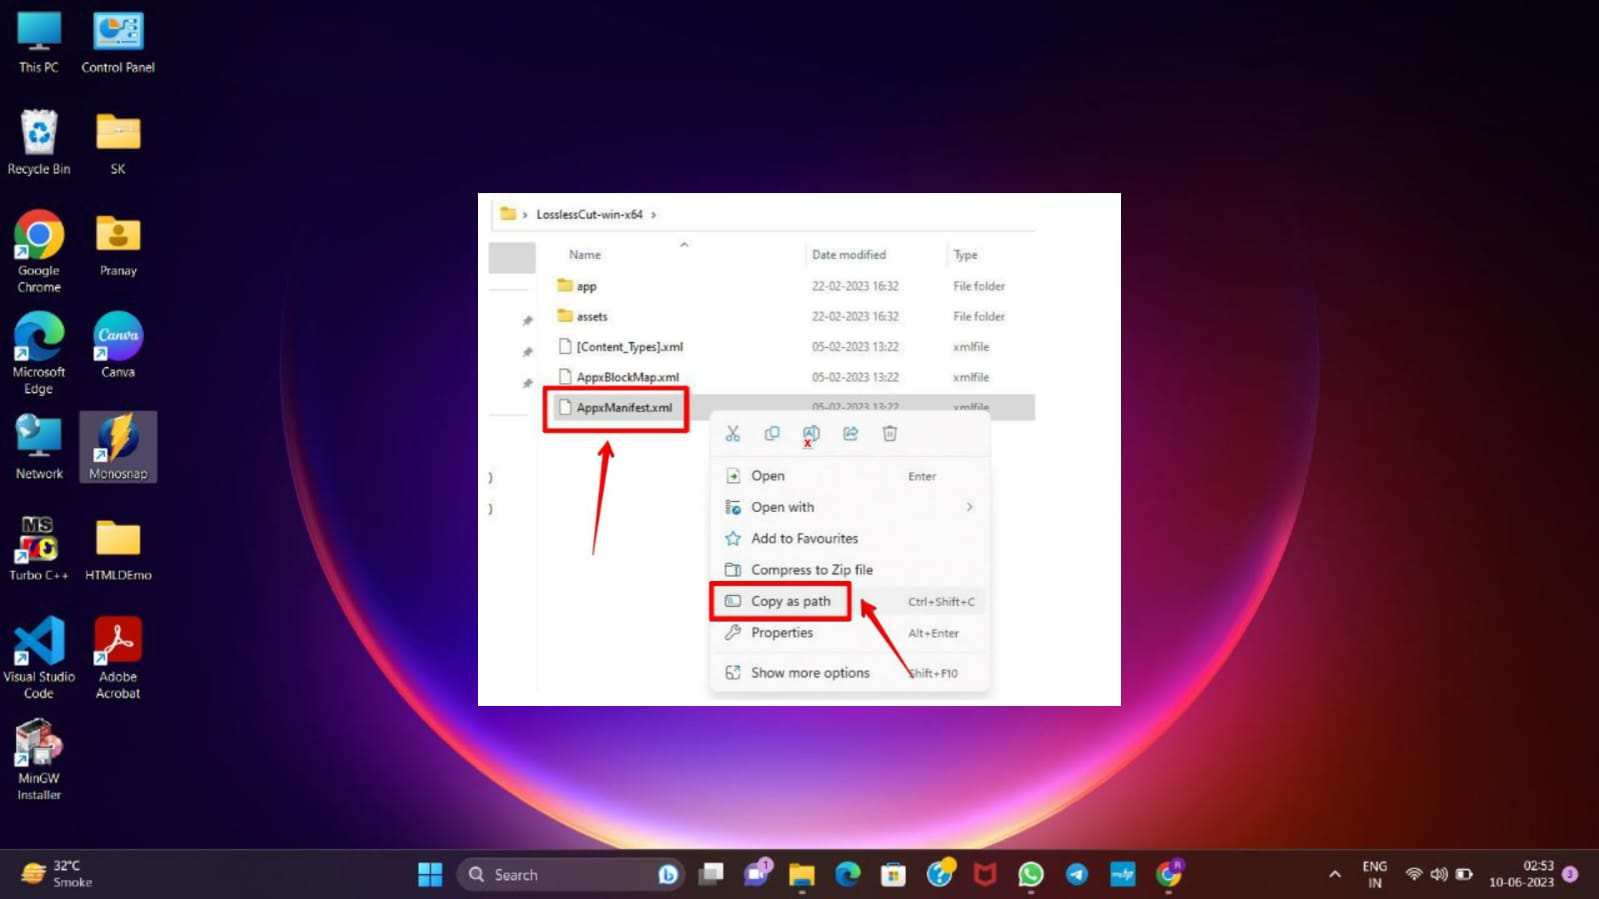
Open the extracted folder and find the “AppxManifest.xml” file.
Step 7
Select the XML file and opt for the “Copy as path” option to copy the file path to the clipboard.
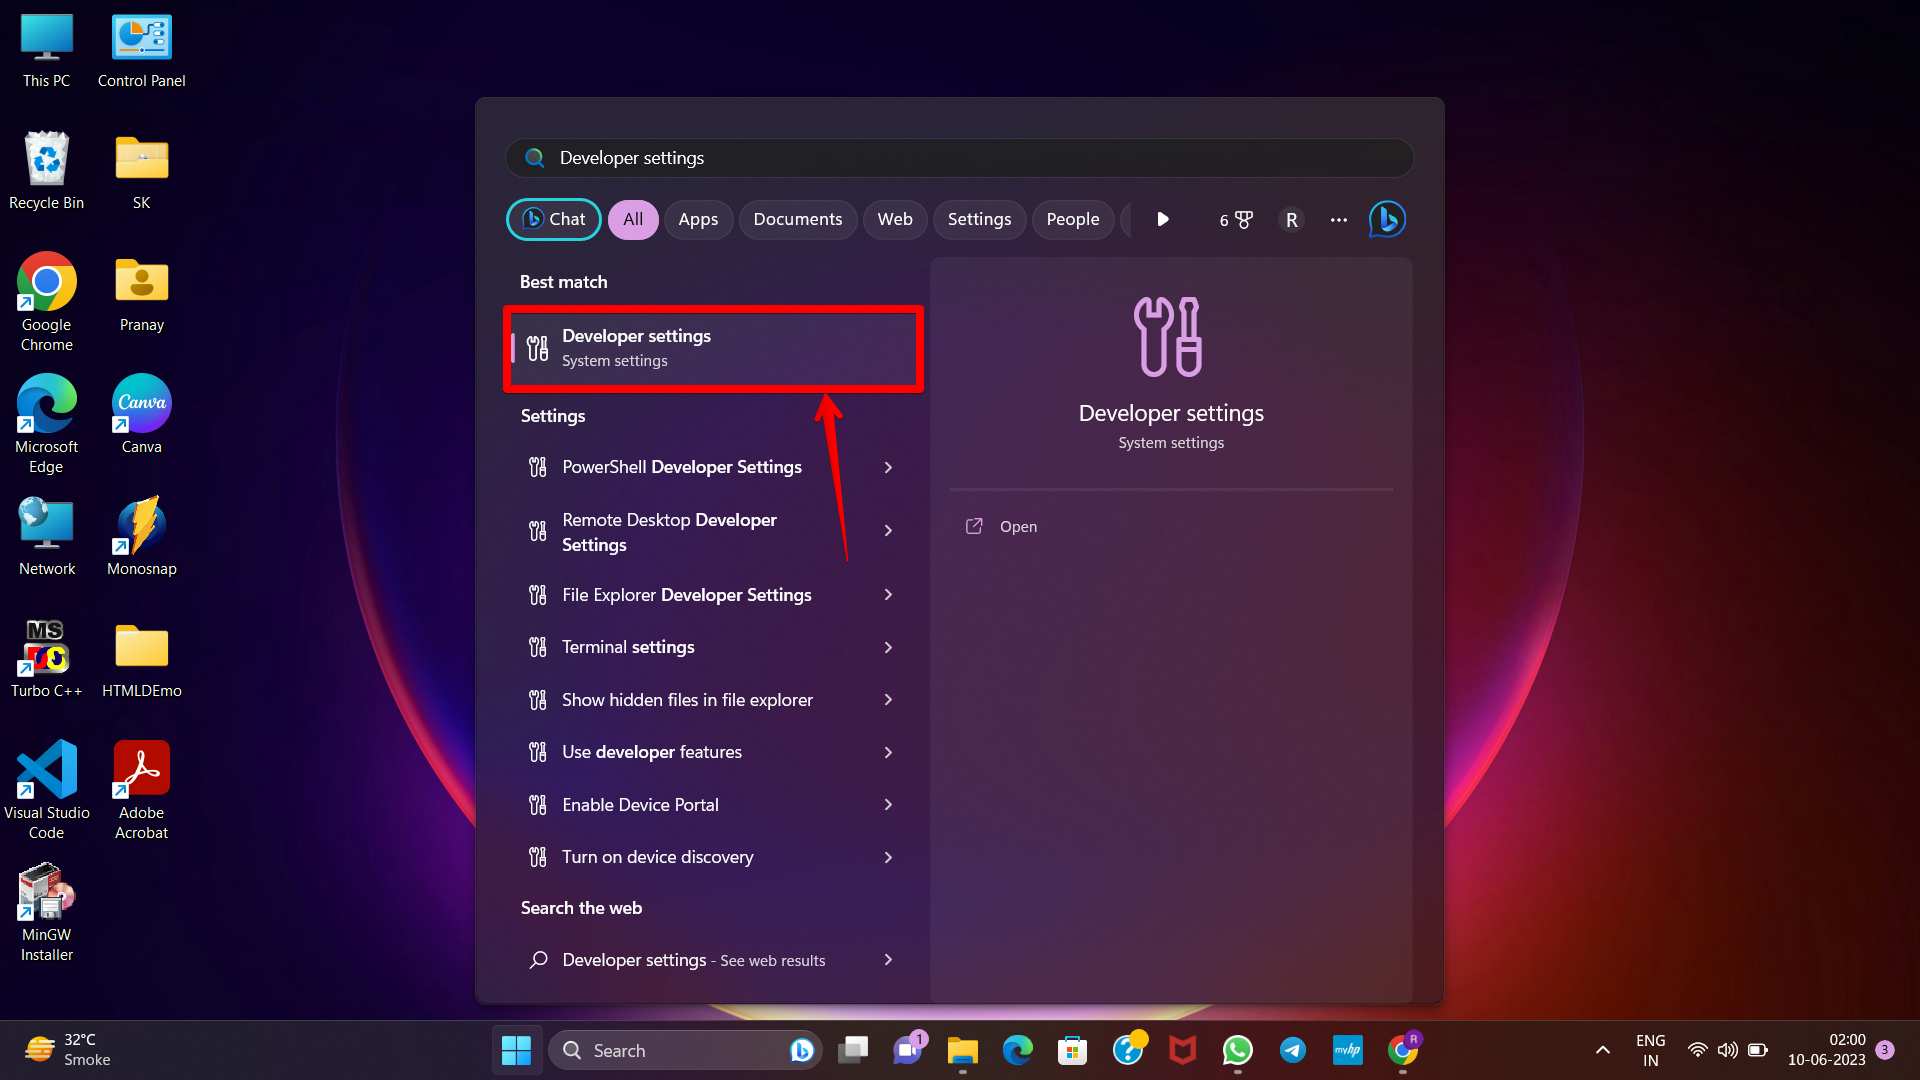
Step 8
To access “Developer settings,” simply press the Windows key and search for “developer.”
Step 9
Enable toggle next at “Developer Mode” in Developer settings.

Step 10
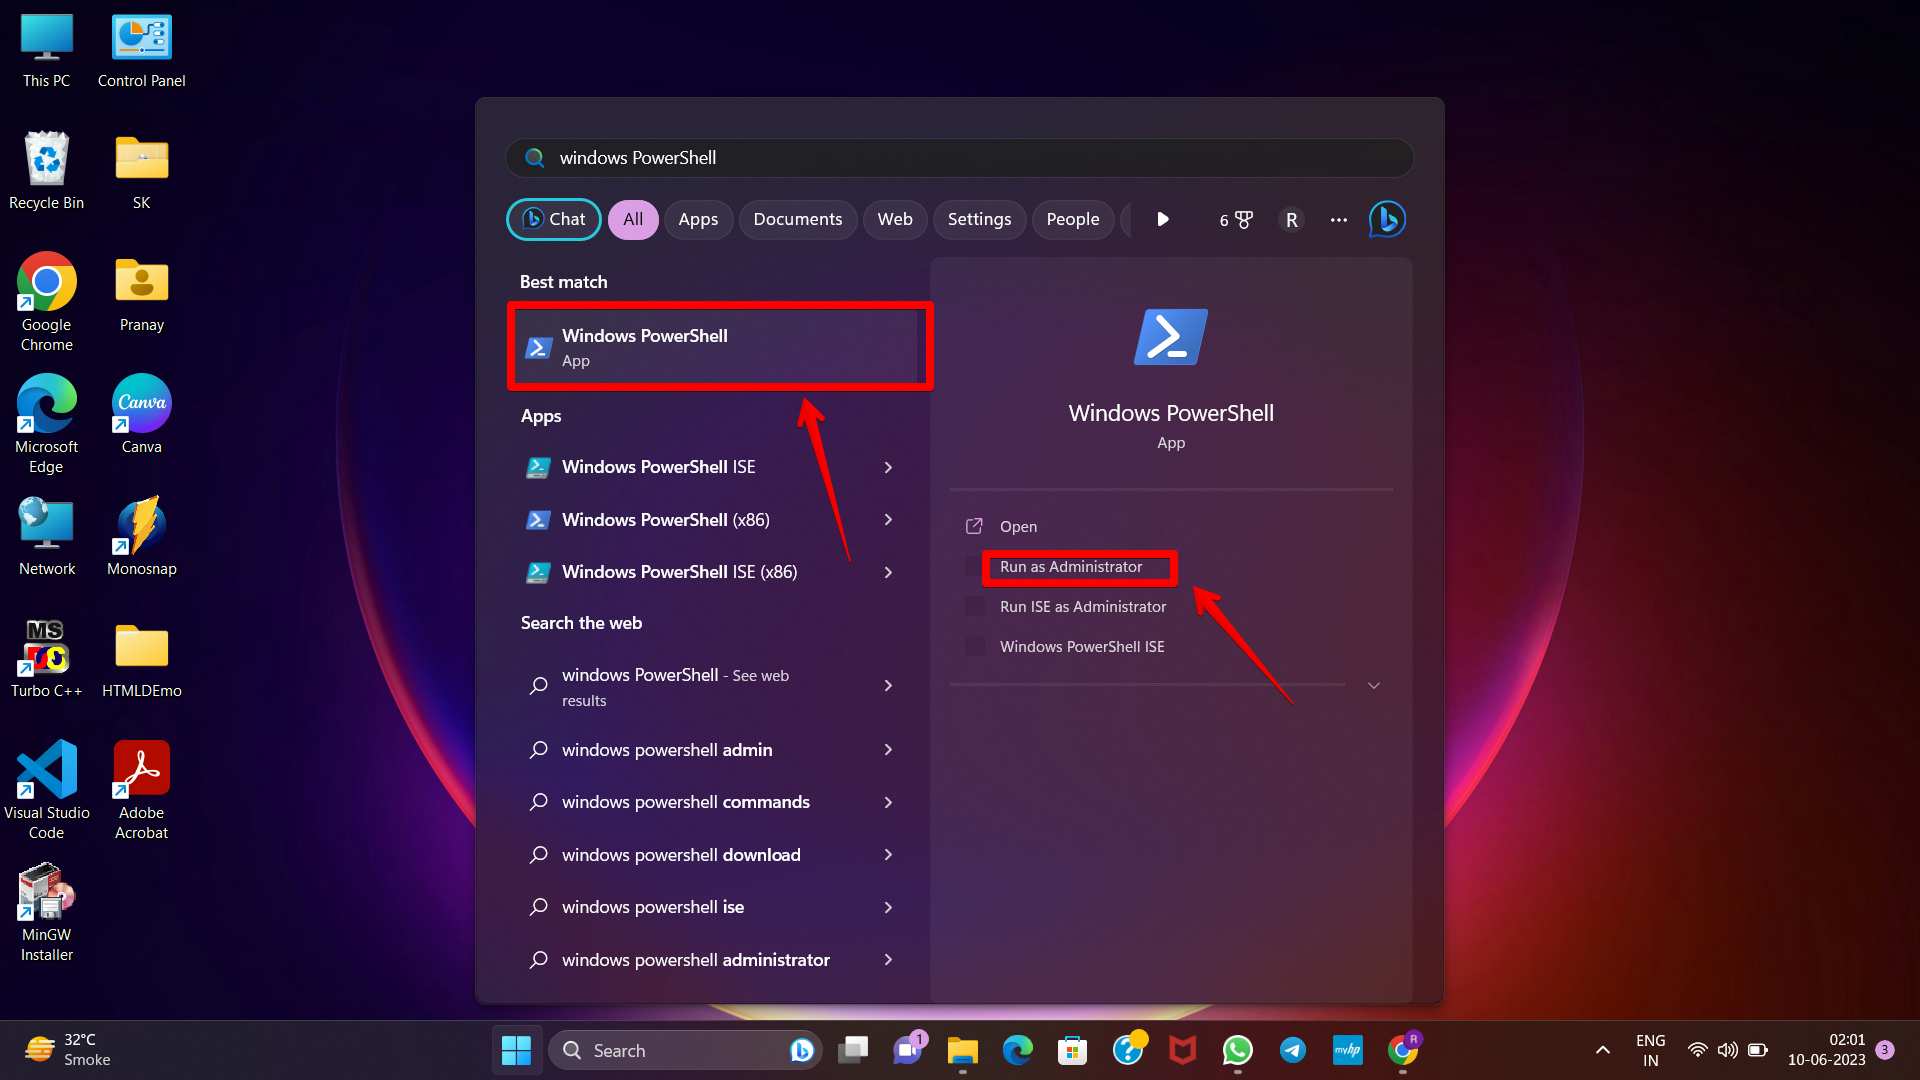
Click on the Windows key and enter “PowerShell.” Simply choose “PowerShell” and then “Run as Administrator.”
Step 11
At PowerShell window, enter following command, replacing “filepath” with copied path of XML file: Add-AppxPackage -Register filepath
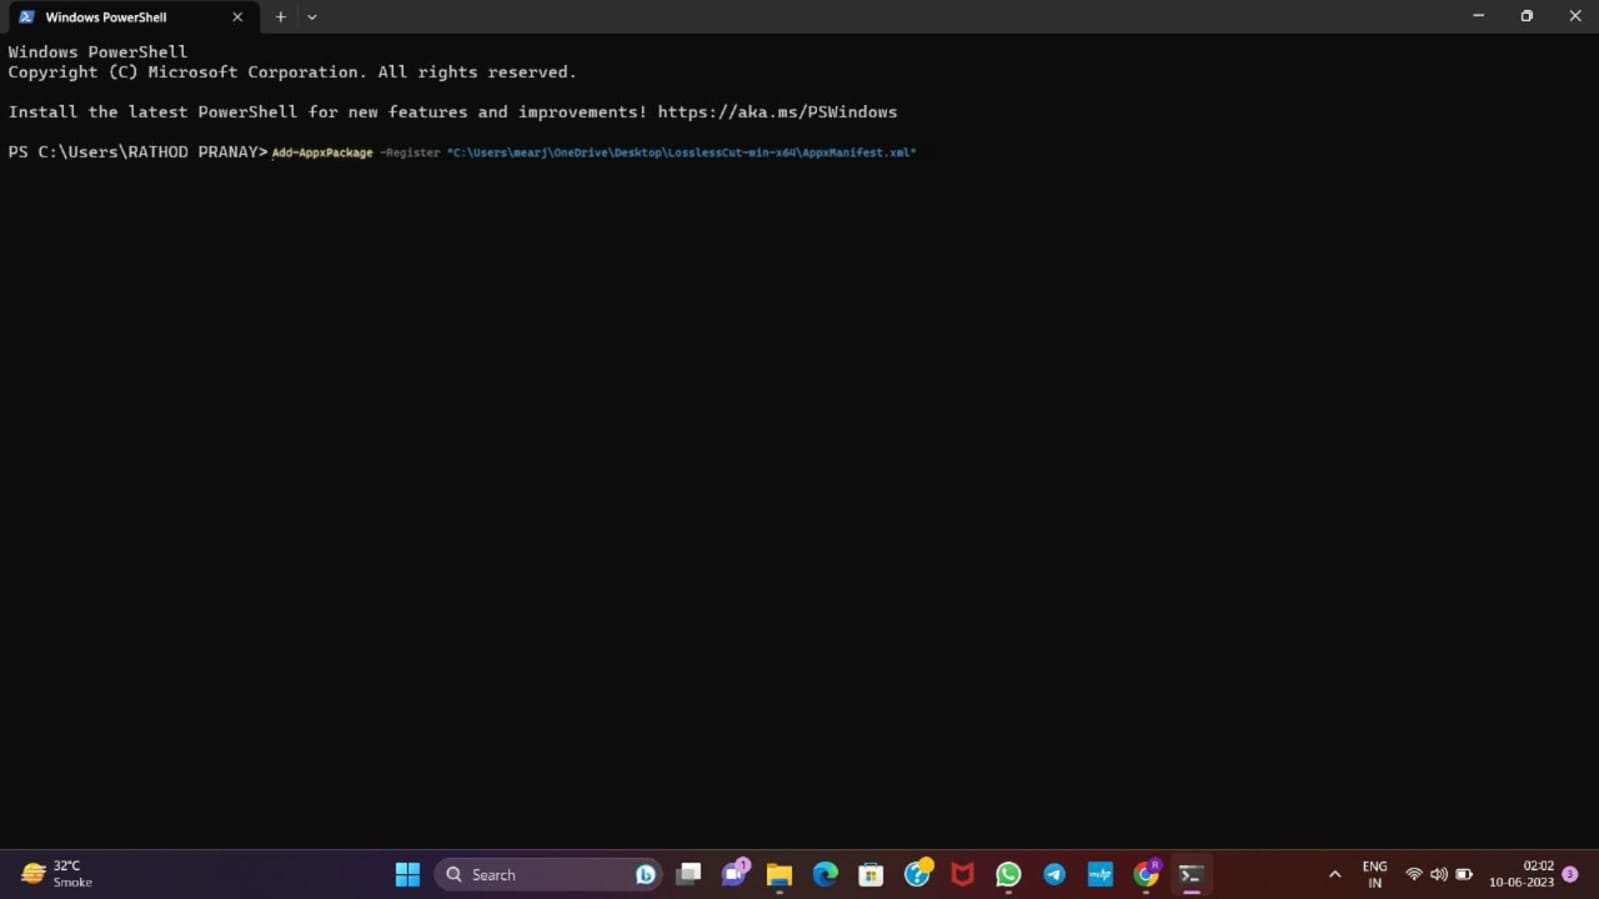
Step 12
Press Enter, and the app will be installed on your PC without encountering the “Publisher Could Not Be Verified” error.
Conclusion
The “Publisher Could Not Be Verified” error on Windows 11 can be an obstacle when running or installing certain programs. You may fix this problem once and for all by using the techniques described in this article. Whether it’s unblocking the file, adding a trusted publisher, modifying Group Policy settings, adjusting registry values, or utilizing Windows PowerShell, there are several approaches to resolve the issue. By following these steps, you can enhance the usability and security of your Windows 11 operating system, ensuring a smooth and hassle-free experience.