![]()
Microsoft Office is crucial when you work on the PC. Amongst various MS tools, MS Word is highly used by the writer, bloggers, web designers and other computer users. MS Word is very effective and useful tool which allows you to create a Word document, you can insert images, graphs etc. quickly and can send the .doc document easily. If you have found that your work is not saved and you have lost the file, here we will show you to recover lost Word document files easily.
There comes a time when you forgot to save the document. There could be plenty of reasons why your Word file or document is not saved there. Finding out the lost Word document files on a Mac system is quite different compared to the Windows 10 systems. If you have been working on a Mac system, then following guidelines will help you out to get the lost word documents from the Mac system easily.
Method 1: Recover from Mac Terminal
Mac OS system saves your files in a temporary files folder. It is also known as TMP folder. So what you need to do is, check inside this folder and see if the Word document which you are looking for is there or not. If you find the file, you can right click on to it and can find out the exact location of the file. From the same folder, you can recover this file.
Step 1:
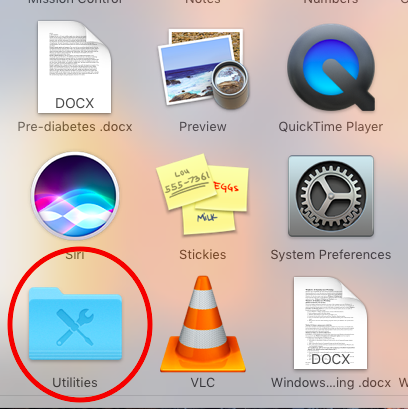
Go to the Dock and click on to the Applications folder.

Step 2:
From the Applications, you need to click on to the Utilities option.
Step 3:
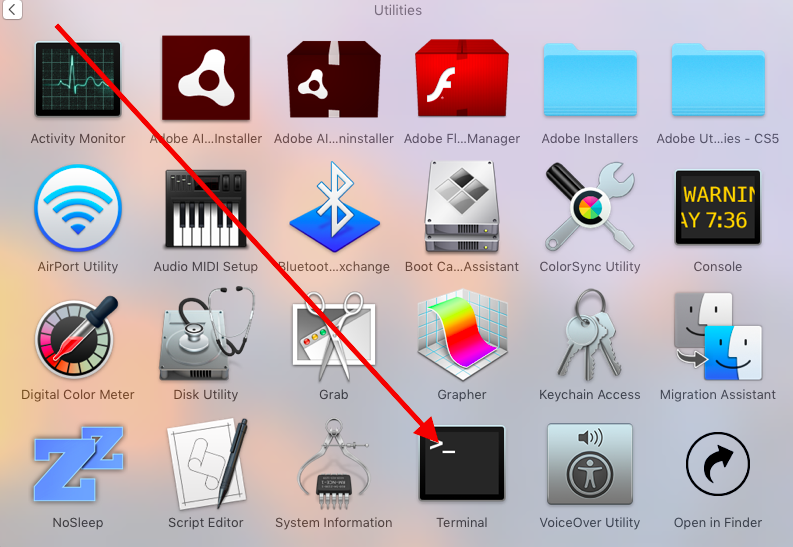
From here, you need to select Terminal option.
Step 4:
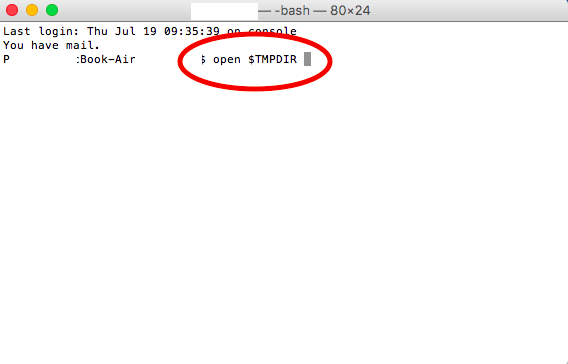
Once the Terminal Window is launched, you need to enter the following command there.
open $TMPDIR
Step 5:
Once you entered this Command, the TMP folder will be launched.

Step 6:
From here, you need to open the folder named “Temporary Items”
Step 7:
A folder will show you all the temporarily saved files. You can search for the Word Document which you are looking for from this folder.
Method 2: Recover Word Document from Word App on Mac
Step 1:
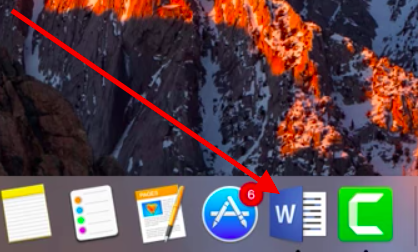
Go to the Dock of your Mac system and launch MS Word application by clicking on to the icon.
Step 2:
Once the Word app launched, go to the main menu and hover over the cursor to Word.
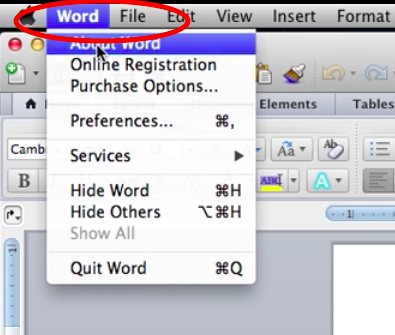
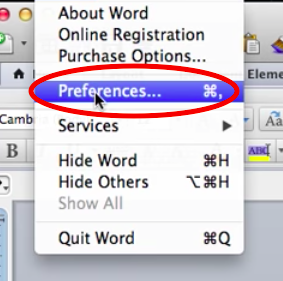
Step 3:
A new menu will be presented from which you need to select Preferences option.
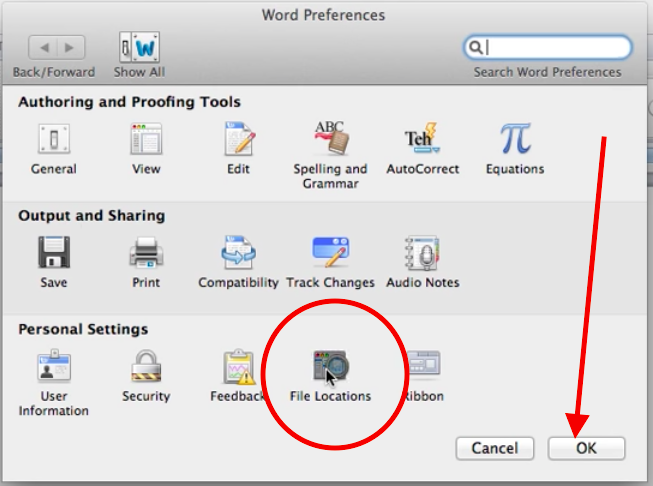
Step 4:
Word Preferences folder will be presented on your screen. Under the Personal Settings option, select the File Locations folder and then click the Ok button.
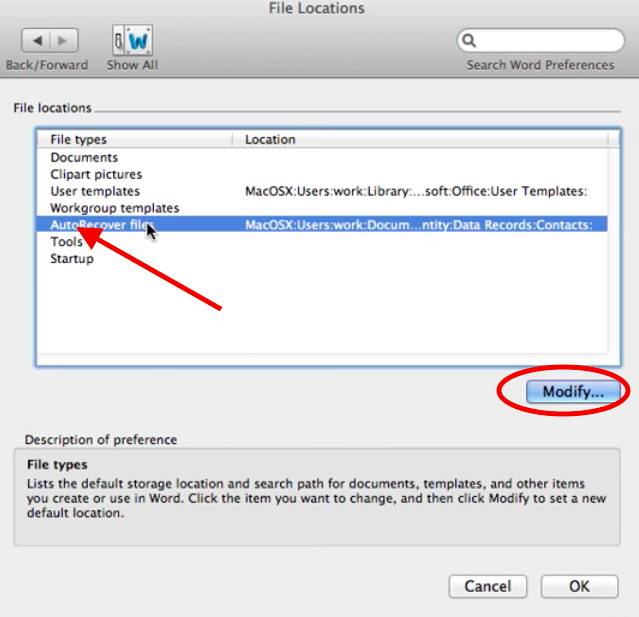
Step 5:
In the File Locations page, you could see a number of options. From here, you need to select AutoRecoverFiles option. Click the Modify button given below the page.
Step 6:
The next page will show you some folders which are already available. You need to create a new folder by clicking on to the New Folder button.
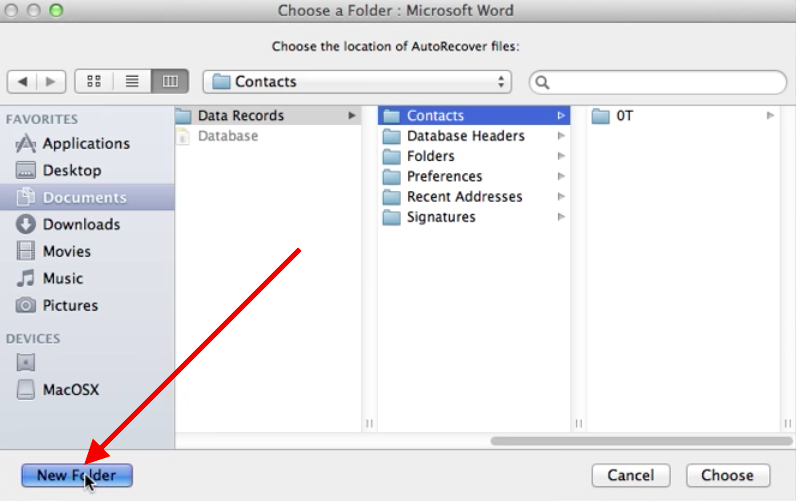
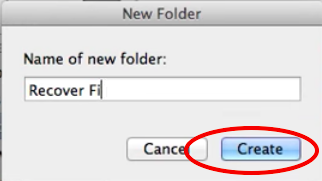
Step 7:
You would be asked to enter the name of the folder. Kind enter the name of the folder and click on Create button.
Step 8:
A new Recovery Folder will be created on the system and you could see it in the section of the same page.
Step 9:
Select the Recover Files folder and click on to the Choose button.
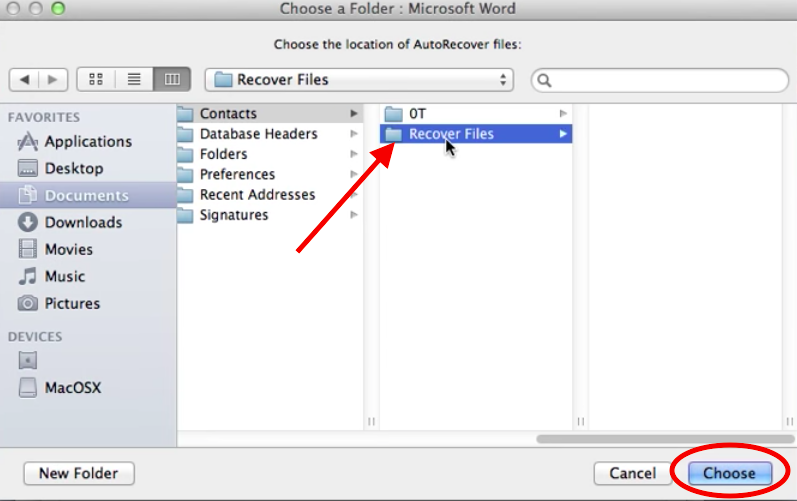
The system will look for modified files and this folder will show you all the files which were not saved. You could easily get the lost Word file from this folder, if you are working on a Mac system.
This is how you can simply get the lost Word documents on a Mac system. There are plenty of other ways available to recover lost files from the system. Moreover, plenty of Recovery tools are also available in the market to restore and get lost files from the system. If the above methods don’t work for you, you can go for the Recovery tools which can recover the lost or deleted files from the Mac system easily. You can get your lost Word Files quickly using the suitable recovery tool.