 In recent times Microsoft launched brand new operating system knows as Windows 10. And it was expected that the new OS would carry with plenty of exploit advancements beyond its predecessors. But that’s not happened. After Microsoft’s all hard works, their latest Windows OS may fail to delight its user’s expectations.
The big apps not only reason behind this but also incorrectly configured settings, etc. If you are thinking to downgrade your Windows OS then just stop! For those who are having a problem with Microsoft’s latest OS.
Today I am going to share with you top 10 tips and tricks to maximize the performance of your Windows 10. These ten tips and tricks will assist you to dispose of sluggish performance and enhance the responsiveness of your system. So, without any further delay let’s go:
1. Avoid Resource-hogging Software
Numerous software utilize too much system resources. That’s why some apps become laggy and in the end and ruin the system’s overall performance. This is the reason why you should uninstall such apps or software that eats too much system resources.
If possible, you can use their lighter replacements. For example, Google Chrome consumes more memory than Mozilla Firefox; Adobe Acrobat Reader utilities more resources than Foxit Reader; Windows Media Player takes extra memory than VLC Media Player. So now I think you have an idea on which ones to use.
2. Minimize Browser Load
Browser extensions are helpful shortcuts when you need to gather lots of information on different thing in a short period. But do you know they can slow down your system performance, particularly when you have installed bundled with them? Utilizing bundles of browser extensions takes more and more system resources and slowdowns the system.
Do you use all the extensions and add-ons whenever you opens the browser? I am sure some of them remains not much used.
Disabling or removing them should be a good idea to improve overall performance.
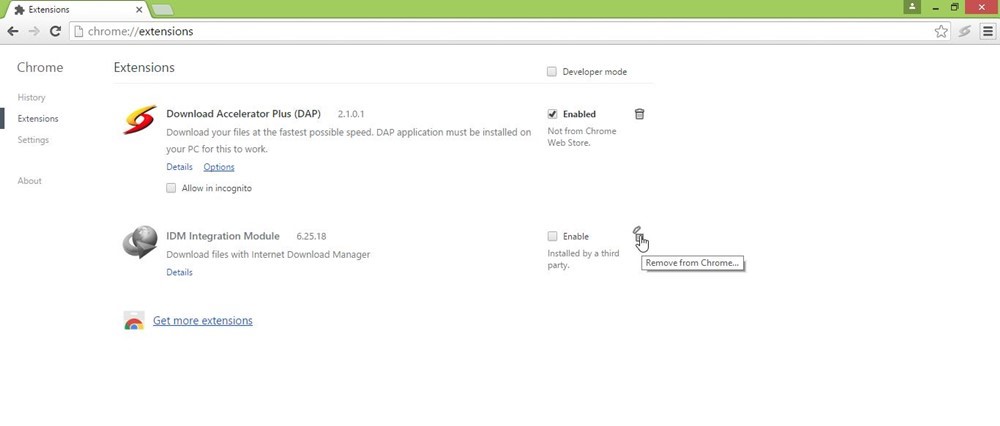
To disable/remove the unwanted extensions in Google Chrome, follow these steps written below:
Open Google Chrome then click on the Menu button at the top right.
Now go to ‘More Tools’ and click ‘Extensions’.
After that Delete/Disable the unwanted extensions.
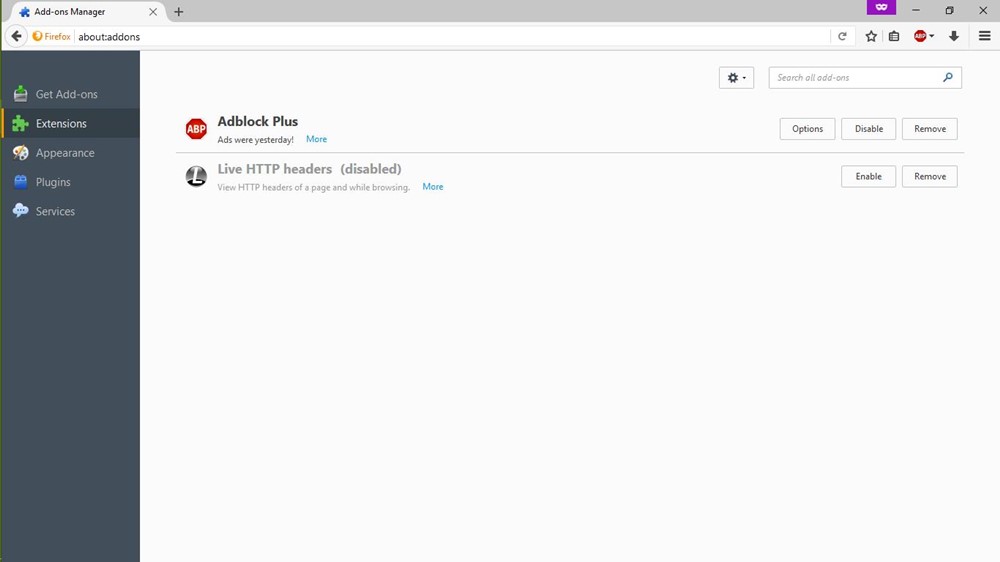 To disable/remove the unwanted add-ons in Mozilla Firefox Browser, follow these steps:
Open Firefox then click the Menu button and click ‘Add-ons’.
Now Remove or Disable the extensions individually.
3. Turn off Background Apps
One of the core reason behind your computer slows and lagging behavior. Background running apps keep sprinting in the background even if you are not using them. As a result of more RAM consumption and high CPU usage. Not only these things, but they also create heating and overall degrade system’s performance. Shutting down background apps should be a magnificent idea to keep the system in shape.
To close all background apps, follow these steps:
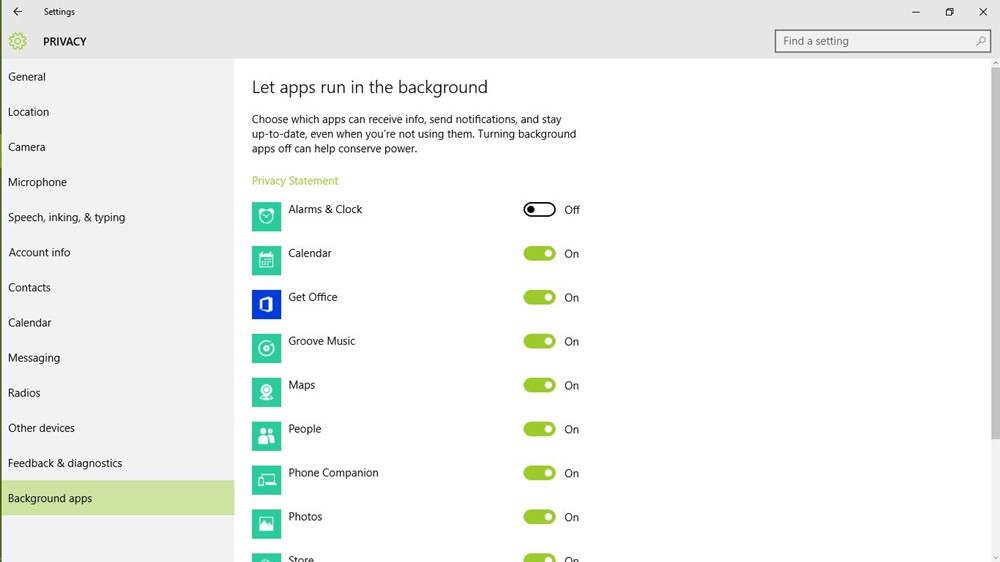 Open the Start menu then go to Settings->Privacy.
Select ‘Background apps’ from the left menu.
Turn off the only apps you don’t need running in the background.
4. Clean up the Disks
Utilizing extensive application and software messes up the hard drive space, then sooner or later it starts slows down your PC because Windows find it tough to use temporary files or caches for boosting up the overall performance. That’s why you should clean up the disk to remove additional contents.
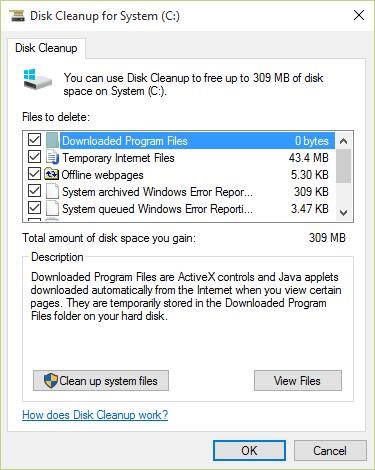
To perform disk cleanup, please follow the instructions given below:
 Search for ‘disk’ after that choose ‘Disk Cleanup’.
Select your preferred drive that requires cleanup.
Choose the type of data/files that should be deleted and click OK.
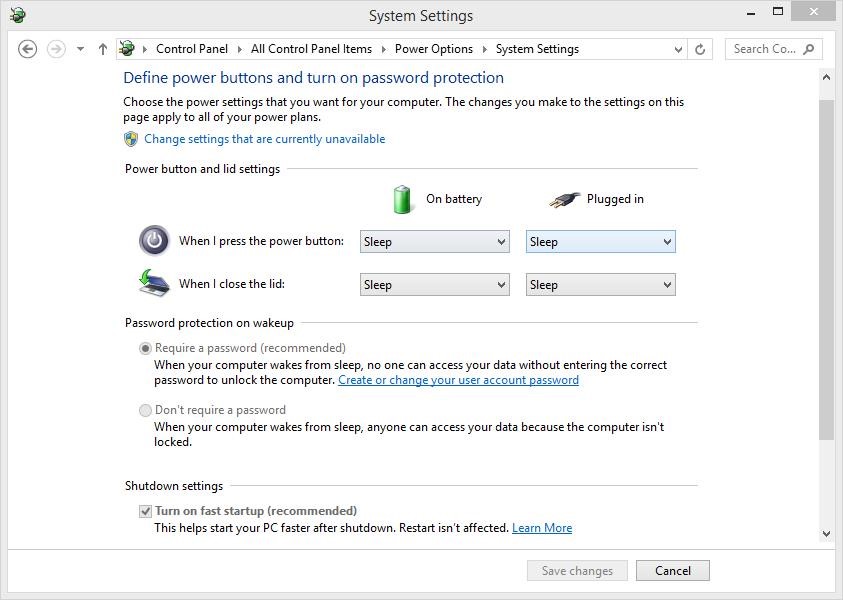
5. Turn on Fast Startup
It’s a Windows feature which combines hybrid power mode to hibernate mode along with shutdown properties, knows as Fast Startup. The fast startup mode speeds up the Windows 10’s startup procedure. When you enabled it, your Windows computer will surely take less time to boot up, grant you to reach your desktop swiftly.
To enable fast startup, simply follow these steps:
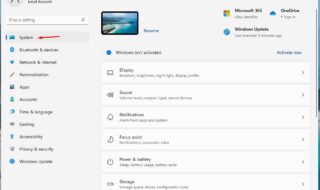
First, Go to Windows 10 Settings then System.
Click on ‘Power & sleep’ from the left menu, then choose ‘Additional power settings’.
From the left-side menu after that click ‘Choose what the power buttons do’.
Now, just select ‘Change settings that are currently unavailable’ then check the ‘Turn on fast startup.’
option.
Finally, Click the ‘Save changes’ button.
6. Choose Maximum Performance Mode
Power cut happens daily, and Windows 10 power saving mode is the saviour. But keep in mind that it diminishes your computer’s performance to save maximum power. As a result, you observe a slower system. But you can fix this by utilising maximum power mode(uses more power) to sprint the system. When you are running your computer on the batter, the best choice will be the power saving mode which is natural but when your computer system connected to power socket make sure you have enabled the maximum performance mode to enrich the experience.
To modify power settings to maximum performance, please follow these steps:
First, go to ‘Control Panel’, second click on ‘System and Security’.
Now, Click on ‘Power Options’ and choose ‘High performance’.
 7. Configure File Explorer Options
Do you know that Windows 10’s file explorer holds a variety of options to enhance overall experience? It’s a free choice, but you can do this if you want to. Because sometimes of these little things load time increases. So in my viewpoint, it would be better if you disable below-given options.
To configure folder options, please follow this process:
Open ‘File Explorer‘after that click the ‘View’ tab.
Now, Click on ‘Options’ button.
The ‘Folder Options‘ dialogue box should open up. Here, go to the ‘View’ tab and uncheck the following options:
Always show icons, never thumbnails
Display file icon on thumbnails
Display file size information in folder tips
Show encrypted or compressed NTFS files in colour
Show pop-up description for folder and desktop items
Show preview handlers in preview pane
And check the consecutive options:
Hide empty drives
Hide extensions for known file types
Hide folder merges conflicts
Hide protected operating system files (Recommended)
Click OK at last.
 8. Disable/Turn off Visual Animations
Visual effects and animation look fantastic on Windows 10, but it makes your PC a bit slow by using RAM and CPU resources consistently. That’s why you should disable to speed up your computer.
Follow this below steps to run your machine smoothly: How to disable visual graphics and animations on PC?
Launch ‘Control Panel’ and select ‘System and Security’.
Open ‘System’ and access ‘advanced system settings’ from the left menu.
Go to ‘Settings’ and click on ‘Performance’.
Opt for ‘Visual Effects’ tab in the window.
Tick the radio button ‘Adjust for best performance’ and hit the OK button.
9. Adjust Virtual Memory
Are you running your system on low RAM? It could be tough for multitasking then. You should upgrade your memory (RAM) but somehow if you are unable to accomplish it, boost your virtual memory. It will make your OS (Windows 10) more responsive and faster.
How would you set virtual memory in Windows 10? It’s very simple and straightforward method. Just follow the necessary steps I am going to mention below:–
Launch ‘Control Panel’ and choose ‘System and Security’.
Select ‘System’ and choose ‘Advanced system settings’ from the left menu.
Opt for ‘Settings’ under ‘Performance’ menu.
Click on ‘Advanced’ tab in the new window.
Hit the ‘Change…’ button and deselect ‘Automatically manage to page file size for all drives’.
For ‘C:’ drive, click ‘Custom size:’ radio button, then set primary size to your RAM’s size and ultimate capacity to double your RAM’s size (for instance, if your RAM’s size is 4GB, then introductory size should be 4000 MB, and maximum size is 8000 MB)
“C: drive” Click on ‘custom size” option and hike your RAM’s superlative space. Presume if you have 4 GB RAM, your primary choice should be same (4 GB) and maximum size 8 GB.
Click on the ‘Set’ button and hit the OK button after that.
10. Nothing works? Reset your PC
I have seen some of the friends Windows 10 PC severely affected by some core problems which extremely hard to remove. If you are one of them, who having this type problem and above-given methods not helping then the only thing should do reset your Windows 10 as fast as possible.
To reset Windows 10, please follow these steps given below:
First, go to Windows 10 Settings->Update and Security->Recovery.
Click ‘Get Started’ under ‘Reset this PC’.
Click ‘Keep my files’ and click Next.
Then, follow on-screen instructions to continue.