 When it comes to ensuring the best security online, you need a VPN client. There are tons of VPN services available on the web right now; both free and paid.
Contents
Is a desktop client necessary to establish a VPN connection?
No, it isn’t! On Windows 10, you can quickly setup VPN manually without the help of any third-party services.
Don’t worry! It is not a mammoth task as some of you may think.
In this tutorial, you will get to know how to setup Virtual Private Network manually in a Windows 10 laptop.
How to Quickly Setup VPN Manually in Windows 10 Laptop?
I have given each of the steps needed for the process, which you can find below. But before you get into it, I want you to have a look at the prerequisites.
Prerequisites
You must need the following details to establish Win10 manual VPN (Virtual Private Network) connection.
#1. VPN server address or name
#2. Login credentials for a VPN service
#3. Protocol (Like PPTP, L2TP etc.)
#4. IP address and port number (in case it is needed)
I hope you have all the four details I have given above. Once you ensure the availability, we can move on to the process of establishing the secure connection that lets you to access any blocked content.
Win10 Manual Setup To Secure All Your Internet Sessions
So, here come the steps needed for the manual setup.
Step 1: First, you have to press Win key or click on the start button. It will open the start menu, from which you have to choose the gear-like button that will lead you to the Settings panel.
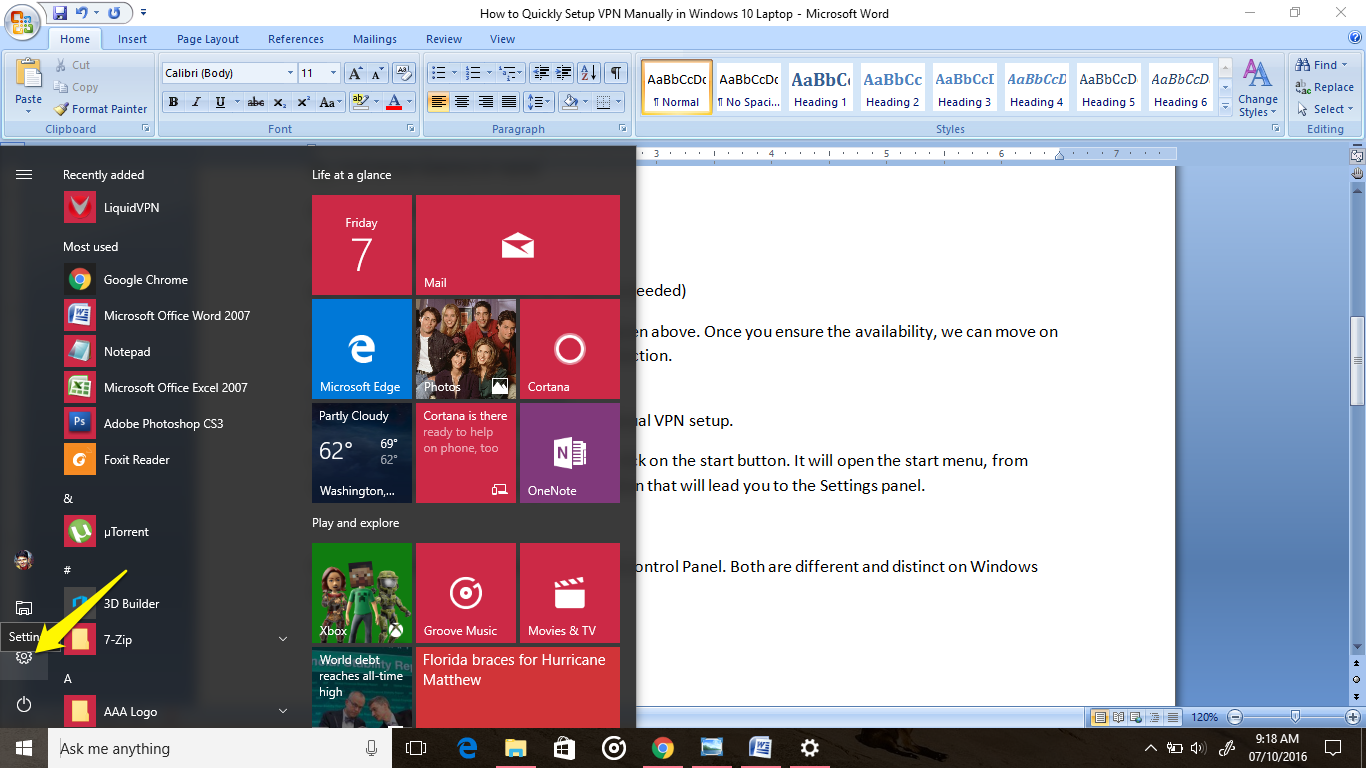 N.B.- Don’t mistake the Settings menu with Control Panel. Both are different and distinct on Windows 10.
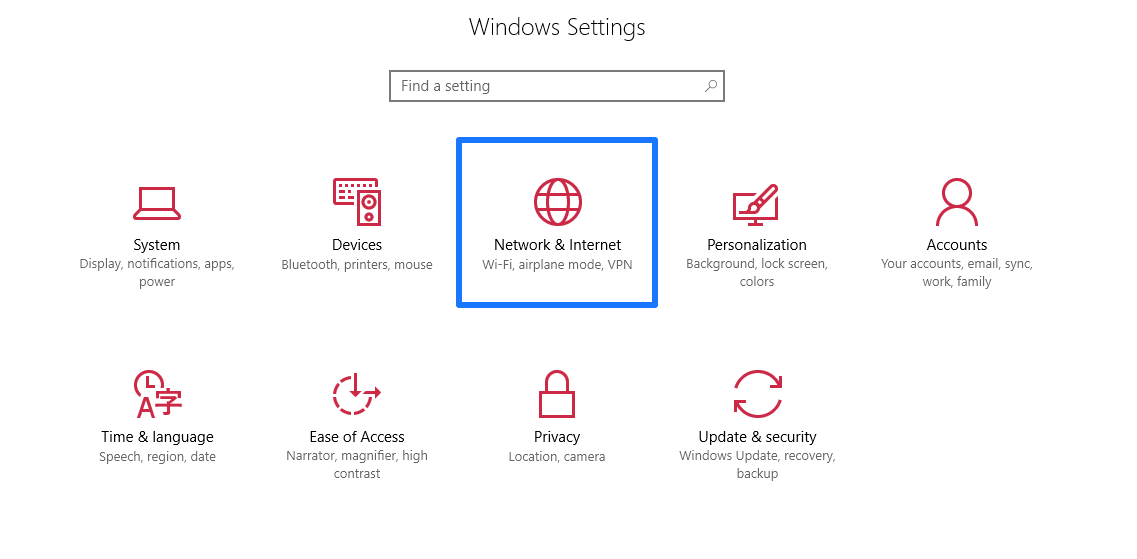
Step 2: Once you reach the Settings panel, you can see a set of icons there. The Virtual Private Network is related to network. Obviously, you have to select Network & Internet (For me, it’s the third option. I hope it’s the same for you as well.)
 Step 3: Pressing Network & Internet will open a new screen. There you can see different options inside a pane given on the left- hand side of the screen.
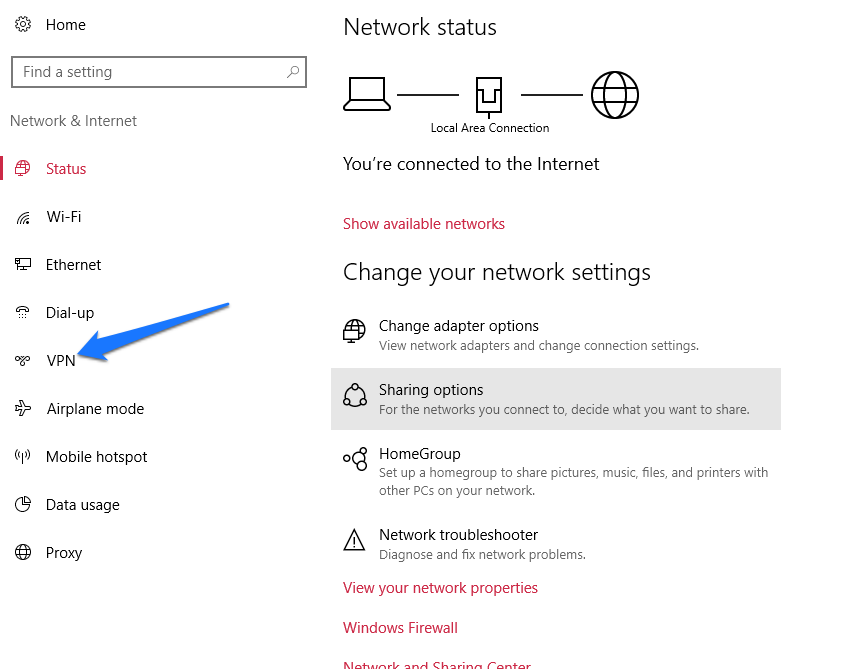 Look out for VPN (the fifth option) and when you spot it, don’t forget to open the same.
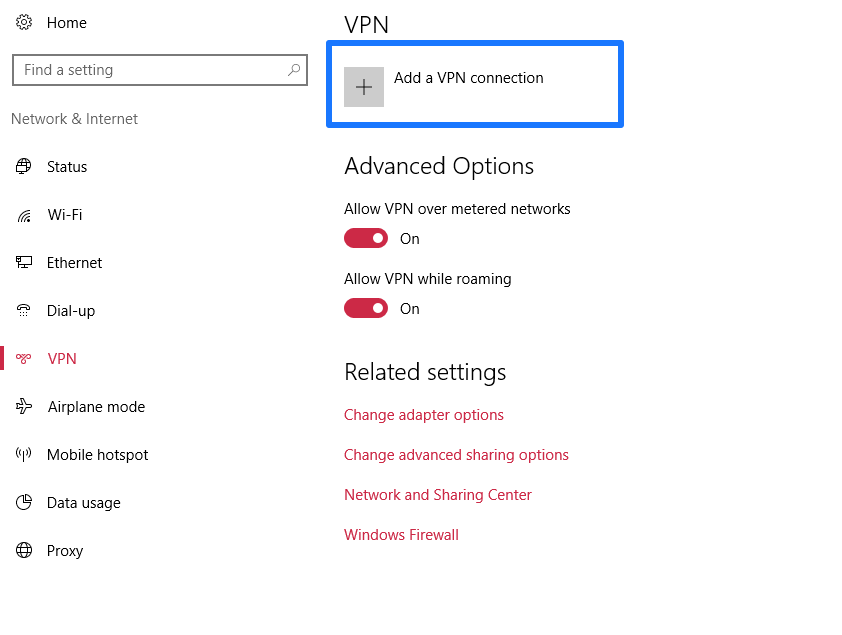
Step 4: If you are setting up manual Virtual Private Network for the first time, you can’t see anything above Advanced Options other than Add a VPN Connection. Simply, click on it proceed to the next step.
Step 5: Now you get a new window with a few fields on it. Let me break them down for you.
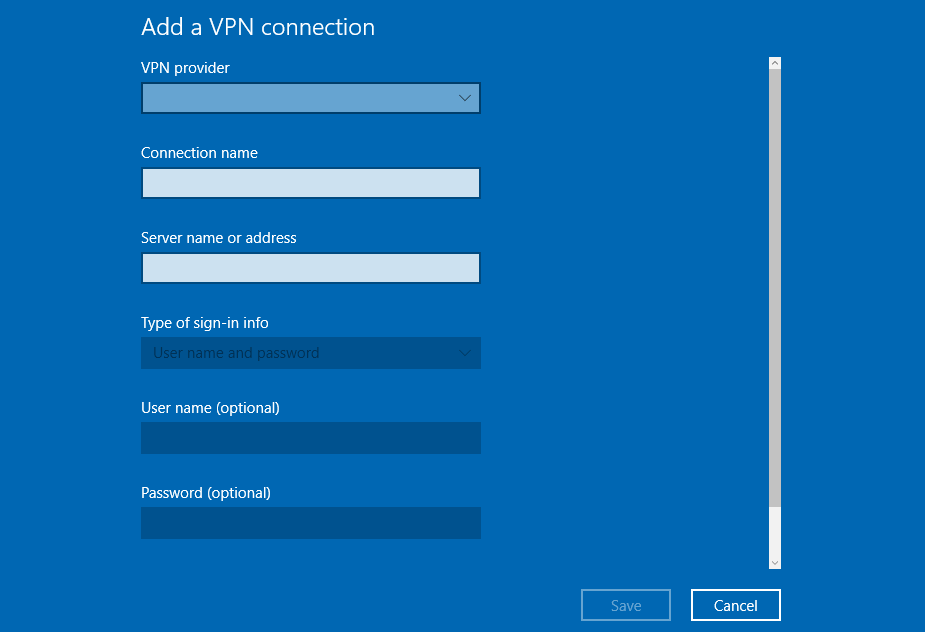 VPN Provider:- What you have to choose here is Windows default (built- in). Most probably, you won’t have a second
option there.
Connection Name:- There is nothing technical about this field. The connection name is only for recognition when you have multiple connections.
Server Name or Address:- I hope you have the URL or IP address of the Virtual Private Network server. In case you don’t have, visit their website and grab it. You can’t establish the connection without filling this field.
Username:- Username of the service.
Password:- Password for the VPN provider you use to log in to their web dashboard or their dedicated client.
If you don’t want to enter the login credentials every time you use the tunneling service, you can check this option to remember the details.
Finally, click on Save to store the information.
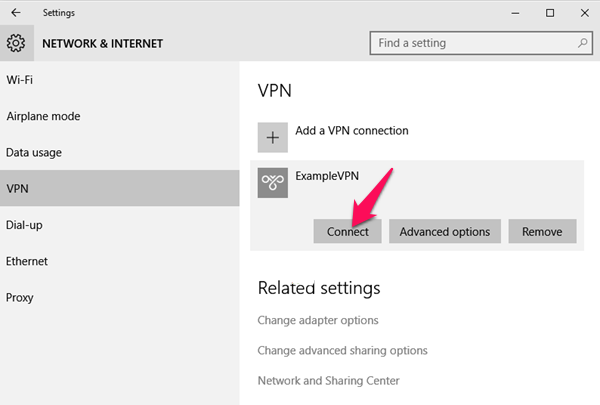
Step 6: The manual setup is ready to be used now. Just click on the VPN from the previous window (Step 4).
You will get three options. What we need is the first option that says Connect. A gentle click on the same will open the door to online anonymity.
 Wrapping Up
Hope you know how to quickly setup Virtual Private Network manually in your Windows 10 machine now.
As I said earlier, you must need the details of a VPN server to get it going. There are numerous free and paid services available with which you can grab the same.
In case you have any doubt regarding this topic, don’t forget to jot down it into the comment form down below. I will try my best to solve your issue as soon as possible.
And, I expect you to share this post on social media if you find this Win10 tutorial useful.

wow thanks for the setup it really worked for i am using PIA VPN. i got it from VPNgrades(.)com but couldn’t get the set. thanks again….
Glad it helped you.
Thankyou for this article!
I saw a setup on NetflixVPN.co exactly the same.
Thanks again.
Hi Mark, there is no tutorials on that website you mentioned above!