Sometimes, we may end up losing some of our valuable photo collections while formatting our hard disk. Also, because of accidental deletion, virus attacks or power surge, our hard disk may get corrupted which in turn we lose our valuable data. In such cases, we need some best and free photo recovery software for recovering the lost photos either from your hard disk or SD card, wherever you lost.
Contents
Overview of Recoverit Photo Recovery Software
Recoverit is one such best photo recovery software by WonderShare using which you can recover your lost photos. The most surprising part is you can use this software for free to recover your photos. This tool is all-in-one solution for all type of deleted photo recovery from USB, SD cards, external hard disk, mobile phones, flash drives etc. There are 8 different type of data recovery modes available in this Recoverit software using which you can recover your photos which you lost in any scenario like deletion by mistake, malicious virus attacks, hard disk corruption etc. Moreover, Recoverit tool is compatible with all versions of Windows 10 operating system from XP to recent 10. You can also check out other picture recovery software available in the market.
Step by Step Usage Guide of Recoverit Software
1). Software Installation
First of all, you need to download and install the application. You can either download from the official website.
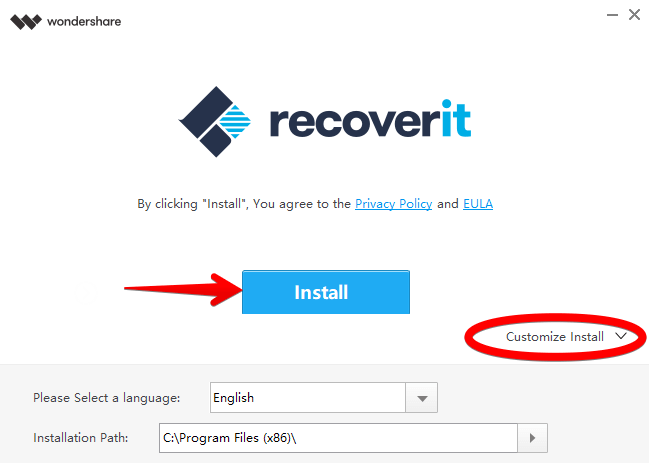
You can even customize the installation by selecting your country language and installation path. Click “Install” button to initiate the installation.
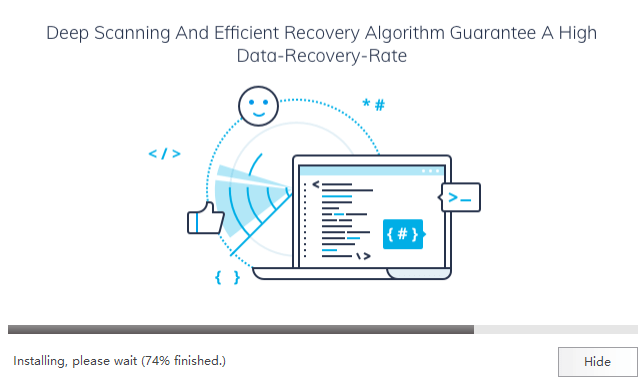
It will take some few seconds to a minute for the installation to complete. Till then, you can kill your time by checking out the software features which will be displayed during the installation process.
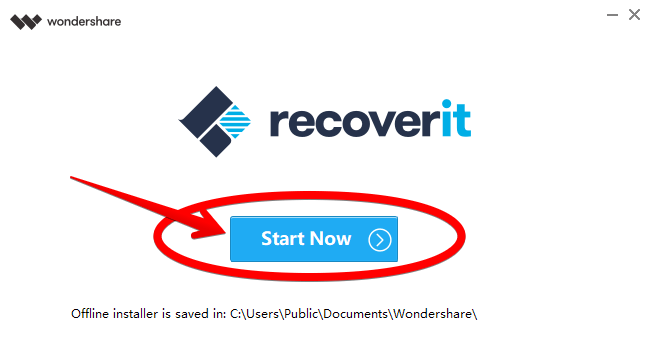
Once after successful installation, you can start the application by clicking on the “Start Now” button as shown in the above picture.
2). Choosing Data Recovery Mode
You will see the below window with different recovery modes when you open the application for the first time.
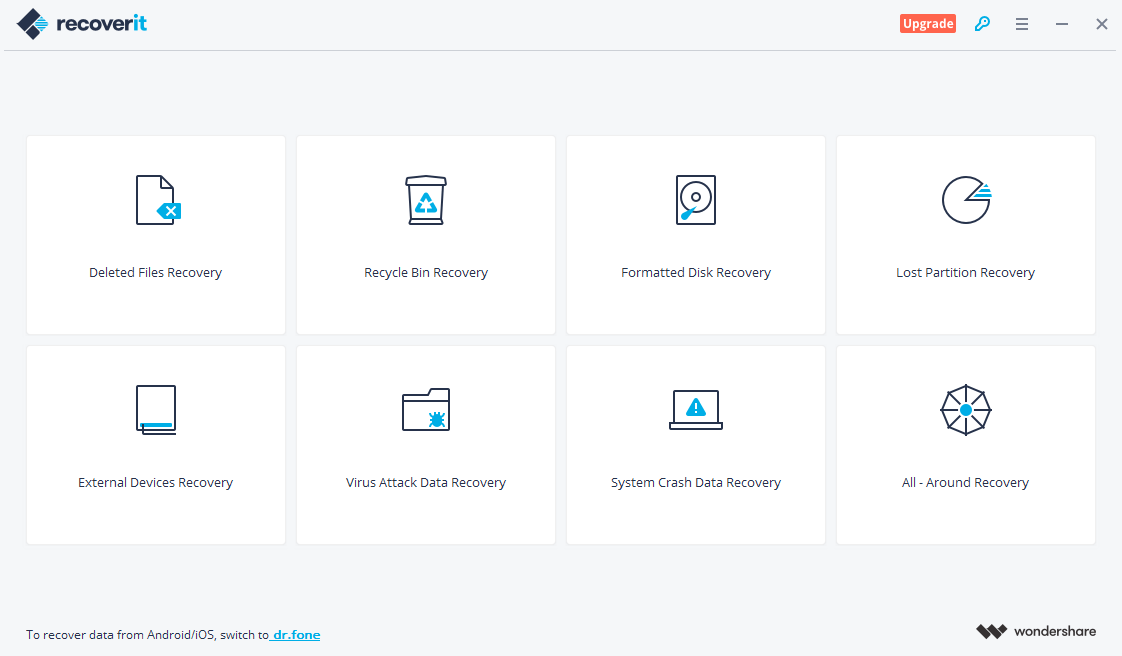
Depending on how and from where your photo got deleted, choose the recovery mode accordingly. For example, if you lost your photo from some external storage media then go for “External Devices Recovery”.
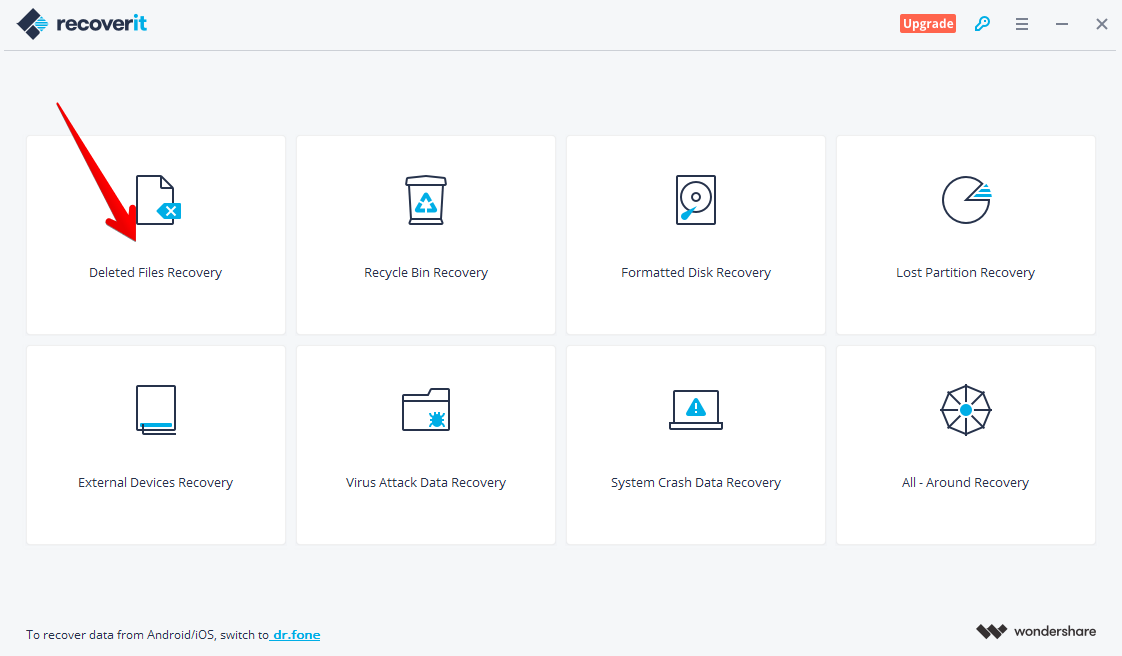
3). Recovery using “Deleted Files Recovery” Mode
Let’s see how to recover the photos which got deleted in your system. Since this is the mostly used mode by many, I’m going with this mode. The other recovery mode process will also be similar to what I’m going to show you now. So you don’t need to worry on that part of usage process.
Click “Deleted Files Recovery” mode as shown in the below picture:
If you don’t know which mode to use for your recovering scenario, then you can just hover the mouse cursor over the available options. It will tell you the scenario for which it can be used as shown below:
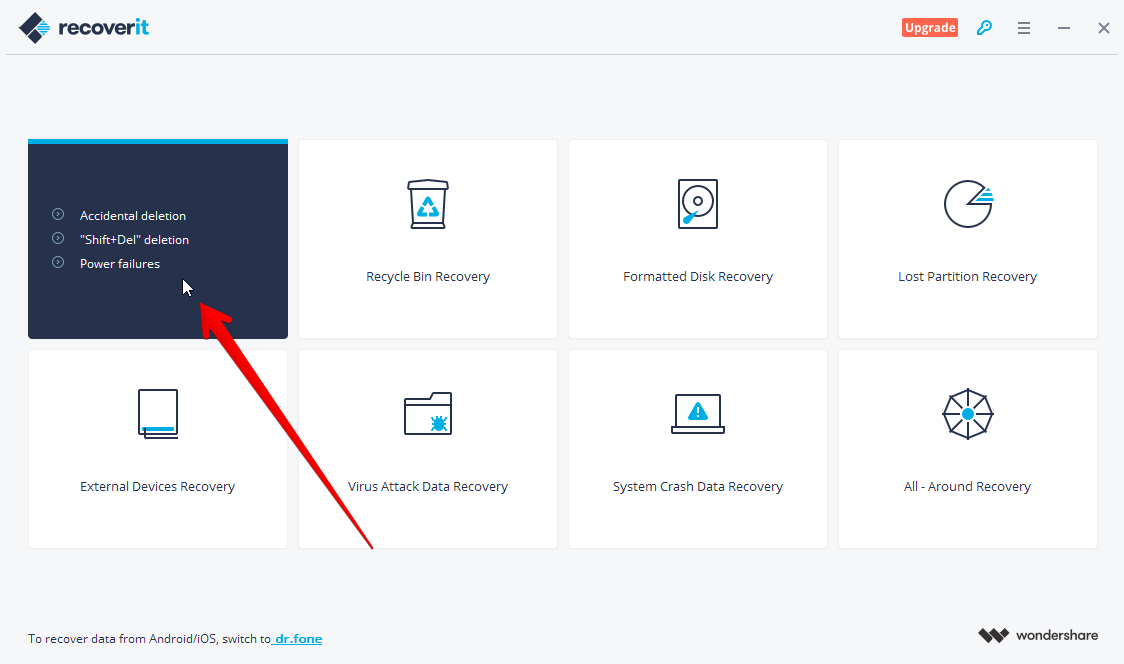
As you can see above, the selected mode recovery option description clearly shows that it will work only for the files which got deleted by accident using Shift+Del deletion or because of power failures.
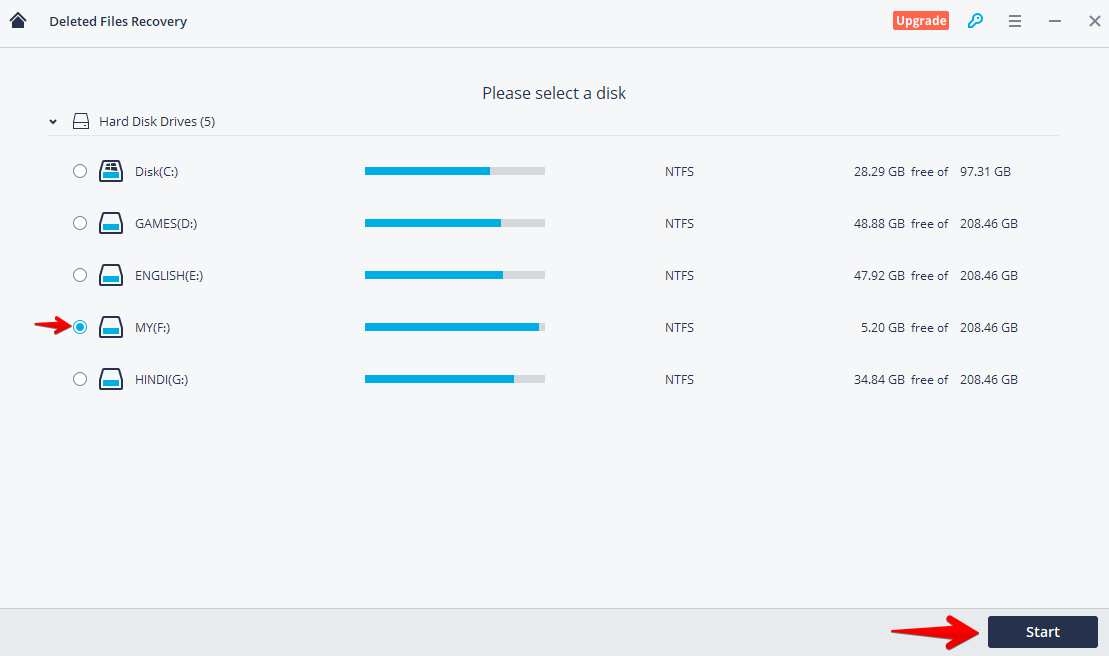
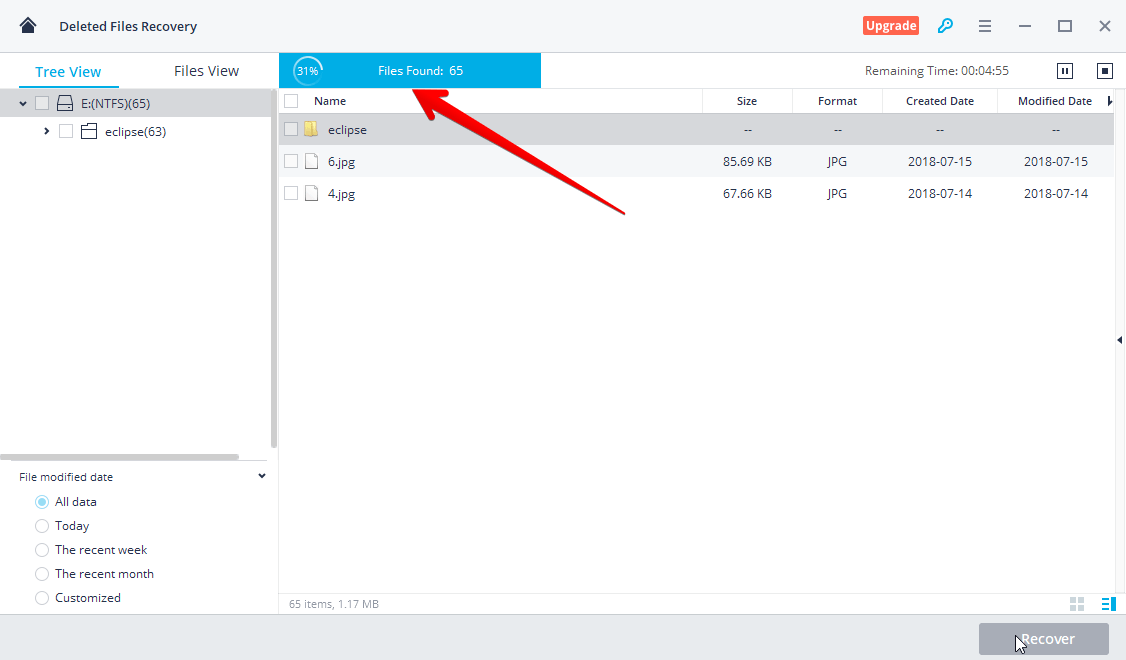
I hope you remember the hard disk drive location that photo was stored before it got deleted. Select that drive as shown in the below picture and click the “Start” button.
The software will start searching for the deleted photo files in your hard disk. The searching time varies depending on the various factors but maximum it will take few minutes to search and show you the results.
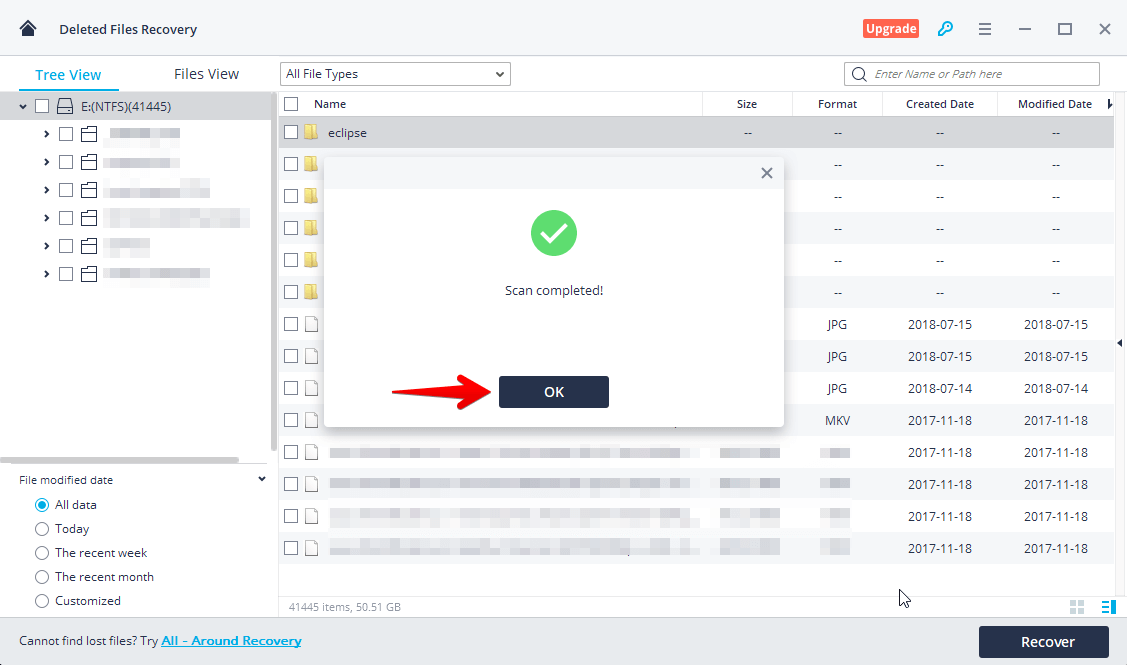
Once after the scan is over, you will get this pop-up saying “Scan completed!” as shown in the below picture with the list of photos & files which you can recover.
Once the photos gets listed, you can select all the photos you want to recover by checking on the check boxes available on the left side of file names. You can even use the preview option to view the image before recovering.
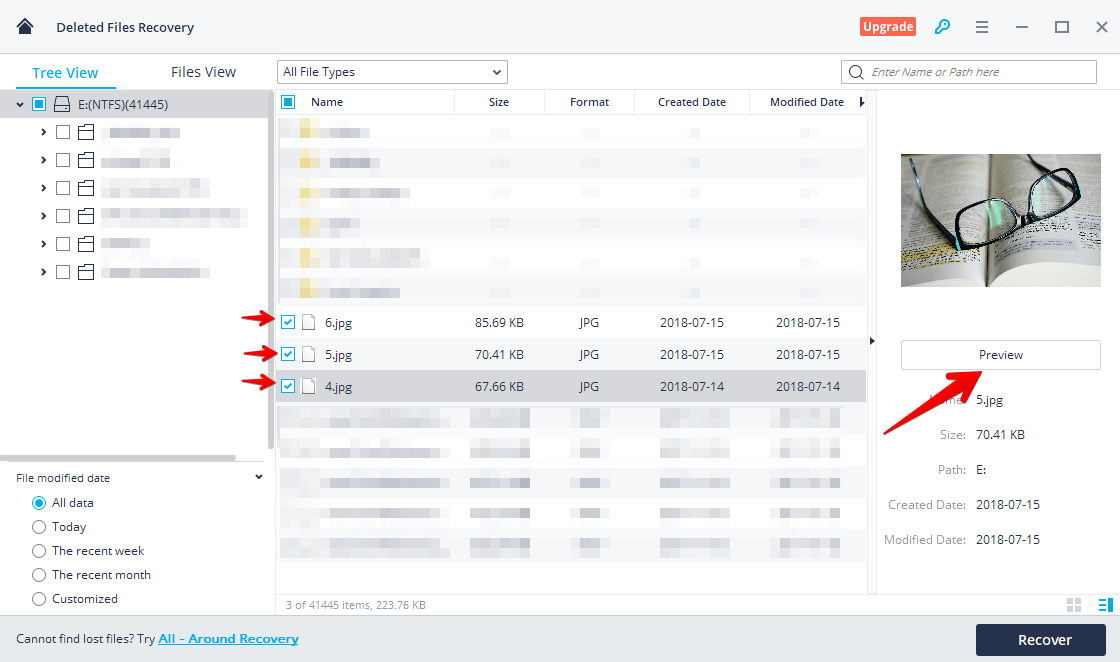
Once selecting on the photo files which you want to recover, you can click on the “Recover” button to initiate the recovery process.
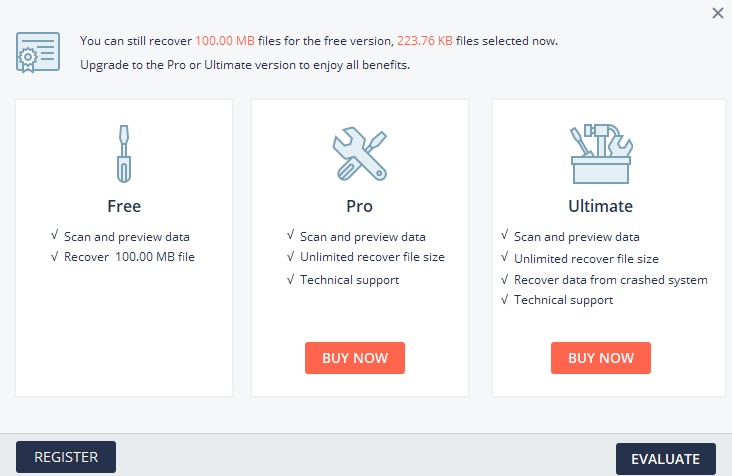
As you are using the free version, a pop-up will appear showing you the 100 MB limit for recovering your photos. You just need to click on the “Evaluate” button to proceed further. In case, the overall size of the photos which are trying to recover is greater than 100 MB then you can consider upgrading to Pro or Ultimate plan.
Then you will be asked to select the location where you want these photos to be stored. Choose your desired drive and click “Recover” button.

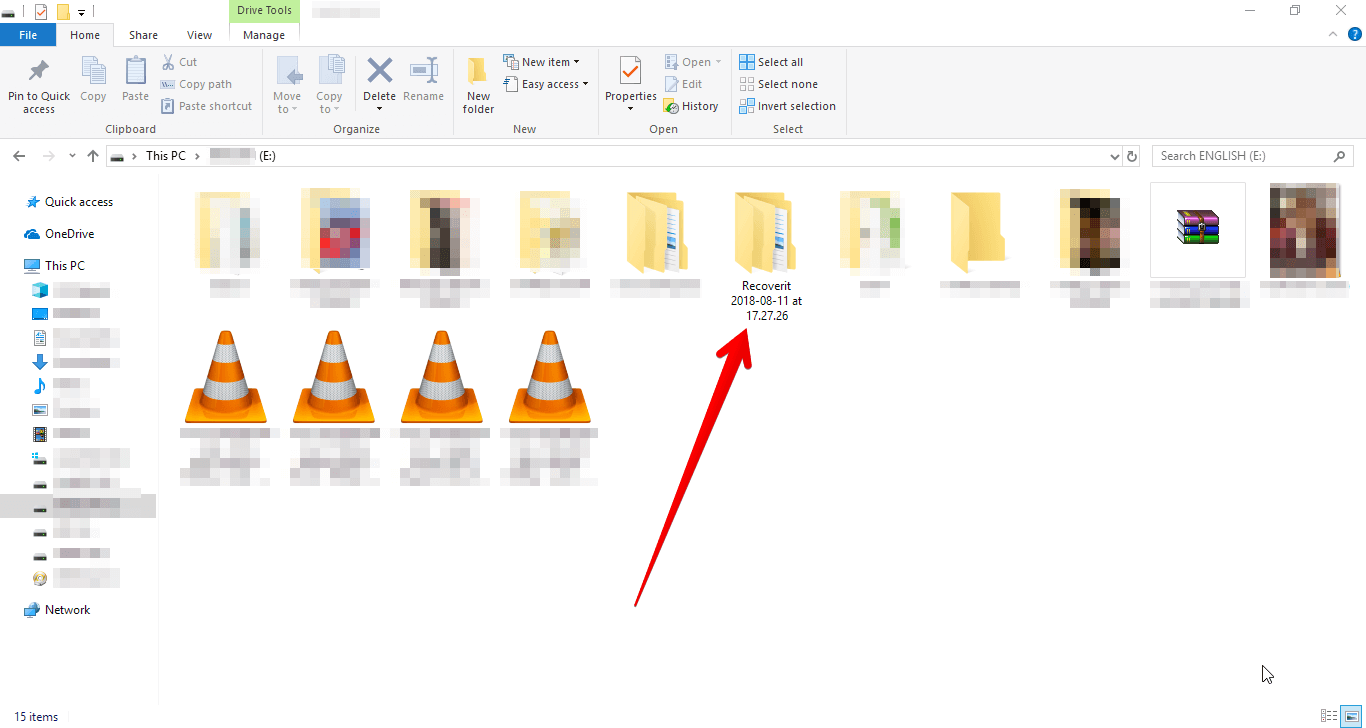
Voila! That’s it… You recovered your deleted pictures successfully using Recoverit software.

The software will create a folder named “Recoverit 2018-08-11 at 17.27.26” (date and time will change accordingly) and will restore the photos to that folder.
Thus, using Recoverit picture recovery software you can easily recover your deleted or lost photos easily and freely without even paying a single penny.

![9 Best Windows 11 Portable Apps Free 2023 List[UPDATED]](https://www.techwibe.com/wp-content/uploads/2023/05/word-image-26766-7-320x190.jpeg)