Mac users can use the screen recording feature to capture gaming videos, tutorials, business sessions, etc. We will show you how to screen record on Mac using two tools. You don’t have to pay a single penny to capture the on-screen activity. We have tested the suggested methods for a long time before authoring the tutorial.
What Are the Minimum Requirements To Screen Record on Mac?
Apple has equipped the latest Mac computers with the exceptional Apple Silicon chipset. However, the innovative chipset lacks a few components for intensive screen recording. Let’s look at the system requirements to record desktop and gaming on your Mac.
Mac computers can handle basic screen recording. Many professors want to share the tutorials and presentations with the students.
- Processor: Intel or Apple Silicon
- Memory: 8GB RAM
- Storage: 256GB SSD
- GPU: Intel integrated graphics for basic tasks.
The system requirements change if you are trying to record gaming videos or screen recording programming tutorials while running heavy programs in the background.
Intel-based Macs may not handle the task smoothly. But the latest Apple Silicon-based computers can handle screen recordings even when you are running heavy programs in the background.
Screen Record Mac Using Screenshot Toolbar
Apple developers made screen recording easy for Mac users. The built-in screenshot tool has screen capture features. Let me show you how you can use and start recording your tutorials.
1. Press Shift + Command + 5 keys.
Or use the Launchpad to search for “screenshot” in it.
2. Hover your cursor towards other icons.
a. Record the Entire Screen
b. Record Specific Screen
Choose one. I have selected the “Record entire screen” option.
3. Click the “Options” button to reveal the settings.
a. You can choose the file-saving location.
b. You can set a timer.
c. Choose the microphone output from internal, external, or headphone mic.
d. Additional settings.
4. Click the “Record” button.
5. The record button will appear on the top menu.
6. Click the stop button from the top menu to stop the recording.
The screen capture tool will save the file in the selected location. Check the recorded file in the QuickTime Player or VLC for video and audio quality. You may notice quality drops if the system is not capable enough to capture the activity.
Screen Record Mac Using QuickTime Player
Apple developers added screen recording capabilities in the QuickTime Player. Older Mac users can put the built-in player to the work. Let me show you how to use the QTP to capture the desktop screen.
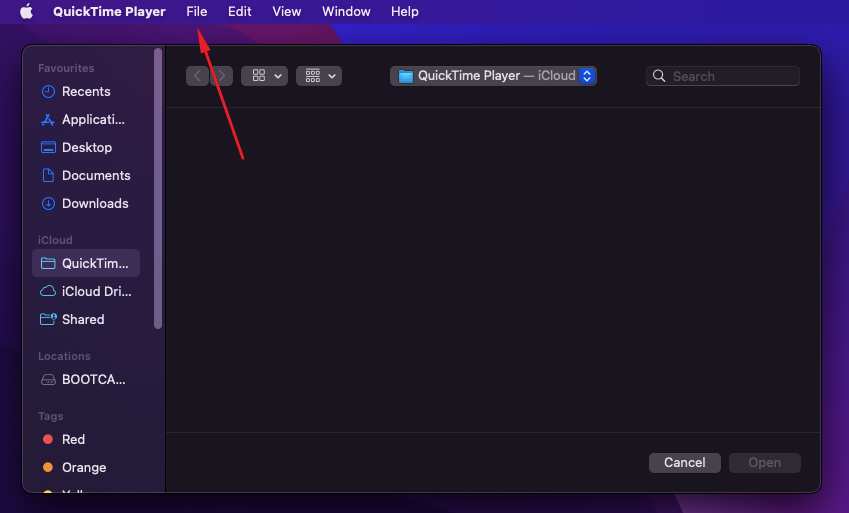
1. Go to the Launchpad and open QuickTime Player.
2. Click the “File” from the top bar.
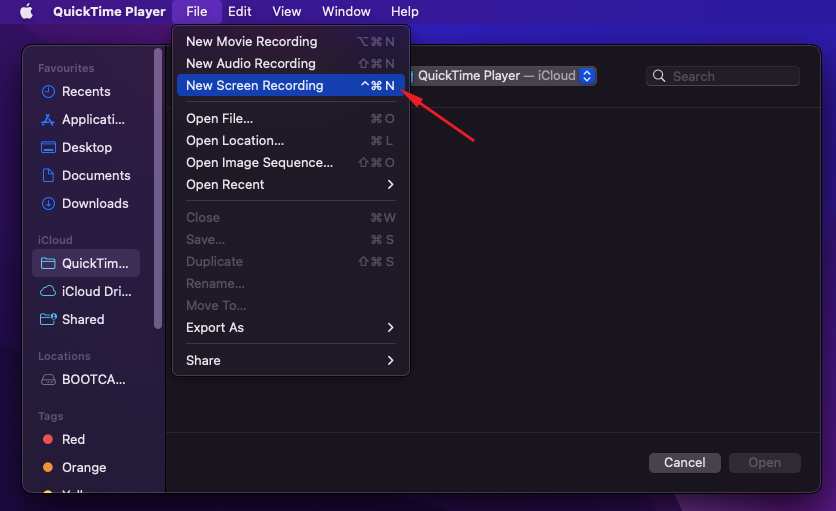
3. Click the “New Screen Recording” from the drop-down menu.
4. Select full screen or select a portion.

5. Click the “Record” button.

6. Stop the recording from the top menu.

You have the same options as the screenshot tool.
Screen Record Mac Using OBS Studio
OBS Studio is an open-source project. There is no corporate company funding the freeware program. You can download and install the advanced screen recording program on your Mac without worrying about privacy issues. OBS has been a companion since 2019, and I have tested the program on Mac, Windows, and Linux. Let me show you how to install and set up OBS on Mac.
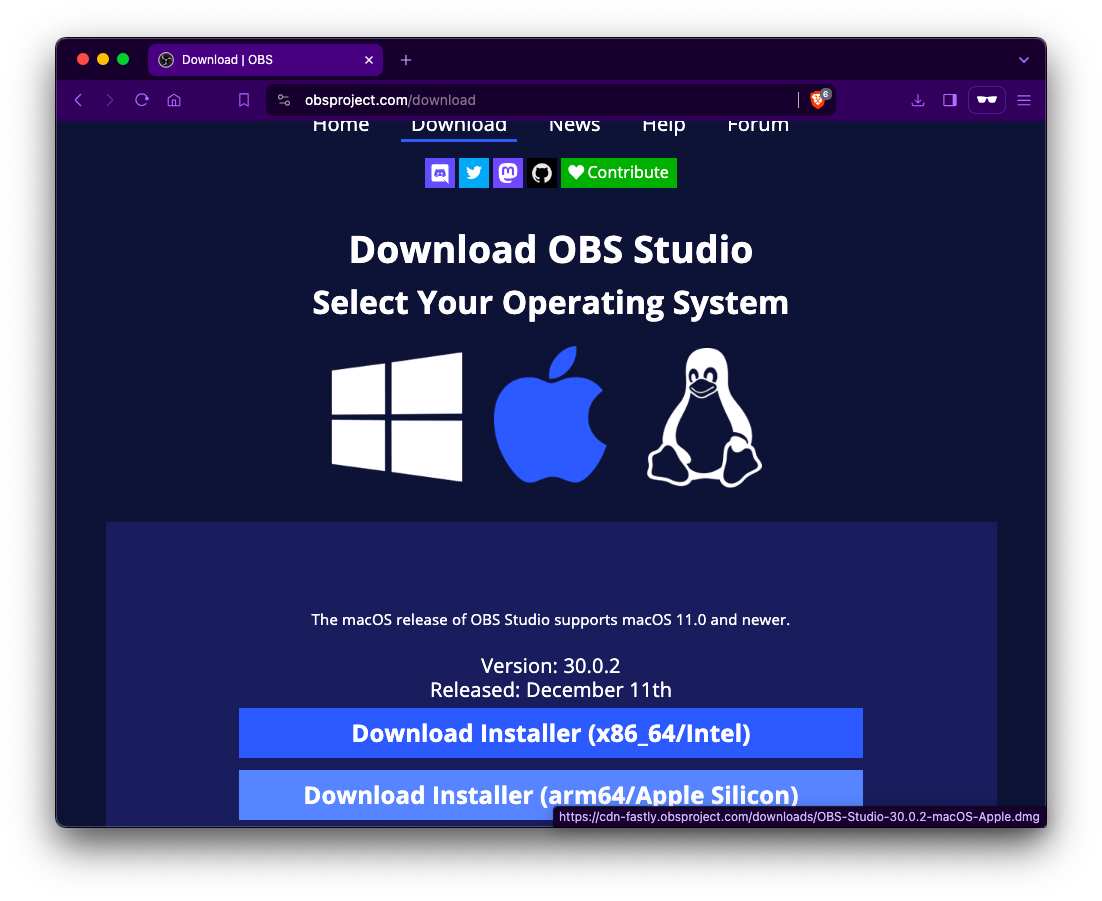
1. Go to OBS Studio’s official download page.
2. Download the compatible version and install the program.
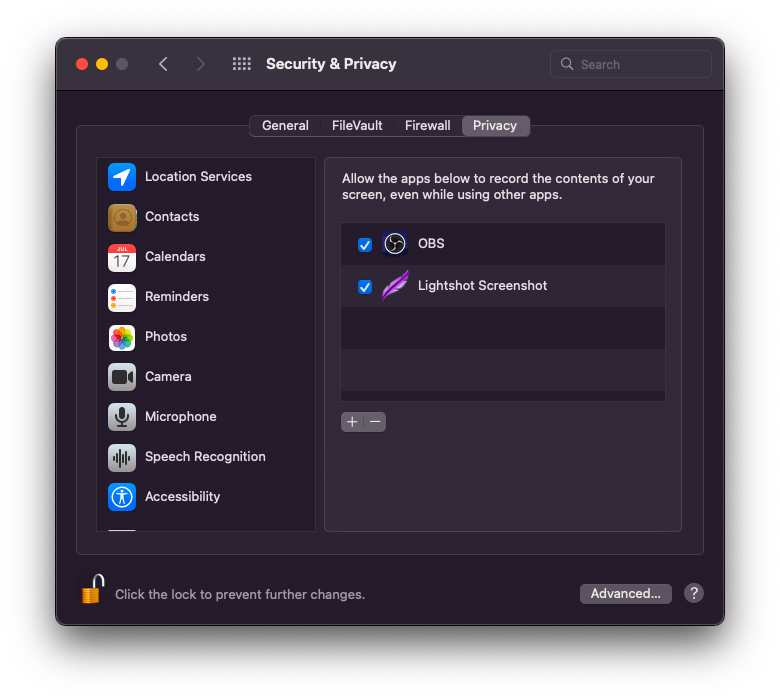
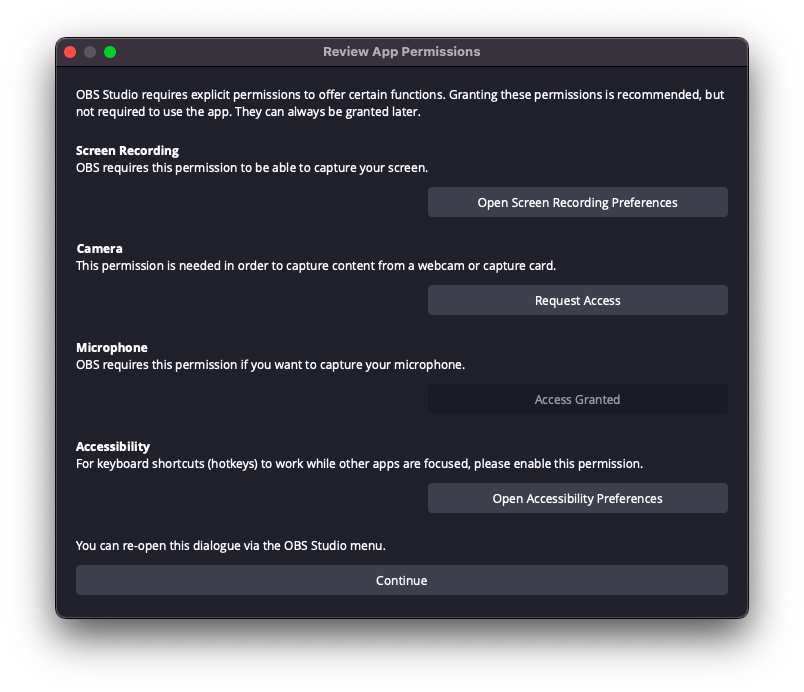
3. Give permissions to the OBS Studio.
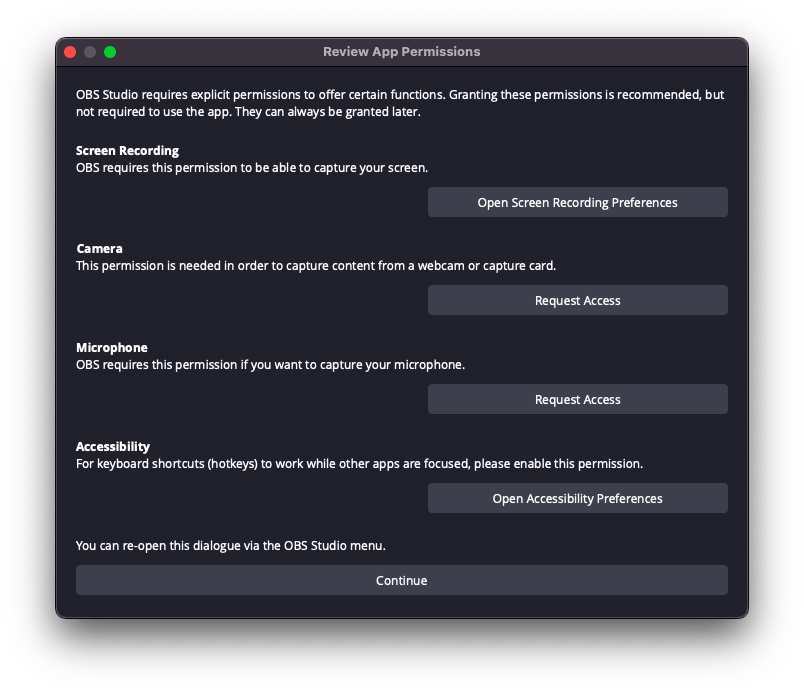
4. Allow OBS Studio to screen record on your Mac.
5. Give OBS microphone access.
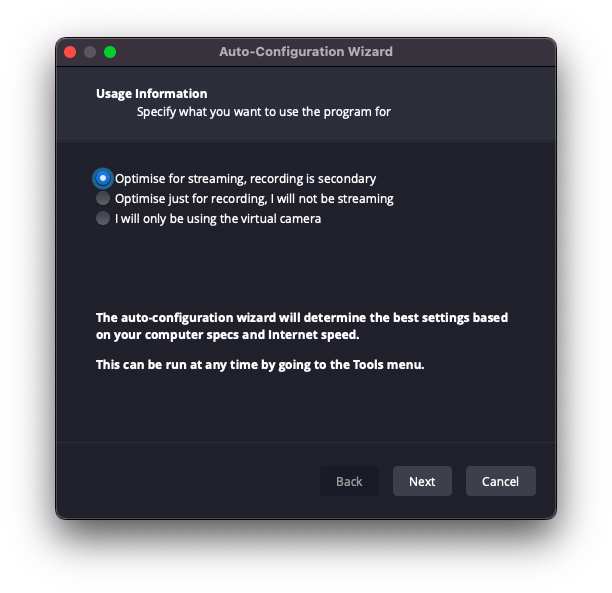
6. Select the second “Optimise for recording, I will not be streaming” option and click the “Next” button.
7. Customize the resolution or move on with the defaults. Click the “Next” button.
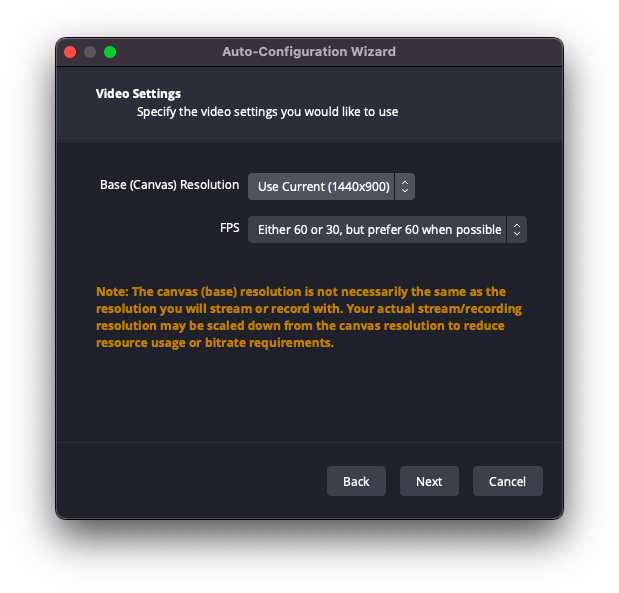
OBS Studio automatically figures out the suitable settings for the computer.
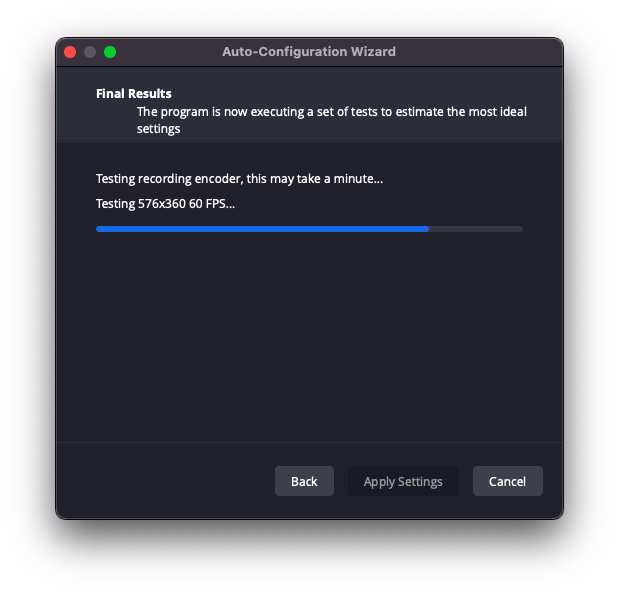
8. Let the program test the hardware.
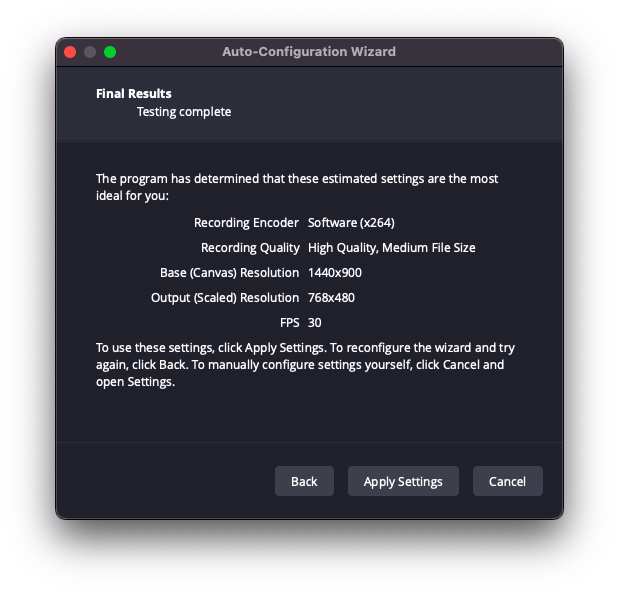
9. Click the “Apply Settings” to proceed further.
10. Add “Display Capture” under “Resources” section.
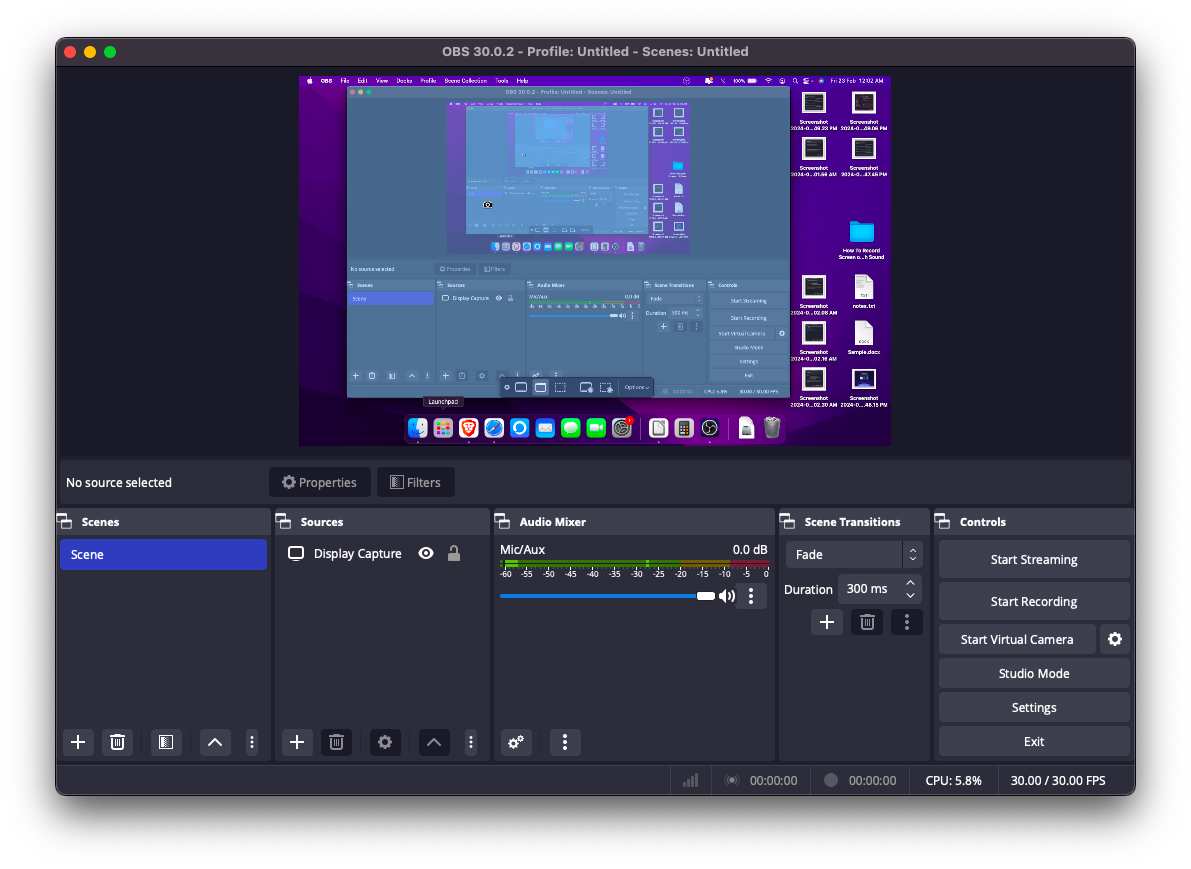
11. Click the “Start recording” to begin the desktop capture.
You can watch any YouTube tutorial video to increase the picture quality or alter the settings. The program may intimidate, but it’s a piece of cake after a few tries.
Bottom Line
I recommend the macOS Screenshot Tool for screen recording on your Mac computers. OBS Studio is another exceptional solution, but it does require a learning curve. I’m delighted by the built-in screen recorder’s quality output and simplicity. Let me know what you chose in the comment section.