Do you get that annoying video that automatically plays in Windows Store? Here we have the best solutions that can help you stay away from the world of AutoPlay media on Windows 10.
The AutoPlay feature on Windows 10 benefits its users from detecting programs to play media. However, it can get annoying at times and we want to turn it off forever. In this guide, we have the solution for how you can stop videos from auto-playing.
To keep it simple we start the guide with the easiest way. After that, you get an intricate yet easy-to-do solution. Overall, you’ll get useful insights and the answer to stop videos from Automatically playing in Windows Store.
Contents
Method 1: Turn-Off AutoPlay from the Settings
The first method is disabling the AutoPlay from the Windows Settings. It takes a few clicks and will help most of your AutoPlay problems.
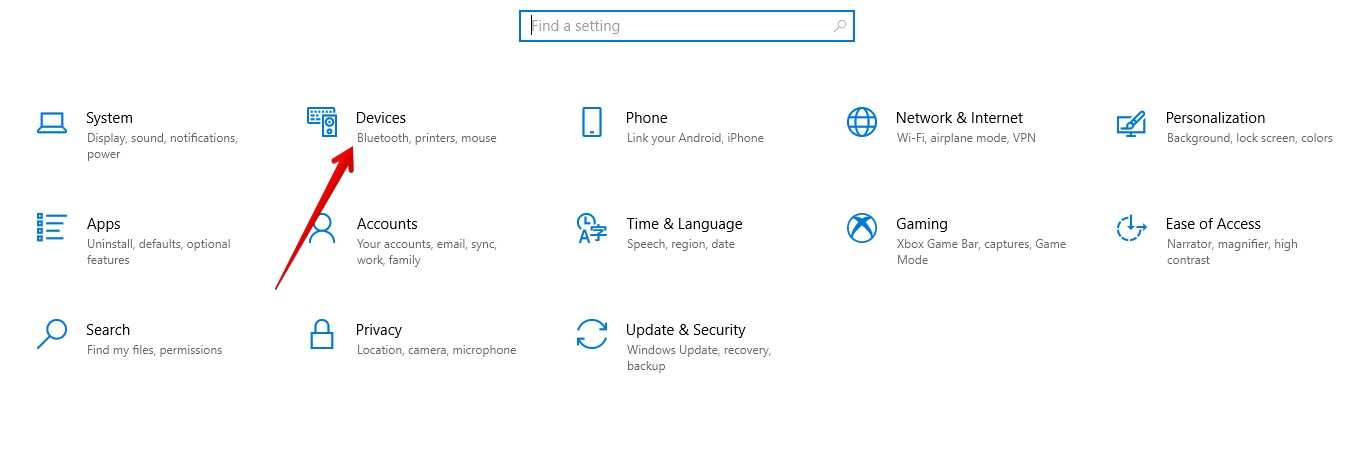
- Hit the Windows Settings shortcut button by pressing Win + I.
- Go to the “Devices” settings.
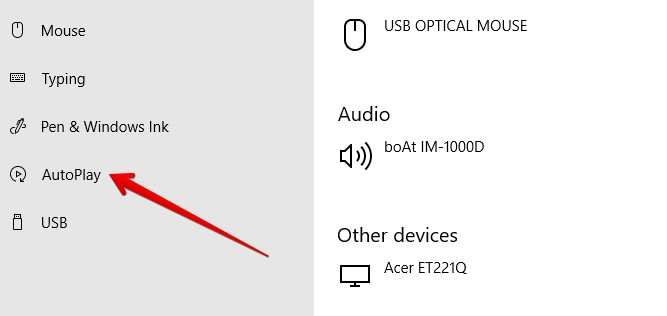
- Inside the window in “Devices”, you have to click on “AutoPlay”. It is roughly located at the bottom left side of the screen.
- Click on the toggle of “Use AutoPlay for all media and devices” to turn it off. (If you do not have the autoplay issue, then this toggle will be already turned off).
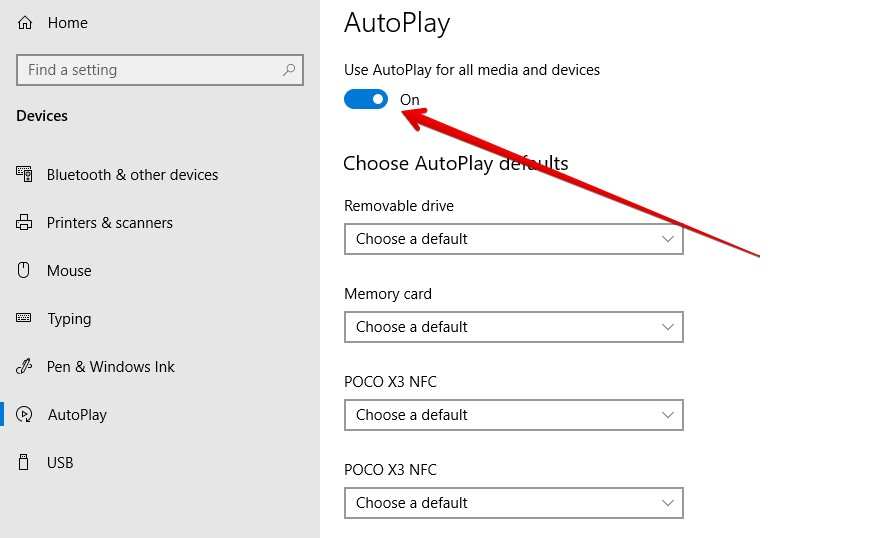
- Under the section of Choose AutoPlay Defaults, choose the default option.
The autoplay in the Windows store enables you have turn ON the AutoPlay. Following the measures above will help you get rid of AutoPlay and you will not have to face this problem again.
Method 2: Disable AutoPlay from the Control Panel
Going to the Control Panel can help you solve the AutoPlay options. Here you have the option to tweak media settings. You only have to follow a few steps to achieve this task.
- Go to Search in the Windows taskbar and search for “Control Panel”.
- Fire up the Control Panel and click on the “AutoPlay” option.
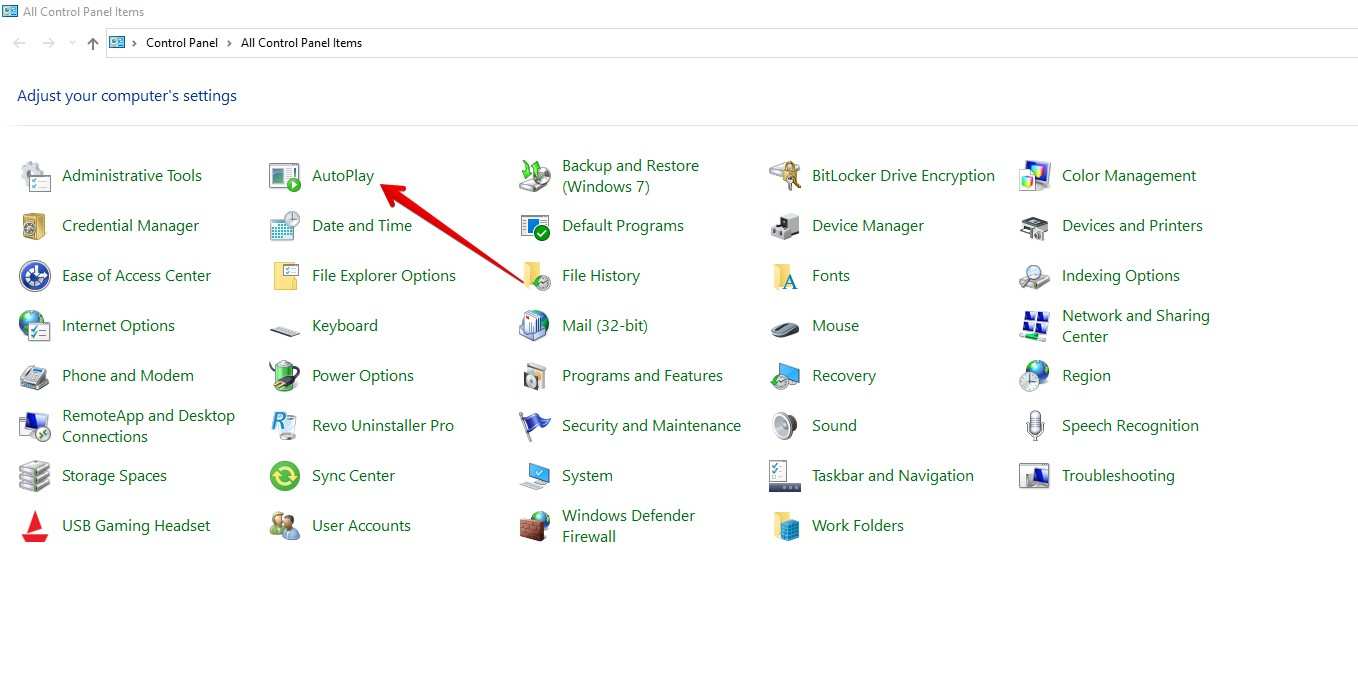
- Now untick the “use AutoPlay for all media” box. You can tick it again to turn ON the AutoPlay.
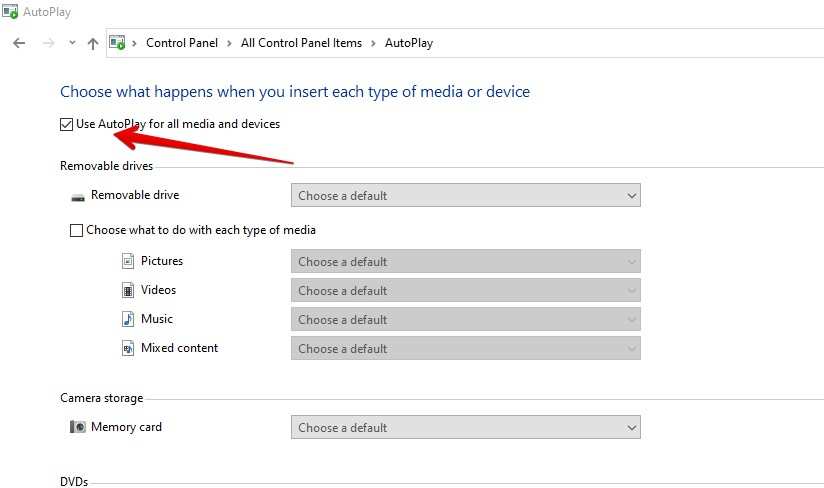
Unticking the AutoPlay option will not play anything that’s affected. Moreover, your windows will not play any media. If you want certain types of media to still play then you go to “Choose What to do with each type of Media”. Below that option, you will see options to play a specific type of media.
Method 3: Disable AutoPlay in the Microsoft Store.
- Open Microsoft Store.
- Go to the options dots button and then click on “Settings”.
- In the Home section of settings, you will find “video Autoplay”. Simply turn off that option.
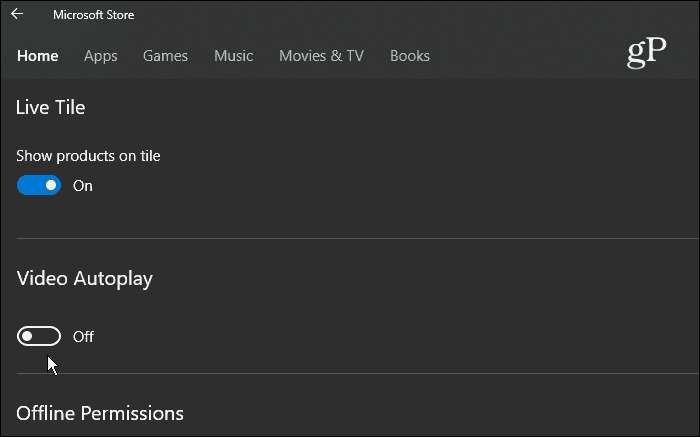
Doing this will turn off the autoplay on the Microsoft Store.
Method 4: Disable AutoPlay from the Group Policy Editor
If you have Windows 10 Pro running on your laptop or PC, then you can simply use the Group Policy Editor for this issue. All you have to do is follow the steps below to disable AutoPlay in Windows Store.
- Hit the shortcut button Win + R to open the run command prompt.
- Now type “gpedit.msc” and press on the enter button.
- The Group Policy Editor will open on your windows laptop or PC. Click on “Administrative Templates”. (It is located under the “Computer Configuration)
- Go to Windows Components and click on “AutoPlay Policies”.
- The details pane on your right hand side will display multiple options. You have to find the “Turn Off AutoPlay” option and open it.
- The properties of “Turn Off AutoPlay” will allow you to tweak its settings. Here you have to click on “enabled” and then choose “All Drives”. Doing this will ensure that you have disabled AutoPlay for all the drives. You can also choose CD-ROM and removable media to do the same.
Conclusion
Now you know all the ways in which you don’t have to see a video that you do not want to watch. By following the methods above, you have full control over the Windows 10 store. In case you want to go back to autoplay, then you can always undo the methods.