Contents
Free methods on how to edit a scanned document [Win/Mac] (2022)
Have you been looking forward to learn how to edit a scanned document? If so, then this article is for you.
We’ll guide you though free and tested methods you can use to check, correct, rewrite and improve all sorts of scanned documents and pages on your Windows and Mac device — and even transfer and save it on other Word processors.
We’ll cover the following topics:
- How to edit a scanned document in Mac and Windows
- How to edit a scanned document on Mac using an Automator and Preview
Feel free to jump to any section to get started.
How to edit a scanned document in Mac and Windows
In this section, we’ll use two tried and tested methods to edit your scanned document. We’ll discuss the following:
- How to edit a scanned document in MS Word.
- How to edit a scanned PDF document using PDNob Image Translator in the following ways:
- Taking a snapshot to capture text.
- Importing the files to OCR.
Plus, we’ll also walk you through how to automate and preview a scanned document on your MacOS device. Let’s dive in straight away.
How to edit a scanned document in Word
MS Word has an inserted OCR function that turns any scanned document, in any file format, into an editable file. It is a straightforward process, and after converting you’ll have access to all their tools to edit your file.
To edit a scanned file:
Step 1: Open MS Word > File > Open > Browse to open your Word document in Word.
![How to edit a scanned document [Win/Mac] (2022)](https://www.techwibe.com/wp-content/uploads/2022/08/word-image-24517-1.png)
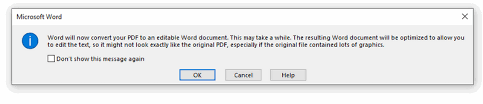
Step 2: A window prompt will popup with the message, “Word will now convert you PDF to an editable document…” and the resulting document, although it might not look like the original PDF, will be optimized to allow you to edit the text.
Step 3: Now, you can edit your scanned document in MS Word easily.
That’s just about it. MS Word retains all the file format styles and graphics used. However, its accuracy is only dependent on the quality of a scanned file.
For a higher accuracy, and an even shorter OCR scan, we’ll use PDNob Image Translator.
How to edit a scanned PDF document using PDNob Image Translator
PDNob Image Translator is an easy-to-use software app that lets you easily extract, translate, and transform text in images or any PDF file into an editable text at 100% accuracy. You will save time, improve your efficiency, and eliminate any errors with PDNob Image Translator.
Tip: This software is compatible with both Mac OS 12 and newer versions and Windows 11/10/8/8.3
With PDNob Image Translator you can:
- Batch OCR multiple files without uploading any file.
- Copy text from restricted or scanned PDF document.
- Convert scanned handwritten file to text.
- Pull and extract text from scanned image files.
- Translate extracted text of 12 languages, including simplified and tradtional Chinese, Korean, Japanese, and Bulgarian.
Now that you know what PDNob offers, let’s pull some text from your scanned PDF document and edit it.
Important Note: You can use PDNob Image Translator to batch OCR entire scanned document and instantly edit them. Similarly, we’ve upgraded our flagship OCR software to a newer version that lets you scan and edit multiple and selected pages, or specific sections of your scanned document, instead of converting an entire document. This is what we’re going to show you.
To get started, you’ll need download and install PDNob Image Translator from PDNob store: https://www.pdnob.com/products/pdnob-image-translator.html
You can then follow these two steps to edit your scanned PDF document.
Edit scanned document by taking a snapshot to capture text
You can use this to batch OCR sections or entire pages of your document. To start:
Step 1: Open your scanned document file.
Step 2: Then, right click the icon in the tray panel and select “Batch OCR”. Press Command + 1 for Mac, and Ctrl + Alt + Z for Windows to activate the screenshot function.
Step 3: Next, take muliptle screenshots of the different and specific sections of your document you want edited. The app will automatimatically start an OCR scan for every screenshot taken. Extracted text will appear on the right side of each screenshot after scanning.
Step 4: Finally, click the Export icon at the top-right side of the UI to export the extracted text as a .txt, .doc, or .docx file to any word processor, for example, an MS Word document for editing.
Edit scanned documents by importing files to OCR
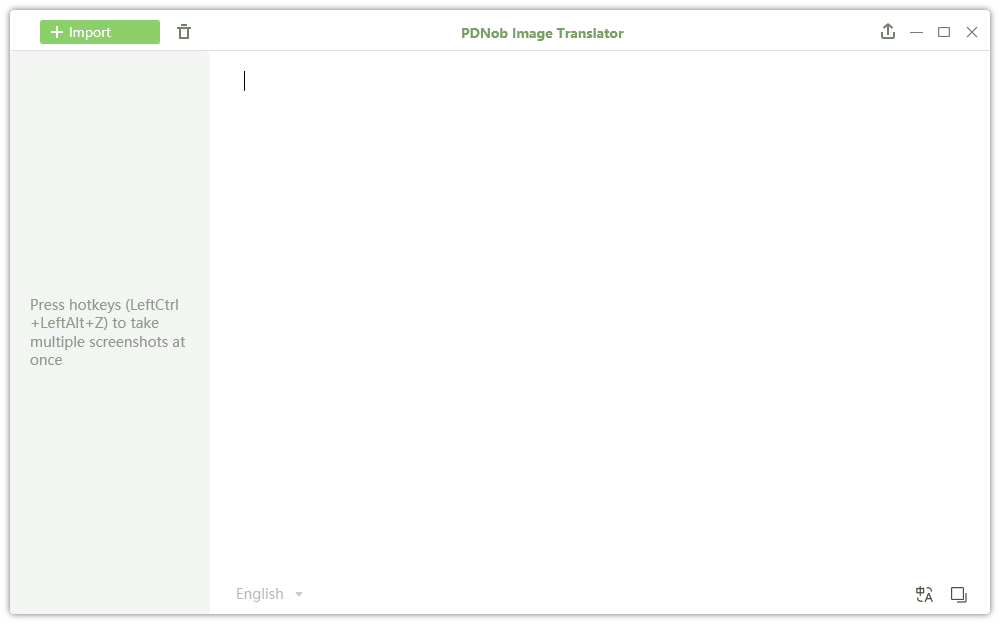
Step 1: Start the app. Right click the icon in the tray panel and select “Import Images” to import PDF image files.
Step 2: The program will automatically begin an OCR scan on each scanned file, consecutively. Extracted text will appear on the right side of each screenshot after scanning.
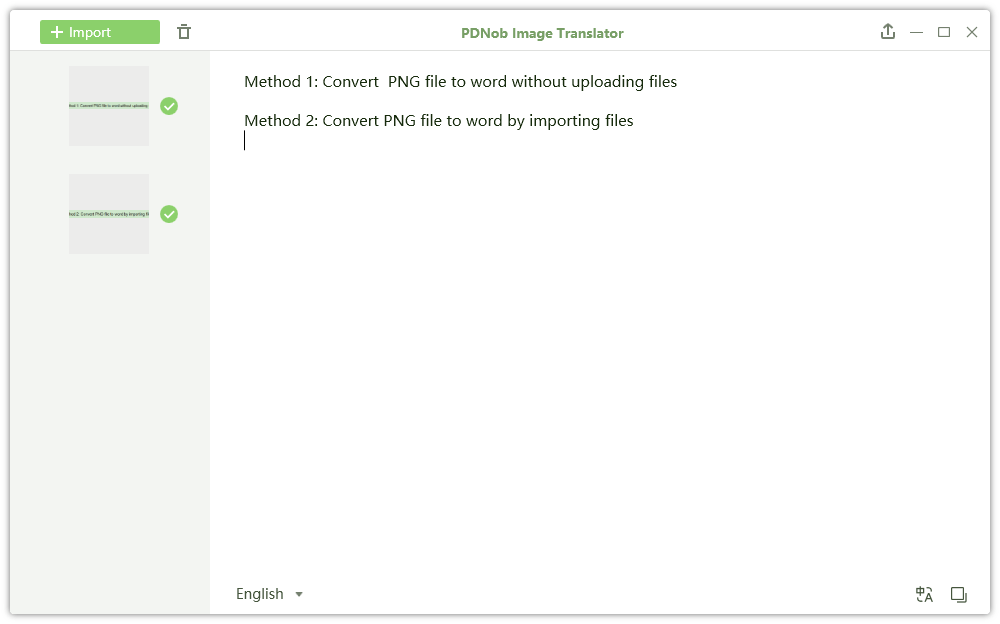
Step 3: You can edit the OCR result if needed. Also, you can click the Export icon to export your OCRed document as .txt, .doc, or .docx file formats to other word processors for editing.
That’s it.
Now, let’s edit on Mac alone.
How to edit a scanned document on Mac
MacOS comes with a handy tools you can use to edit a scanned document.
How to edit a scanned document – Automator
An automator is a tool in Mac OS X that lets you to build custom workflows to performa simple or complex tasks on you device, in our case, to edit scanned documents. To start:
Step 1: Start the Automator app and select the PDFs option in the Action tab.
Step 2: Next, scroll down to look for Extract Text from PDF action and click on it, or simply type in extract text from PDF to locate the action type you want to execute.
Step 3: Drag in the Extract Text from PDF action to build your workflow. A window prompt will appear.
Step 4: Make sure you click on Add to add the automator action. Then, save it as Edit scanned documents and select the destination, you want it saved, for example, desktop.
Step 5: Finally, drag you scanned document on the icon you saved and it automatically scan the doct and extract text from it for edit. Voila! You’re done.
![How to edit a scanned document [Win/Mac] (2022)](https://www.techwibe.com/wp-content/uploads/2022/08/1661140873074.png)
How to edit a scanned document – Preview
Preview on Mac is basically an image and PDF viewer on Mac you can also use to edit these media types. Although you can’t edit text on Preview app, you can copy and paste text and transfer to other word processor for edit. To edit text using Preview:
Step 1: Start Preview and choose Select All from its toolbar.
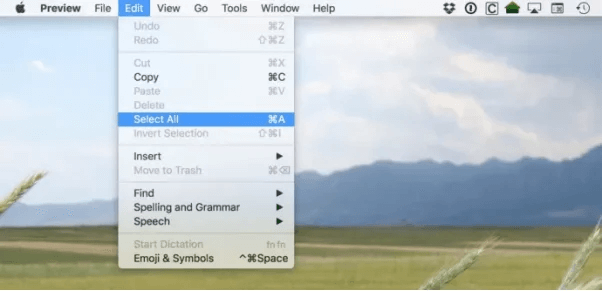
Step 2: Next, select the text you want to extract and right-click your mouse over the selected area to copy the text to your clipboard.
![How to edit a scanned document [Win/Mac] (2022)](https://www.techwibe.com/wp-content/uploads/2022/08/1661141328021.png)
Step 3: You can then paste the text to word editor to edit.
What is the best software to edit scanned documents?
The best software for editing a scanned PDF document is PDNob Image Translator, with MS Word coming in a close second. It can be used in most use cases, it’s accurate enough, has a short scan process time for huge PDF documents, and retains all formatting styles.
It’s an easy-to-use OCR software that can crop and edit text in scanned files and convert entire pages to editable text. PDNob Image Translator is also compatible with most word processors, cloud storage apps, and other image processing apps for Mac and Windows OS, and the good news is, its latest version is available in the market today.


![DirectX Not Installing Error on Windows 11 [WORKING FIX] For PC, Laptop](https://www.techwibe.com/wp-content/uploads/2023/06/word-image-27263-7-320x190.jpeg)