Isn’t it irritating?
You log in to your site dashboard and see tons of spam in the form of user registrations, comments, contact form messages, etc.
Due to the huge number of spam, you may fail to recognize the genuine content. That’s why you need a helping hand to filter spam out of the league.
What do you think is the best spam fighter? Whatever be your answer, I have a special solution to the spam chaos.
Contents
Spam Protection by CleanTalk WordPress Plugin Review
![]() I know you have heard of a number of anti-spam plugins. But you must know, the cloud-based ones are the best regarding detection rate. They compare all the content in forms with their own algorithm to find out the legibility.
I know you have heard of a number of anti-spam plugins. But you must know, the cloud-based ones are the best regarding detection rate. They compare all the content in forms with their own algorithm to find out the legibility.
The joyous part is Spam Protection by CleanTalk is a cloud-based anti-spam plugin.
Installation and Initial Setup
In this section, you are going to know how to install the plugin and make it usable for the first time. Follow the steps given below.
Step 1: You have to sign into your WordPress dashboard. Don’t forget to enter the proper credentials. Or else, you will not be able to do so,
Step 2: Just like you install any other plugins, go to Plugins>> Add New. You will get a new screen with a search box.
Step 3: Type CleanTalk into the search field and, hit Enter or click the link here to download the zip package from the repository. You will get Spam Protection by CleanTalk as the first result. Click on the Install button given just right to the name of the plugin.
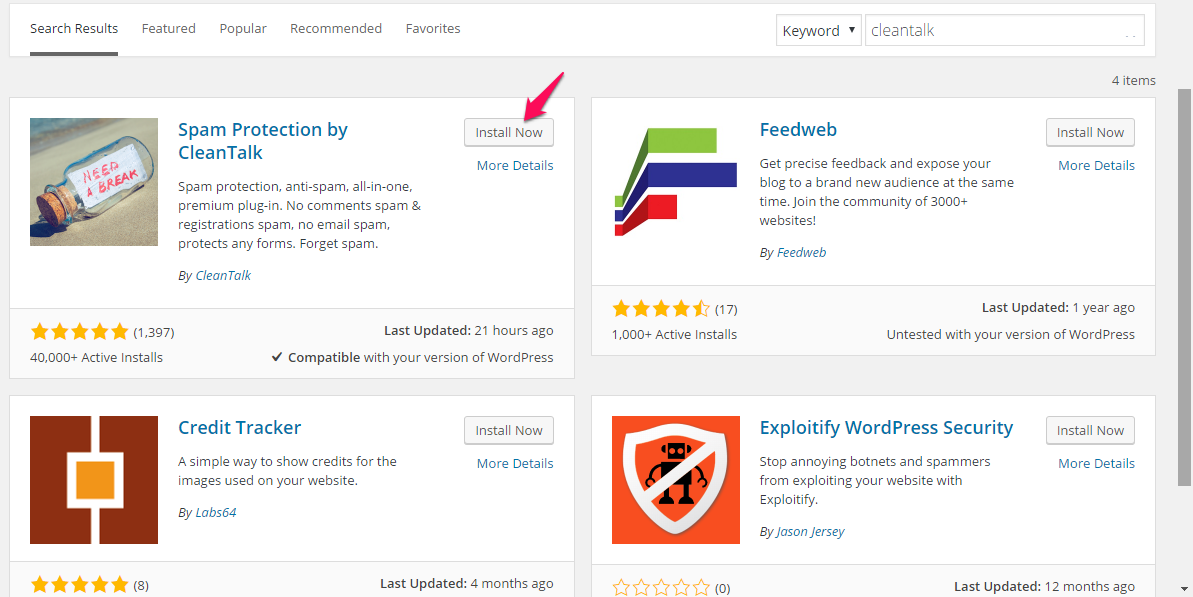
WordPress search result
Step 4: Once the installation is completed, you will get a link to activate the plugin. Don’t forget to click it.
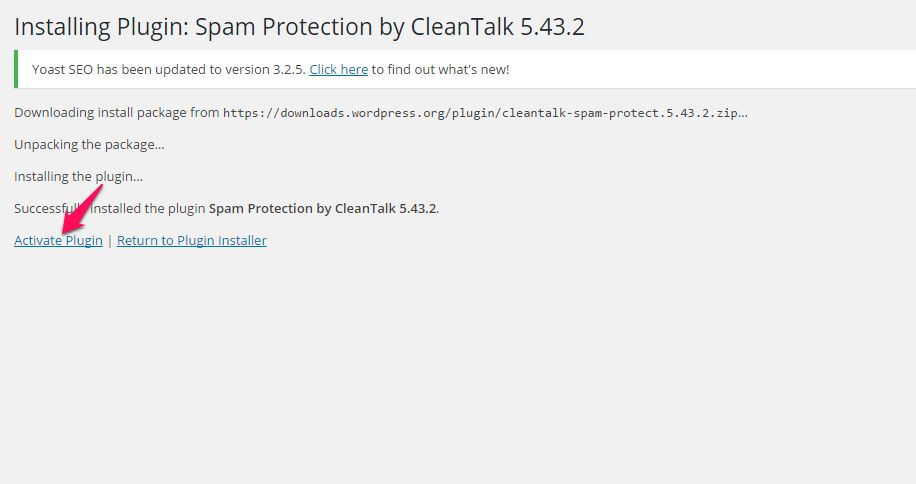
WordPress plugin installation and activation
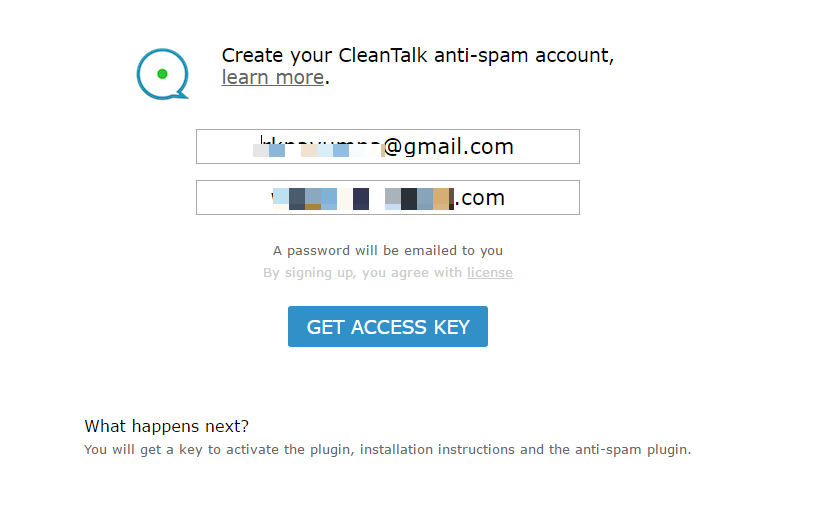
Step 5: On activation, you are brought to the CleanTalk settings panel on the blog dashboard. The first thing you need is an Access Key. You can’t make the plugin functional without it as the key acts as a connecting bridge between your WP site and their cloud server.
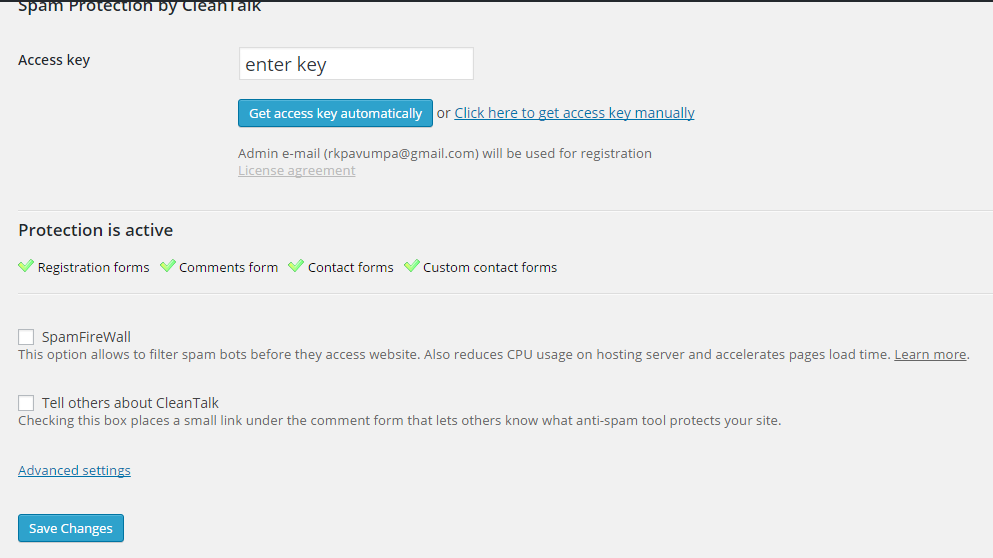
Adding access key to WordPress
You can get an access key by two means; automatic and manual. For automatic method, you only need to click the blue Get access key manually button. And for the manual mode, you have to click the right link then, fill a form like the one given below. (You will get a mail with your CleanTalk account password).
 Now, you are good to go.
Configuring the Plugin
Once the plugin becomes ready-to-use, you can move on to configuring the same.
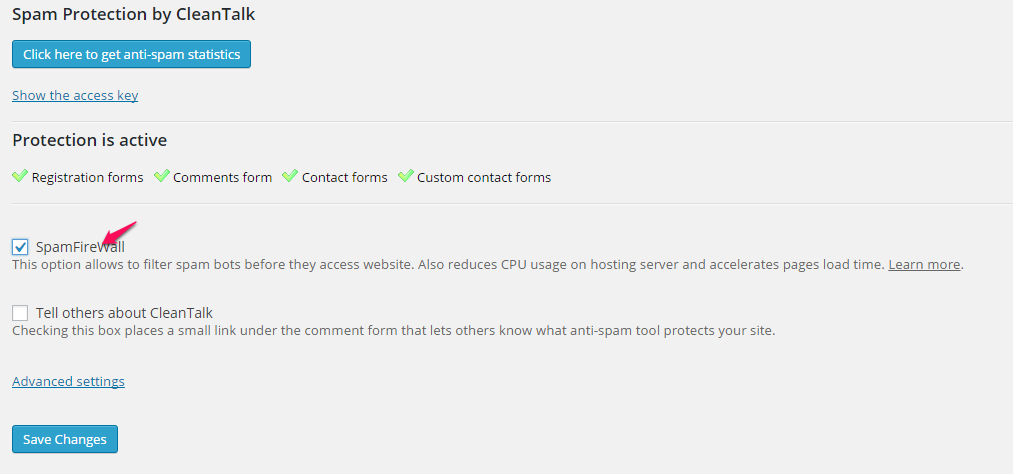
WordPress protection is now active
Access Settings>> CleanTalk if you haven’t already. And, make sure the checkbox ‘SpamFireWall’ is turned on.
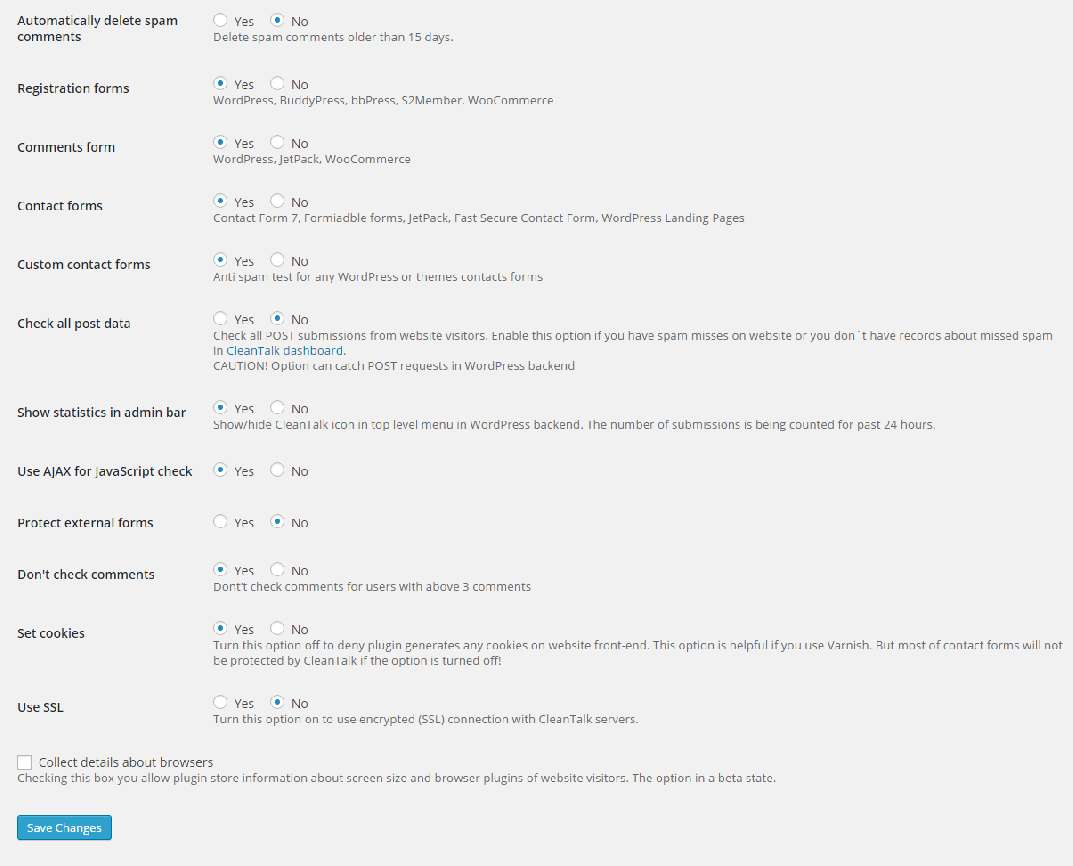
Settings available in your WordPress
The image given above is a set of options you get on clicking Advanced Settings link. The purpose of each option is comprehensible by reading the description there. So, I don’t think you need any help here. You can turn on or off them according to your needs.
Accessing the Dashboard
You know Spam Protection by CleanTalk is a cloud-based WordPress plugin, don’t you? So, you can monitor the form content of your site from another medium as well.
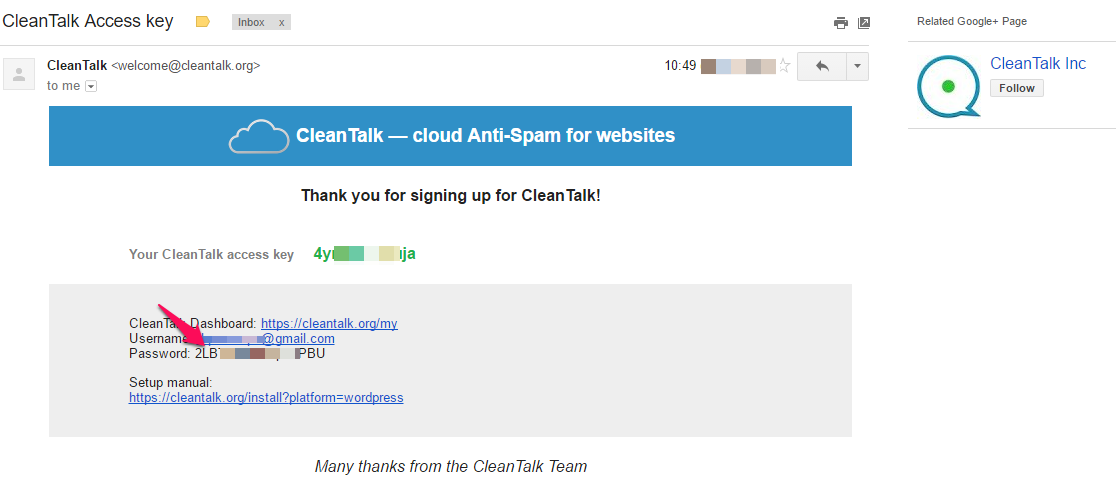
The first step is grabbing the password from the mail they sent to you. First, you have to visit your email client. If you are a Gmail user, you will see the email in Updates tab.
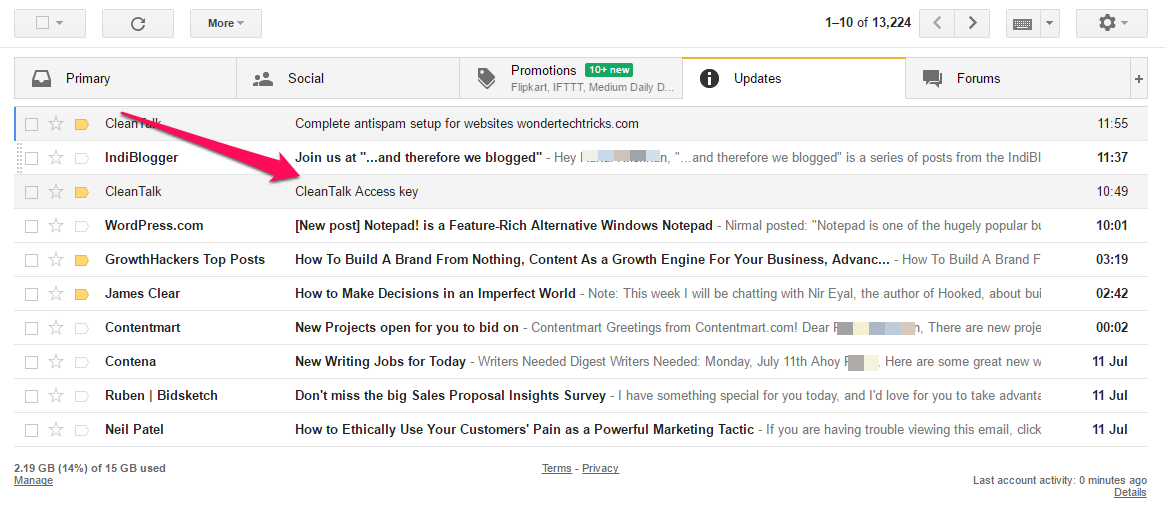 Open the mail. You can see the password at the end of the mail. In case you forget access key, you can use this mail as a reference for that too.
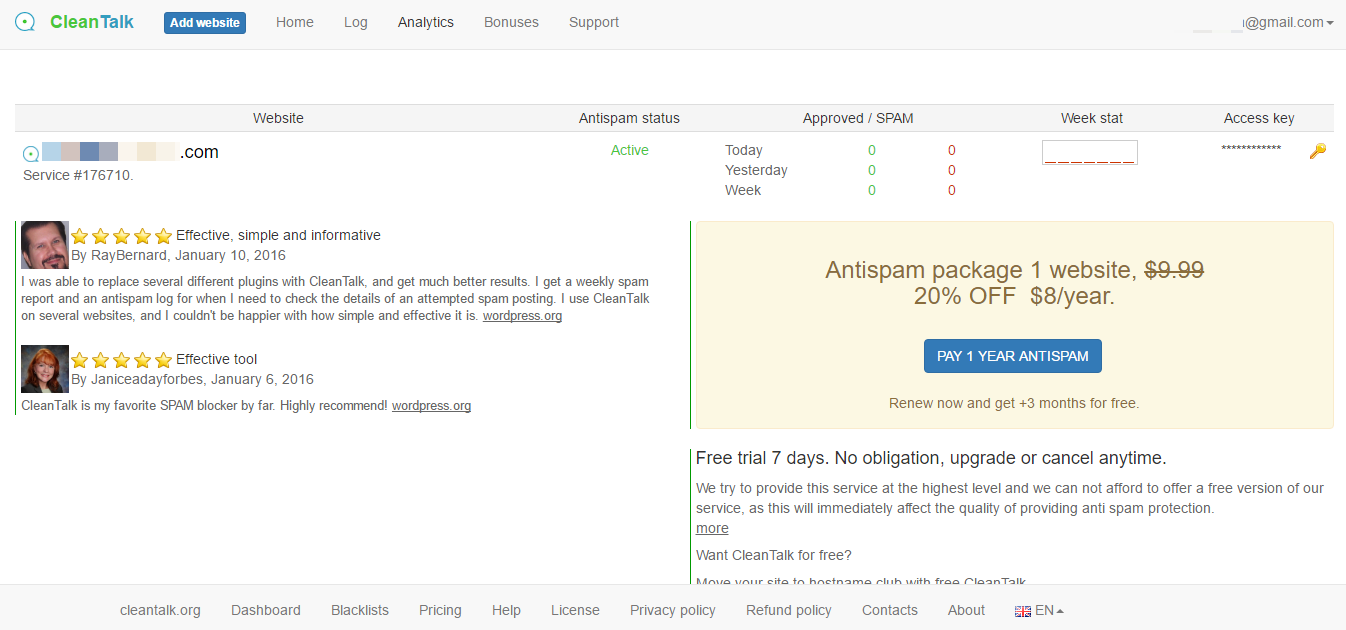
 Now, go to cleantalk.org and, you can see a login link there. You can use your email or website URL as the username, and password is the one you copied from the mail.
There you will see your website, anti-spam status, a few stats along with access key (clicking on the key-like icon reveals the code) there.
 When you hover your mouse pointer over the website, you can see five options; Log, Settings, Delete, Black&White lists and Setup Manual.
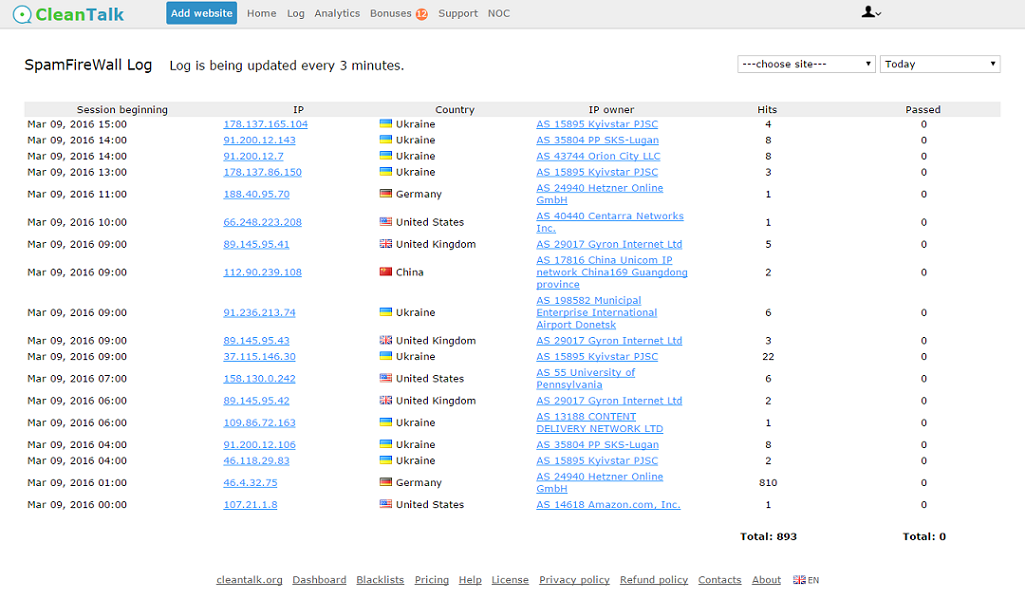
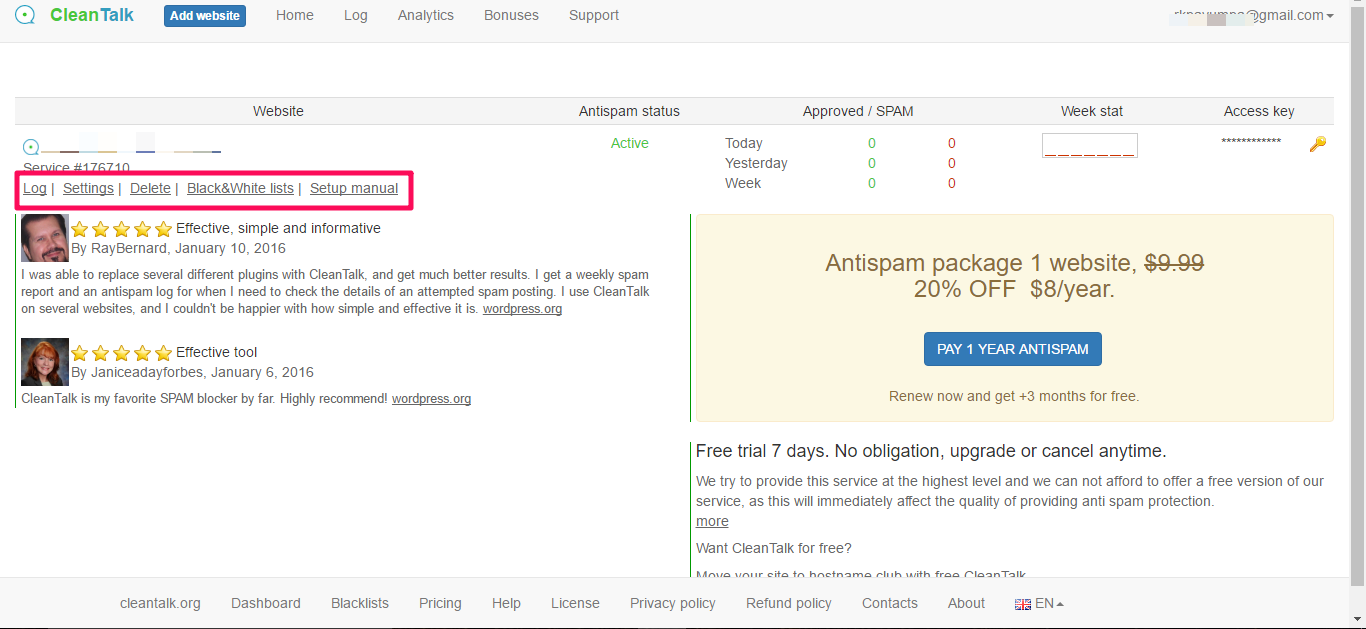 Log: – You can see every content posted on your site here. The log is being updated every 3 minutes.
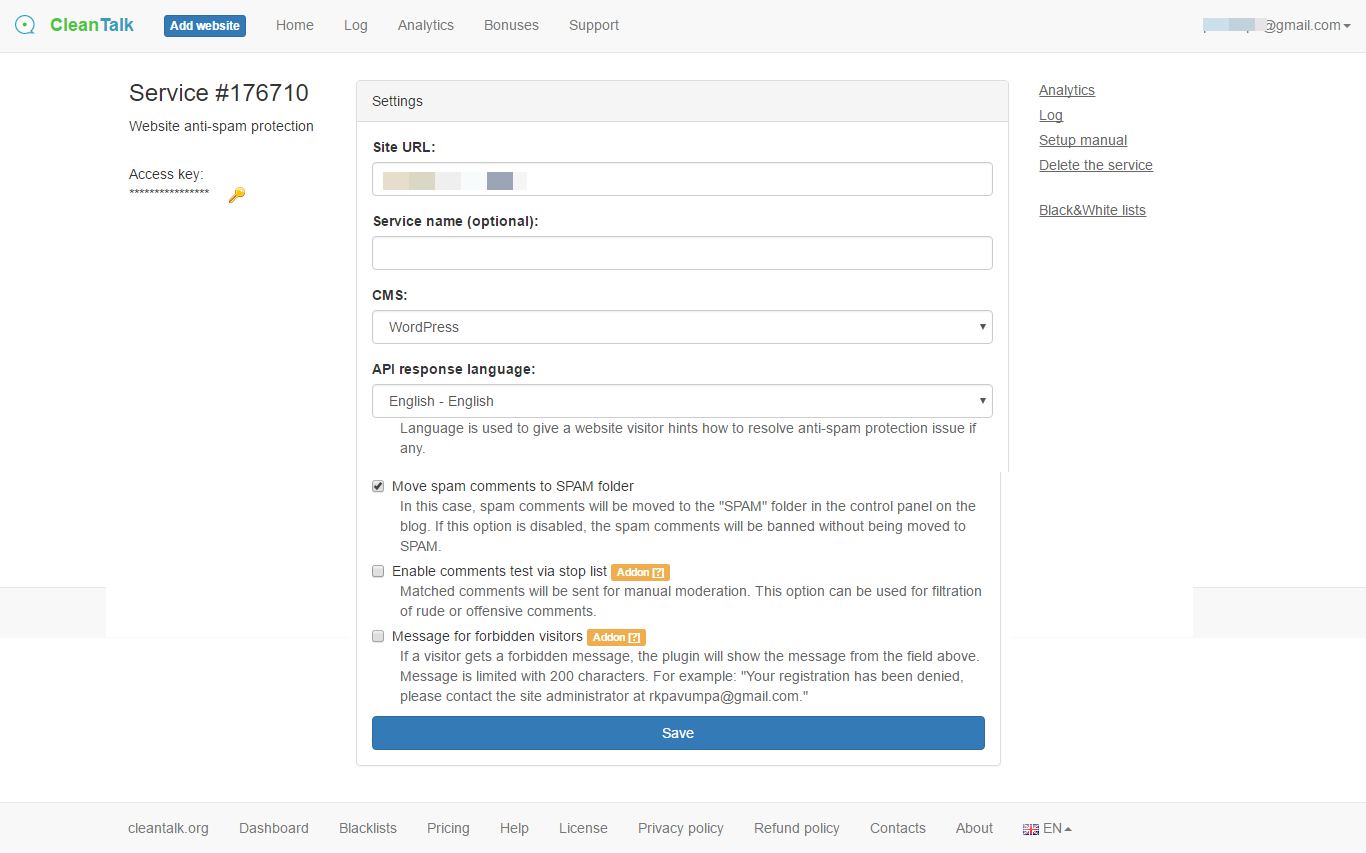
Settings: – Here, you can change API response language, CMS, URL, etc.
 Delete: – Clicking on this link will delete that particular domain from their server
Black&White lists: – In case you want to block or allow a specific email address or country, you can use this feature.
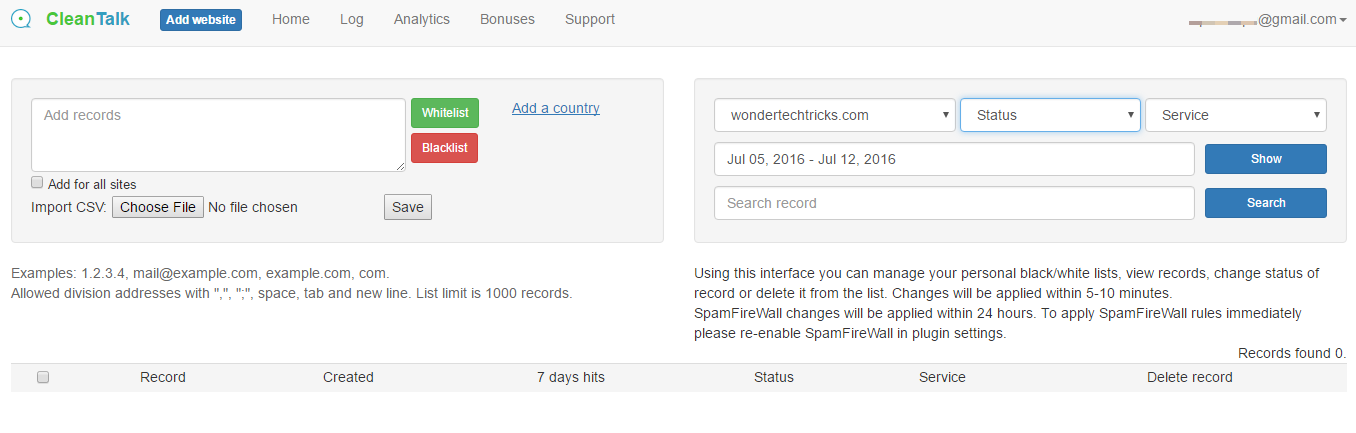 Setup manual: – In case, you need any help in setting up this plugin, you can use their setup manual.
If you want to add a new website, the blue Add website button just right to the header is the thing you should pick.
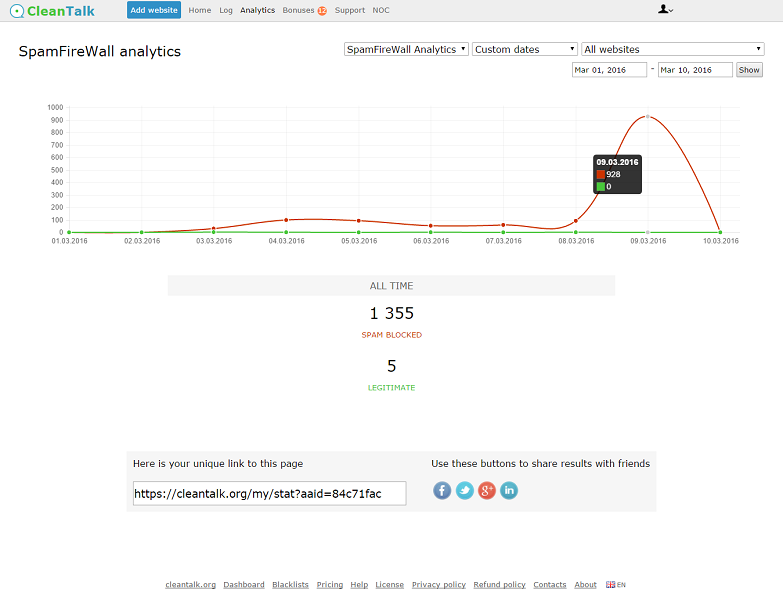
The in-depth statistics can be seen by clicking Analytics link on the top navigation bar.
How it works?
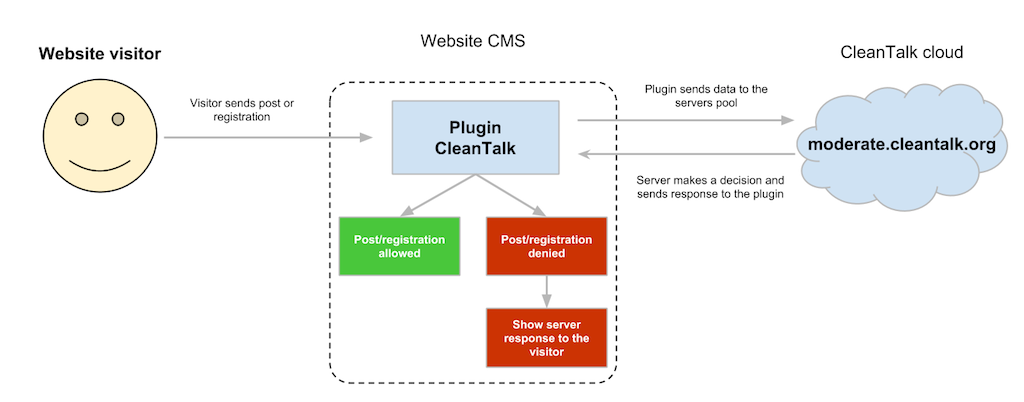
Whenever a visitor enters your website or tries to register as a new user or comment the CleanTalk plugin cross check if the HTTP request is from a real user or a spam bot (by comparing with 5.8 million of certain IP spam bots) by using their reliable cloud, so if it’s a bot it sees a blank page else the real web page is shown. Since every parameter is written to the log you can also view it from the Control Panel.
 Anti-spam logs
Since all the activities (like Day, Date, Time, IP address, Country, IP owner) are being logged for a period of 45 days you can ensure reliable protection of your websites from spam and no false/positive filtering.
 Pricing
CleanTalk has eight different plans with the difference in price and number of websites. Starting from $8/year, I don’t they overcharged the product.
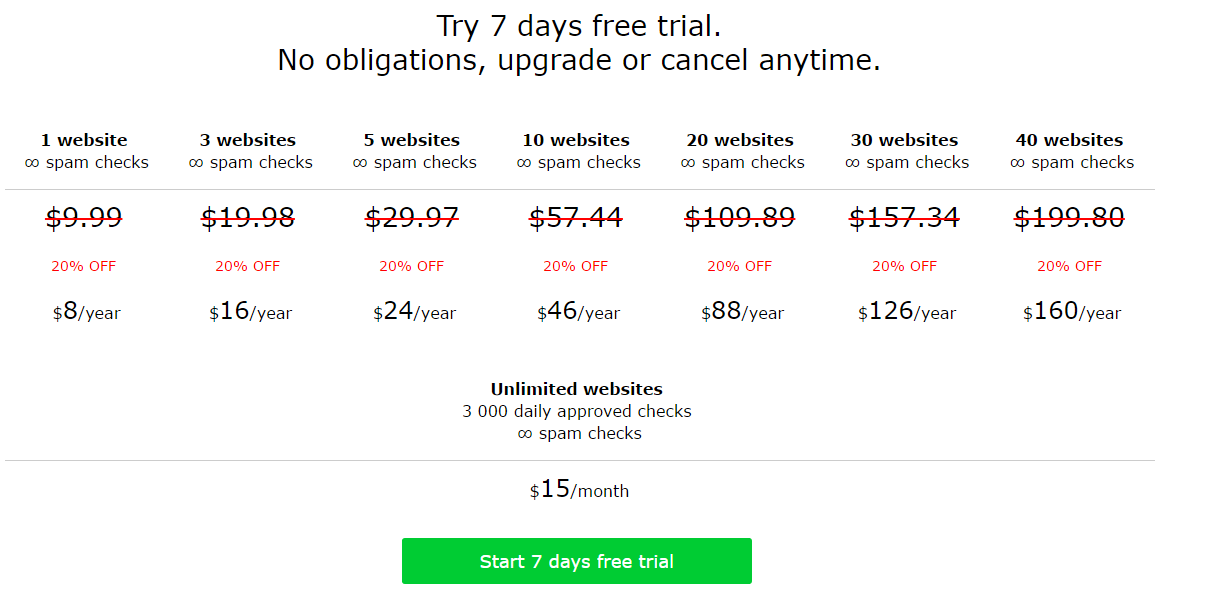 You can try the plugin for seven days by taking advantage of the free trial period.
Wrapping Up
What do you think now?
Being a cloud-based spam armor, we all know the efficiency is on the higher side. Moreover, they prevent spam from every form on your website. So, it will not be a walk in the park for spammers to break the great anti-spam wall of CleanTalk.
What are you waiting for? Just join and try the plugin for seven days. Then, you will purchase a paid plan, I swear.