Windows has its fair share of design aesthetic choices to please its broad range of users. One of the effects is the acrylic blur effect which we see in the sign-in screen. The blue effect is prominent in both Windows 10 and 11. While this blur effect is turned On by default, you can remove the blur if you do not like it.
You must have been using your computer every day and whenever you turn your PC on, it shows the blue effect which you don’t like. Thankfully, just like Windows gives its users versatility in customizing the OS, it also gives few options in the design department. The fuzzy sign-in screen may not be the cup of tea for everyone. So let’s see how you can turn off the blur effect.
Contents
Want to Clearly See the Background Image on the Sign-in Screen? Unblur the Background Image.
The blue effect or acrylic effect of Windows 10 is one of the designs that Microsoft put as default. However, Microsoft is generous enough to let its users customize the sign-in screen if they don’t like the default screen. As a result, here we come to the next question that is how do we disable the acrylic effect on Windows 10?
Removing the blue background will make you enjoy the wallpaper even more. Moreover, Windows has its spotlight images that look stunning and too good to be seen in a blurry manner. Those images are high-quality gorgeous-looking images that you can use as your next background image on the sign-in screen. To enjoy beautiful pictures from Windows, you have to unblur or turn off the acrylic blue effect.
The Best Way To Turn Off The Blur Effect On Sign Screen Background Picture
Unblurring the background sign-in screen is possible by going through the Windows settings. In addition, doing this is also the easiest route to remove the blurred image when you turn in the computer.
- The first is to press some buttons and hit the Windows + I key to fire up the settings screen.
- In the settings, you will see a bunch of sub-categories of settings. Select the “personalization” option.
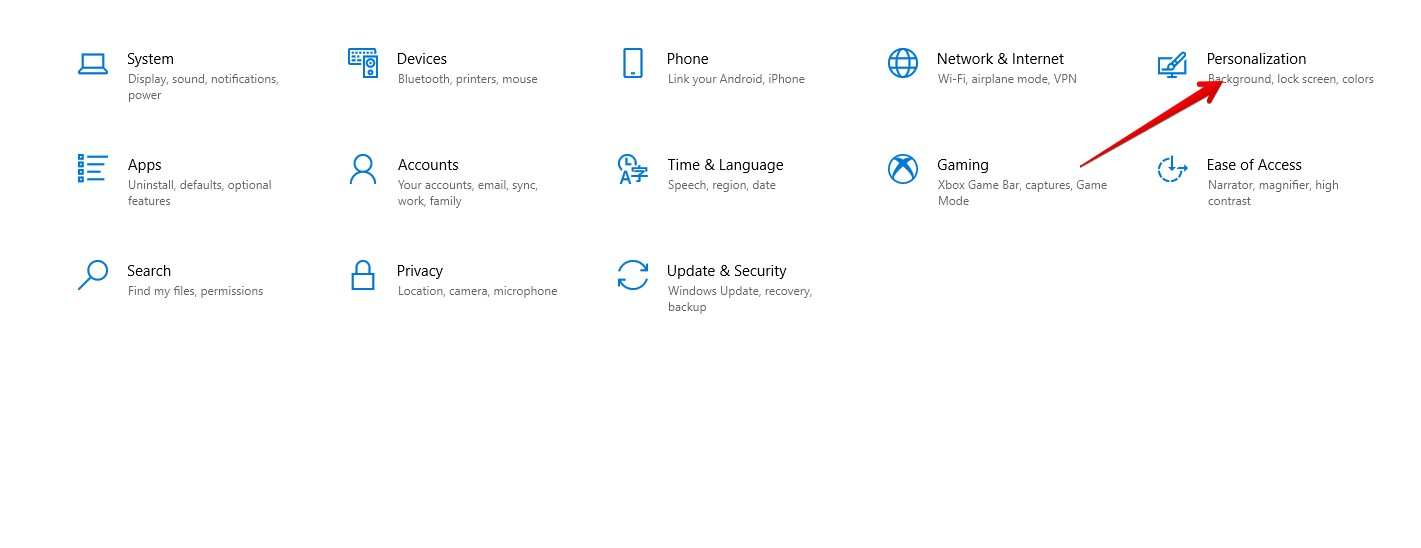
- You can also directly open up the personalization settings by right-clicking on the desktop and clicking on “Personalization”.
- After that, click on “Colors” located on the left pane.
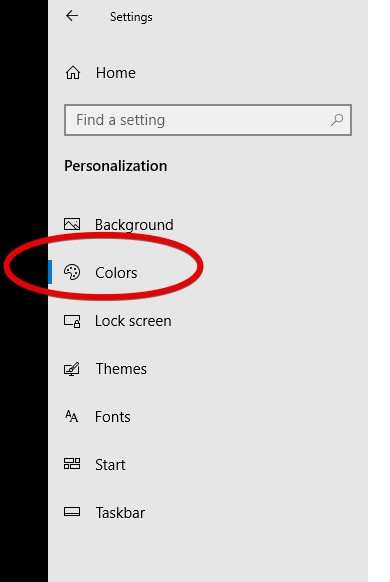
- Now the colors screen will open as you can see in the image.
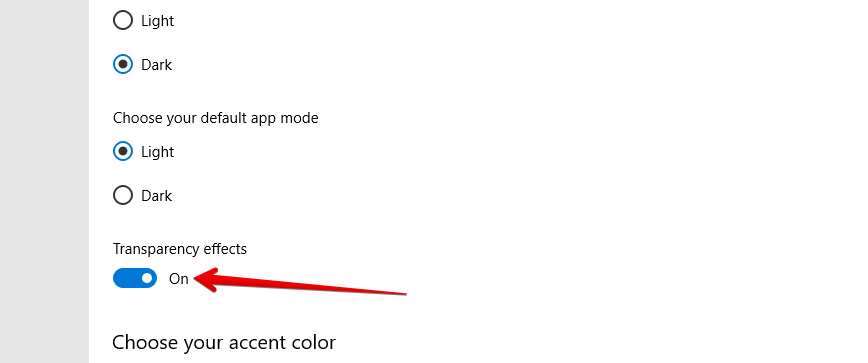
- Scroll down and you will find the “transparency effect” turned on. Simply turn it off by clicking on the toggle.
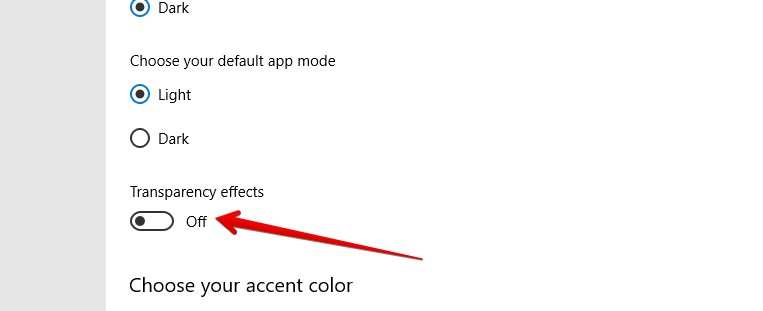
After turning off the Transparency Effect you will no longer see the Acrylic Blur in the sign-up screen. Here in the Colors window, you also have the option to choose the theme of your windows and select accent colours. You can make your computer your own by playing with each setting.
How to check the blur effect?
After turning off the transparency effect in the settings, you can easily check it. The first option is to restart the PC and you will see the sign-screen in no time. There you will find that there is no blur effect in the background image and you can enjoy the image.
You don’t have to restart your PC to see this effect take place. You can also do it by pressing the Windows + L keys. After pressing these keys, your Windows will go to its lock screen. There you will see the Sign-screen without having to restart your whole computer.
Keep in mind that if you turn off the transparency mode in Windows, then there are some changes you need to know. Firstly, the taskbar behaviour will change as there will be no blur effect in that. Similarly, the Start menu and Action Center will also be different.
Conclusion
Whether you like the blurry image of the sign-in screen or not. You have the option to disable or enable it in the settings. Windows have a variety of options for you to make your PC personalized. Removing the blur effect is a distinct design choice as not many people do not know how to turn the blur off.