The way a DNS server works requires multiple stages in order to get the request from a new website. This process takes time and the person who is browsing has to wait because of that.
Thankfully, you can speed up the process of websites loading your requests by flushing the DNS Cache. In this guide, we will briefly go through a tutorial about how to flush the DNS cache in Windows 10.
Overview of DNS
DNS or Domain Name System is like an address book of the internet. Domain names are used to extract specific information about websites. Users can access these Domain names using web browsers via Internet Protocol (IP) addressed. In Simple words, web browsers load websites with the help of IP addresses to access these domain names.

Your computer which is connected to the internet has its unique identity known as IP address. Other computers can find your computer using your IP address.
So who keeps a record of IP addresses to know which IP address belongs to what computer? Well, clearly it is difficult for humans to memorize such addresses for millions of unique IP addresses. DNS servers are a technology that understands and keeps track of all the unique IP addresses that you visit. It can detect IPv4 and more intricate alphanumeric IPv6 addresses as well.
Contents
What is DNS Cache?

DNS cache is the content of temporary files that your DNS server stores in your local storage. These caches are usually from previous browsing sessions on web browsers. The main reason why DNS stores cache is to efficiently load and retrieve the web content in a quick manner. Moreover, the website’s URL and its IP address can be resolved efficiently.
DNS caching is a complex caching system as compared to other type of cache files. It is not only limited to occurring at the browser or OS level. DNS caching requires DNS lookups which include multiple steps.
The DNS lookup involves going through a recursive resolver and then reaching the root server. From there, the lookup passes through the TLD server. TLD server keeps all the information regarding top-level domain names.
If the local DNS storage in your PC is void of any cache, the resolver still has a copy of the cache. As a result, the DNS lookup does not have to go through the lookup process all over again.
The Benefit of Flushing the DNS Cache
While DNS cache might speed up online browsing, it can also cause issues if the cached data is corrupted or gets out-of-date. You may have trouble visiting a website if it changes its IP address and your computer is still using the previous IP address stored in its cache. Additionally, connection problems may occur from a faulty DNS cache.
All of the DNS data that has been saved on your device must be deleted in order to flush the DNS cache. This step forces your computer to ask the DNS server for updated DNS information whenever it connects to a website. Connection issues caused by stale or damaged DNS information can be resolved by flushing the DNS cache.
In other words, DNS caching speeds up the internet by storing DNS records locally and speeding up the process of resolving domain names to IP addresses. This cache, though, may become an issue. When a website moves to a new server and its IP address changes, for example, your computer can still use the previous IP address stored in its cache, making the site unavailable. The same may be said for a DNS cache that has become corrupt.
This saved information is removed by flushing the DNS cache, forcing your computer to get the most recent DNS data from the DNS server on your next visit to a website. By doing this, you can resolve connection problems brought on by stale or damaged DNS information.
How to Flush DNS cache in Windows 10?
Here is the ultimate yet quick method for flushing DNS cache on Windows 10
- With the combination of the shortcut key Win + R, open the run command.
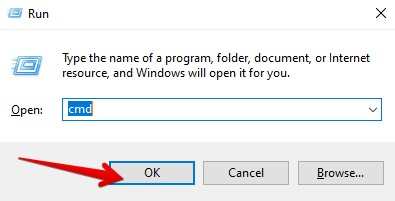
- Inside the dialogue box of the command prompt, type cmd and run the CMD.
- Enter the query config/flushdns inside the cmd prompt and press enter.
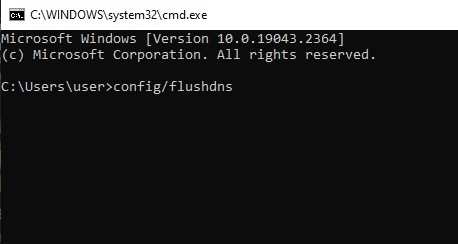
- In just a few seconds your cmd will perform the flushing of DNS cache. The cmd command prompt will show a successful message after the operation.

Now your computer has successfully flushed the DNS cache from its storage. Other types of DNS may also let users flush the domain cache.
Conclusion
This article showcased the method that users can use to flush every DNS cache on their Windows 10 computer. We hope you find this guide helpful.