Have you ever experienced a frustrating situation where you are using your computer? Suddenly, an unexpected and troubling error message appears on your screen, stating, “Explorer.exe class not registered”?
Experiencing this error can be incredibly frustrating, particularly when you have important tasks to complete, which impedes your progress.
Today, we will guide you through resolving the Explorer.exe class that is not registered error on your Windows 11 operating system.
What is a “Class Not Registered” Error?
The “class not registered” error usually appears as an interruption message, such as “file explorer class not registered,” indicating a problematic or inaccessible process. These details provide insights into the nature of the error and help identify the specific class or characters causing the issue.
The error message suggests that your Windows operating system cannot establish a connection between a file you wish to access and the program you are attempting to execute.
Users may face this issue when they try to open photos. The specific image application cannot access the file due to a missing component or object. The error message usually provides a detailed description highlighting the particular element or thing causing the issue.
Resolving the issue “Class Not Registered” with three simple method
Method.1 Force Close and Reopen File Explorer
One effective solution to resolve your issue is performing a force close of the File Explorer application and reopening it. By completing this action, you can effectively fix numerous minor glitches associated with the file manager. Moreover, the process itself is straightforward and user-friendly.
Step.1 To initiate the process, right-click the “Start” menu icon in your screen’s bottom left corner.
Step.2 From the context menu that appears, please select the option labeled “Task Manager.”
Step.3 Navigate to the option”Windows Explorer.” After searching, right-click on it and tap on the “Restart” button.
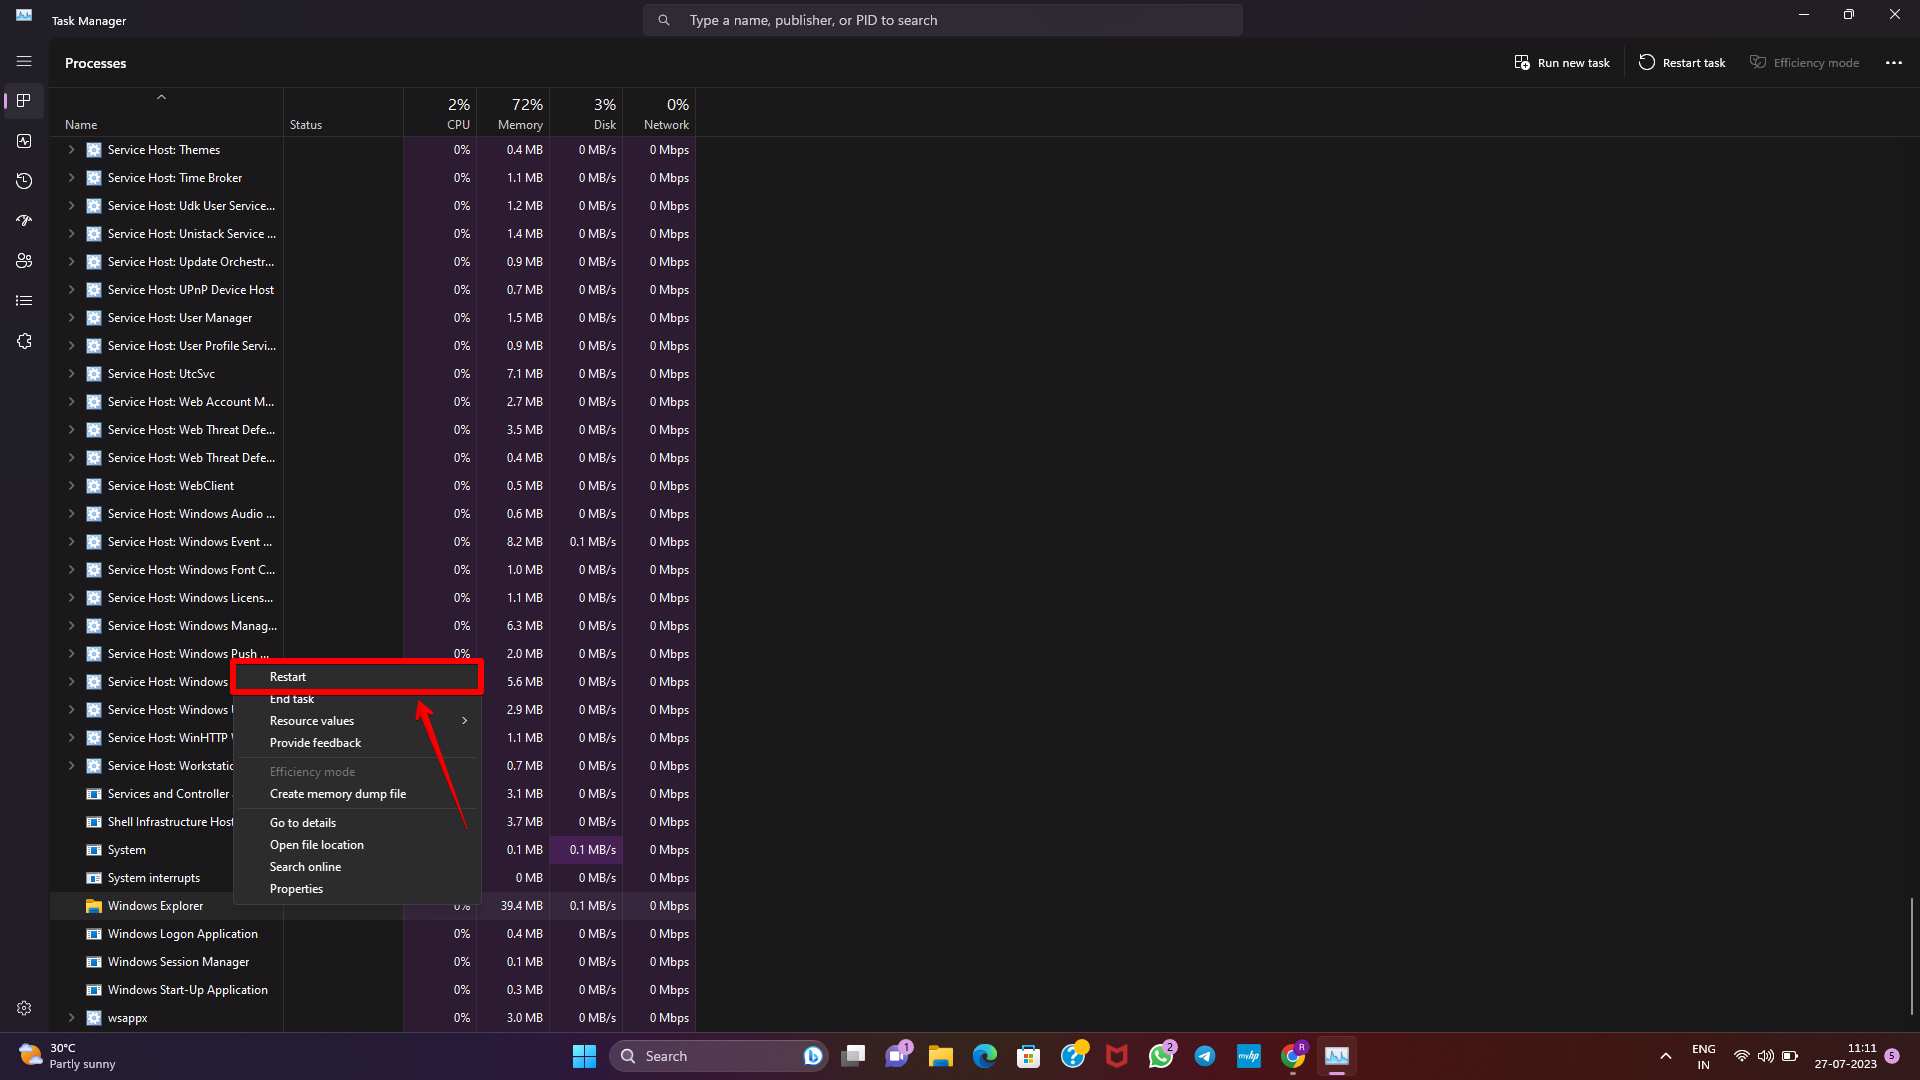
The File Explorer application will automatically close and reopen itself without any delay.
Method 2. Reset the Windows Default Apps
If you encounter an error while using File Explorer on Windows, a built-in Windows application may be causing the issue.
Another method includes resetting all default apps on your Windows operating system.
To reset the default apps on your device, follow these steps:
Step.1 On your device At, first, Go to the Settings menu.
Step.2 Look for the “Apps” or “Applications” option and tap on it.
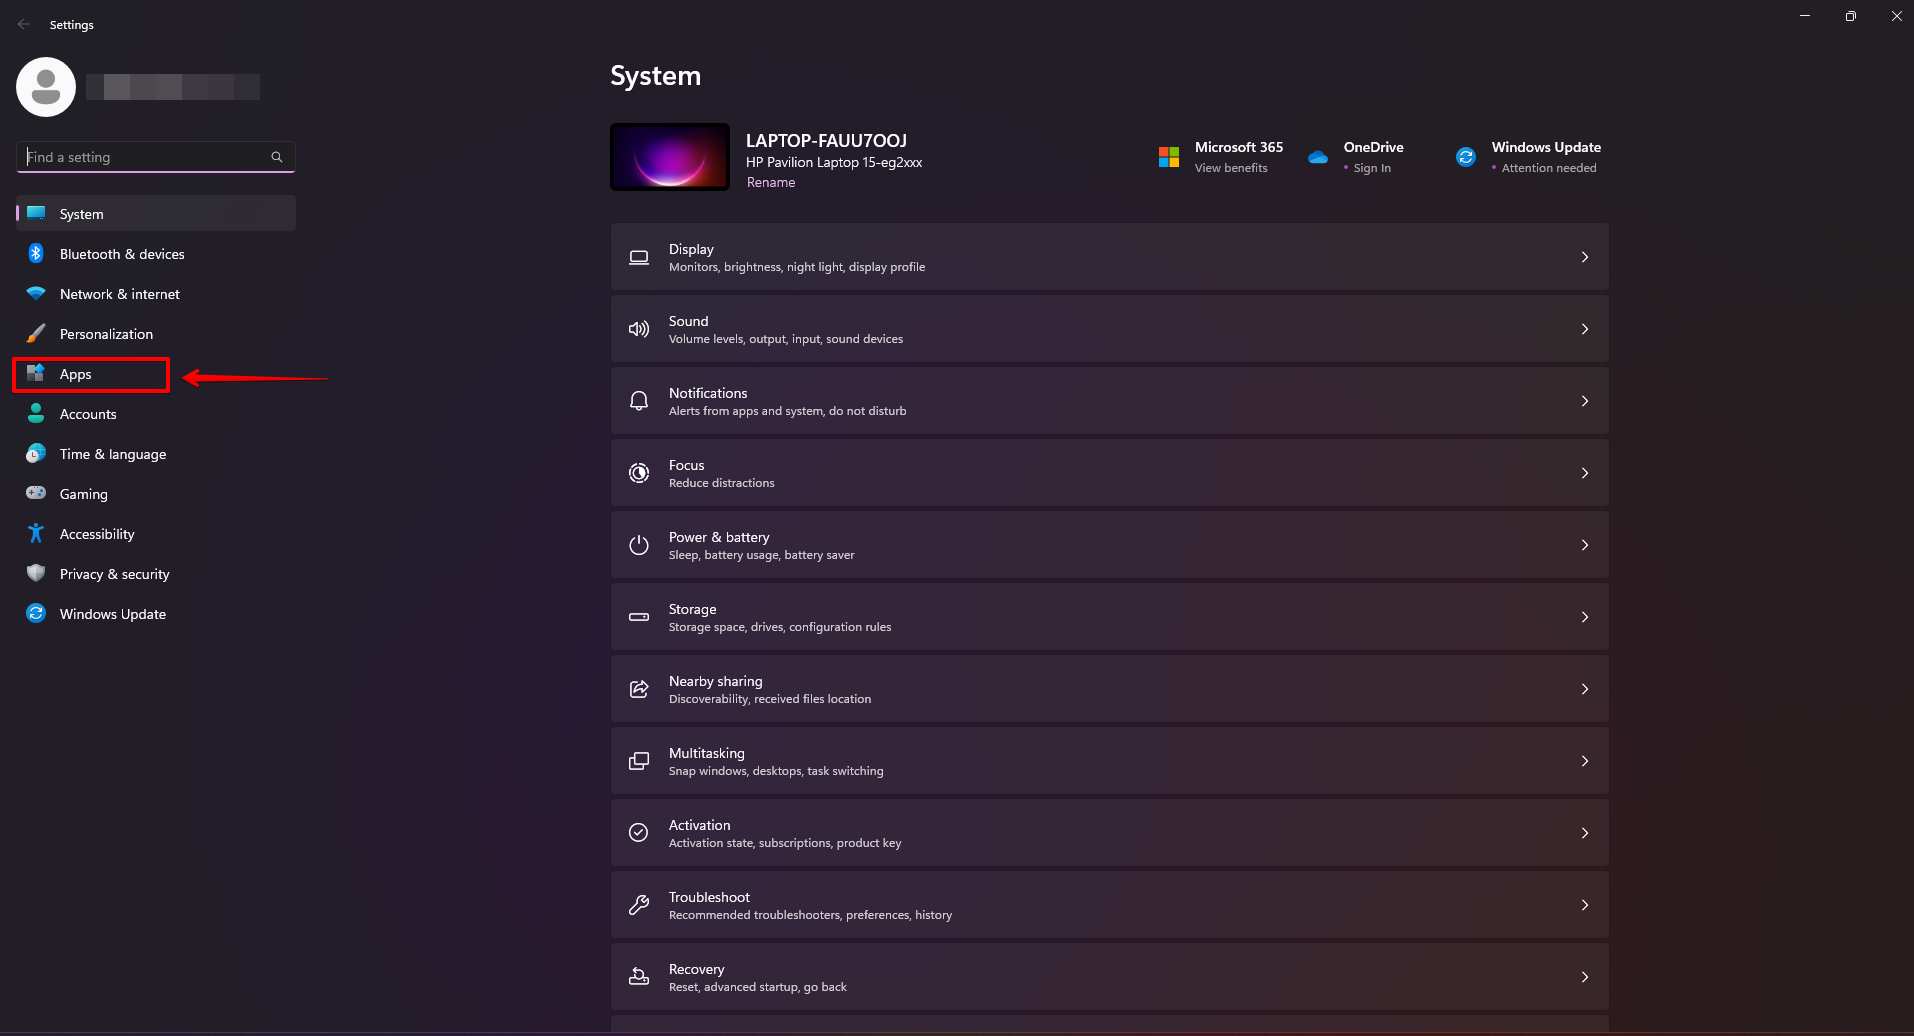
Step.3 To access the Default apps option, locate and click on the option on the screen’s right side.
Step.4 Scroll down to the bottom of the page and locate the Reset button, which is positioned next to the Reset all default apps option.
Step.5 And last, tap on the Reset button. This will initiate the resetting process of apps to the default settings.
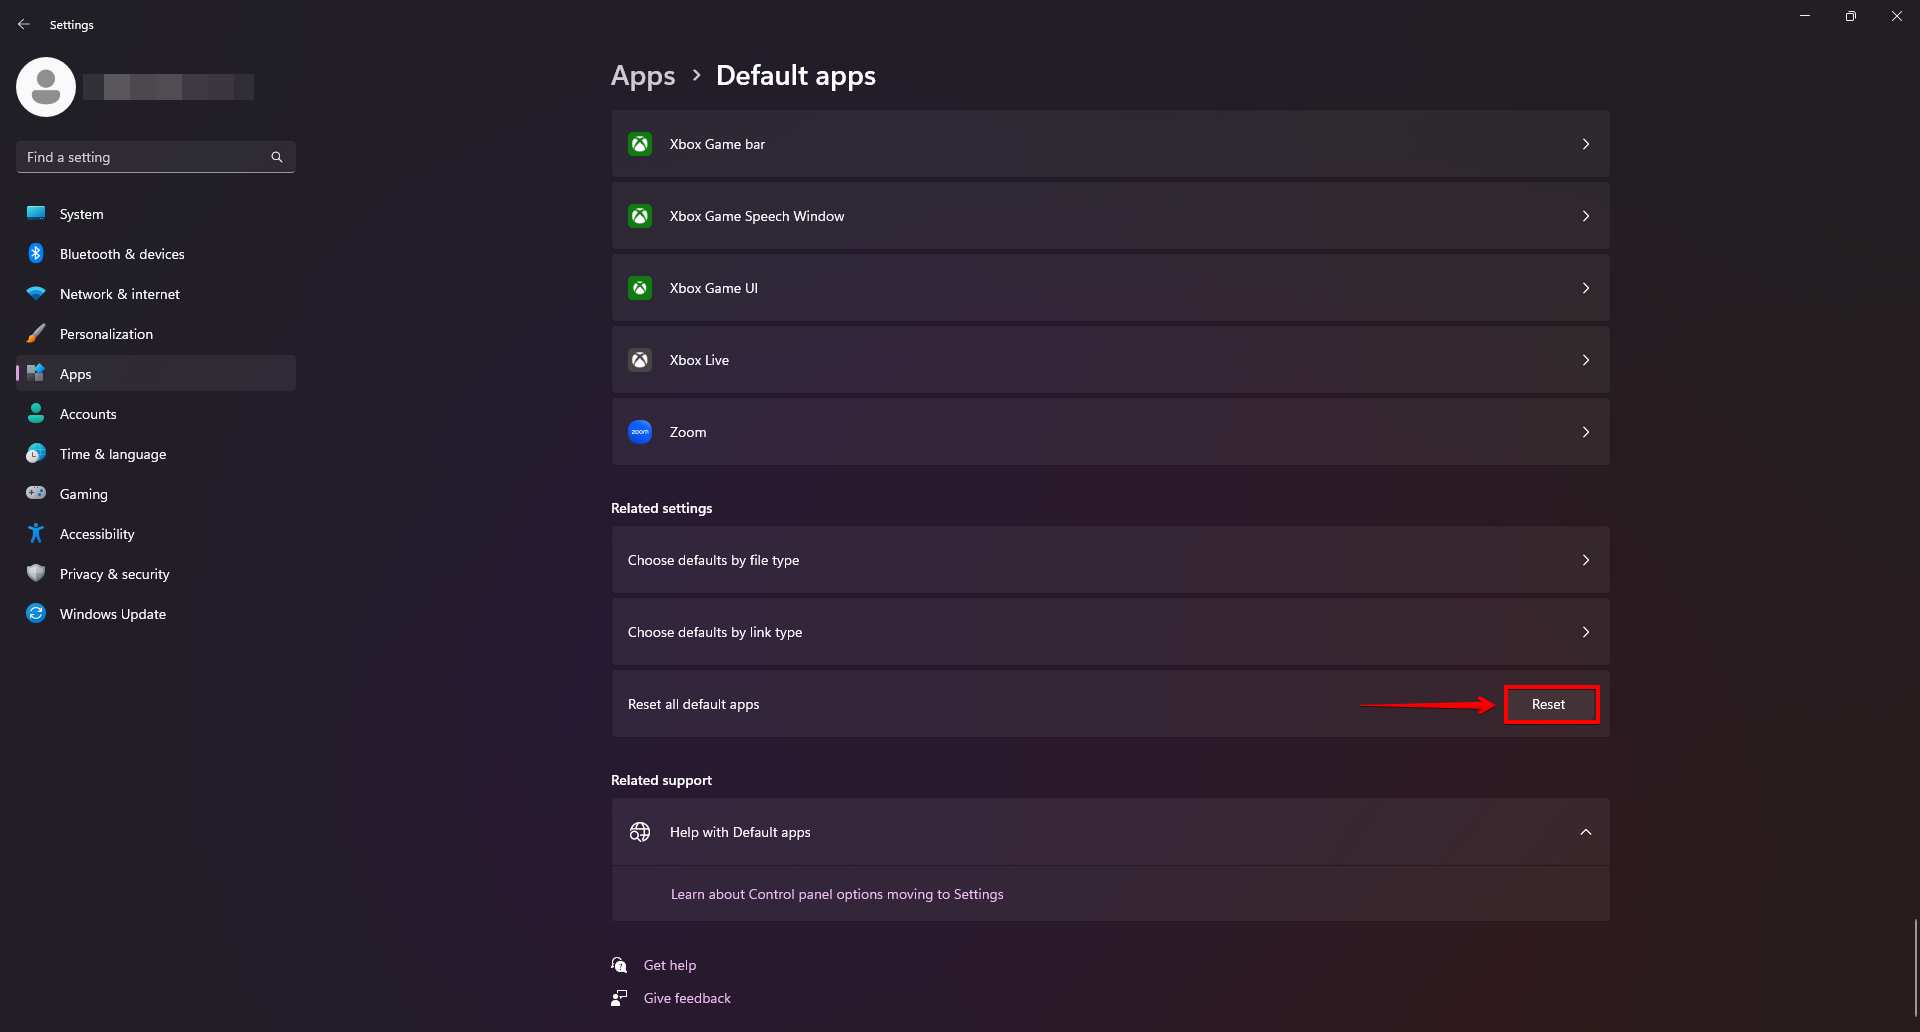
By performing these actions, you will successfully reset all default apps to their default configurations.
Method.3 Re-register all DLL files
It is possible that the Dynamic Link Library (DLL) file of an app has not been registered on your system. The Visual C++ Redistributable is essential for running applications and games developed using Visual Studio. A Dynamic Link Library (DLL) file provides the necessary runtime environment and dependencies for these programs to function correctly. Without the Visual C++ Redistributable, users may encounter errors or be unable to launch and use these applications effectively.
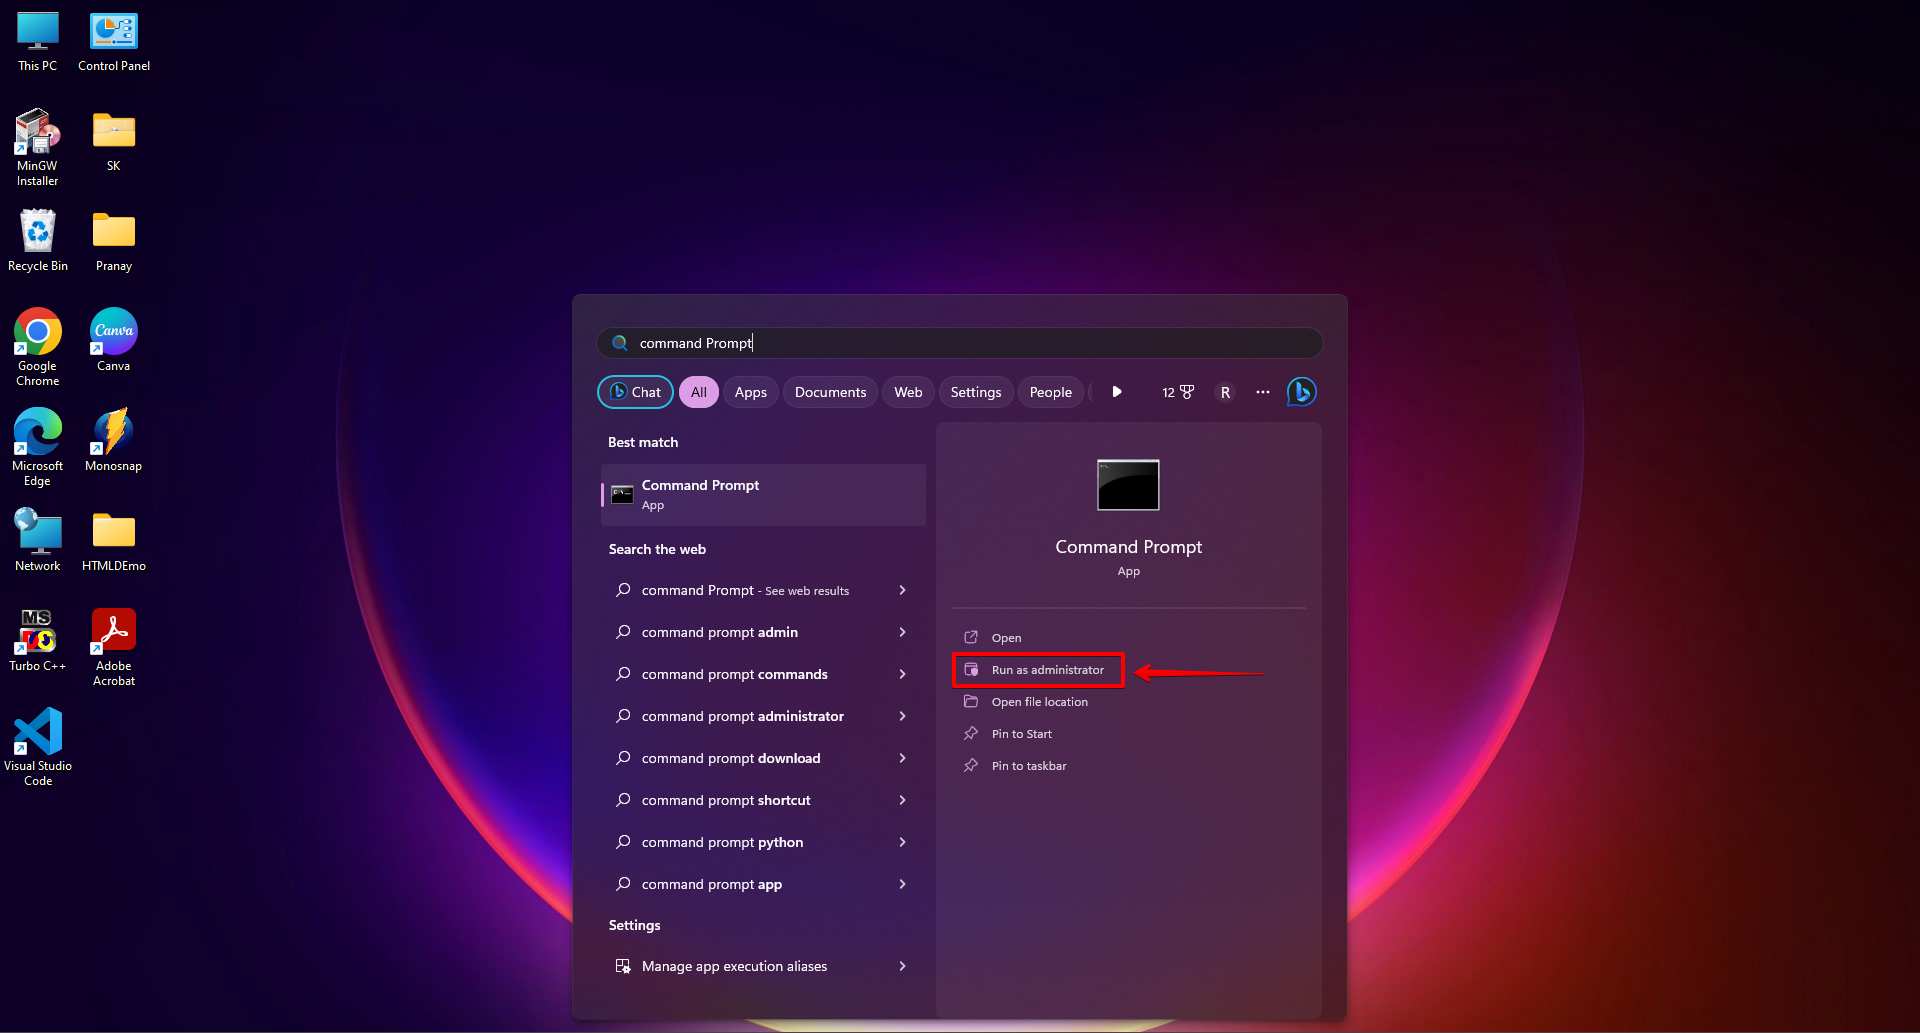
Step.1 To open the Command Prompt on your Windows computer, locate the Windows key on your keyboard and tap on it.
Step. 2. In your device’s Start menu search bar, type “Command Prompt.” And don’t forget to run Command Prompt at the end. To do that, locate the right-hand side of the menu and click “Run as administrator.”
Step.3 After that, now enter the below-mentioned command in the text field. Tap on the enter key from your keyboard and process for the next.
for %1 in (*.dll) do regsvr32 /s %1
Step.4 As the DLL files are being re-registered on your system, you can observe each file scrolling on your display in the prompt.

Step.5 Afterward, attempt to launch the app causing the issue.
Conclusion
You need not be concerned anymore when you get the “class not registered” error message. The solutions above have thoroughly analyzed various instances of the “class not registered” error messages and have provided explicit instructions on resolving them, specifically on Windows 11/10 operating systems. We sincerely hope our solutions will always be available to you exactly when needed, ensuring you never have to wait or experience delays.
By following the steps outlined in this article, you will be able to overcome this issue and restore the smooth functioning of your system.