Microsoft biggest venture has always been Windows, and their latest release is Windows 10 operating system. We have seen a variety of changes in their most recent version of operating system. There are plenty of things which have changed from the time-to-time, and the price has also impacted the market.
Currently, Windows 10 is running on 70% of the PC & Laptops worldwide. In the previous version of Windows had same minor features but in Win10, they have started to make bigger changes, which are not familiar to the old ones.
As we have mentioned that the changes are also causing difficulty for the new users to make changes, even if they are trying to make minor changes.
Change the Default PDF Viewer in Windows 10
How many of you are using third-party viewers & Editors? Personally, I have been using Adobe for a while, and I prefer Adobe PDF reader than the default one of Windows. However, you cannot open the PDF file because the default Microsoft PDF viewer takes over, which is frustrating.
So we are going to teach you how you can set the third-party or non-Microsoft PDF viewer to view in a single click. There are two methods of doing it, and we are going to start with the easier one, so let’s proceed.
Method One:
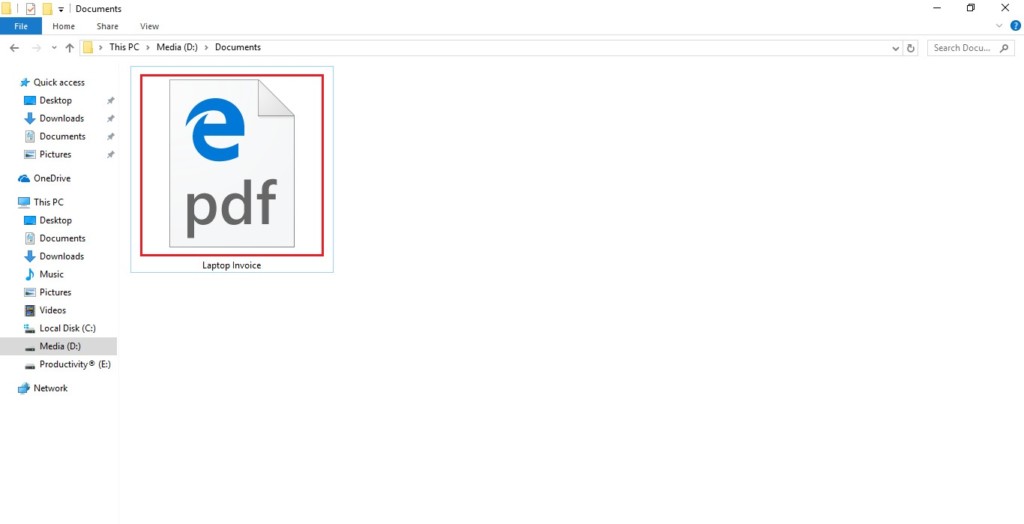
Step 1: Find the PDF file which you want to open in your third party PDF program.
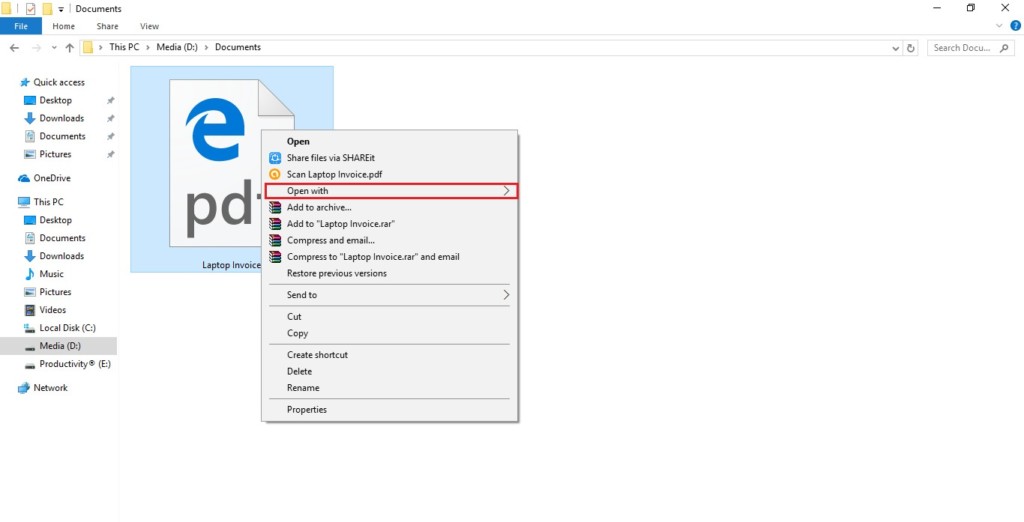
Step 2: Now it’s time to use your mouse and right-click on the PDF file and select the “Open With.”
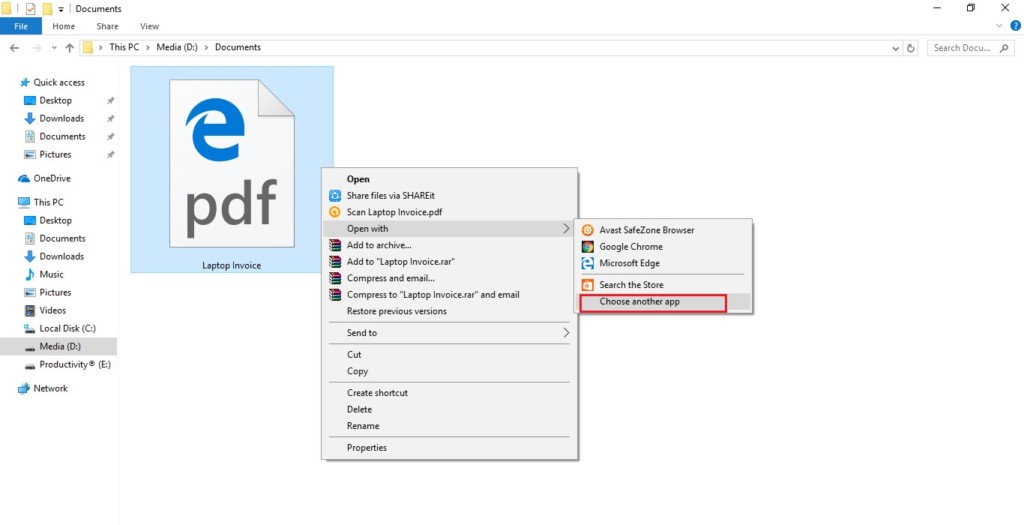
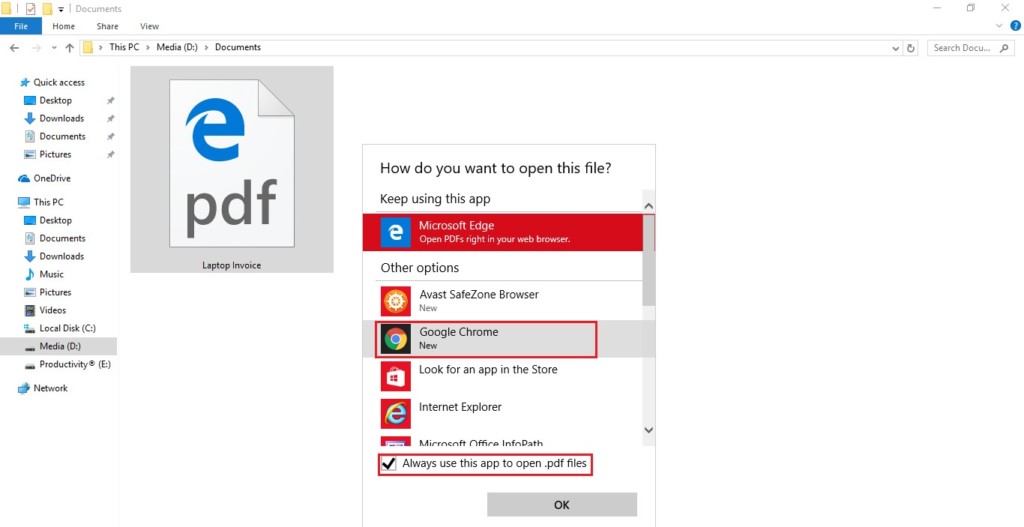
Step 3: As you can see the below image that you have to select “Choose another App” and it will pop-up another tab on the screen.
Step 4: If you can find the viewer, which you want to set as default then you can proceed but if you are unable to find then click on “More Apps,” in the image below.
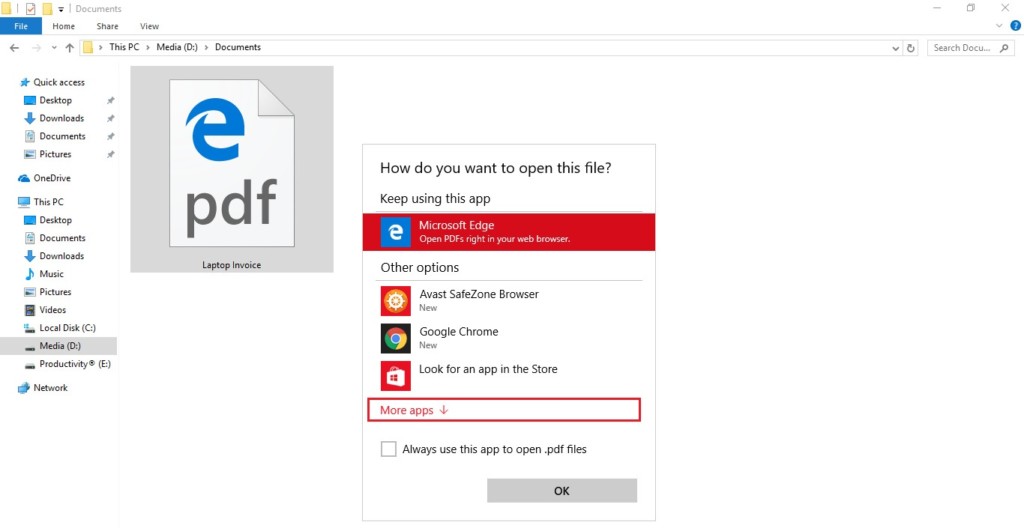
Step 5: In my case, I have selected “Google Chrome, ” and I have also marked on the bottom “Always use this app to open.PDF files.“
As you can see that the method first is incredibly easy and anyone can finish the task, but if you are unable to find or locate the program. You should begin with checking the installation. Re-install the program.
Method Two
We understand that something went wrong for you and the above method isn’t effective for you, so why don’t you try the alternative, which we are going to show you.
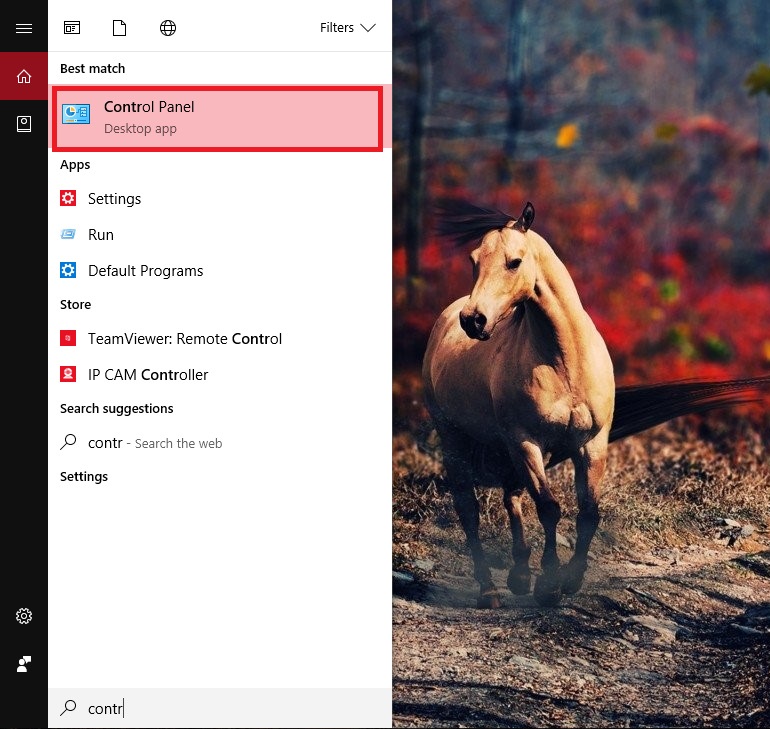
Step 1: Go to search bar in the Win10 or any version of Windows and look for “Control Panel” and click on it.
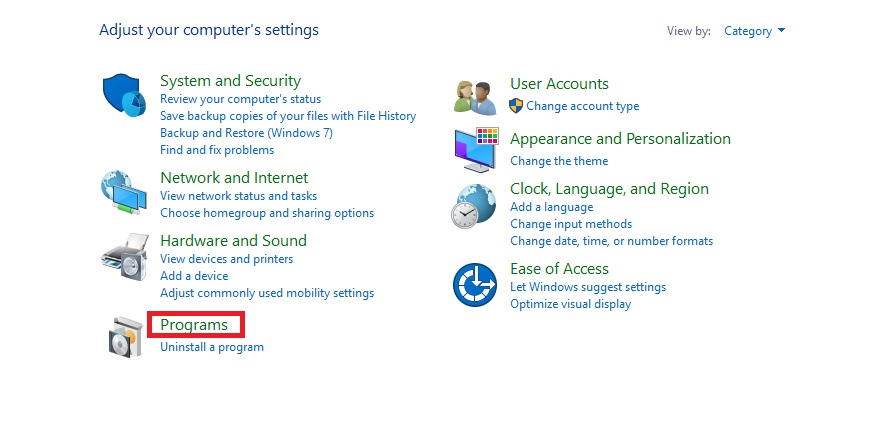
Step 2: As you can see there are a bunch of options you can see in the Control Panel, and you have to select “Programs.”
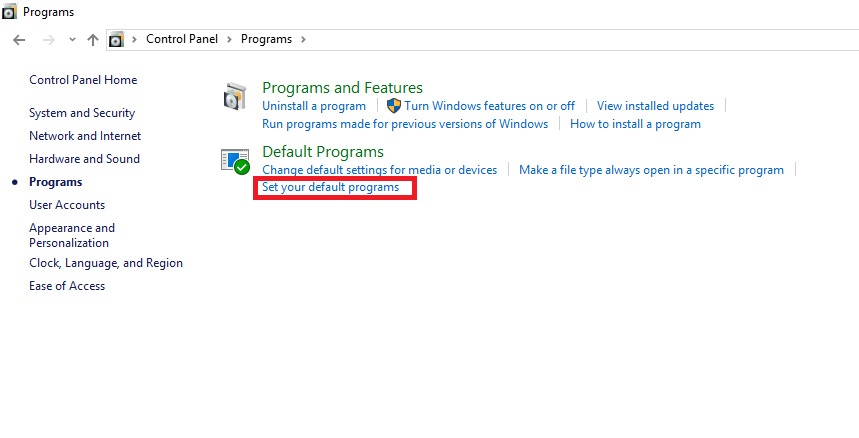
Step 3: This is where most of the users get confused, and we would like you to take a look at the image below for better view understanding. As you can see that you have to select “Set Your Default Programs.”
Step 4: It will open a tab, and it takes the time to load. The loading time is between 10 seconds to 1 minute, to give you an idea, the loading time depends on your Laptop or PC configuration. You have to patient and wait for the programs to load.
Step 5: Once the page is loaded then you can find all programs, which are installed on your Win10 PC or Laptop and you can even find programs, which are installed by Microsoft, and they are also called default programs. So do not get panicked when you find more programs than usual.
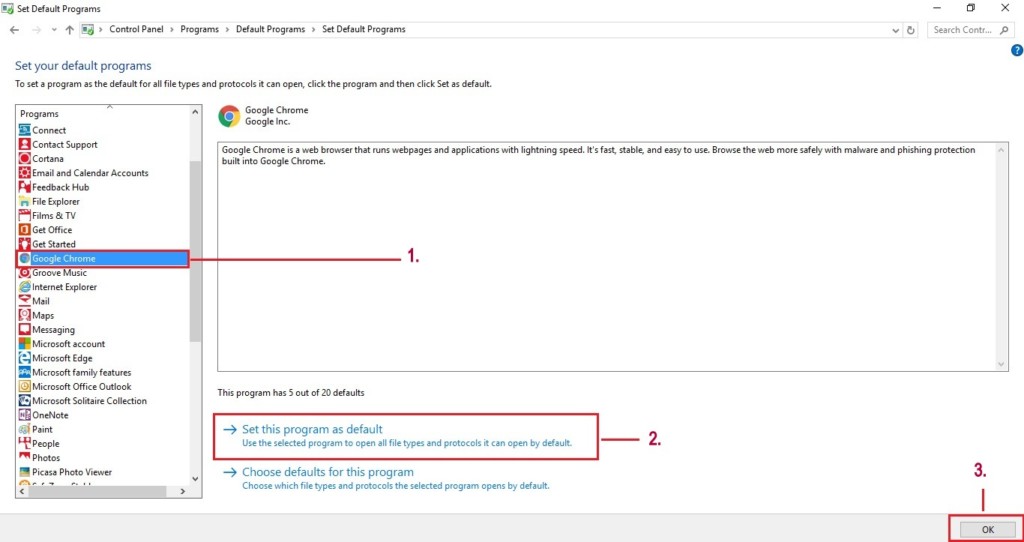
- First, you have to select your program from the list, and I have selected “Google Chrome.”
- Then you have to select “Set This Program As Your Default, t” and it will set the program as default.
- Click “Okay.”
We have made our efforts to give you the best method, which Windows allows you to make changes.
Conclusion
As you can see that these are the two different methods, which you can use to make changes, and you can also restore the default program by repeating the process. We have used the best method to make you comfortable making such changes, and we would like to your ideas and opinions in the comment below.