Many developers have used artificial intelligence technology to convert an audio file into a text file. We have seen the technology implementation in YouTube auto-generated subtitles a few years back. Third-party AI tools have availed the exclusive piece of tech for regular users. Let me show you how to convert an audio file into a text transcript. We will use a free solution for one-time users and save you money.
Contents
How To Convert an Audio File Into a Text Online?
Use any online editor and convert the video into an audio file. We will use an online tool for one-time use. I have created another tutorial below if you want to transcribe the meetings or group sessions.
1. Open your browser and sign up for an account on the Notta AI website.
I have tested the product and created a demonstration for the readers.
- Verify your account from the registered email. It will take you to the dashboard.
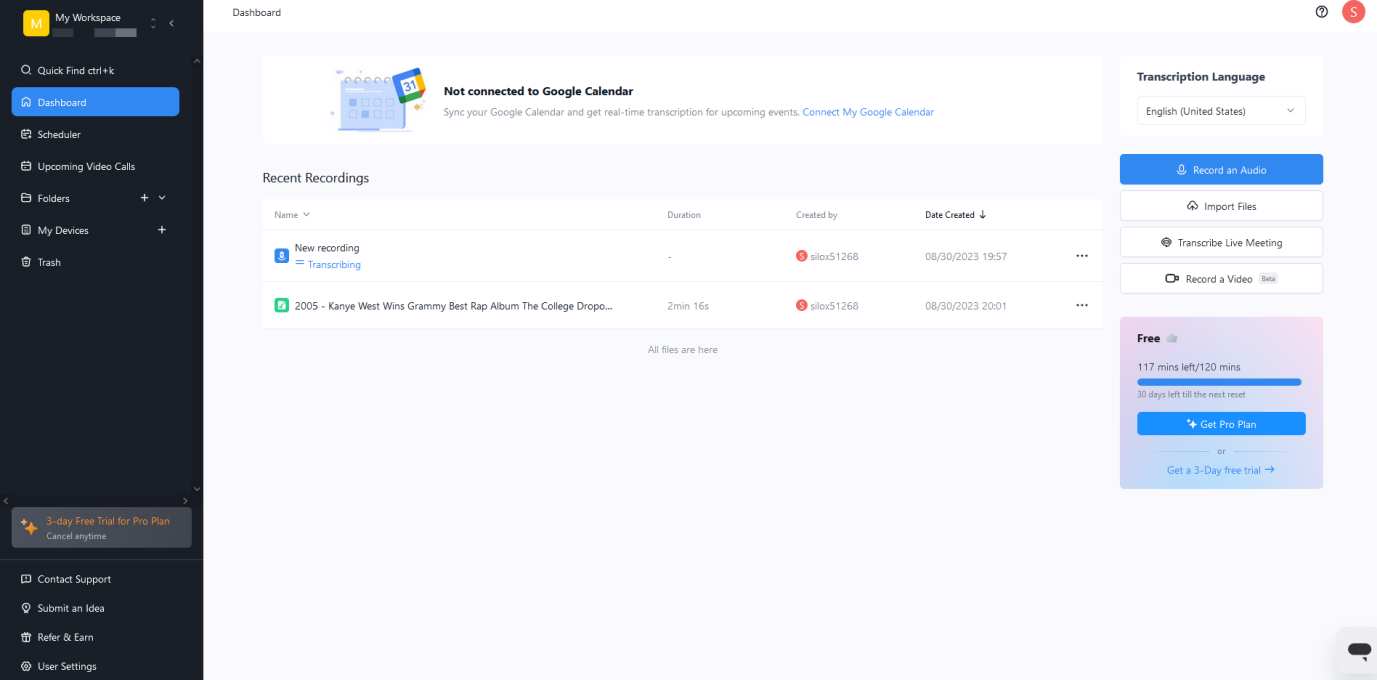
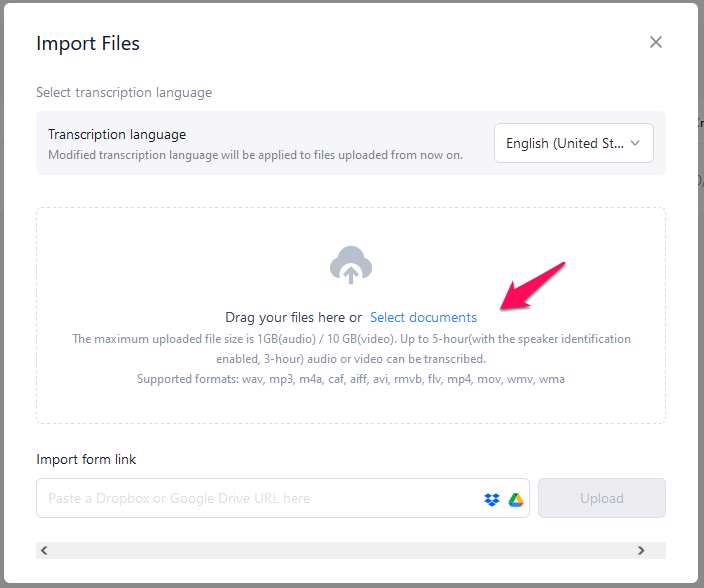
3. Click the “Import Files” from the right side menu.
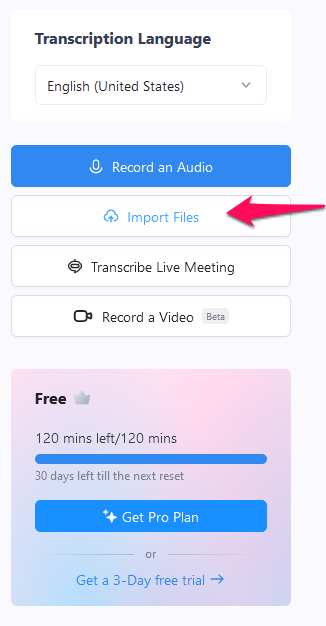
4. Drag & drop the audio file or click on the “Drag your files here” button.
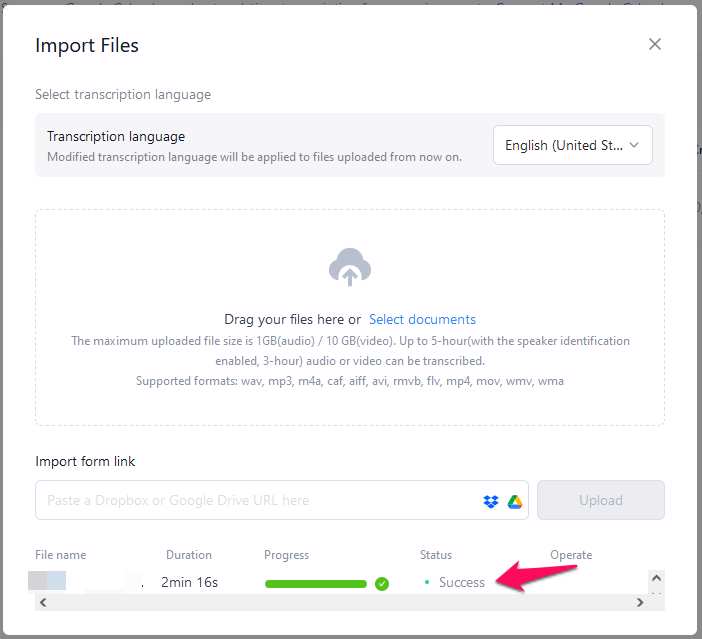
5. Give the web tool a minute to upload the file. Wait for the “Success” message in the status bar.
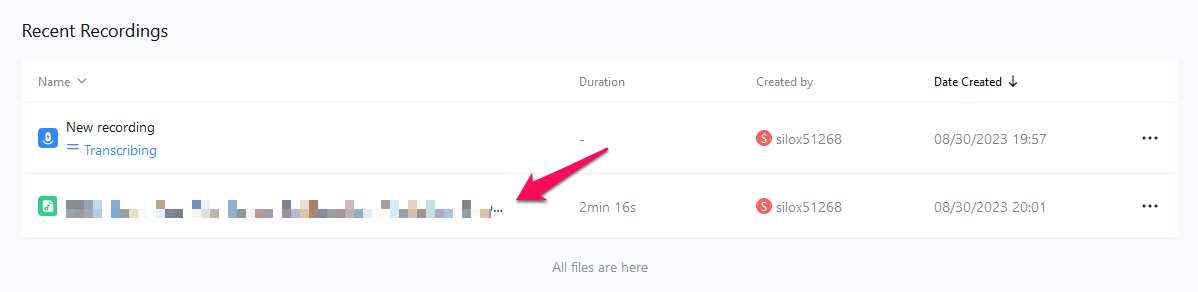
6. Go back and click the file name in the dashboard.
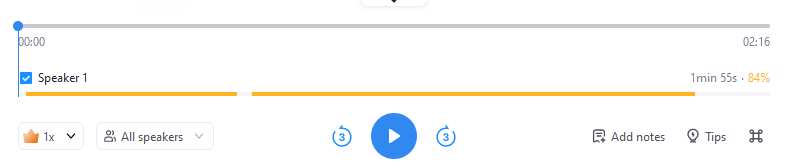
7. You can view the transcript play-by-play in the tool.
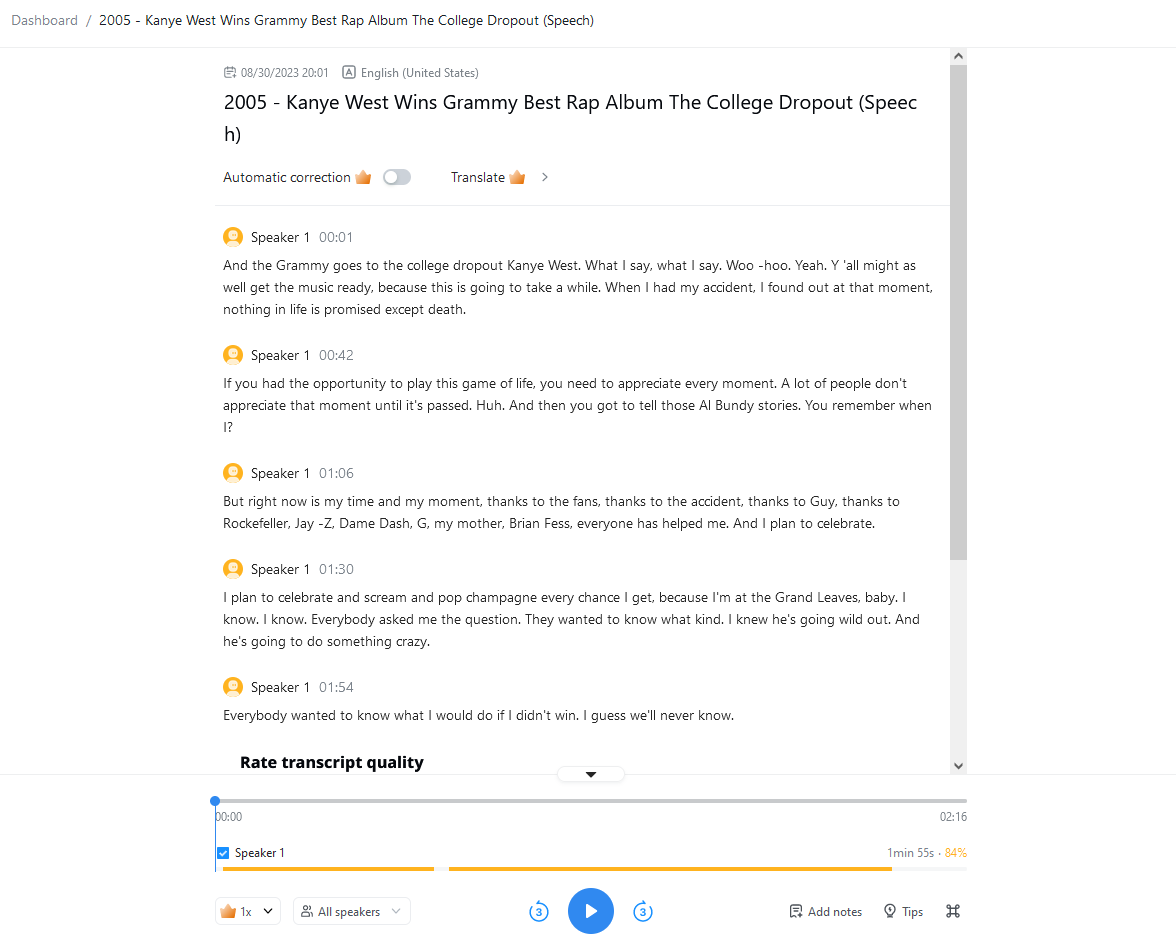
8. You got play and pause controls in the tool.
The Notta AI may seem intimidating at first glance, but it’s a user-friendly tool. Meanwhile, you don’t have to pay a single penny unless the 120-minute threshold crosses. Notta wants to generate revenue from the services. You can find the paid plans in the upgrade section.
How To Convert an Audio File Into a Text in Windows?
Windows has an advanced tool in the system. You can create live transcription without paying a single penny. However, you spend a few minutes setting up the Windows Dictation Tool. Many non-tech-savvy individuals may find the method intimidating and quit early. I request everyone to follow my lead step by step for the first successful attempt.
For Windows 10:
1. Open the “Settings” from the search bar.
2. Click the “Ease of Access” option.
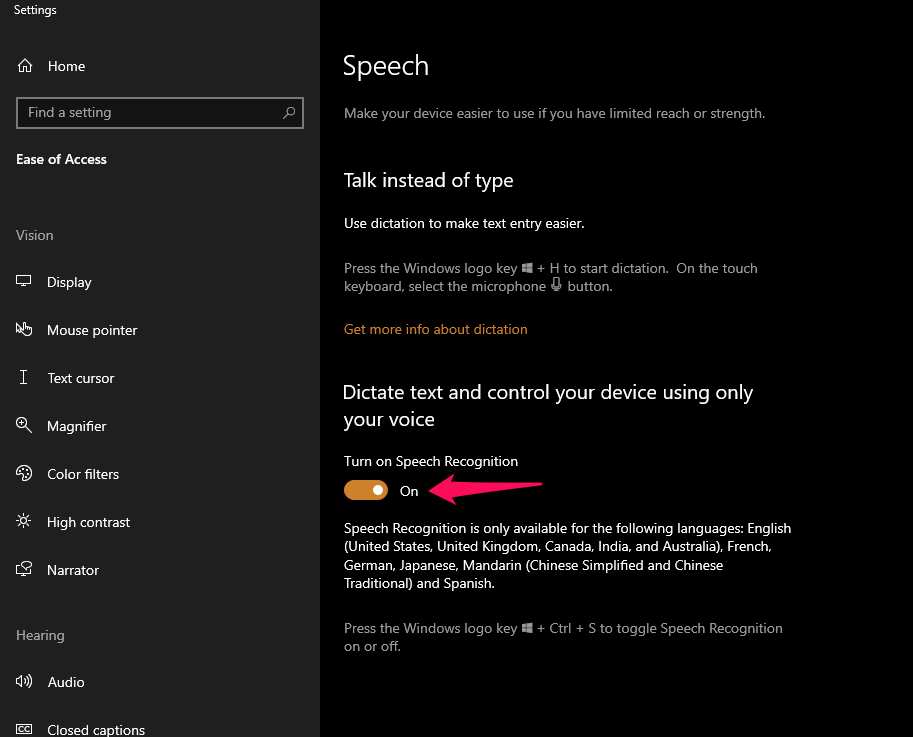
3. Click the “Speech” option.
4. Click the “Turn on Speech Recognition” option.
A new window will appear on the screen.
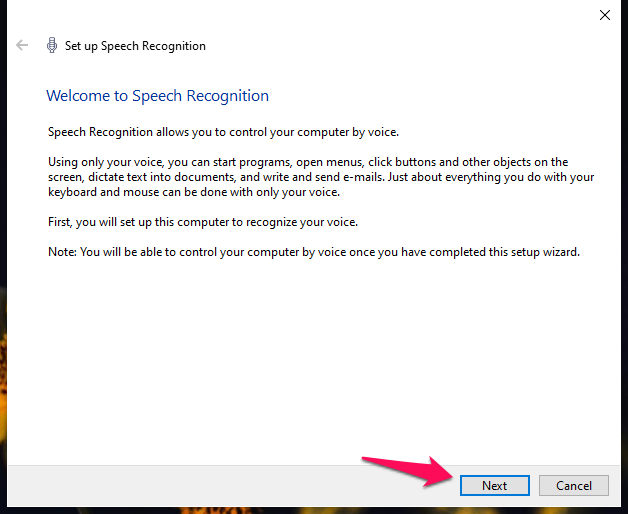
- Use the above tutorial and turn on the Speech Recognition tool.
2. Click the “Next” button.
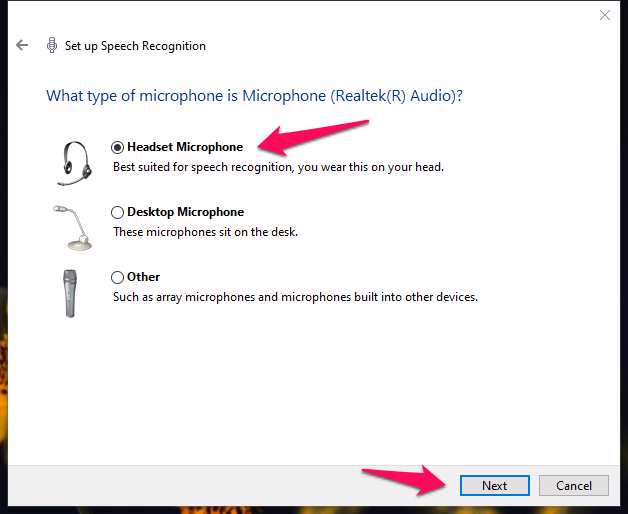
3. Choose the microphone from the three options. Click the “Next” button after selecting the module.
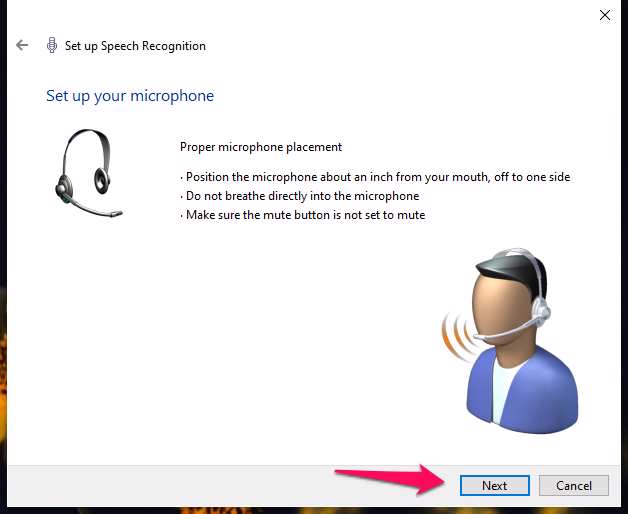
4. Follow the instructions suggested in the window and click the “Next” button.
5. Read the text suggested by the tool. The green bar should hit the end when you speak in the microphone. Click the “Next” button.
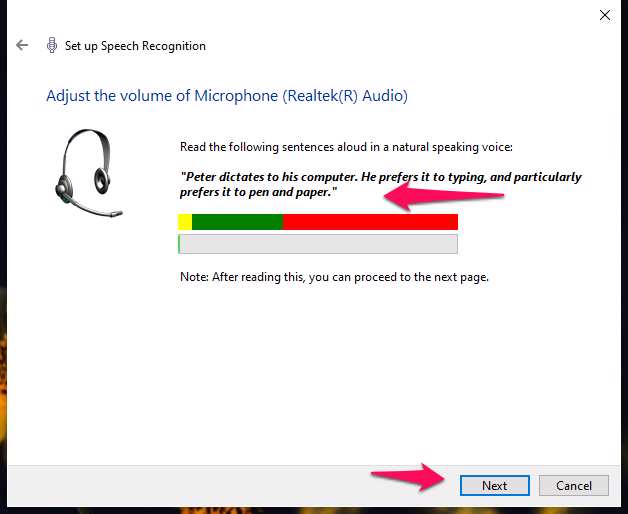
6. The Speech Recognition tool could not hear my voice. My microphone volume was too low for the speech recognition tool.

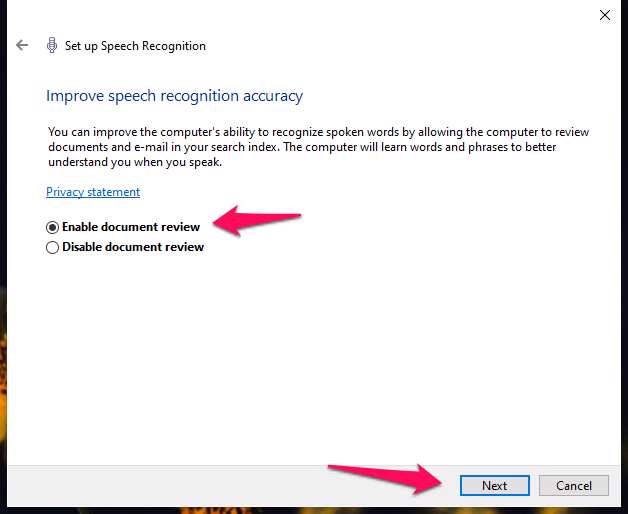
7. Turn on or off the document review and click the “Next” button.
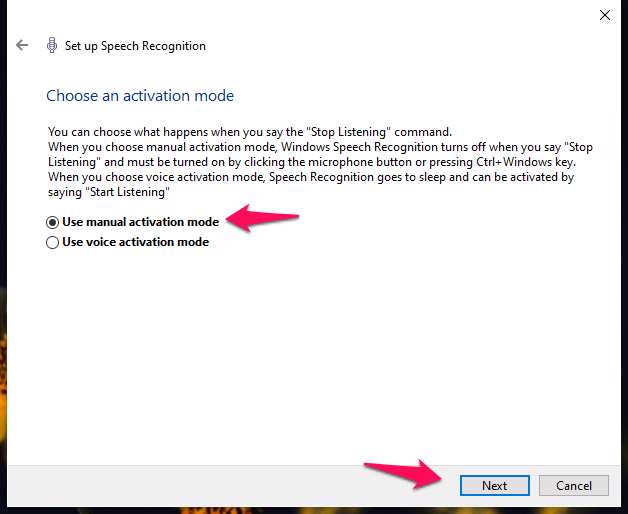
8. Select the activation mode and click the “Next” button.
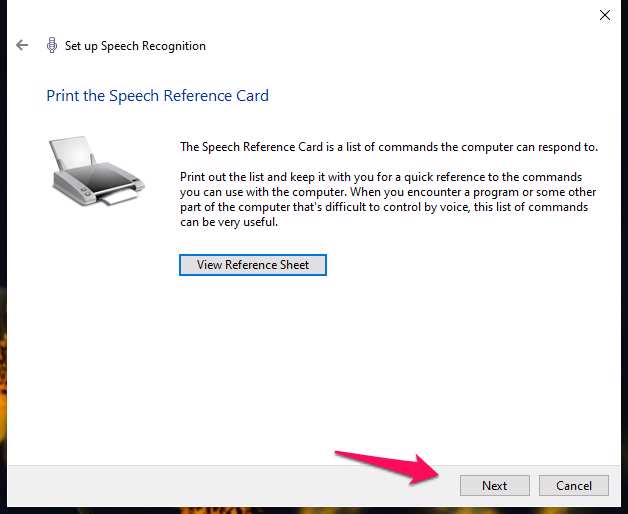
9. Click the “Next” button. You can view the reference sheet for further information.
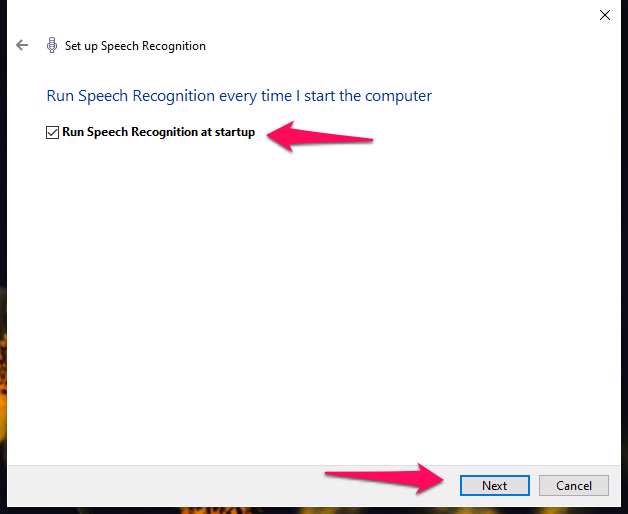
10. You can allow or disallow Speech Recognition at start-up. The tool launches when you turn on the computer.
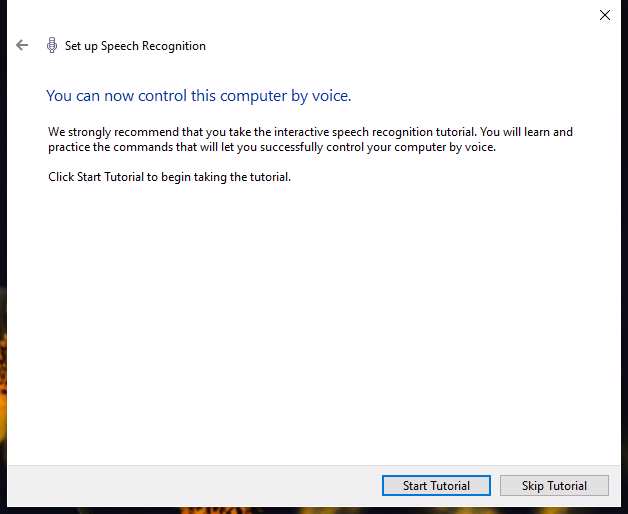
11. Skip the tutorial if you know how to use the feature.
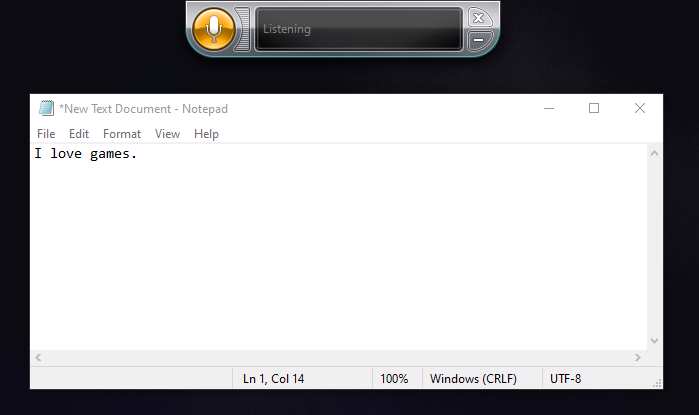
12. The Speech Recognition tool appears on the screen. Click on the microphone icon to enable the feature.

13. Create a new notepad and speak while keeping the text program on the top. The Windows Speech Recognition tool writes down every word in the text editor.
You don’t have to purchase or download additional programs to convert audio into text files. I have shown you two ways to convert the live meeting into a text transcript.
Bottom Line
You can convert audio to text files in Windows without spending a dime on paid tools. Many professionals have switched to the Work-From-Home schedule. You can convert group sessions and audio discussions into a text file using a VB-Cable Virtual Audio Device. You can use the virtual audio cable as the route for the Speech Recognition to write down the notes. Increase the text accuracy by opting for a better microphone setup. Let us know what you think about the solutions in the comment section.