No one can ignore the scope of cloud networks today. When you burn out the storage space of your computer and you realize you have no free external media, there is only one effective solution – cloud storage.
You can store your files on the cloud without even paying a dime. There are 50+ cloud services available on the web right now. Not every single one of them gives unlimited space, but you can avail the facility by spending a few bucks.
Once you step into the world of cloud computing, you will get to know an irritating fact. The user interface of all those cloud services is not the same as the one we are used to seeing on our computers.
That’s why you need a file manager for all your cloud services. Don’t worry! I have got you covered.
OtixoOtixo Review
Yeah, you have read the solution already! It’s Otixo.
I know you may be new to this whole file manager for cloud idea. So, I will walk you through all the features and steps needed to set up an account for yourself or for your company.
Features of Otixo
The following are the features of Otixo that I found enticing:
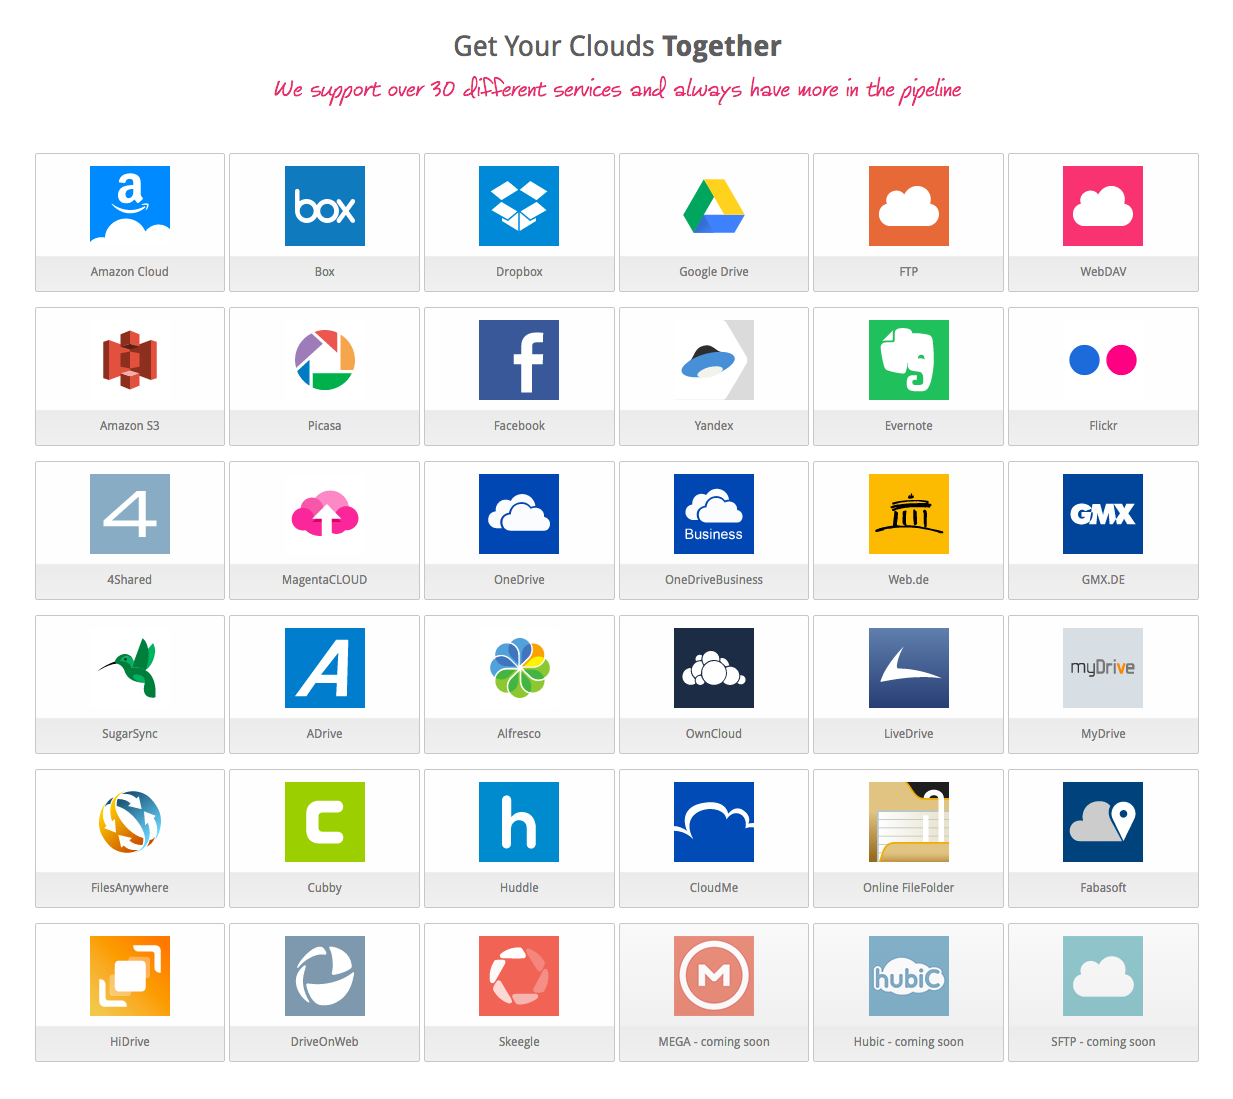
#1. Supports 30+ Cloud Services
Can you believe it? Otixo currently supports 33 services, and the list is growing regularly.
 I know, as a person, you don’t need all these cloud storage services. But different people need different services. For example, your primary cloud service may be OneDrive, but mine is Google Drive. Therefore, it is mandatory for a cloud file manager to support as many storages as possible to accommodate the needs of its customers.
That’s the strategy Otixo has embraced by supporting 35 cloud storage services, and it’s undeniably true that you will find your favourite service in their list.
#2. Availability of Android and iOS Mobile App
You can’t always sit in front of the computer to access your files on the cloud. Sometimes, you have to open files stored in the cloud while traveling. Pulling the bulky laptop out of your bag and booting it up while on the go may not be the most practical option.
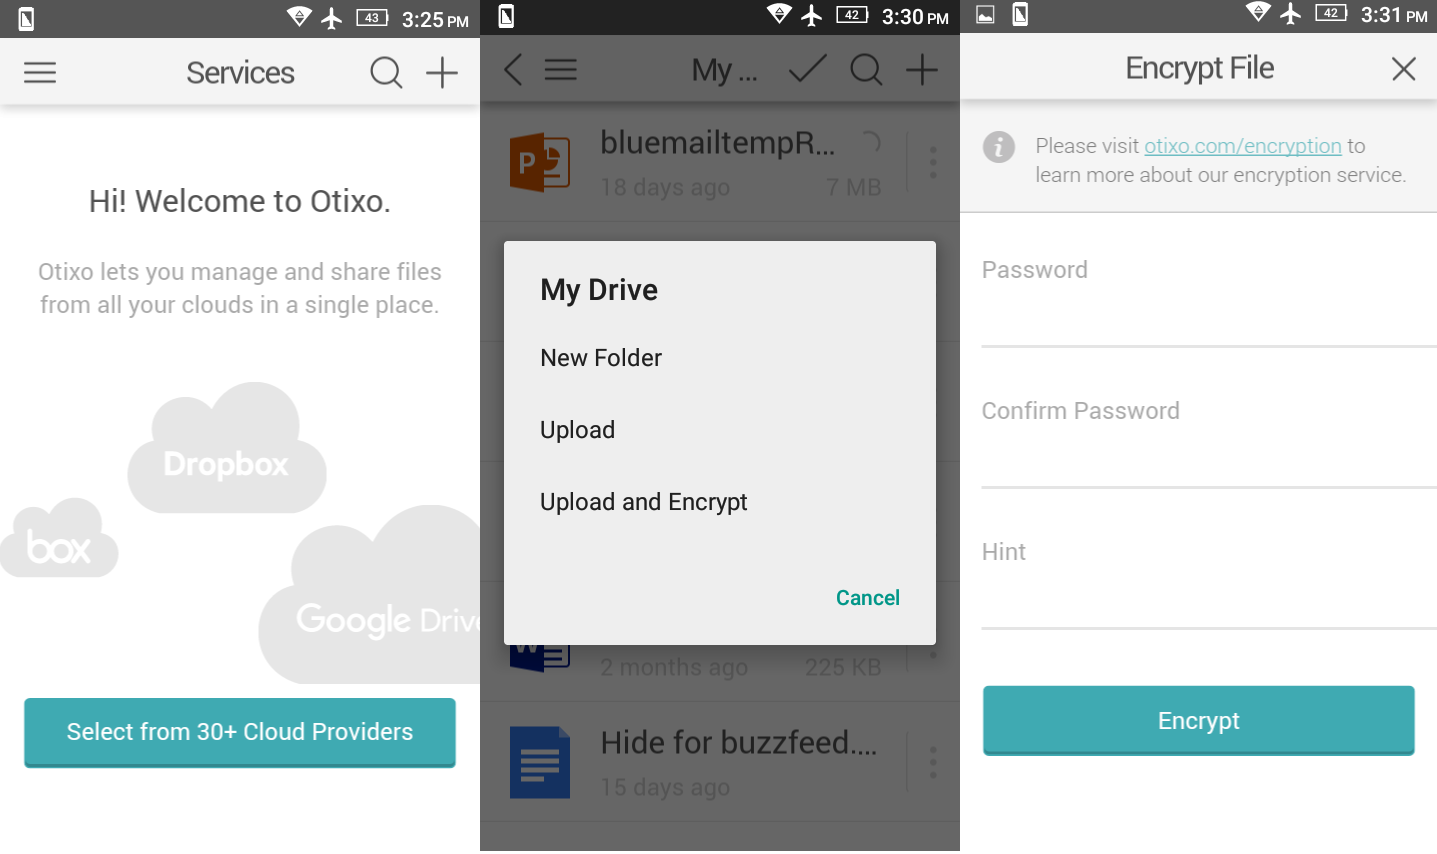
Thank God for smartphones! And thank Otixo for providing an Android and iOS mobile app for accessing the files in the cloud. You can download both apps from Google Play and the Apple Store for free.
The mobile app also lets you encrypt you files before uploading them to the respective cloud storage. The files can then be decrypted using the web app, or upon download from the mobile app.
 #3. Powerful AES256 Encryption For All Your Files And Folders
Once you authorize Otixo to connect to your favorite cloud storage services, you don’t have to worry about the security. Every single file can be encrypted right from your browser and it’s based on AES256 method.
#4. They don’t Store Your Files
Otixo only functions as a mediator between you and the cloud services. When you upload a file, Otixo caches it for a short time until the upload process is finished. It doesn’t store your files permanently on their servers.
They only store your name and email address, while your password is encrypted using AES 256 technology. Even the billing is managed by a dedicated service called Recurly.com with PayPal as the merchant.
#5. Sharing
You can share any files or folder with your team and he/she can access the file once they create a free account with Otixo, as well as writing comments (similar to chatting) for the file by using the Comments option.
How to Join and Setup Your Account?
Here you get to know how to sign up for Otixo and, start using it.
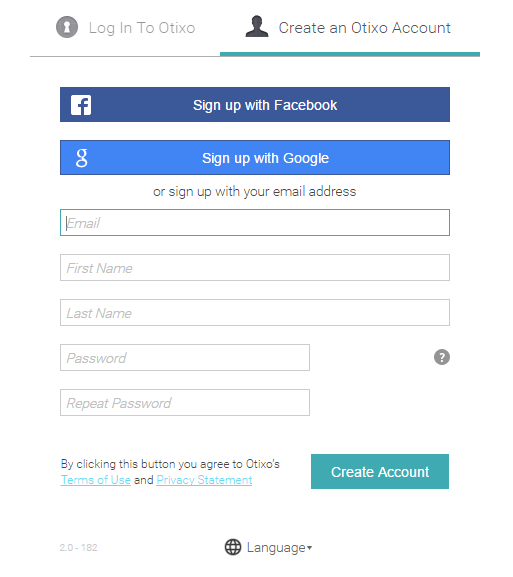
 Step 1: Visit www.otixo.com and click on Sign up from the top navigation bar.
Step 2: Choose one of the three sign up methods; Google, Facebook or the conventional form filling way.
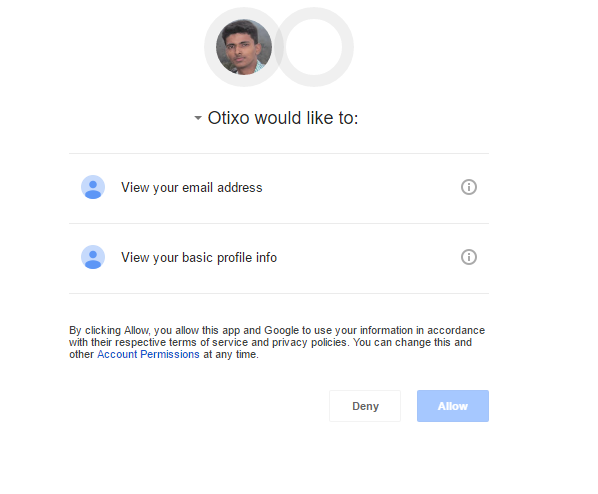
 Here I chose Google. So, it asked me to authorize Otixo to use my account details.
 Step 3: What you get after signup process is your workspace, which you can see in the image given below.
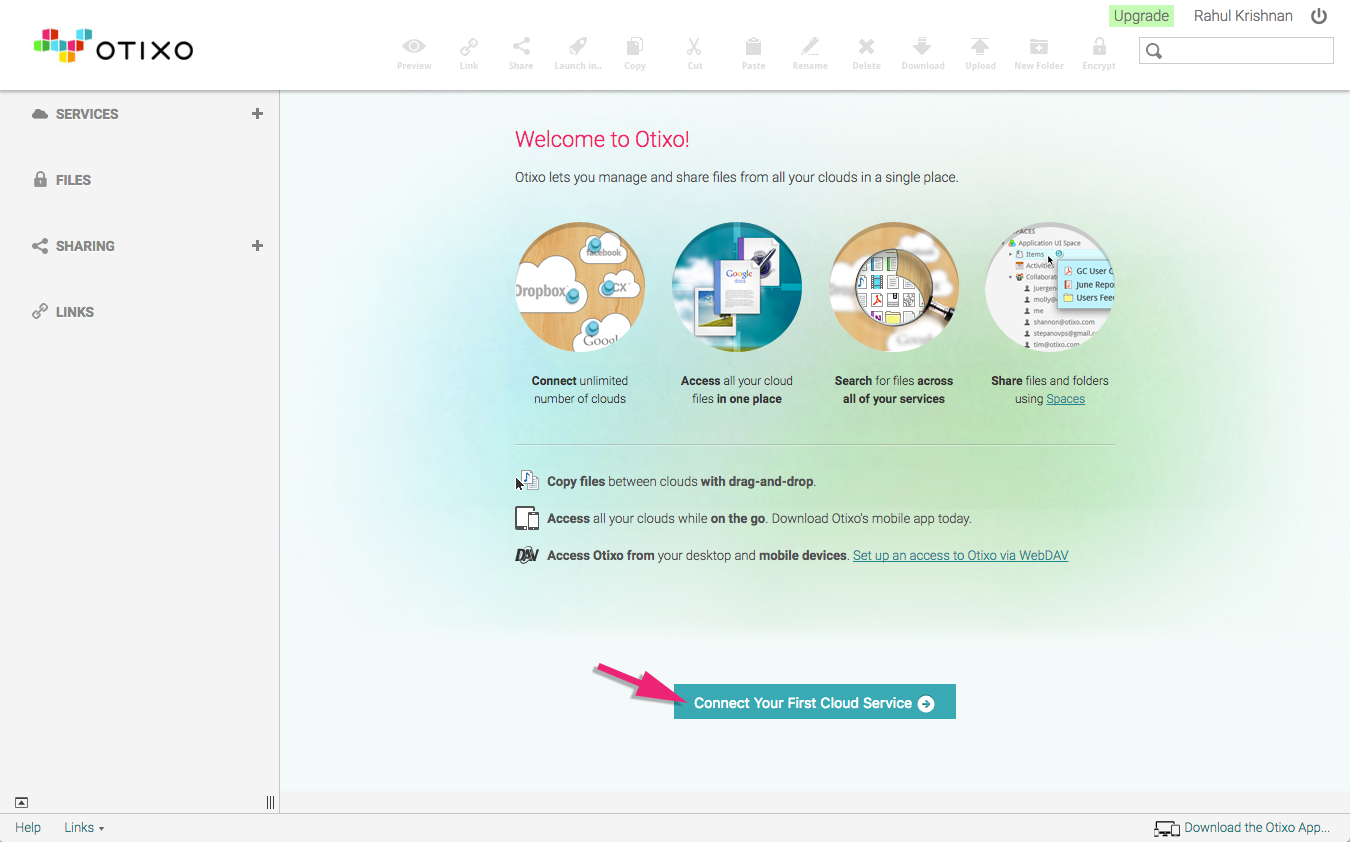 As I haven’t connected any service, you can’t see anything there. In order to connect to a cloud storage service, you have to click on Connect Your First Cloud Service, or click on the “+” button next to Services.
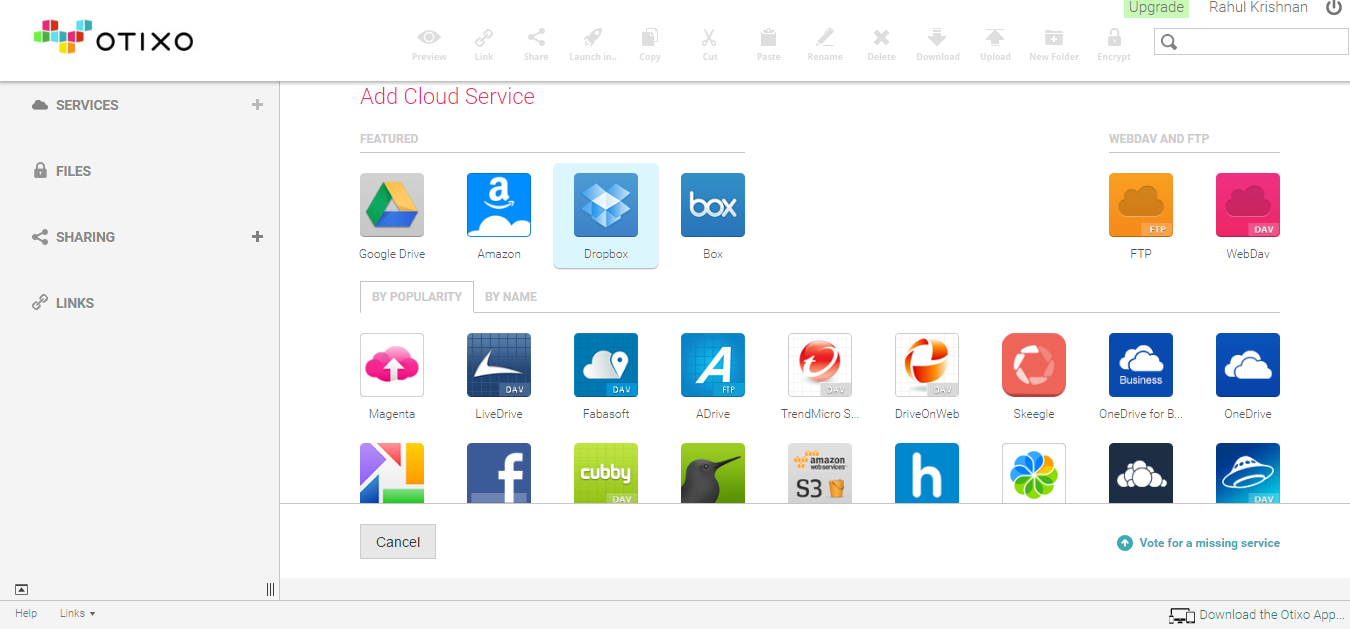
Step 4: You will get a number of services there. I would like to go for Google Drive here. But you can choose any one from the list.
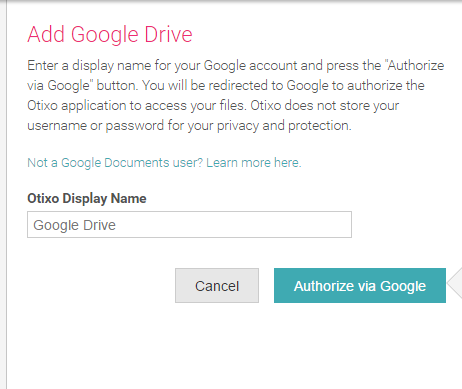
 Step 5: Once you choose the service, you have to provide a display name and authorize the connec-tion.
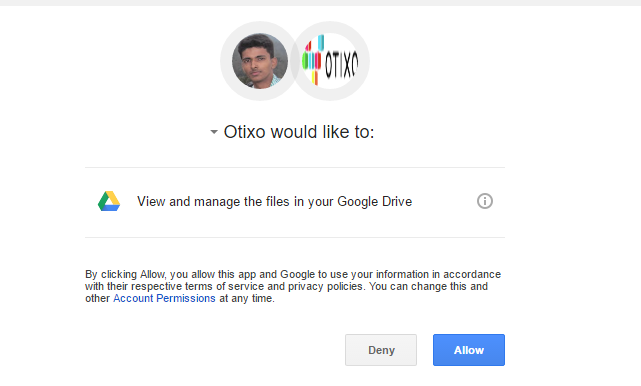
 Step 6: At this step, you should provide Otixo the permission to see and access the files. Simply, click Allow for that.
 Step 7: Once you finish with all the steps given above, you will see the folders and files on that particular cloud service.
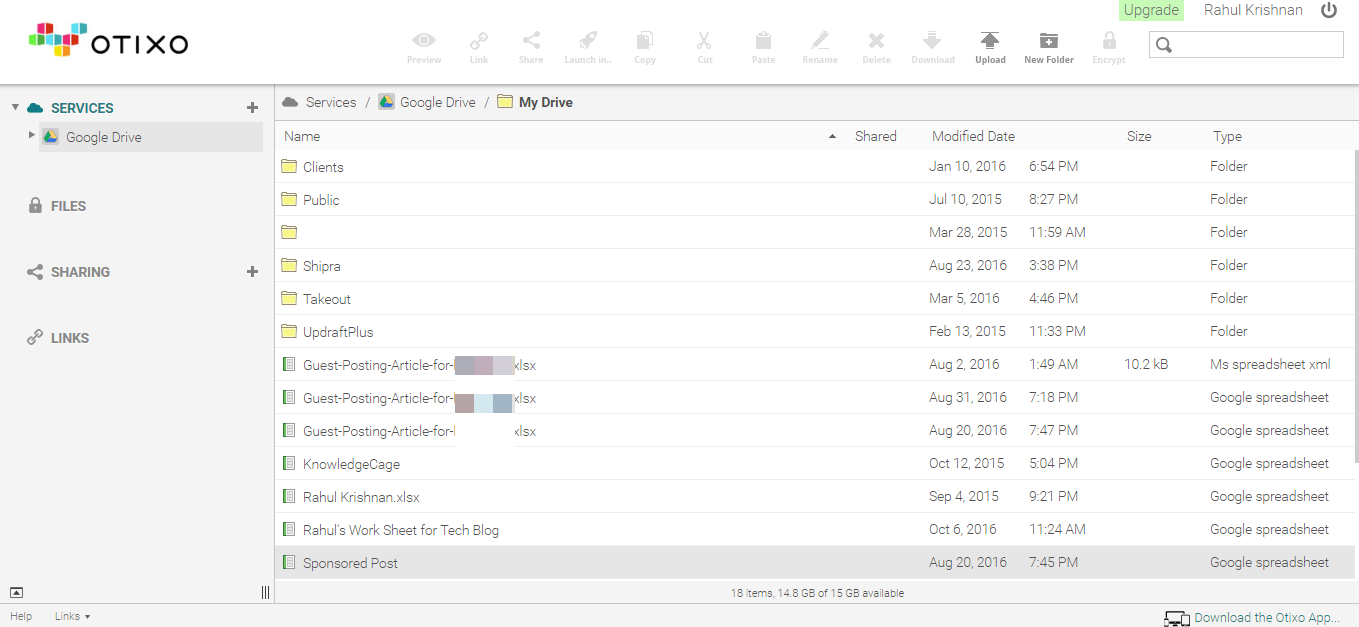 On the top of the screen, you will get buttons to manage the files and folders, such as preview, link, share, launch in, copy, cut, paste, rename and delete. You can add files directly to the cloud by uploading them from your desktop via drag and drop.
Pricing
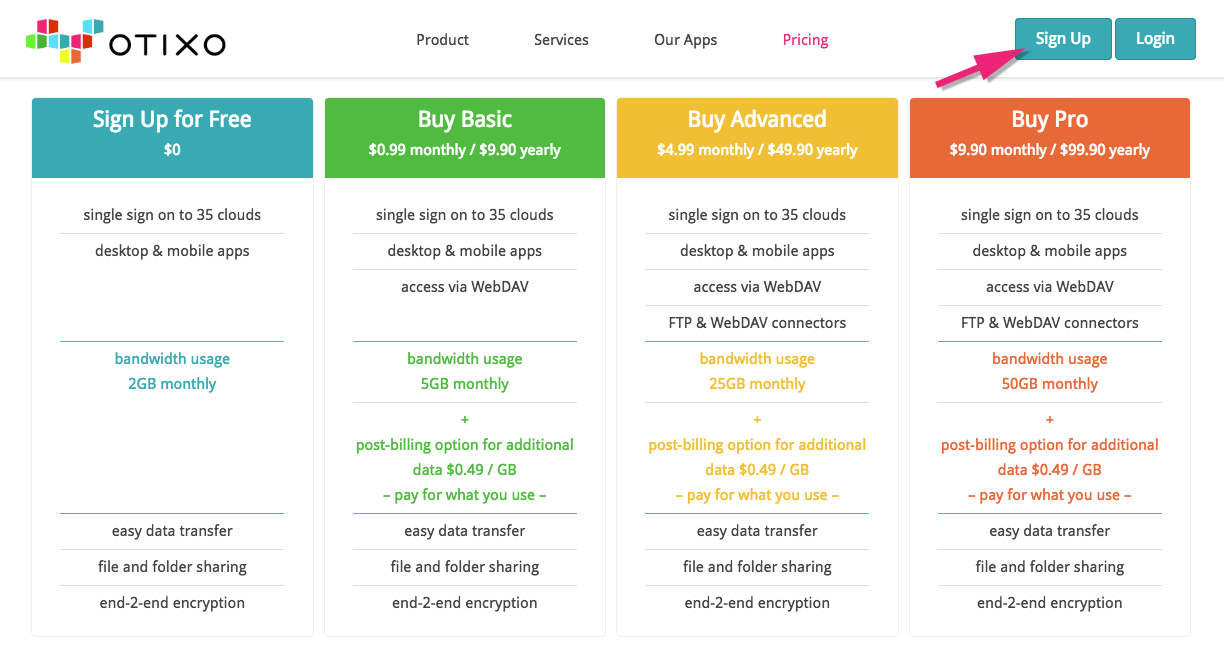
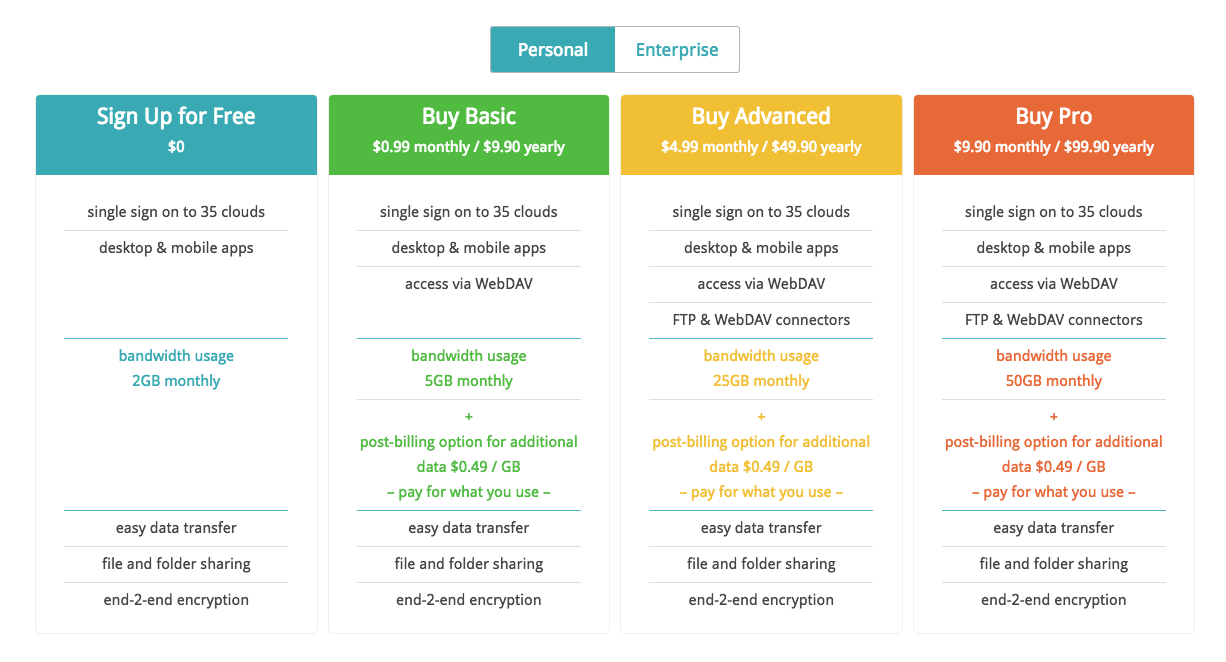 There are five different pricing plans available for Otixo: four Personal and one Business. Of course, those include a free plan as well.
Each of them differs in features like bandwidth, post billing option etc.
Updates
- PayPal is now added a payment option for all users
Final Verdict
So, you have finished reading my Otixo review. Based on my experience, accessing all your cloud services from a single login will make your cloud life easier.
As there is a free plan available, you have nothing to lose. Just sign up now and enjoy the cloud journey.